
REPORT ON THE ASCENT OF MONT BLANC DU TACUL VIA THE SOUTHWEST RIDGE THROUGH THE AIGUILLES DU DIABLE, CATEGORY 4B, BY THE TEAM OF AK POLITECHNIK FROM ST. PETERSBURG ON AUGUST 5, 2018
I. ASCENT DOCUMENTATION
-
General Information 1.1. Leader: Belyaev Evgeny Valerievich, 2nd sports category 1.2. Participants: * Vigursky Evgeny Sergeevich, 2nd sports category * Khromchenko Natalia, 2nd sports category 1.3. Coach: Molodozhen V.A., Master of Sports 1.4. Organization: AK Polytechnik
-
Characteristics of the Climb Object 2.1. Region: Alps, France 2.2. Chamonix Valley 2.3. KMGV Section Number: 10.3 2.4. Peak: Mont Blanc du Tacul, 4248 m 2.5. Peak Coordinates: 45.857753, 6.887819
-
Route Characteristics 3.1. Route: via the southwest ridge (through the Aiguilles du Diable) 3.2. Proposed Category: 4B 3.3. — 3.4. Route Terrain: rocky 3.5. Route Elevation Gain: 600 m 3.6. Route Length: 1050 m 3.7. Technical Elements of the Route: * snow 30–40° — 150 m * 1st category rocks — 50 m * 2nd category rocks — 490 m * 3rd category rocks — 230 m * 4th category rocks — 80 m * 5th category rocks — 40 m * Closed glacier travel — 1000 m * Rappelling: 150 m 3.8. Descent from the summit: via the "North Face" route, category 2A 3.9. Additional Characteristics: no water on the route
-
Team Actions Characteristics 4.1. Travel Time: approach — 1 hour, route — 10 hours, descent — 1.5 hours 4.2. Overnight Stays: none 4.3. Route Start Time: 2:00 AM, August 26, 2018 4.4. Summit Arrival Time: 1:20 PM, August 26, 2018 4.5. Return to Camps: 4:30 PM, August 26, 2018
-
Report Responsible: Vigursky E.S.: peanutwolf@bk.ru
II. ASCENT DESCRIPTION
-
Climb Object Characteristics 1.1.
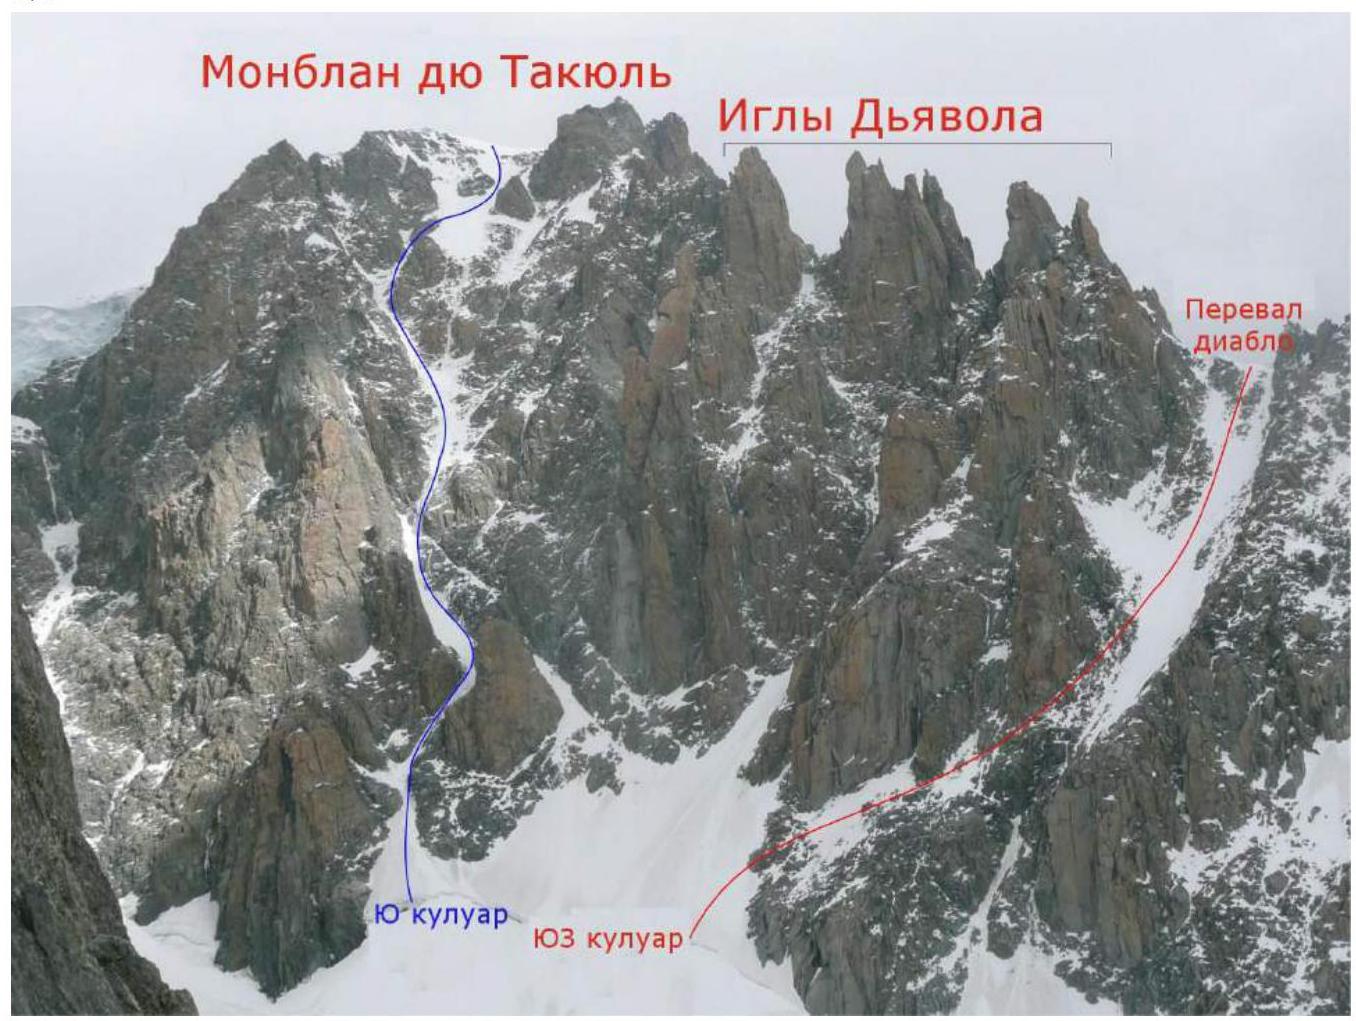
Fig. 1. Southwest Ridge of Mont Blanc du Tacul
1.2. The Chamonix valley is located in the French Alps in eastern France, on the border with Switzerland and Italy. The route begins from the Glacier du Géant.
The Glacier du Géant can be accessed by cable car, either from the French or Italian side. It is also possible to hike from the Chamonix valley, but this takes 2 days. The team used the cable car on the Italian side. The Skyway cable car can be reached by bus from Chamonix center. Then, after ascending to the Glacier du Géant, move towards the Grand Capucin. Camping on snow, on a plateau under the Grand Capucin. The journey from the cable car to the campsite takes about 1 hour.
Approach to the route from the campsite:
- Move along the glacier past the Grand Capucin towards Mont Maudit.
- Then, when the ascent begins, turn into the Mont Maudit cirque.
- Move through the center of the cirque towards the southern wall of Mont Blanc du Tacul.
Travel on the glacier in teams, closed glacier. Find the southwest couloir leading from the foot to the Diable pass. The couloir and the path leading to the pass are clearly visible during the day.
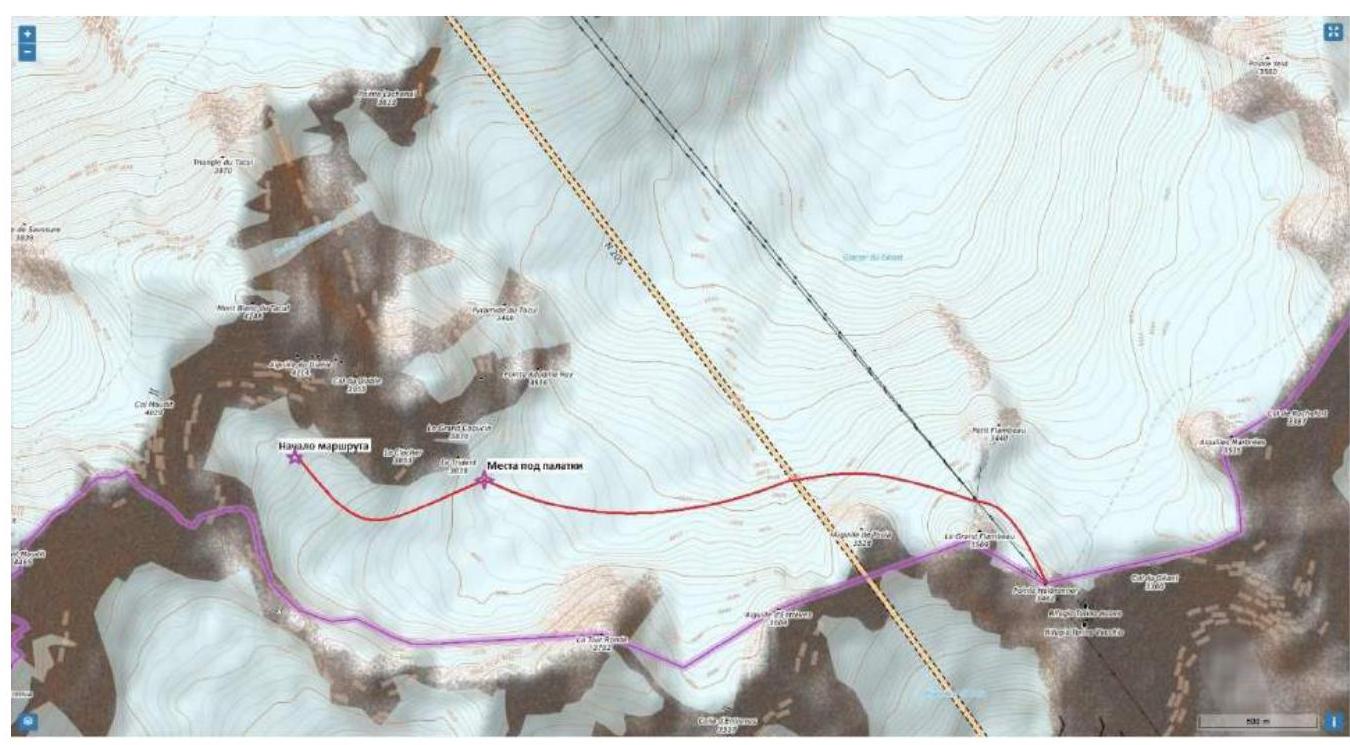
Fig. 2. Approach route to the campsite and under the route.
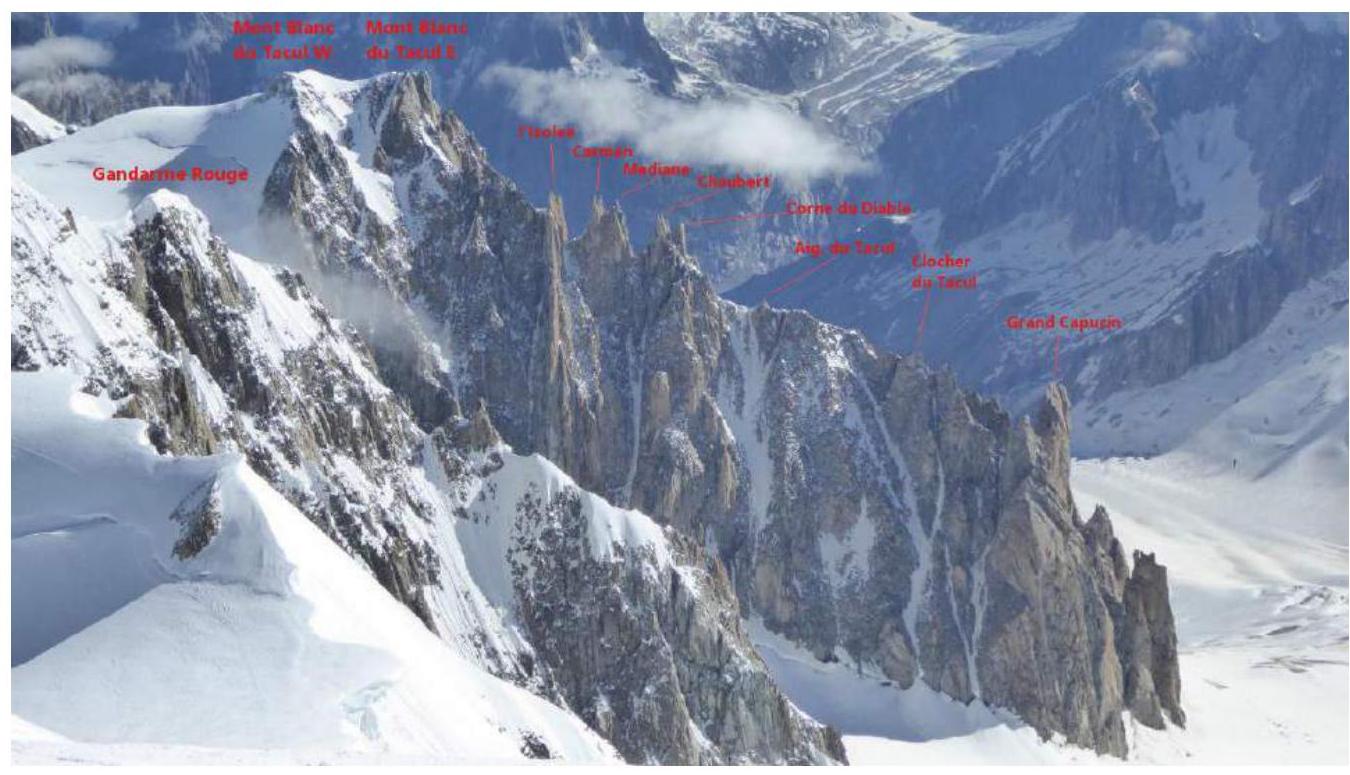
Fig. 3. Panorama. View from the summit of Mont Blanc.
-
Route Characteristics
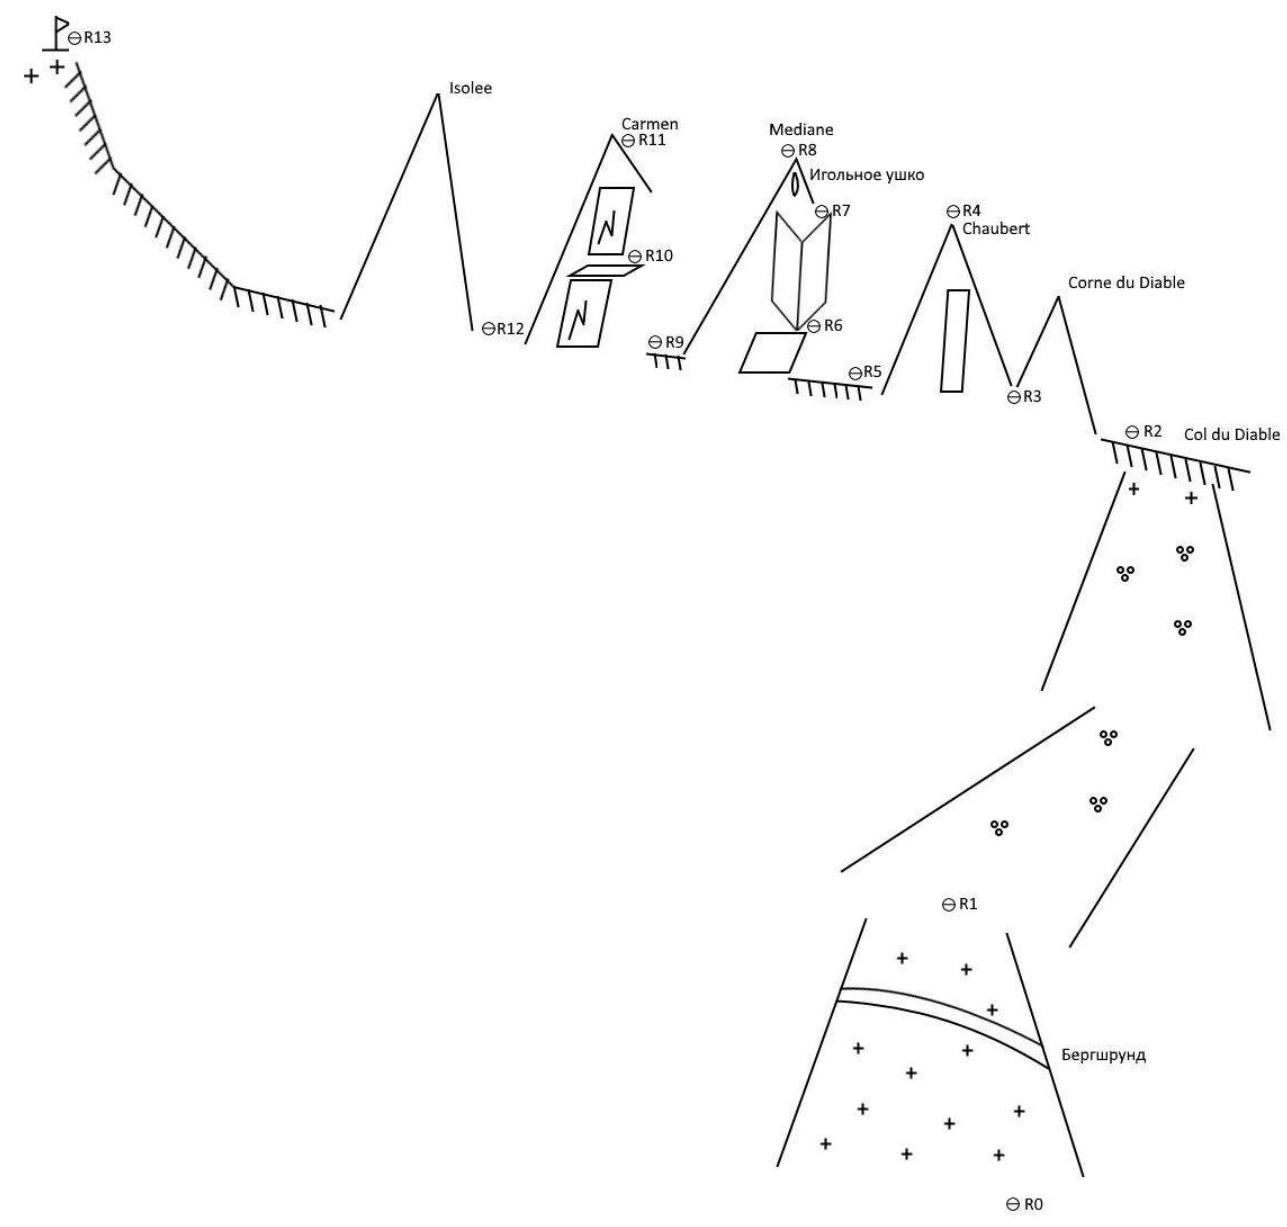
2.1. Technical photograph of the route — Fig. 4.

Fig. 4. Route via the southwest ridge of Mont Blanc du Tacul (Aiguilles du Diable), August 5, 2018.
2.2. Technical characteristics of route sections.
Section # Length Section Characteristics Category Number of Pitons R0–R1 150 m snow slope 30–40° R1–R2 250 m rocks 1–2 0 R2–R3 100 m rocks 2 0 R3–R4 50 m rocks 4+ 8 R4–R5 60 m rappelling R5–R6 40 m rocks 2 3 R6–R7 40 m rocks 5+ 12 R7–R8 40 m rocks 3 3 R8–R9 30 m rappelling R9–R10 40 m rocks 3+ 5 R10–R11 30 m rocks 4 4 R11–R12 60 m rappelling R12–R13 300 m rocks 2–3 0 2.3. Route diagram in UIAA symbols
-
Team Actions Characteristics
3.1. Route Description.
R0–R1. Ascend the snow slope to the left of the couloir. Overcome the bergschrund. Move up to the right towards the couloir.
R1–R2. Move to simple rocks and, staying to the left of the center of the couloir on scree shelves and short walls, ascend to the Diable pass.
R2–R3. Move up to the left towards the Corne du Diable gendarme. Bypass the gendarme on the left and ascend to the saddle under the Chaubert peak.
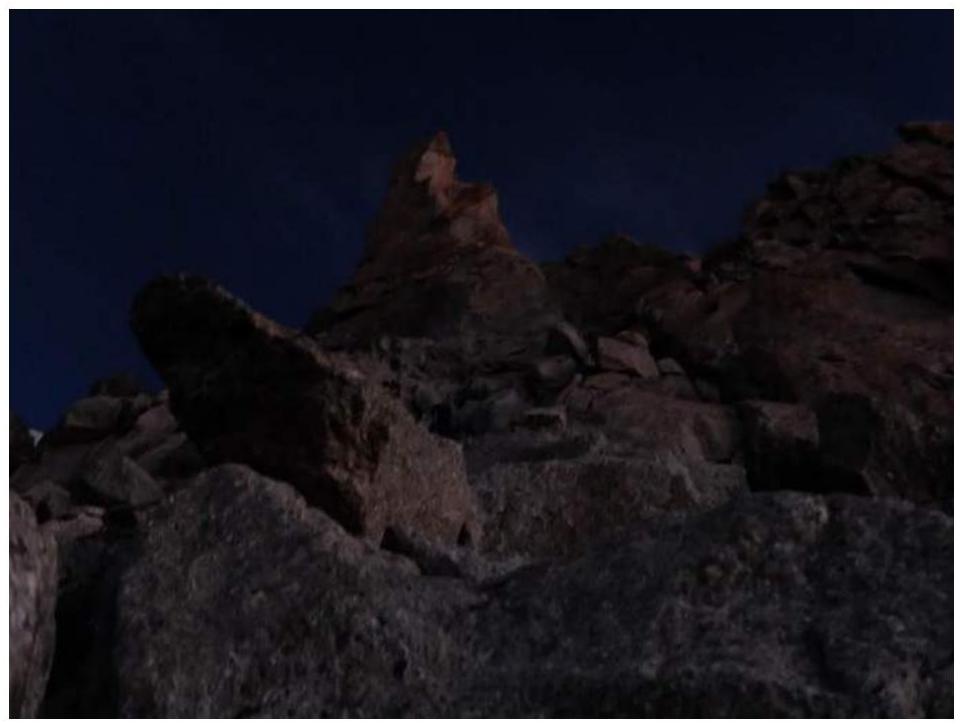
Fig. 5. R2–R3. View of the Corne du Diable gendarme.
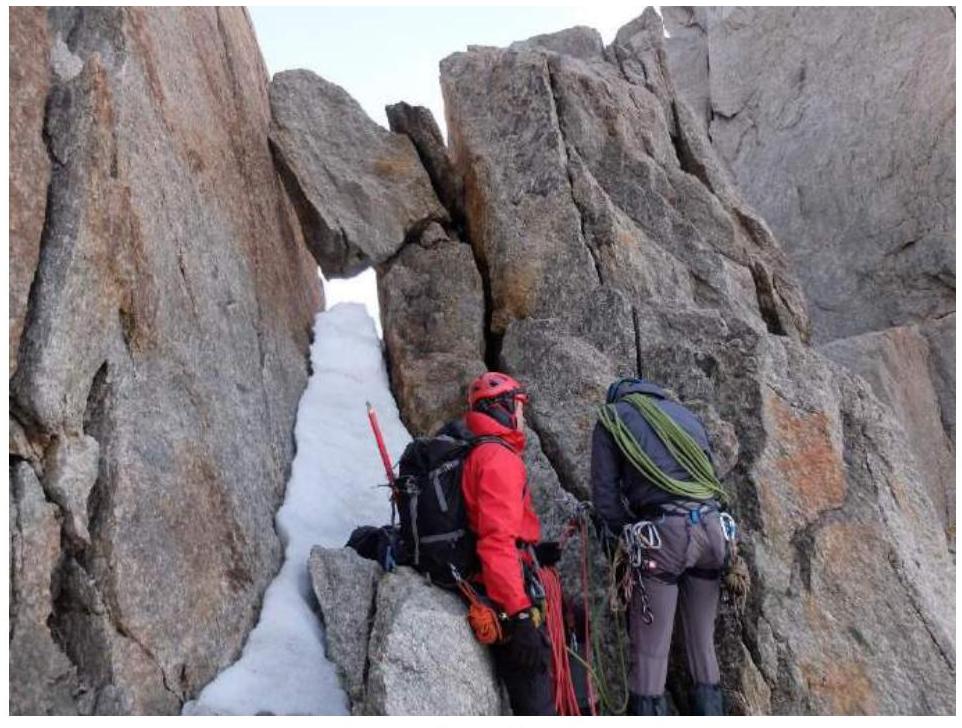
Fig. 6. R2–R3. View of the saddle under the Chaubert peak. R3–R4. Climb along the eastern ridge to the summit of the Chaubert peak. From below, the wall appears smooth, but actually:
- there are holds
- there are opportunities for belaying
There are two bolts on the summit.
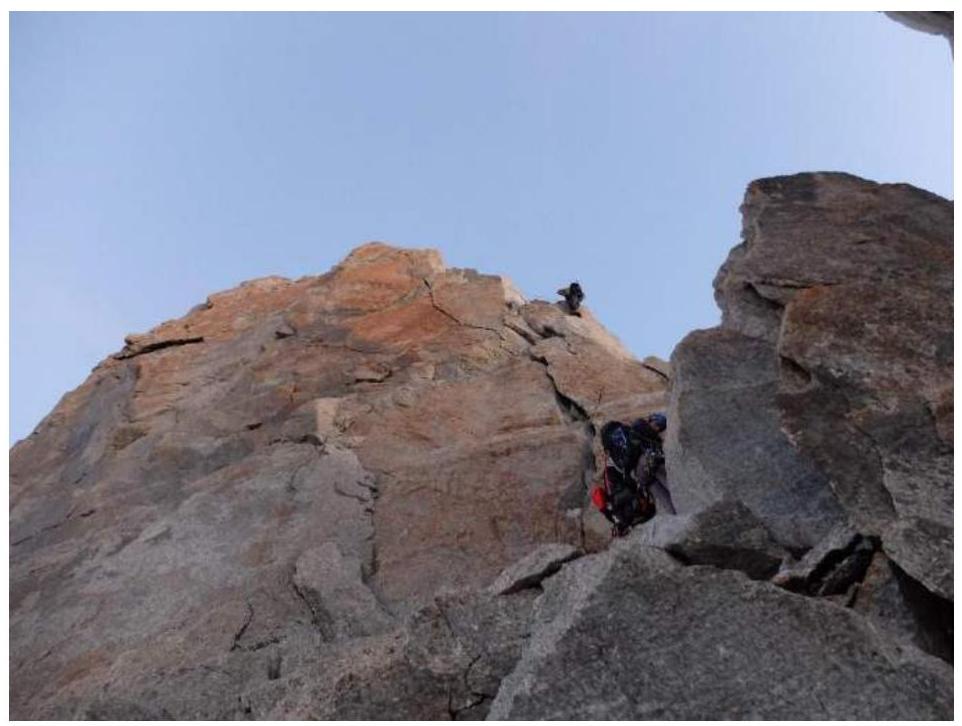
Fig. 7. R3–R4. Climbing section on the Chaubert peak. R4–R5. Make two 30 m rappels down the northwest face of the Chaubert peak to the saddle under the Mediane peak.
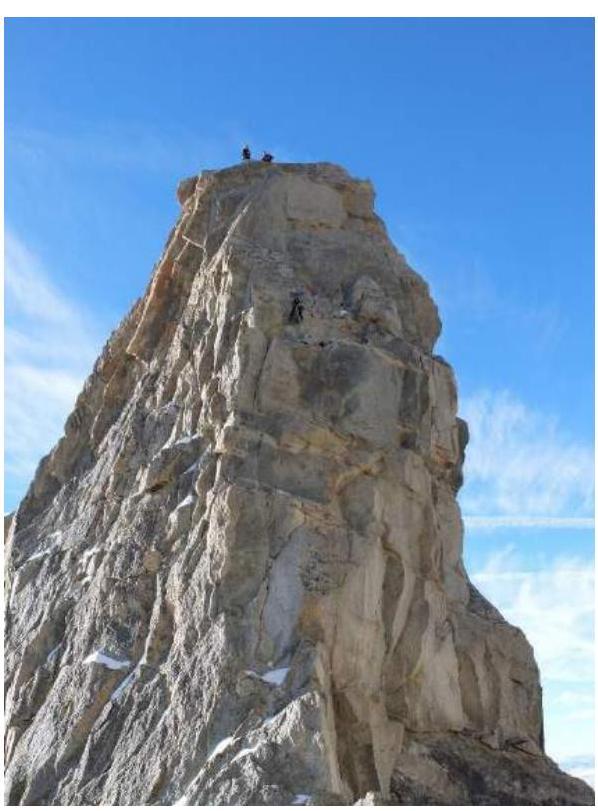
Fig. 8. R4–R5. Rappelling from the Chaubert peak. R5–R6. Traverse along the saddle towards the north and climb simple rocks up to the right, under the internal corner on the western face of the Mediane peak.
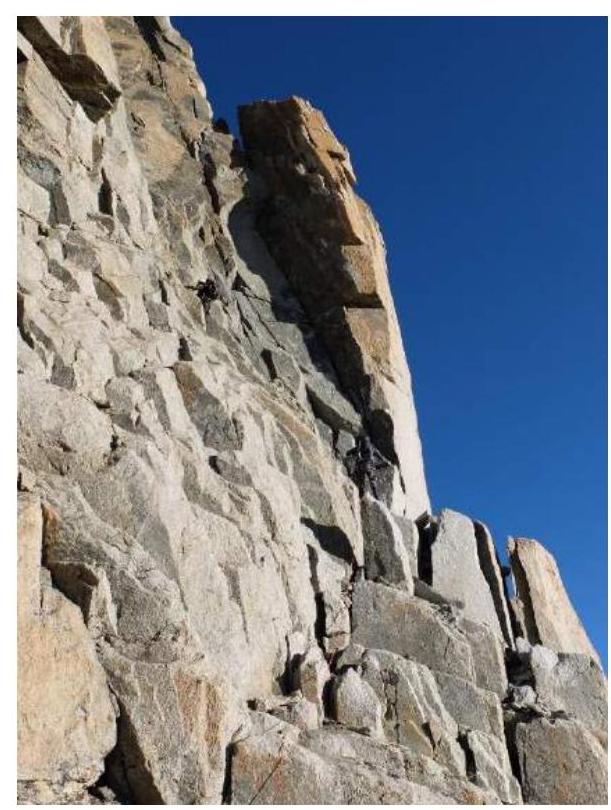
Fig. 9. R5–R6. View from the saddle to the lower section of the Mediane peak. R6–R7. Climb the internal corner 40 m to a small ledge on the right.

Fig. 10. R6–R7. Key rope on the Mediane peak. R7–R8. Climb simple rocks to the summit of the Mediane peak. The summit rocks form a needle-like formation. R8–R9. Make a 30 m rappel through the needle-like formation to the saddle between the Mediane and Carmen peaks.
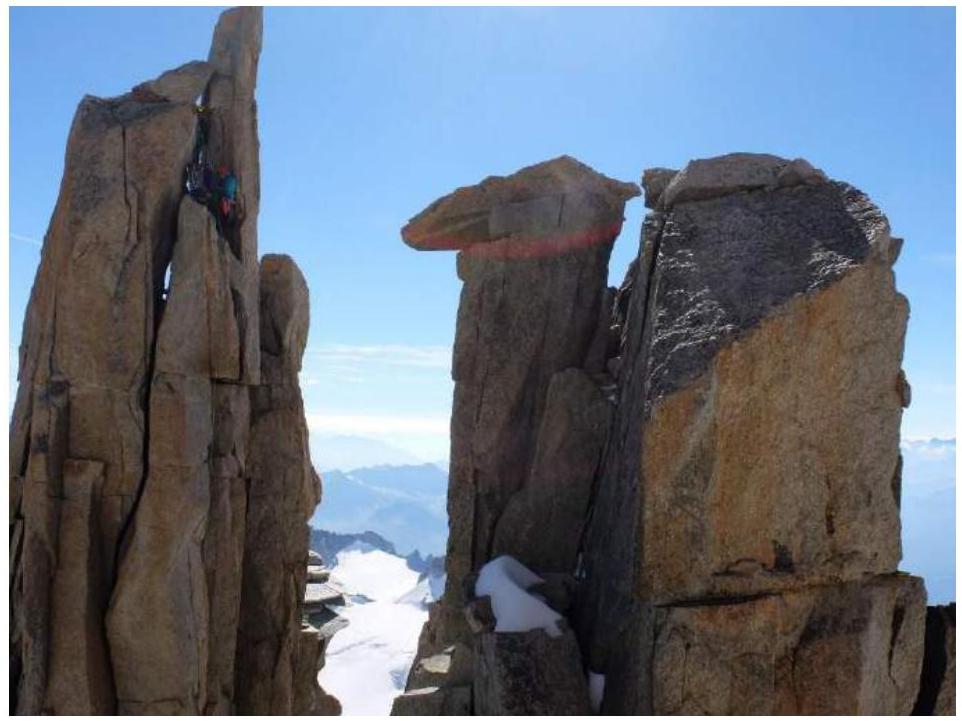
Fig. 11. R8–R9. Rappelling from the Mediane peak. R9–R10. From the saddle, climb up cracks on the right side of the eastern ridge of the Carmen peak. Reach a ledge.
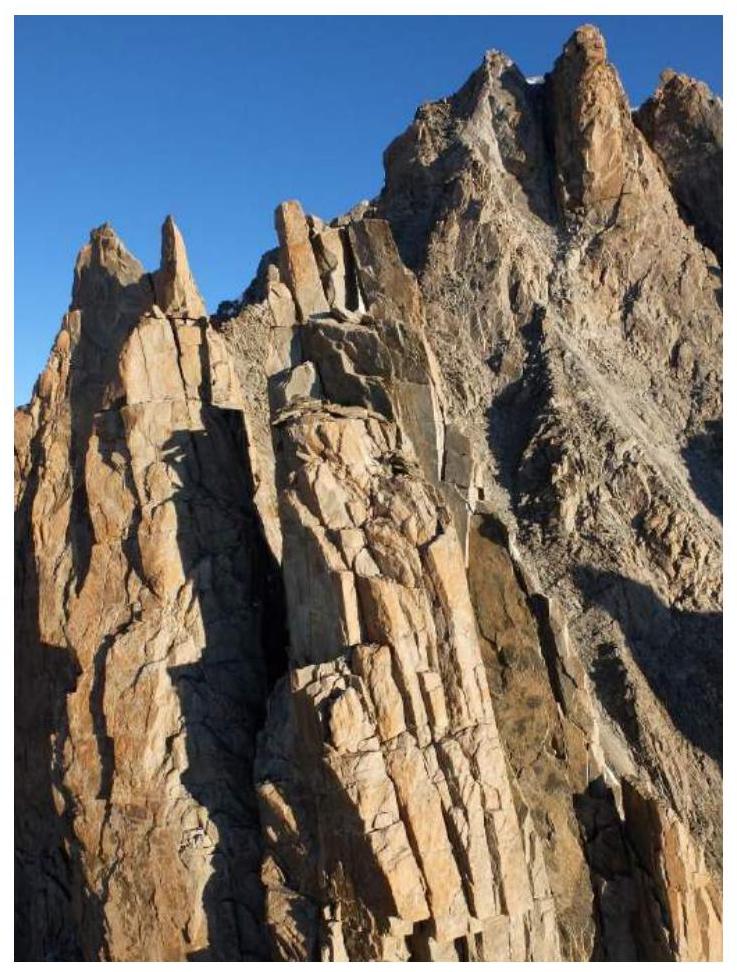
Fig. 12. R9–R10. View of the Carmen and Mediane peaks from the Chaubert peak. R10–R11. Climb the wall and cracks to the summit of the Carmen peak. R11–R12. Make two 30 m rappels to the saddle between the Carmen and Isolee peaks.

Fig. 13. R11–R12. Rappelling from the Carmen peak. R12–R13. Bypass the Isolee peak on the right. Move up to the right along the ridge towards the summit. Bypass difficult sections on the right. Bypass the white wall with challenging climbing on the left. Reach the summit along the snowy ridge.

Fig. 14. R12–R13. View of the Isolee peak and the pre-summit ridge.
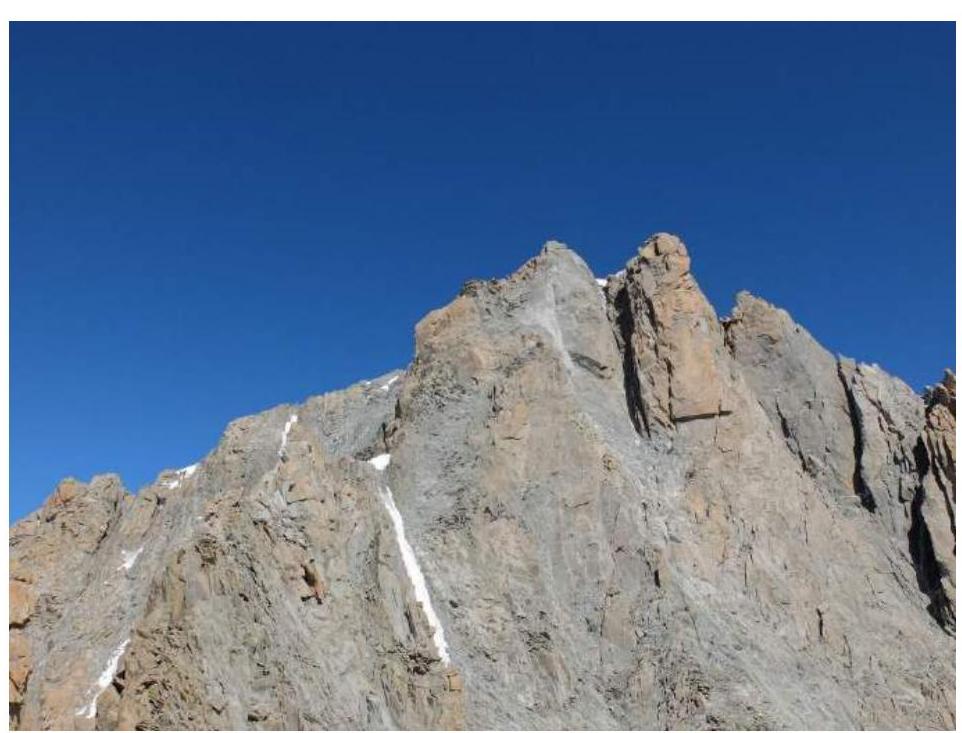
Fig. 15. R12–R13. View of the pre-summit ridge.
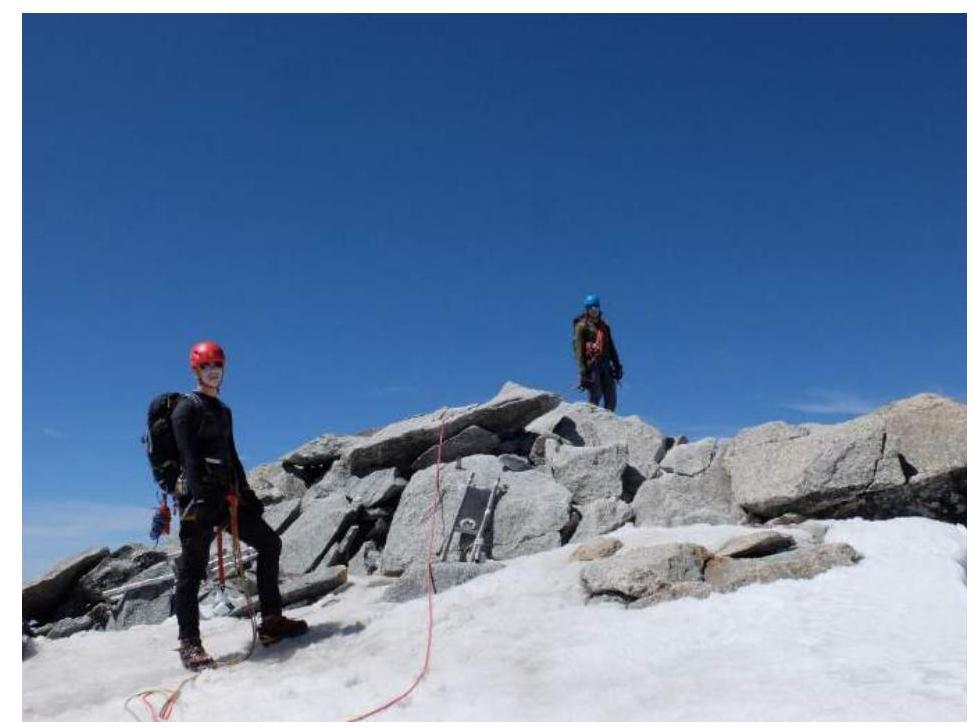
Fig. 16. Team photo at the summit.
Comments
Sign in to leave a comment