St. Petersburg Alpine Climbing Championship 2012
DESCRIPTION OF THE ASCENT TO THE SUMMIT OF KARA-KAYA (3646 m) VIA THE CENTRAL SPUR OF THE SOUTHWEST WALL, 6A cat. dif., (E. Poltavets, 2010)
The route was completed by the team of the "Polytechnic" Alpine Club
-
Central Caucasus, Bezengi gorge, section No. 2.5 of the route classifier for mountain peaks, paragraph 2.5.226 (Minutes of the Classification Committee meeting No. 6 dated December 28, 2010)
-
Peak name: Kara-Kaya (3646 m), route name: via the central spur of the southwest wall (E. Poltavets, 2010)
-
Cat. dif.: 6A
-
Route type: rock
-
Route elevation gain: 700 m (by altimeter)
Route length: 1151 m.
Section length: 5 cat. dif. — 245 m, 6 cat. dif. — 491 m.
Average steepness:
- first bastion: 76°,
- second bastion: 81°,
- third bastion: 87°,
- entire route: 68°.
-
Pitons used (denominator for artificial aids):
rock pitons: 127/71, chocks: 144/57, stationary drill pitons: 10, including 1 for artificial aids (all left by the first ascenders). Total artificial aids used — 128. Pitons left on the route: 0
-
Team's total climbing hours: 6 hours, 6 days
-
Team leader: Molodozhen Vladimir Alexandrovich, Master of Sports.
Team members:
- Teplov Dmitry, 1st sports category
- Lukovkin Alexander, 1st sports category
-
Coaches: Lobachev Evgeny Alexandrovich, Candidate Master of Sports, 2nd category instructor; Timoshenko Tatyana Ivanovna, Master of Sports, 2nd category instructor
-
Route start: 7:00 AM, January 4, 2012.
Summit reached: 12:00 PM, January 9, 2012.
Return to Base Camp: 6:00 PM, January 9, 2012.
-
Report responsible: Molodozhen V.A. (jen@ahd.ru)
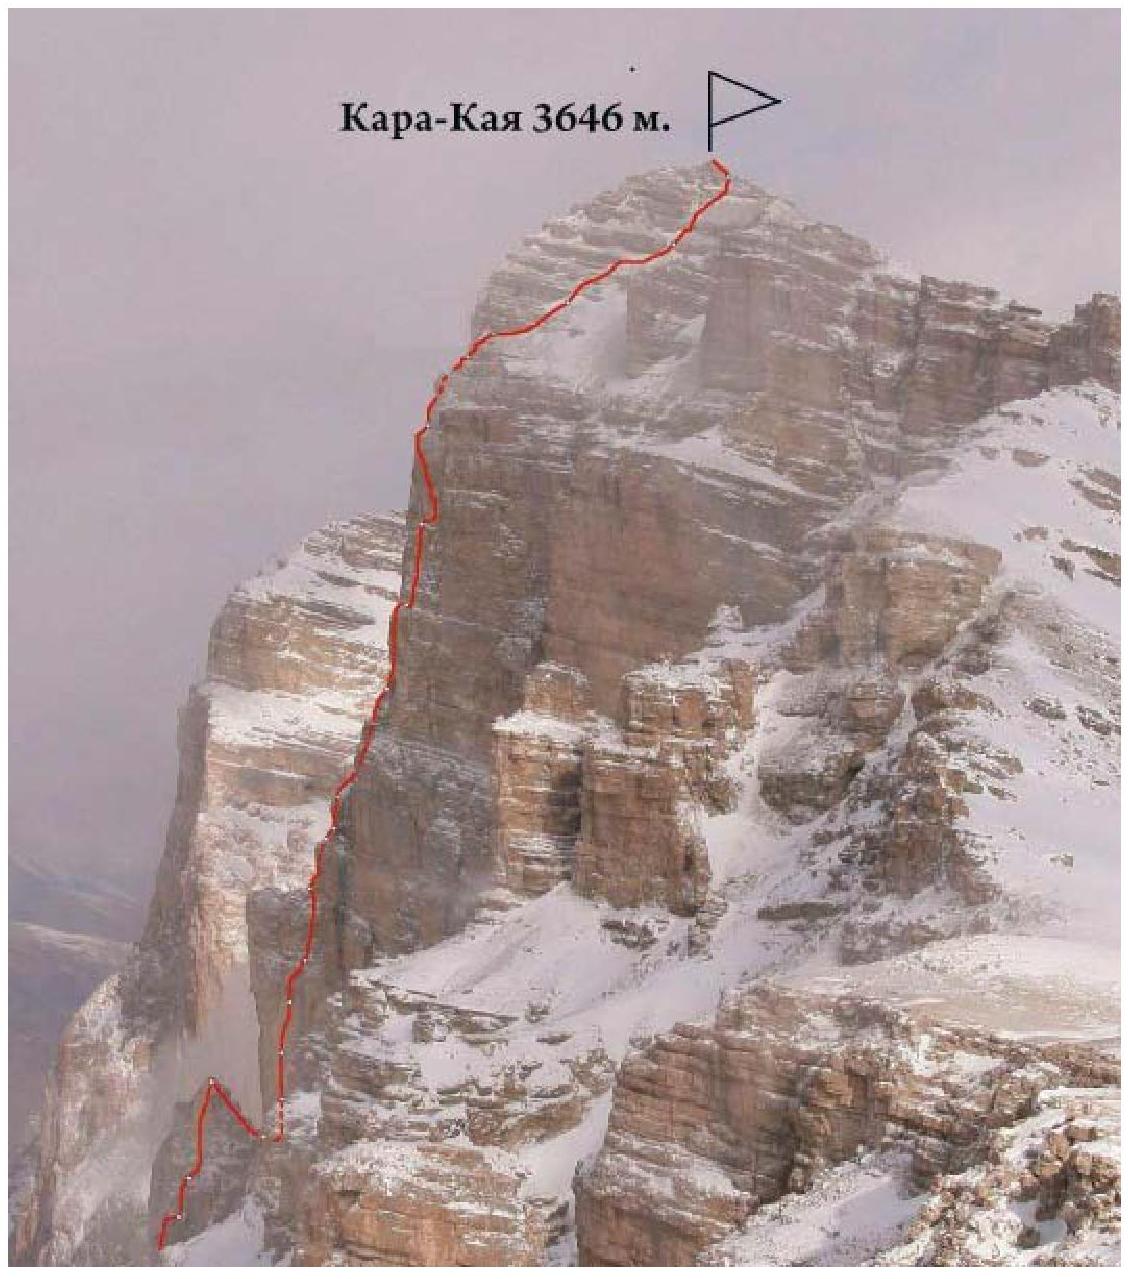
General Photo of the Summit
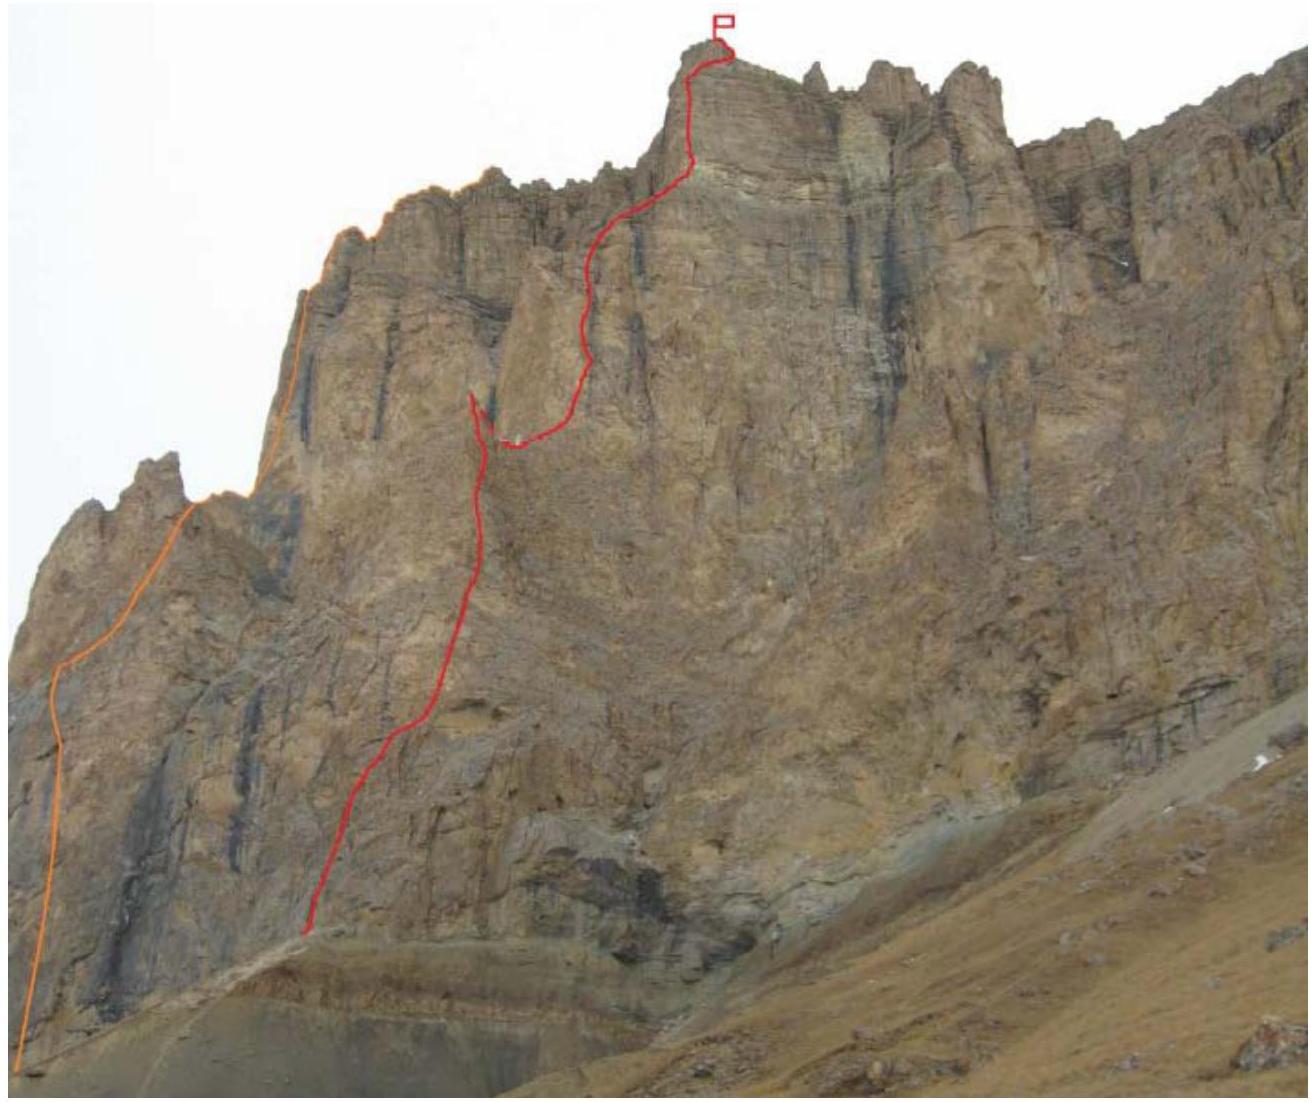 Mt. Kara-Kaya from the south
Taken from the slopes of Dumala pass at an altitude of about 2600 m, February 2011. The yellow line marks the route through the center of the southwest bastion (“The Land of Mists”), E. Poltavets, 2009, 5B (6A for the group).
The red line marks the route via the central spur of the southwest wall, 6A (E. Poltavets, 2010), completed by the team.
Photo of the Route Profile from the Left
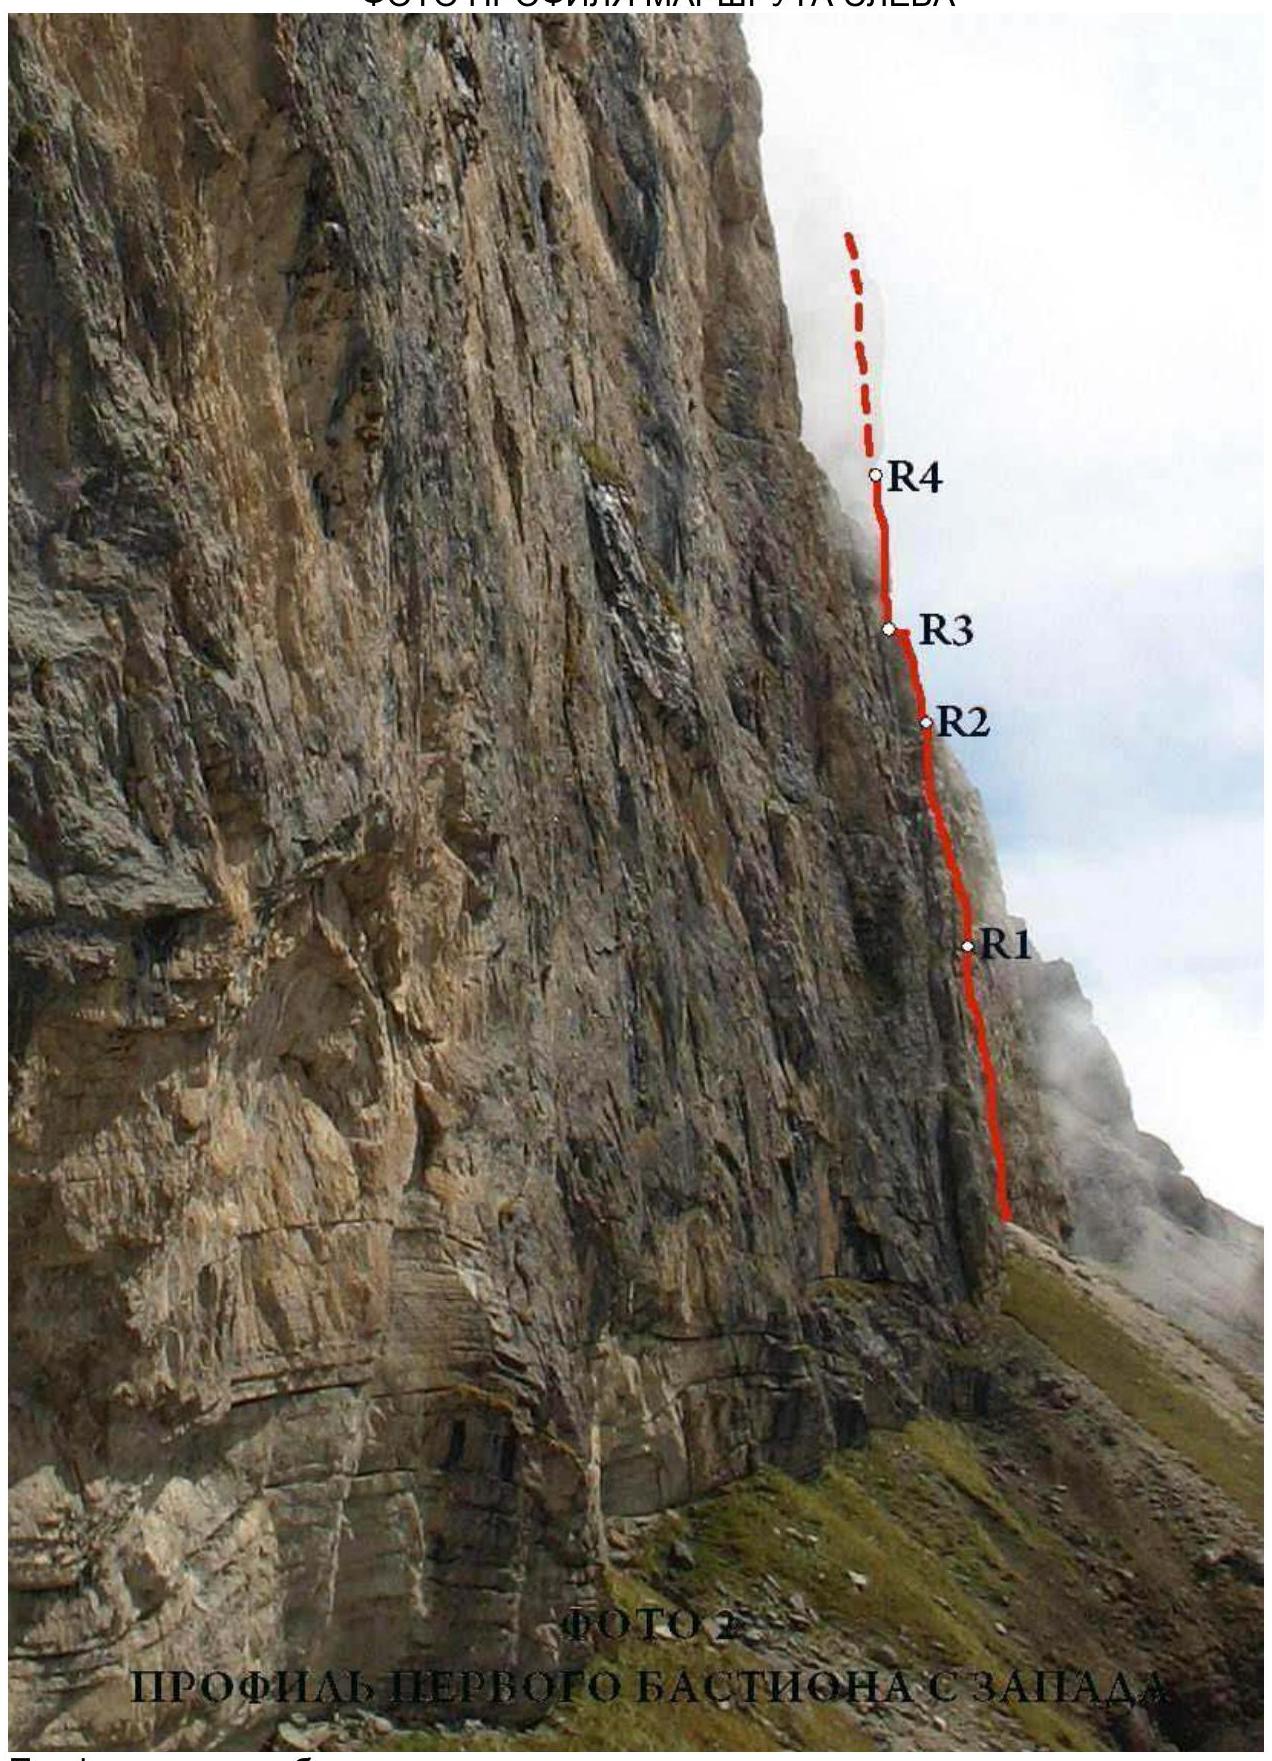
Profile of the first bastion from the west. Taken in summer 2010 by E. Poltavets.
Route profile from the east from the slopes of Mt. Ak-Kaya. Visible:
- upper part of the first bastion
- second bastion
- third bastion, February 2010 (photo by A. Lavrinenko)
Drawn Route Profile

Route Diagram in UIAA Symbols
Kara-Kaya 3646 m via the Central Spur of the SW Wall, 6A (E. Poltavets, 2010)
| Section | Pitons | Chocks | Drill Pitons for Rappel/Artificial Aids | Length, m | Steepness, ° | Difficulty |
|---|---|---|---|---|---|---|
| R28–R29 | – | 3 | – | 130 | 50 | 2 |
| R27–R28 | 1 | 6/2 | – | 8 | 90 | 6 A1 |
| 15 | 50 | 2 | ||||
| 20 | 50 | 3 | ||||
| R26–R27 | 1/1 | 3/2 | – | 8 | 90 | 6 A1 |
| 15 | 50 | 2 | ||||
| R25–R26 | 7/6 | 12/10 | – | 40 | 90 | 6 A2 |
| 10 | 45 | 1 | ||||
| R24–R25 | 5/3 | 7/3 | 1/0 | 35 | 90 | 6 A1 |
| R23–R24 | 9/7 | 10/10 | 1/0 | 20 | 85 | 6 A1 |
| 25 | 95 | 6 A2 | ||||
| R22–R23 | 1 | 5 | – | 25 | 90 | 3 |
| R21–R22 | – | 3 | – | 30 | 50 | 1 |
| R20–R21 | 6/4 | 5/3 | – | 15 | 95 | 6 A1 |
| 35 | 50 | 2 | ||||
| R19–R20 | 4/2 | 5/2 | – | 10 | 90 | 6 A1 |
| 10 | 60 | 3 | ||||
| R18–R19 | 4/2 | 9/3 | – | 25 | 85 | 6 A1 |
| 15 | 60 | 4 | ||||
| R17–R18 | 4/3 | 8/6 | 1/0 | 20 | 90 | 6 A2 |
| 10 | 80 | 5+ | ||||
| R16–R17 | 13/12 | 3/2 | 1/1 | 30 | 95 | 6 A3+ |
| R15–R16 | 10/10 | 6/5 | 1/1 | 15 | 100 | 6 A3+ |
| 15 | 80 | 6 | ||||
| R14–R15 | 8/8 | 5/4 | 1/0 | 35 | 85 | 6+А2 |
| R13–R14 | 7 | 5 | 1/0 | 25 | 90 | 6 |
| 20 | 60 | 5 | ||||
| R12–R13 | 3 | 4 | – | 15 | 60 | 4 |
| 20 | 30 | 2 | ||||
| R11–R12 | – | – | 1/0 | 35 | 60 | 3 |
| R10–R11 | 4 | 4 | 1/0 | 35 | 80 | 5+ |
| R9–R10 | 7/5 | 8/5 | – | 10 | 70 | 4 |
| 40 | 90 | 6 A2 | ||||
| R8–R9 | 6 | 5 | – | 40 | 75 | 5+ |
| R7–R8 | 5 | 5 | 1/0 | 30 | 80 | 6 |
| R6–R7 | 4 | 6 | – | 25 | 75 | 5 |
| 15 | 65 | 3 | ||||
| R5–R6 | 6/5 | 9/4 | – | 40 | 90 | 6 A2 |
| 10 | 80 | 5 | ||||
| R4–R5 | 4/3 | 6/1 | 1/0 | 30 | 85 | 6 A1 |
| R3–R4 | 4/2 | 5/1 | – | 25 | 85 | 6 A1 |
| R2–R3 | 3 | 4 | 1/0 | 30 | 75 | 5 |
| R1–R2 | 3 | 6 | – | 15 | 80 | 5 |
| 15 | 60 | 3 | ||||
| 15 | 90 | 5 | ||||
| R0–R1 | 4/3 | 9 | – | 45 | 80 | 5+А1 |
Description of the Route Completion
Day One
R0–R1. The start of the route is a characteristic internal corner ten meters to the left of the edge of the scree gully. Up the internal corner. 45 m. 5+ A1.
R1–R2. Up the crack to the right 15 m, then 15 m along simple rocks to a vertical wall. Up the wall to a ledge under the cornice. 15 m. 5; 15 m. 3; 15 m. 5.
R2–R3. Up the corner to a large ledge. Station under the cornice. Drill piton. 30 m. 5.
R3–R4. Rightward up a destroyed, partially overhanging crack. Live rocks! 25 m. 6, A1.
R4–R5. Rightward up a destroyed, partially overhanging crack. Enter the chimney. At the base of the chimney is a drill piton. 30 m. 6 A1.
R5–R6. Bypass the plug, exit the chimney. Rightward-up along a steep overhanging wall to a ledge. 10 m. 5, 40 m. 6+, A2. Descent to overnight stay under the wall.
Day Two
R6–R7. Along the ledge traverse left to approach the “Finger” outcropping. Up the left edge of the outcropping along the wall. 15 m 3, 25 m 5.
R7–R8. Up the wall 30 m. Station on a sloping ledge with a drill piton. 30 m. 6.
R8–R9. Up to a comfortable ledge. 40 m. 5+.
R9–R10. Right to a drill piton, then up a steep, destroyed wall rightward to an internal corner. Up the corner to a ledge. 20 m 6, 30 m 5.
R10–R11. Exit to the ridge, overnight stay on a ledge at the top of the first bastion. Along the ridge, approach under the second bastion, “Iron”. 20 m 3, 15 m 1.
Day Three
R11–R12. Along the slabs approach under the overhanging wall, then difficult traverse along a sloping ledge right to a drill piton (behind the bend, not immediately visible). 20 m. 5; 25 m. 6.
R12–R13. Traverse right to an overhanging crack, up it, then rightward-up along the wall to a drill piton (loose rock, points may be unreliable!!!). 35 m. 6+ A2+–A3.
R13–R14. Traverse rightward-up into an overhanging internal corner. Up the corner (drill piton present), overcome the cornice, then difficult climbing up to a ledge with a drill piton. 15 m. 6 A3+; 15 m. 6. Descent to overnight stay at the top of the first bastion.
Day Four
R14–R15. Up the corner 10 m., then along a slab to an overhanging corner (drill piton present). Up the corner 15 m. Station is inconvenient. 30 m. 6 A3+.
R15–R16. Up, under the cornice. Overcome the cornice and exit to a ledge with a drill piton. 20 m. 6 A2; 10 m. 5+.
R16–R17. Right into an internal corner, up the corner with difficult climbing to a ledge. Along the ledge, traverse left to the spur. 25 m. 6 A1; 15 m. 4.
R17–R18. Overcome a wall and along gentle rocks left to a ledge. 10 m. 6 A1; 10 m. 3.
R18–R19. Through an overhanging internal corner, pass the wall, exit to gentle, destroyed rocks. Further to a comfortable ledge in the middle part of the scree coming from the base of the third bastion. The ledge is a convenient overnight stay. 15 m. 6 A1; 35 m. 2.
Day Five
R19–R20. From the overnight stay spot, up to the base of the third bastion. 30 m. 1.
R20–R21. Along a narrow ledge traverse right to an overhanging internal corner. Station is inconvenient. 25 m. 3.
R21–R22. Up through the internal corner, approach under a cornice, overcome it, and then move rightward-up right of the spur to a ledge with a drill piton. 20 m. 6 A1; 25 m. 6 A2.
R22–R23. Up the wall to an outcropping. In the lower part of the outcropping, traverse right to a crack. Drill piton. 35 m. 6 A1. Descent down to overnight stay under the third bastion.
Day Six
R23–R24. 5 m right into a corner. Up the corner under the cornice. Overcome the cornice and move up, bearing left under a large cornice (live blocks, very rockfall prone!). Pass this cornice in the left part. Further up 8 m through a vertical wall to a scree ledge. 40 m. 6 A2; 10 m. 2.
R24–R25. Overcome a short difficult wall and along the scree approach under the next ascent of the spur. 8 m. 6 A1; 15 m. 2.
R25–R26. Right around the corner. Along the ledge approach to an internal corner. Up the corner, then along strongly destroyed rocks to a monolithic wall. 15 m. 2, 8 m. 6 A1; 20 m. 3.
R26–R29. Move up along simple, strongly destroyed rocks. Sometimes short, steep walls are encountered. Exit to the summit ridge. 130 m. 2. Along the ridge, ascend to the summit of Kara-Kaya 3646 m. From the summit, descend west along the north side of the slope.
100 m west of the saddle between Kara-Kaya main and Kara-Kaya western — a smooth descent of 50 m along a steep slope to a large stone with a worn loop. From it — a series of rappels through an icy gully leading to gentle grassy slopes at the base of the wall.
Note from the Summit
There are no control tour checkpoints on the route. A tour is set up at the summit.
Report Photo Illustration
 Start of the route
 R0–R1
R0–R1
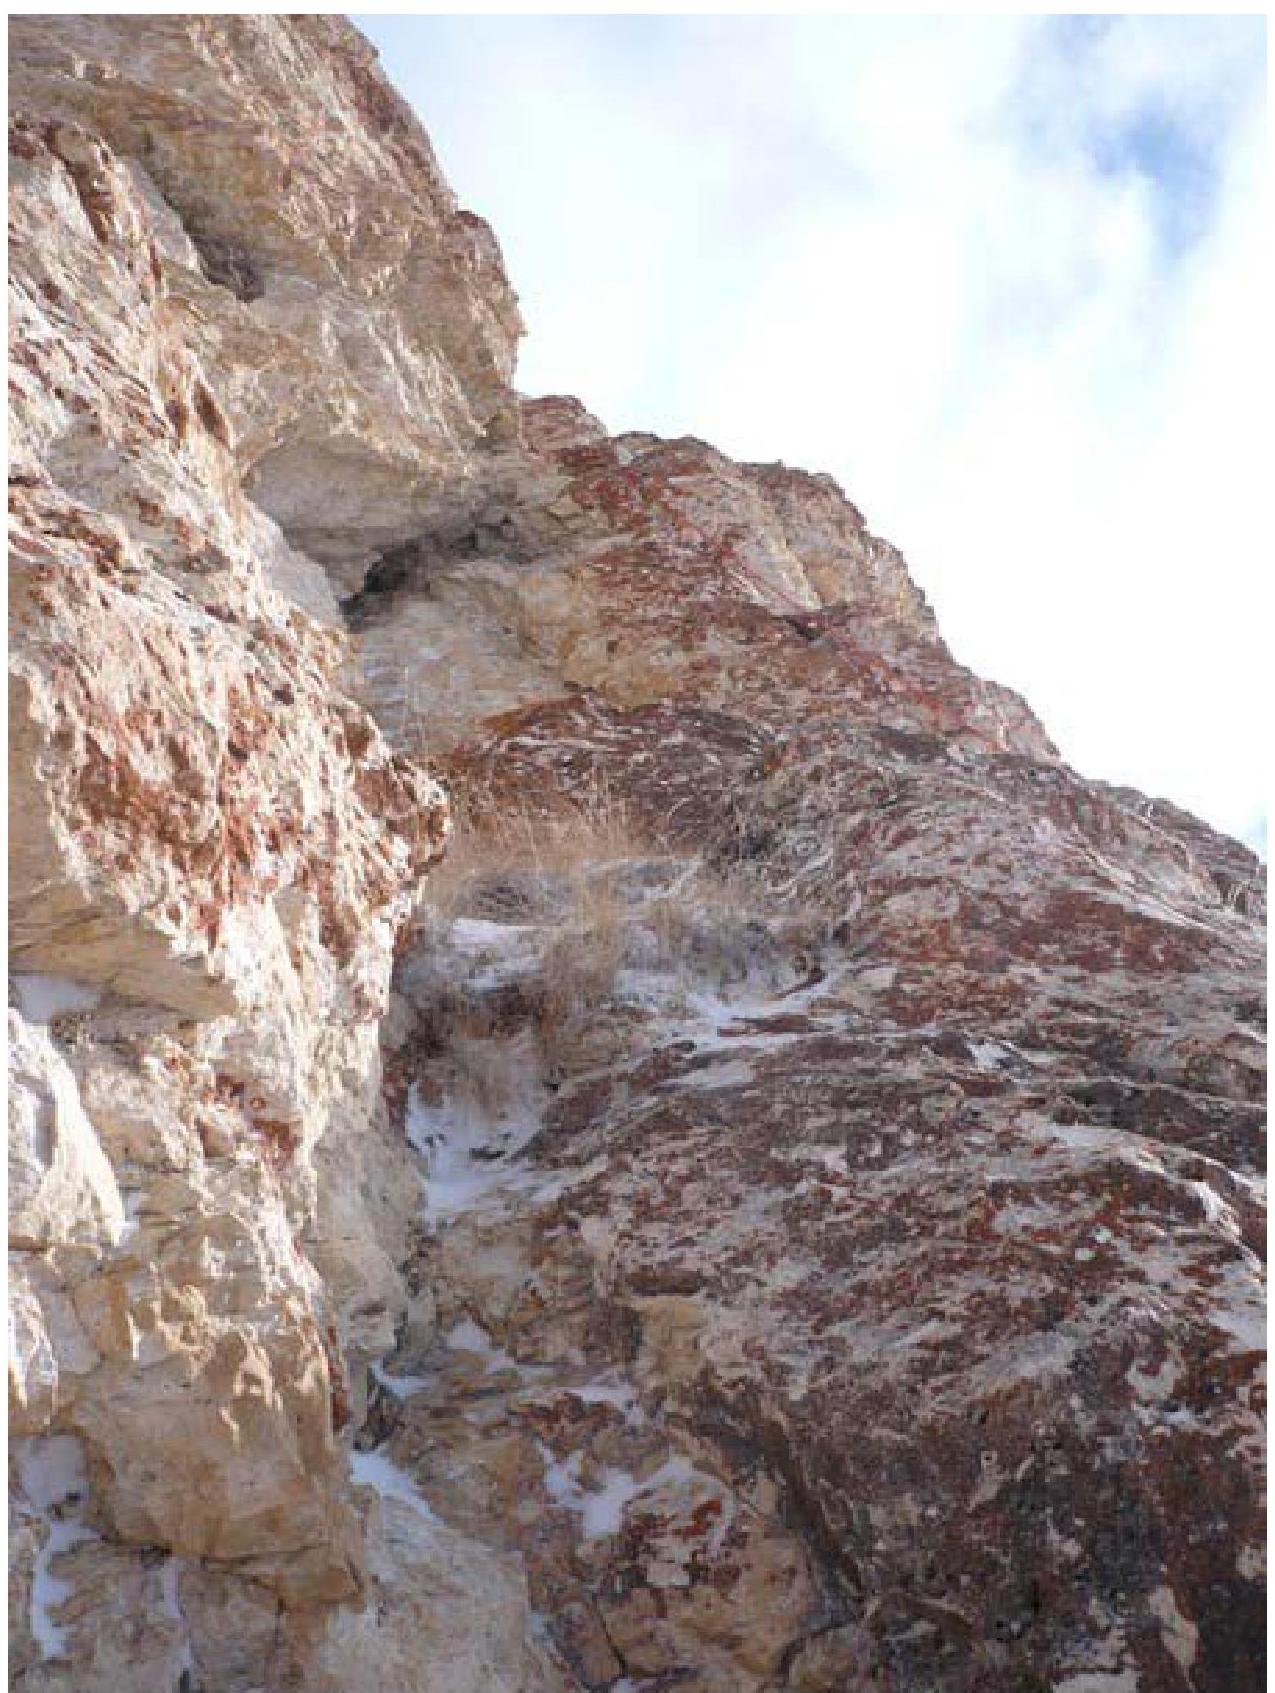
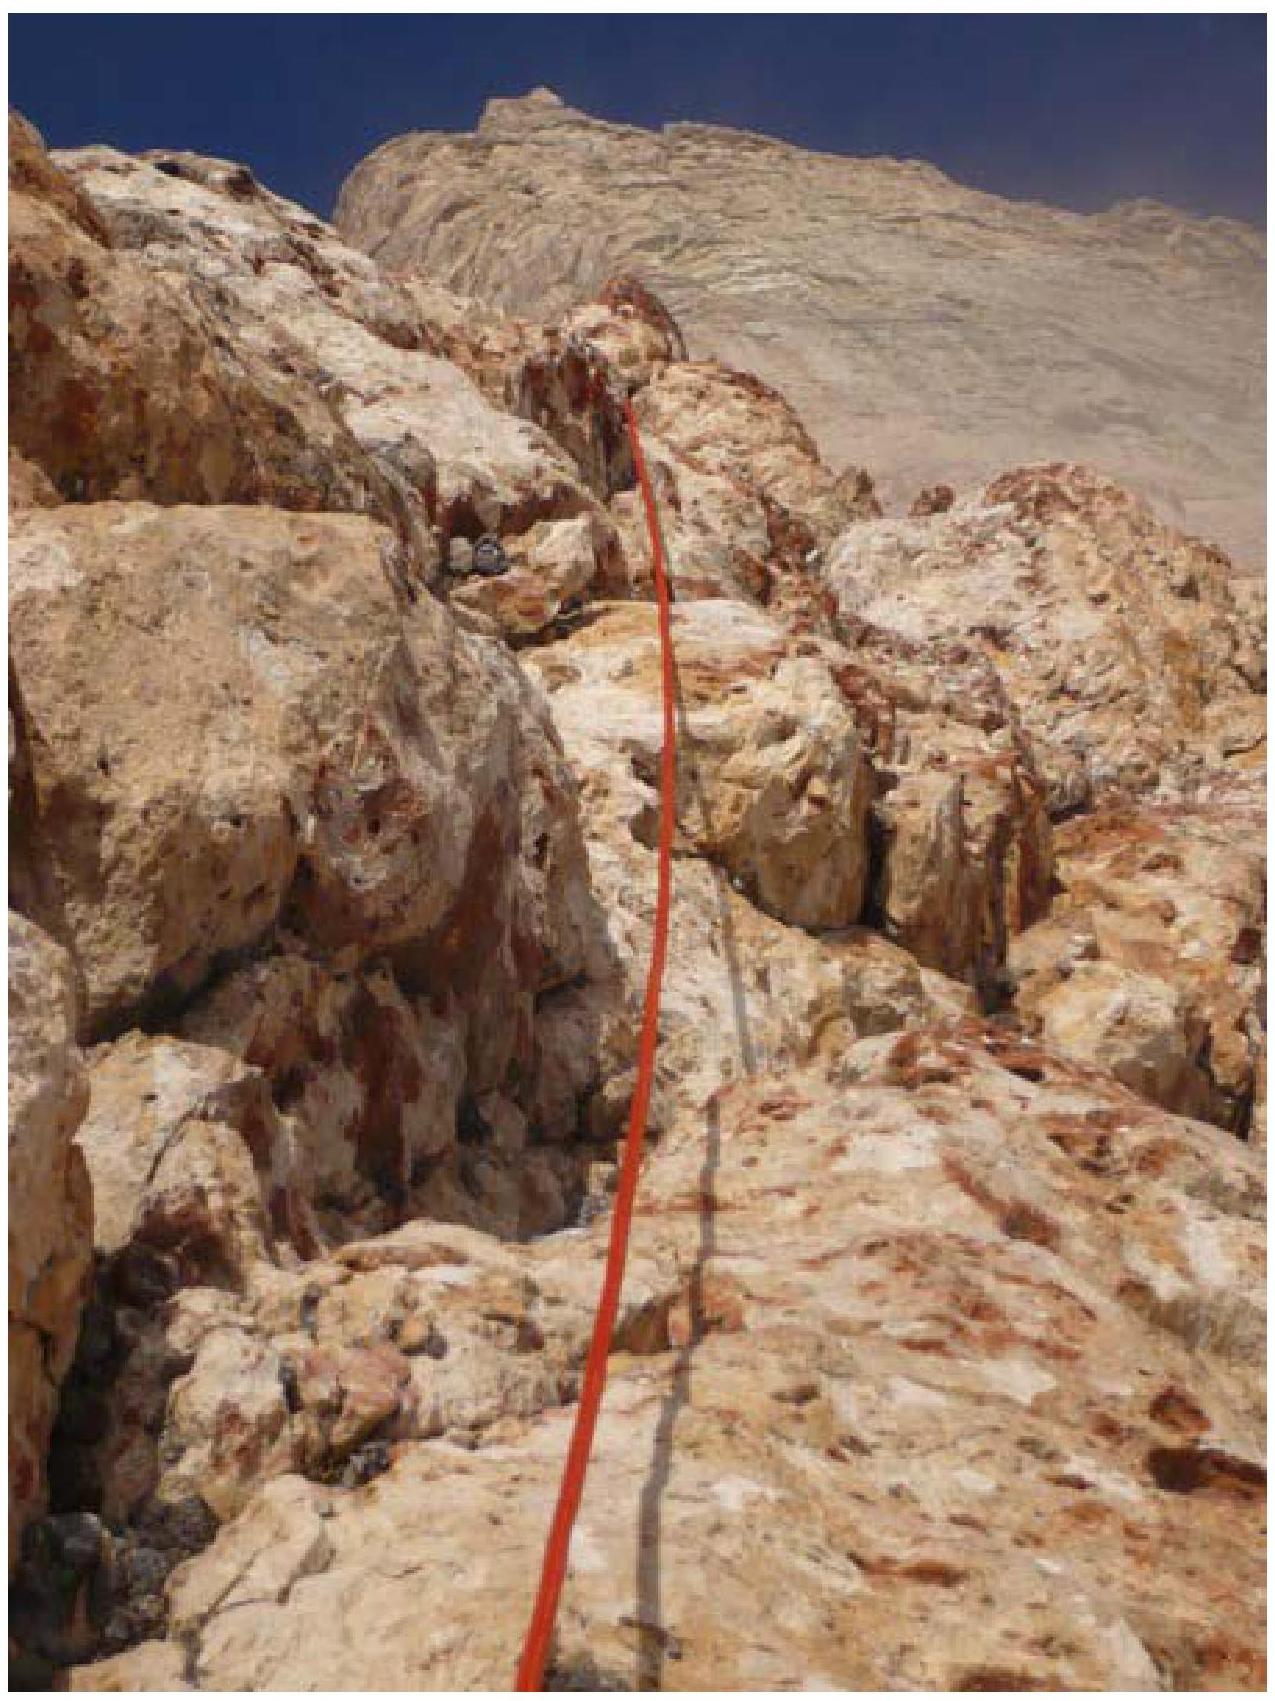
 R2–R3
R2–R3
 R3–R4
R3–R4
 R4–R5
R4–R5
 R5–R6
R5–R6
 R8–R9
R8–R9
 R9–R10
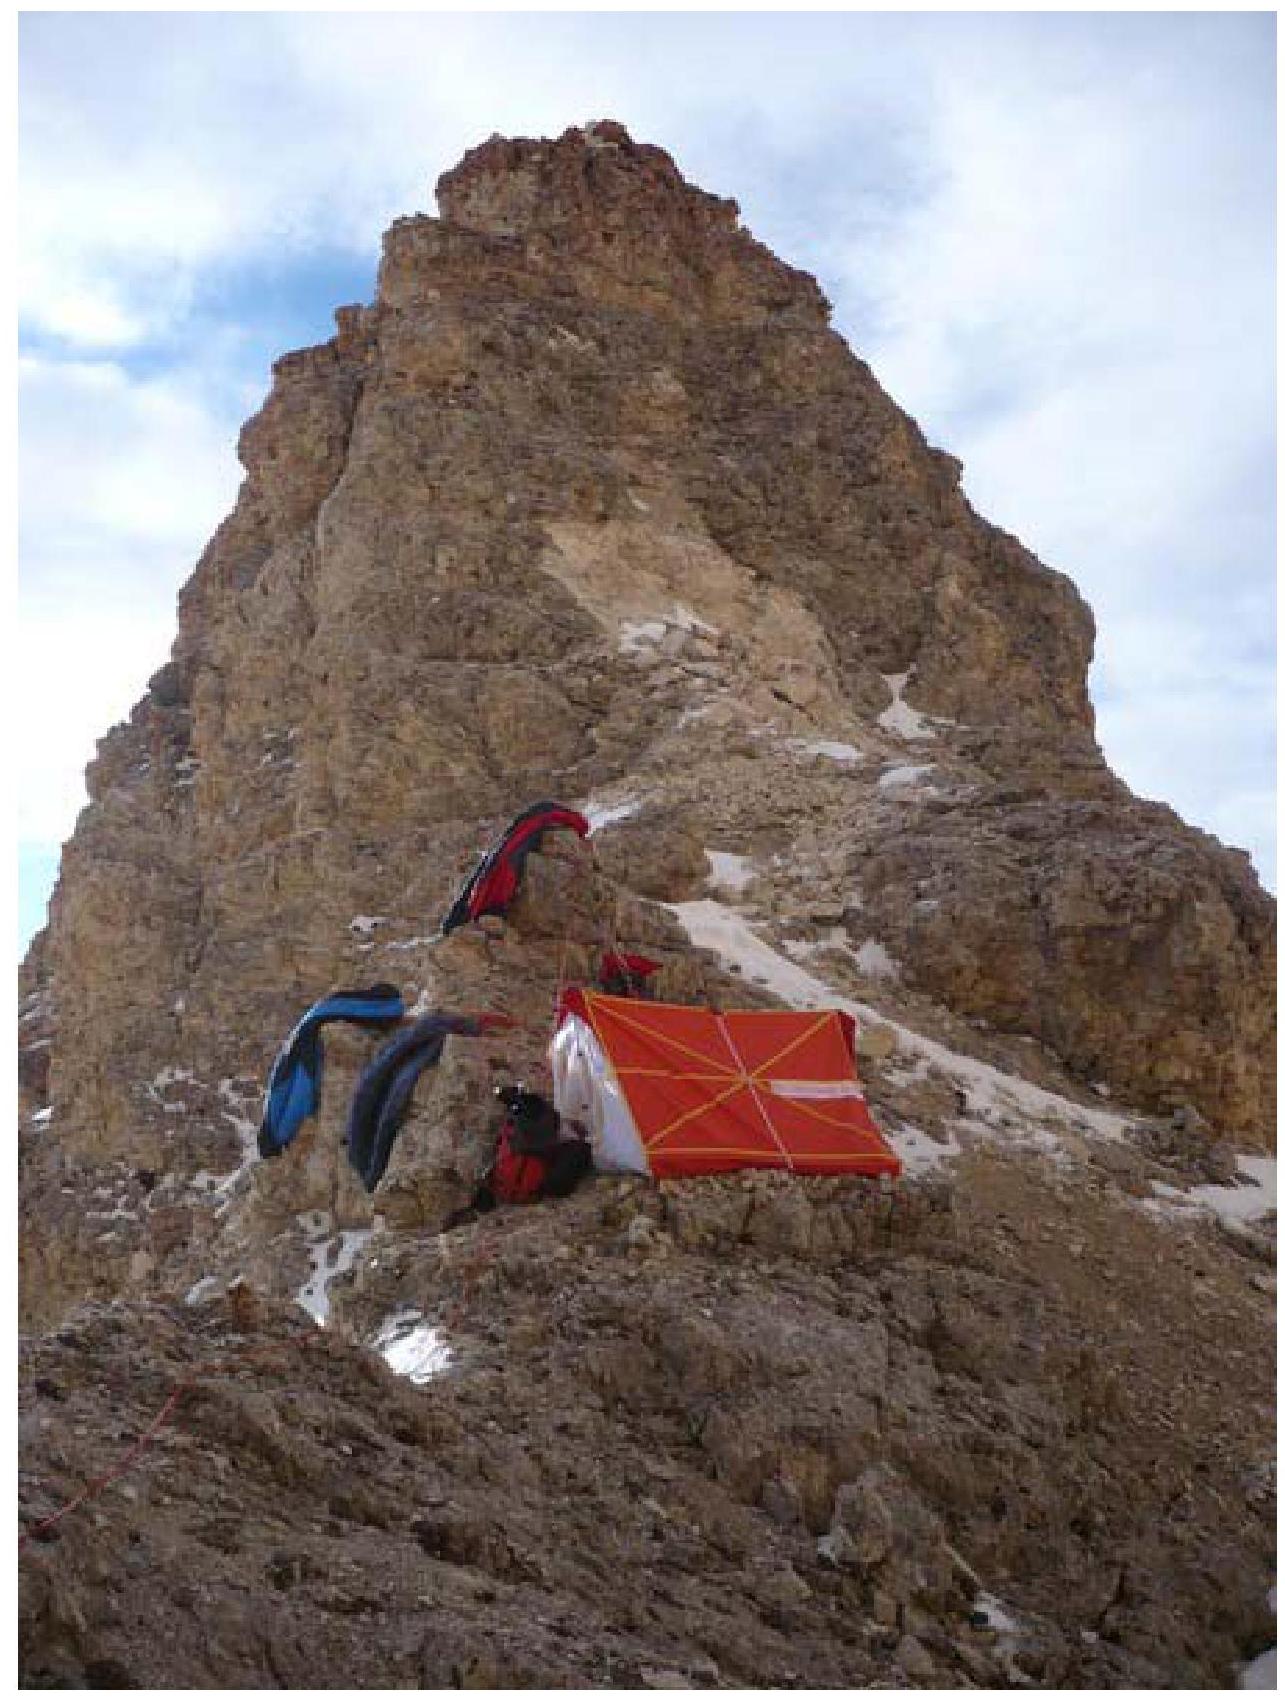 R10–R11, overnight stay at the top of the first bastion
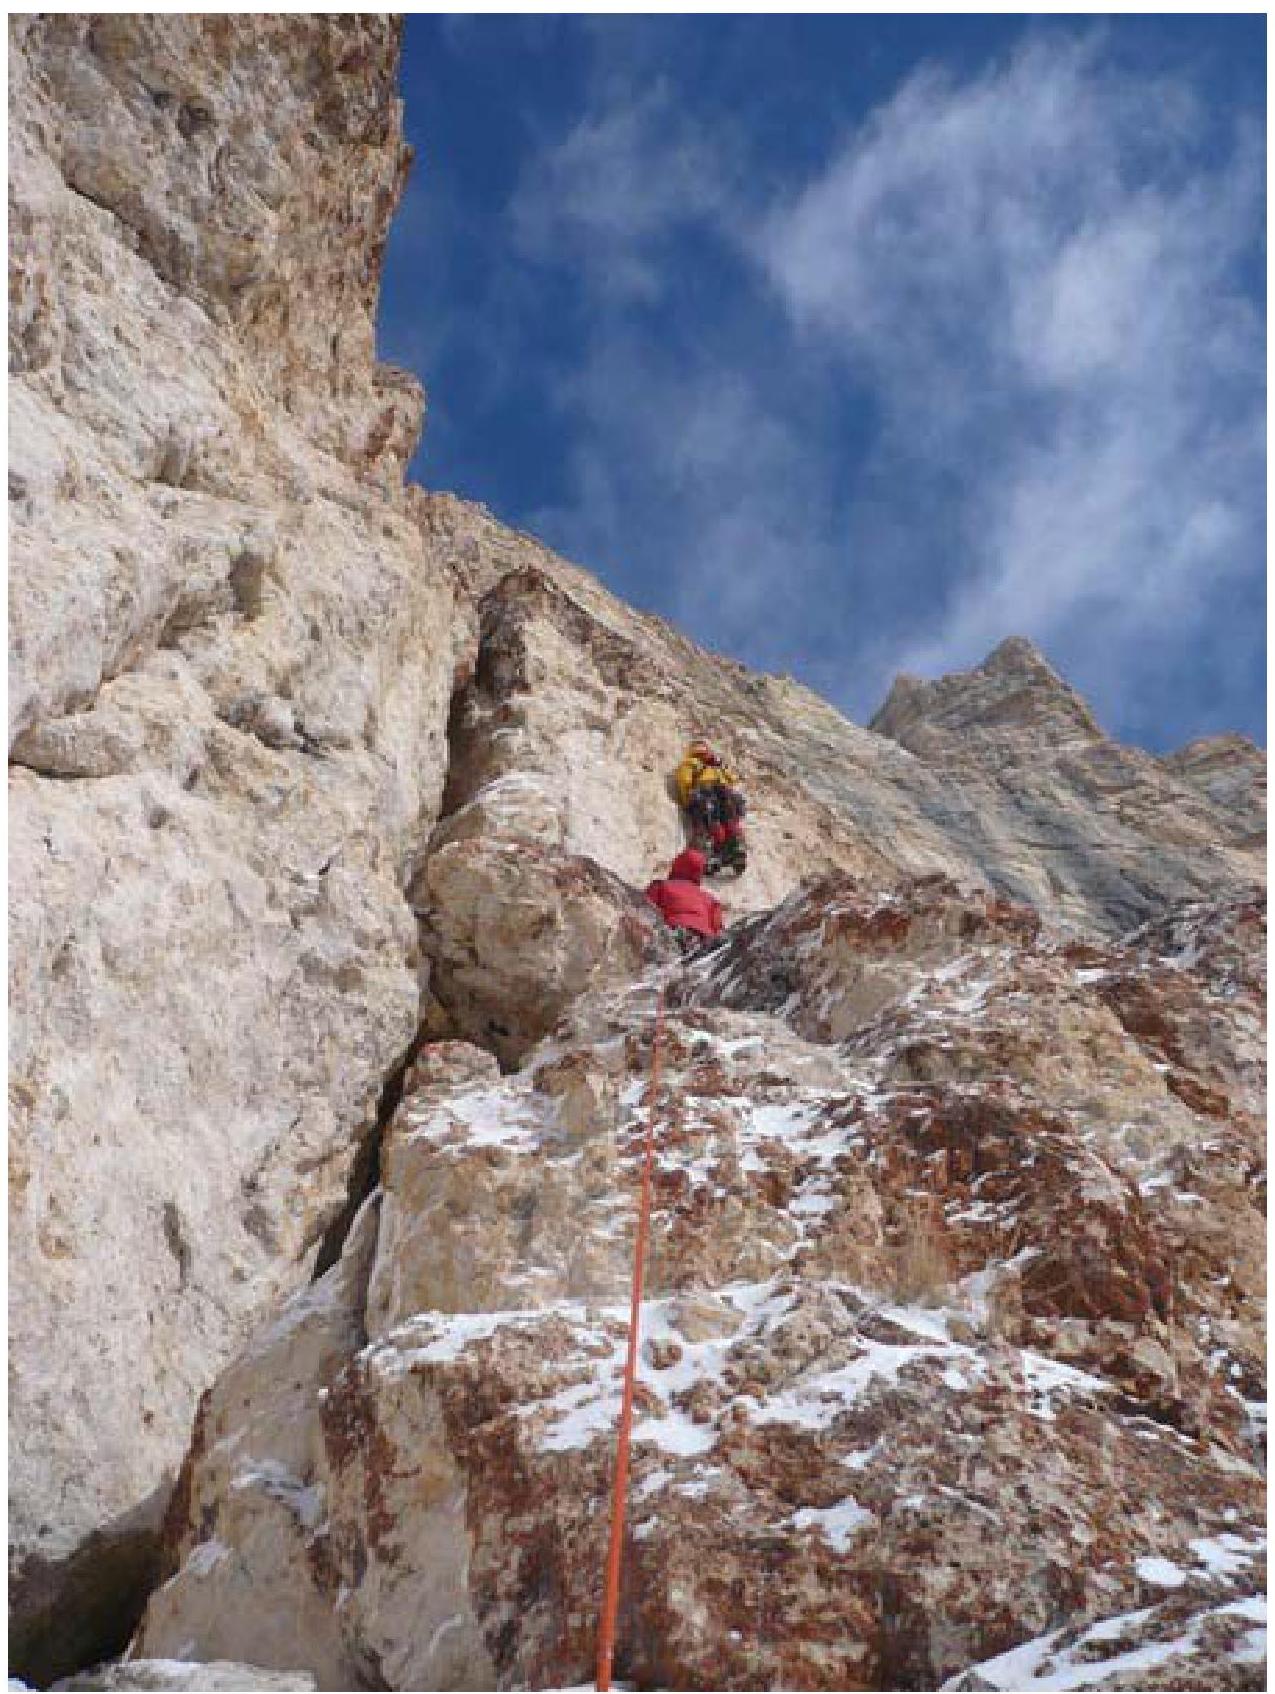
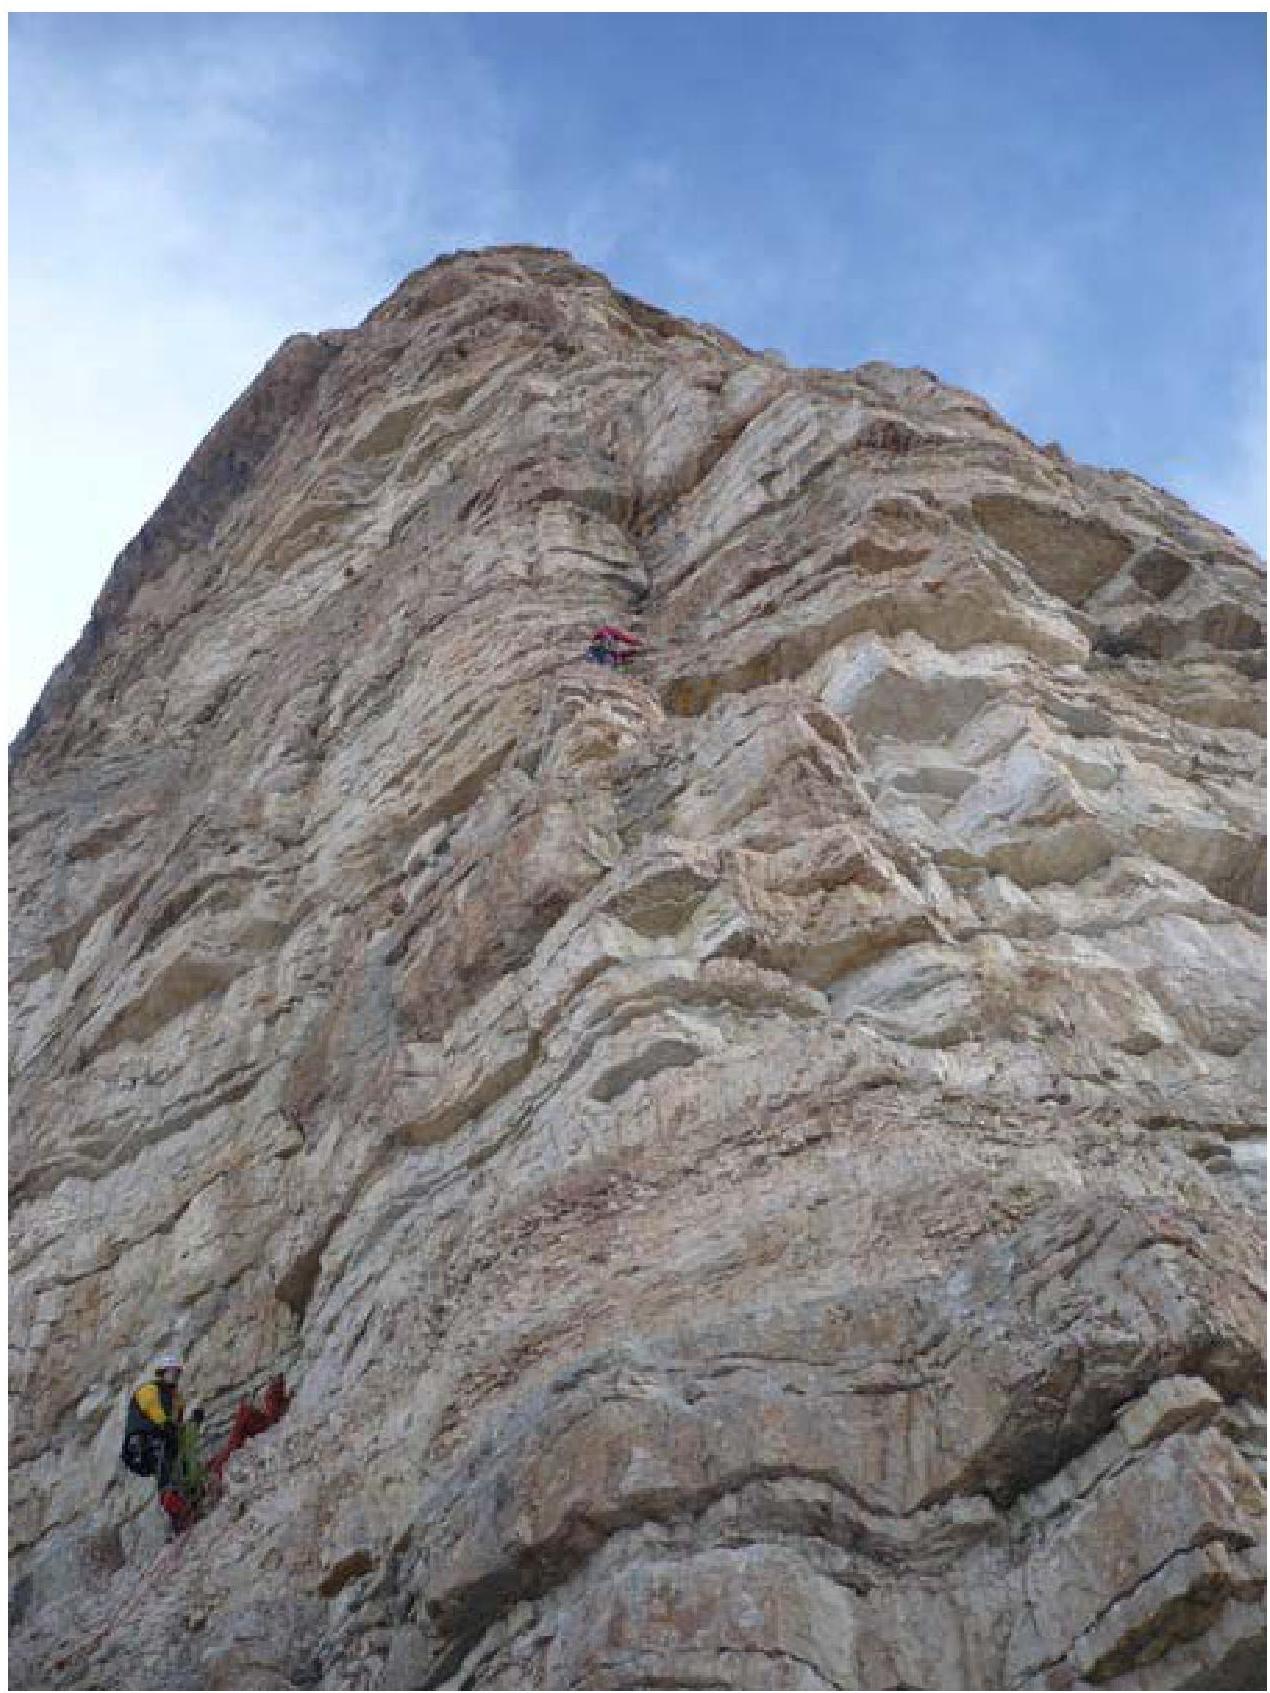
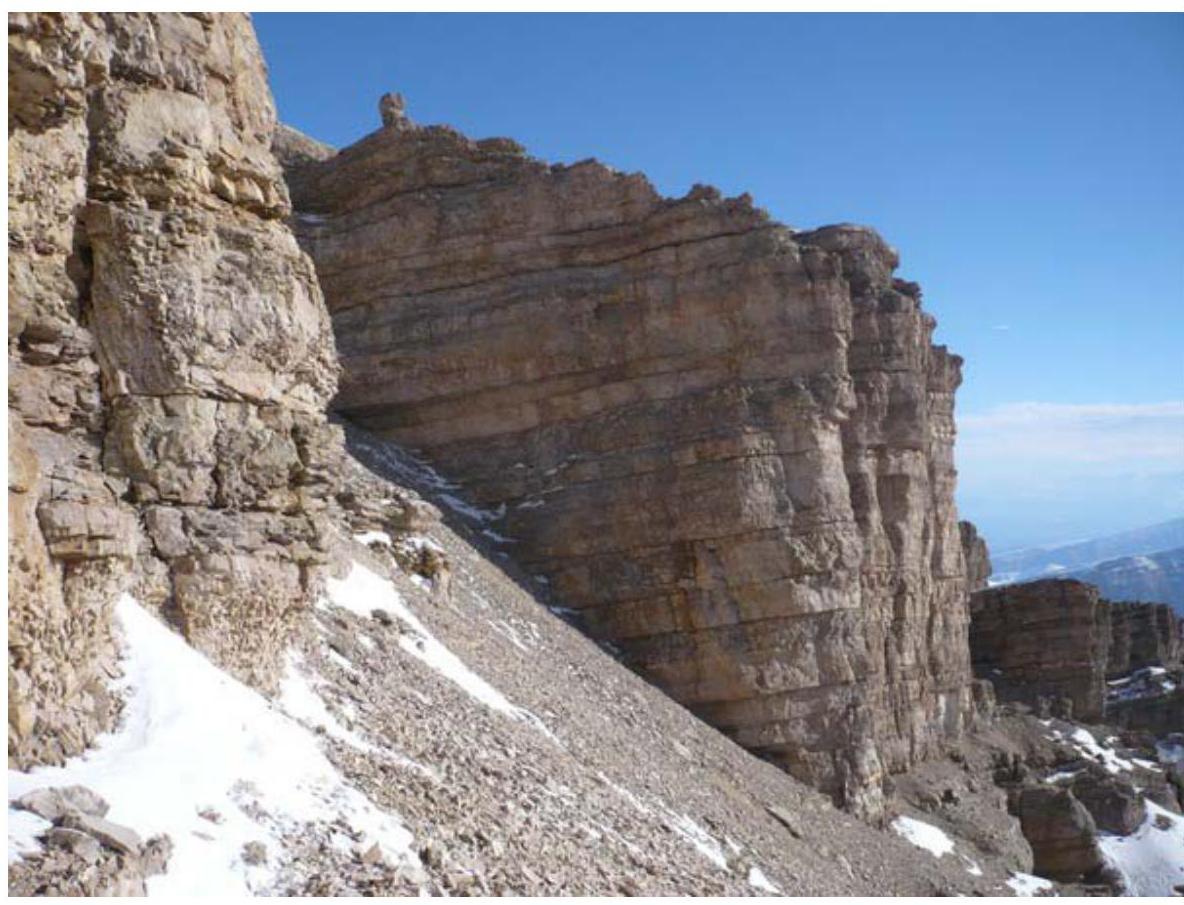
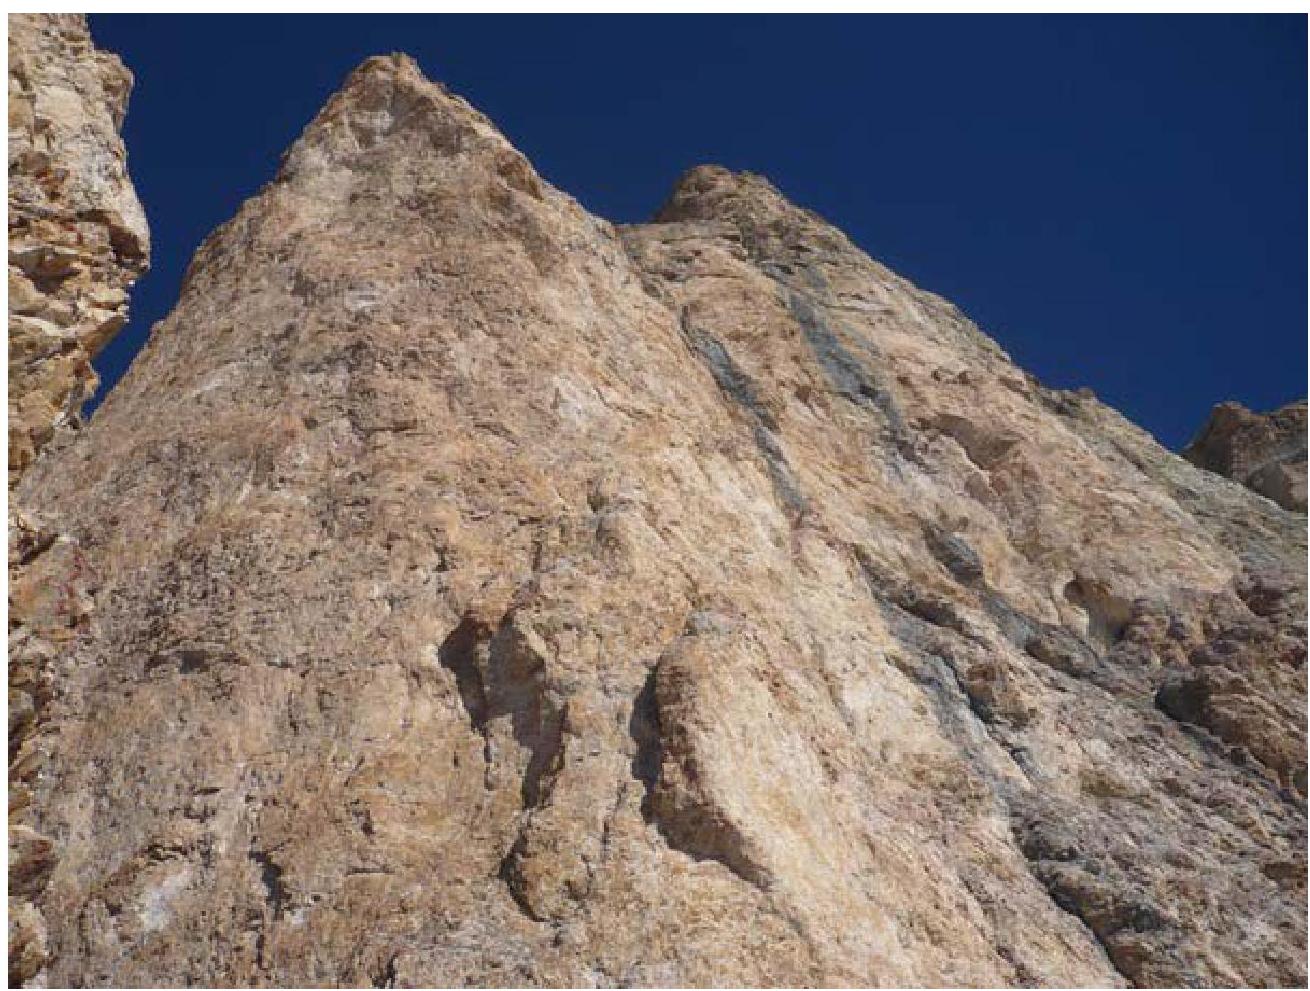 R11–R17 General view of the second bastion, lower part, from the overnight stay at the top of the first bastion
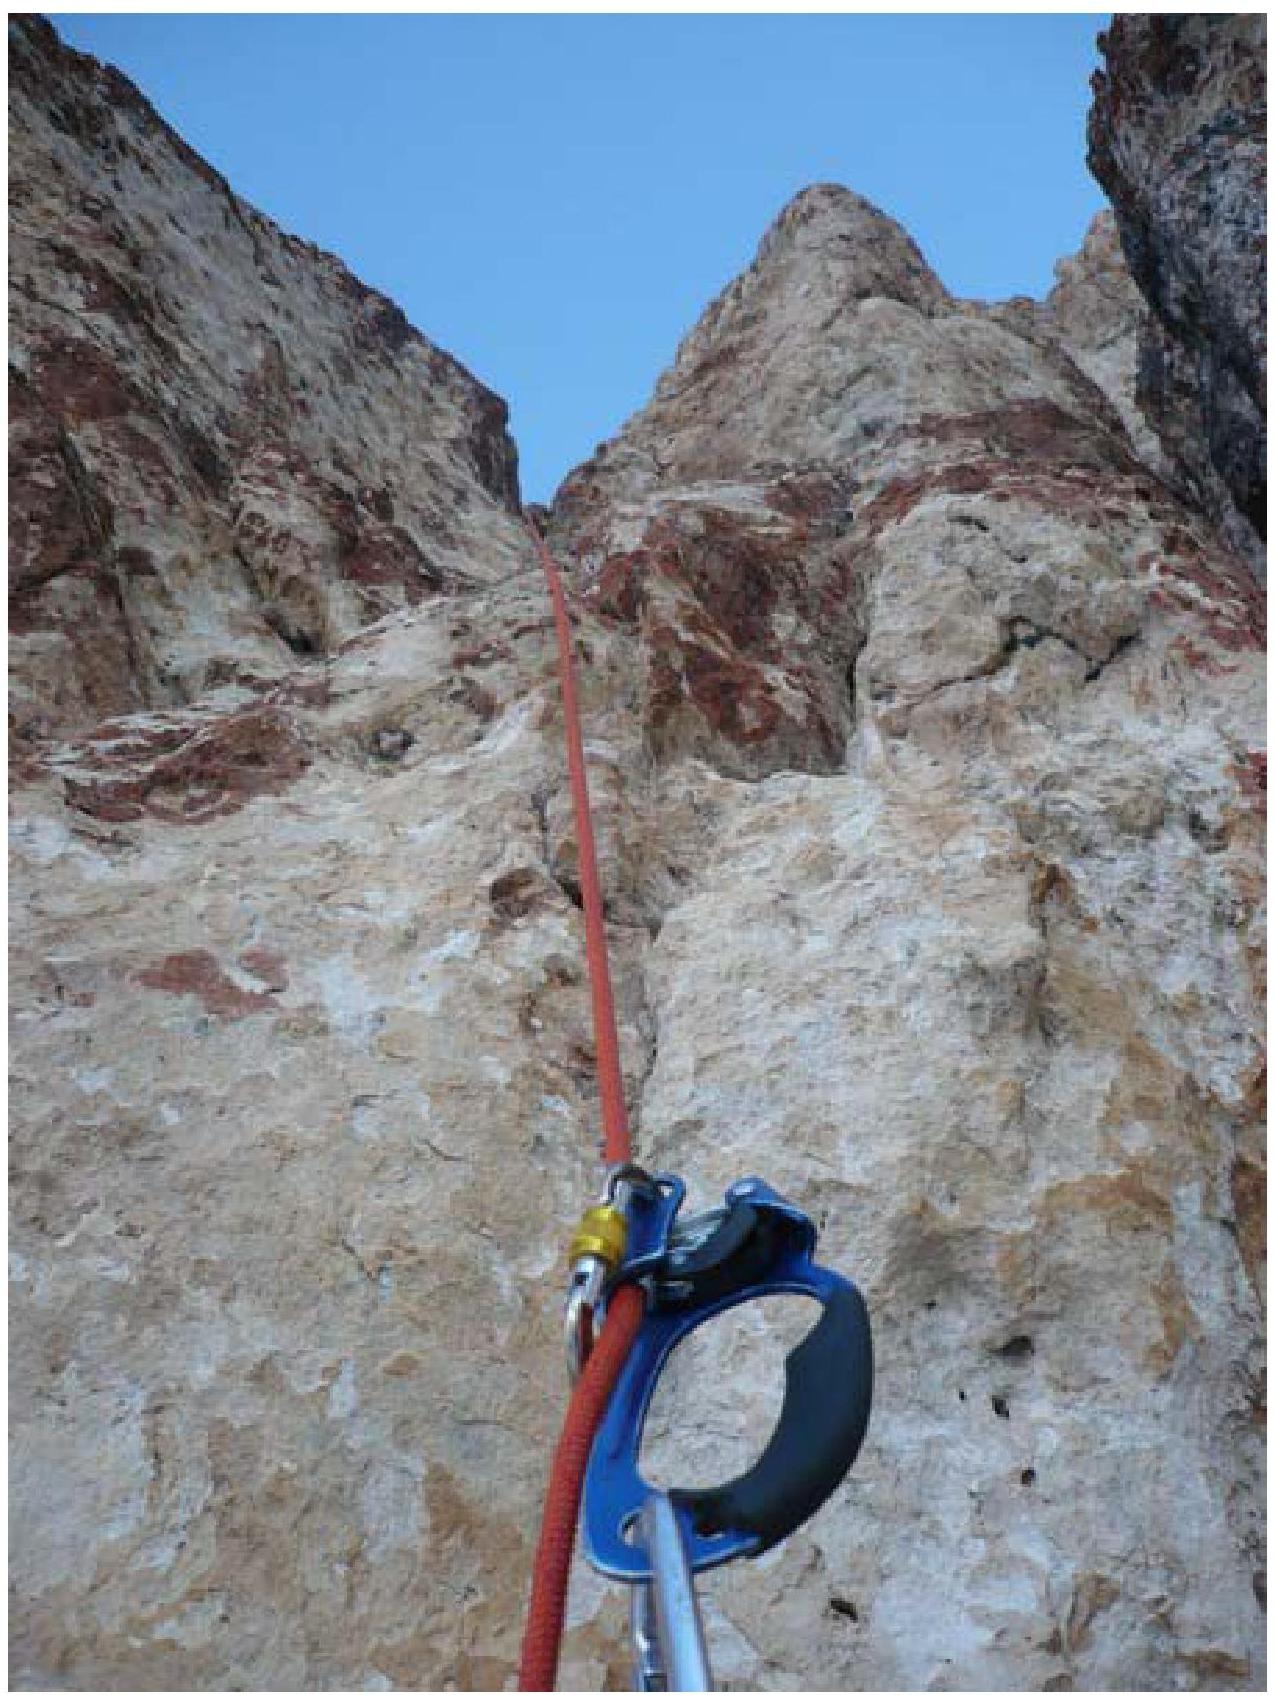
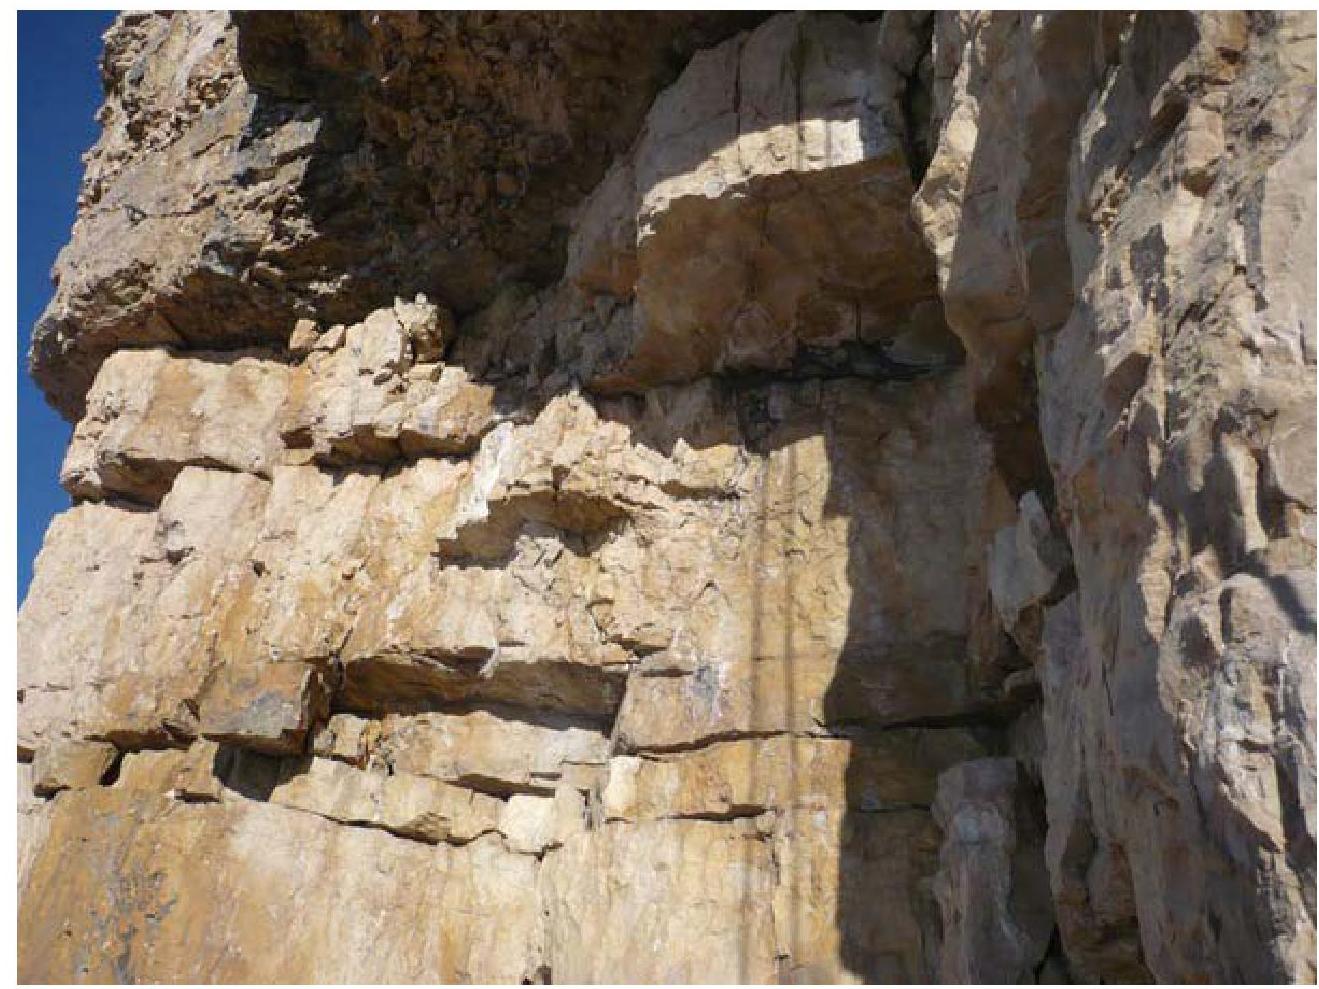
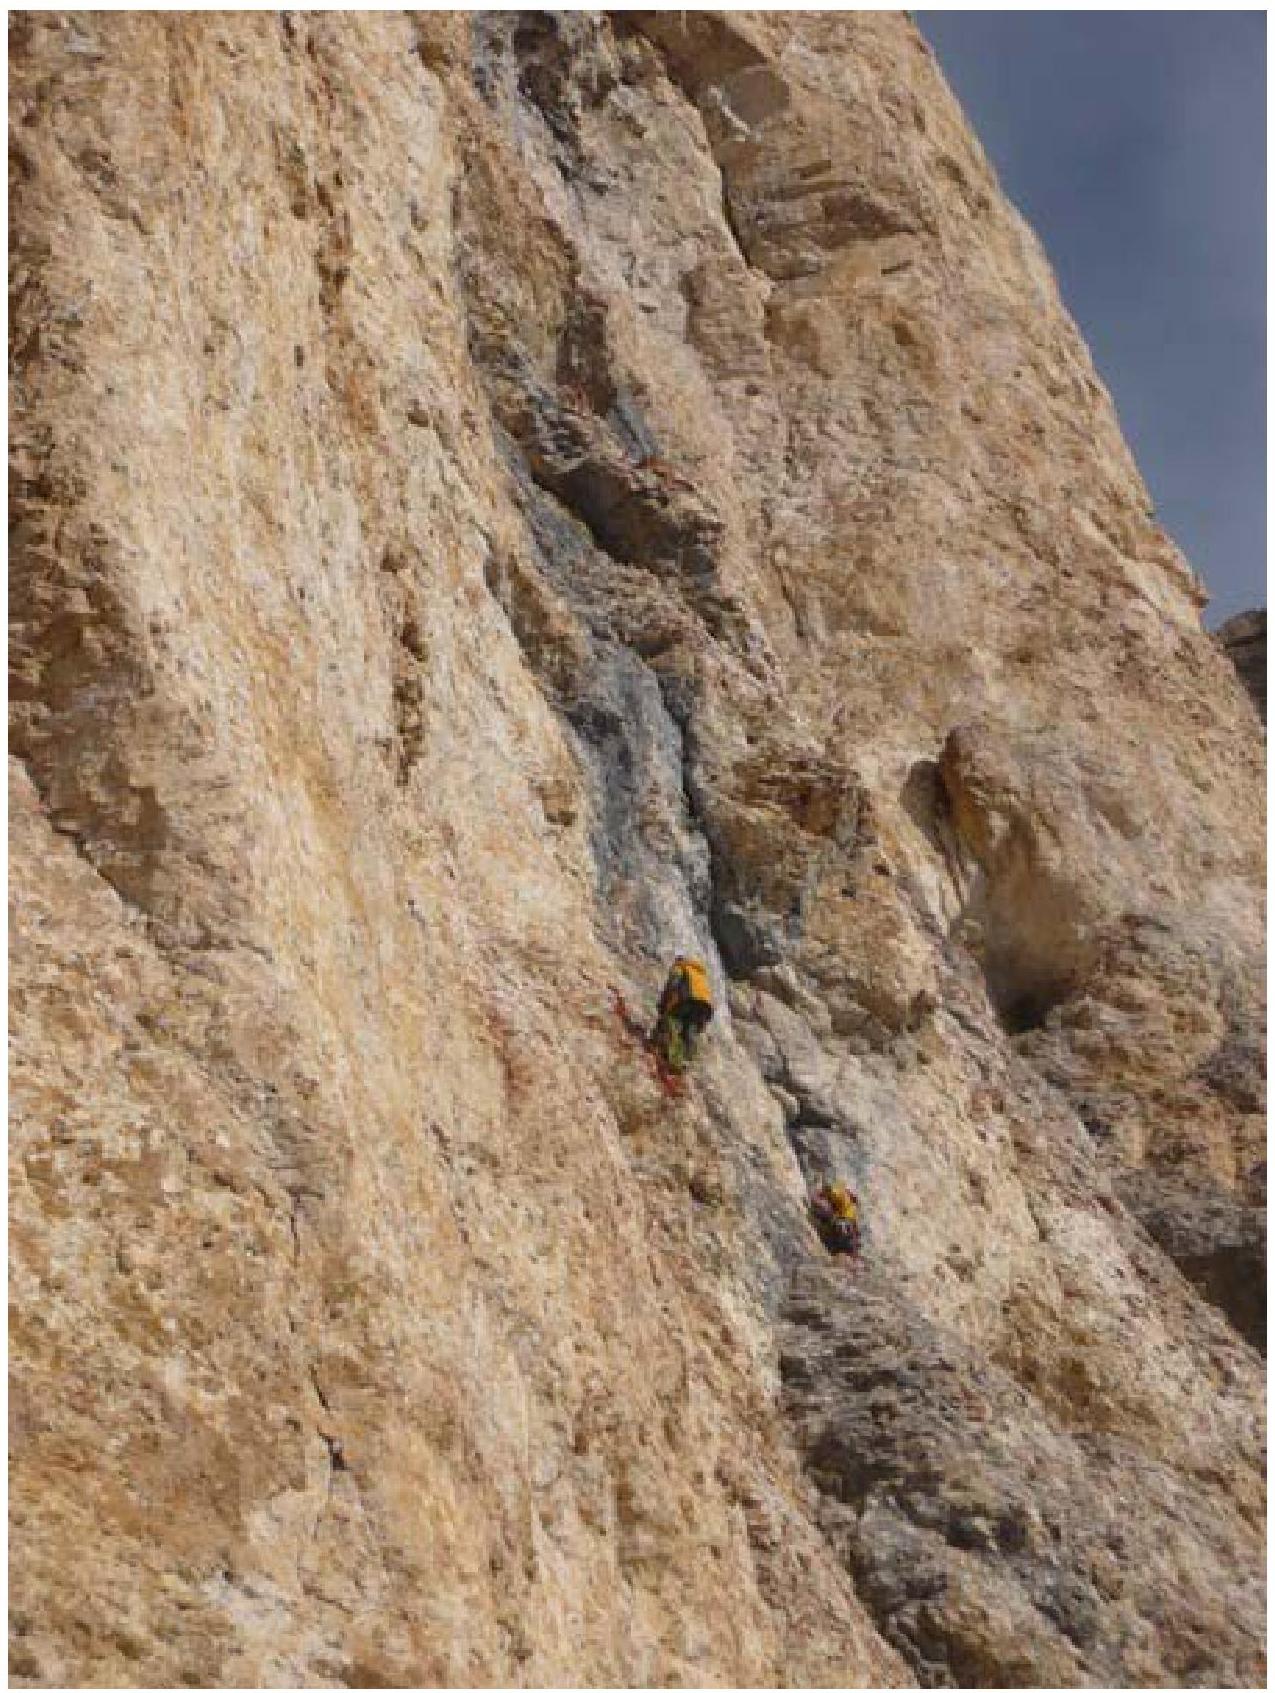 R12–R13
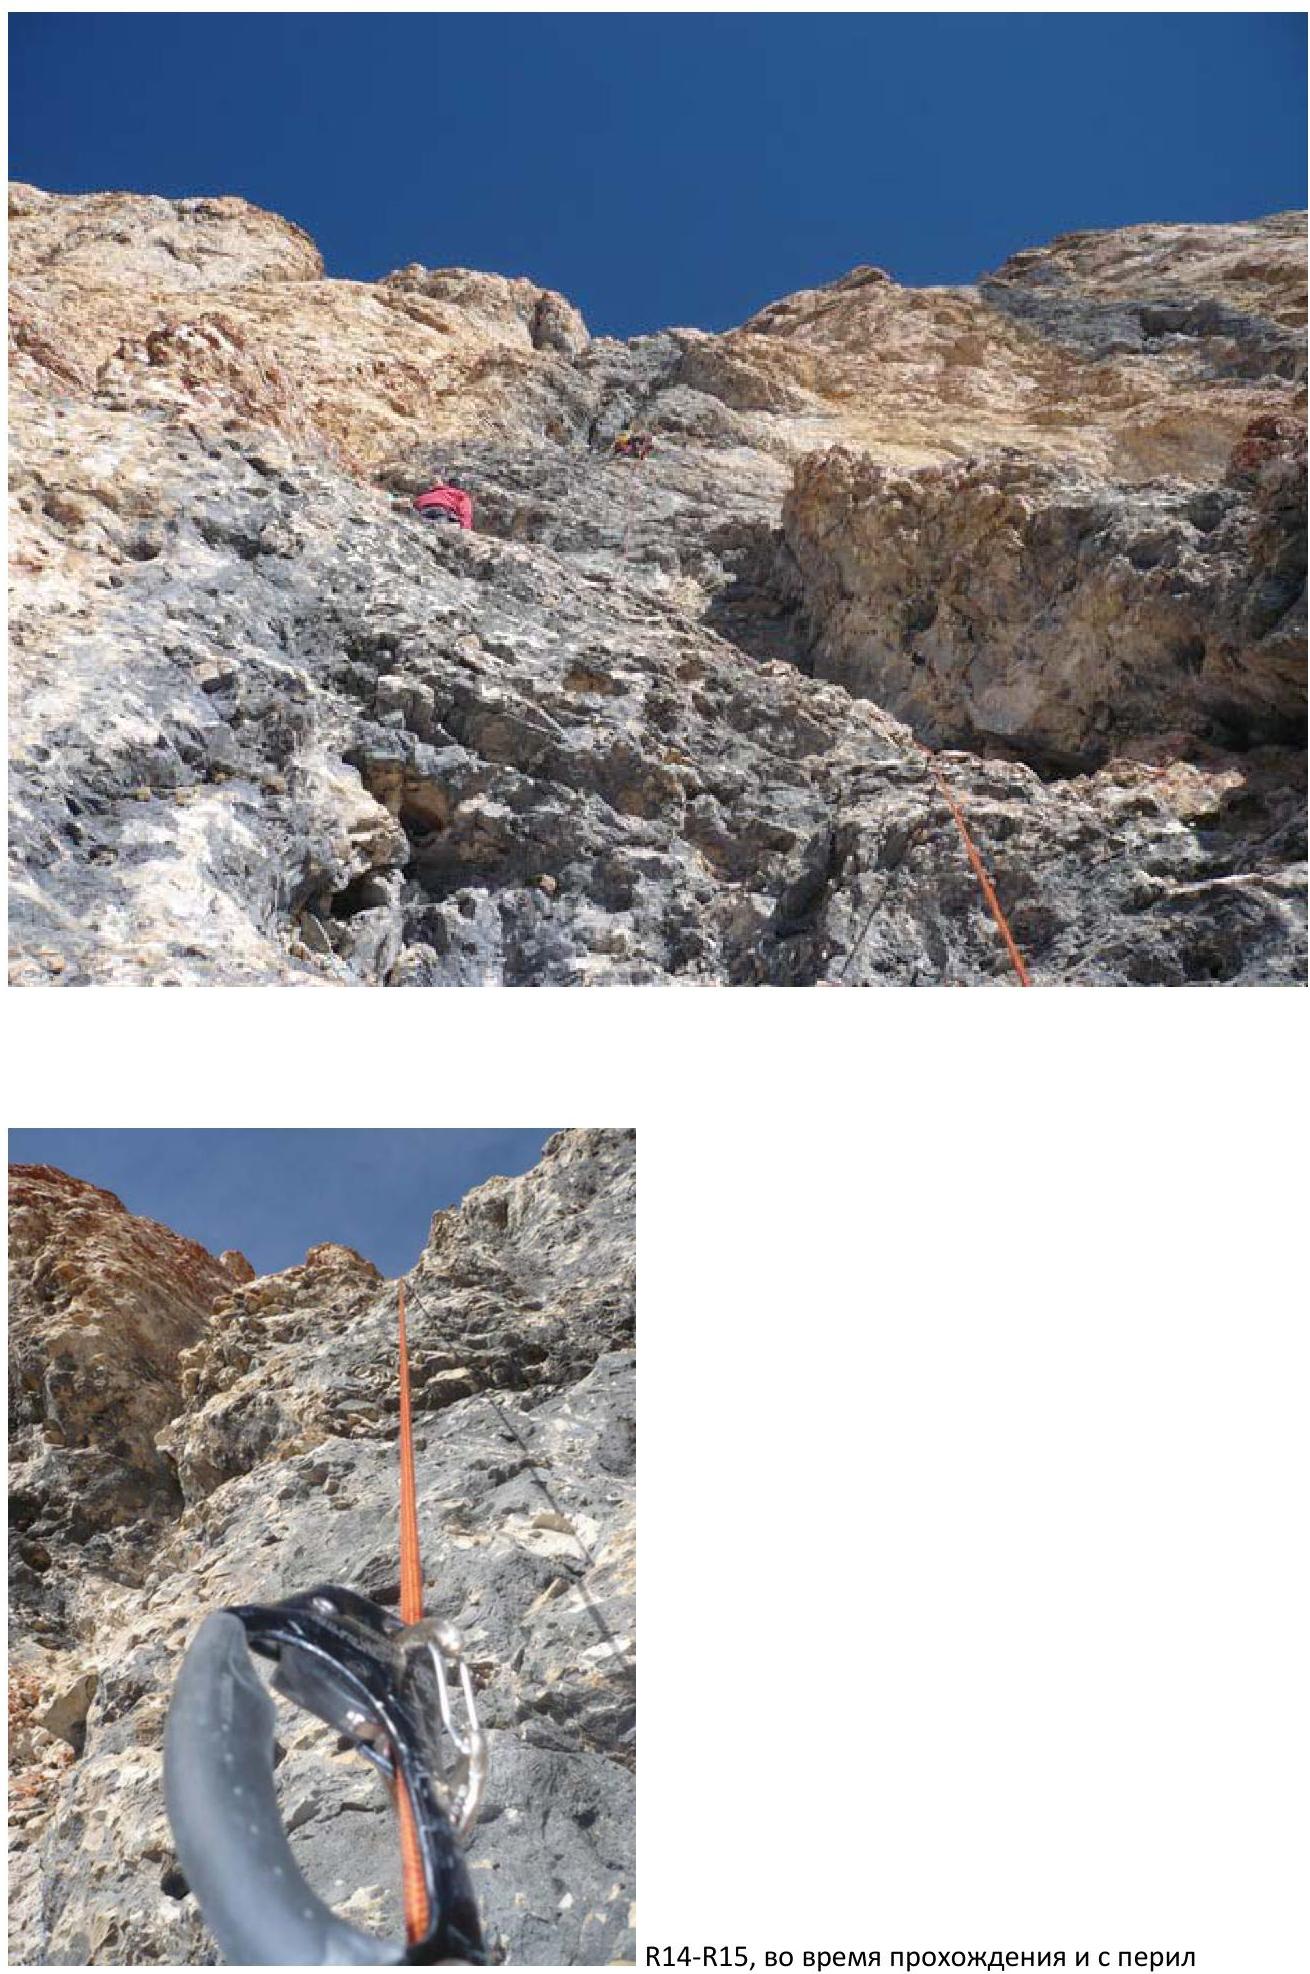 R14–R15, during passage and from the rappel
 R16–R17
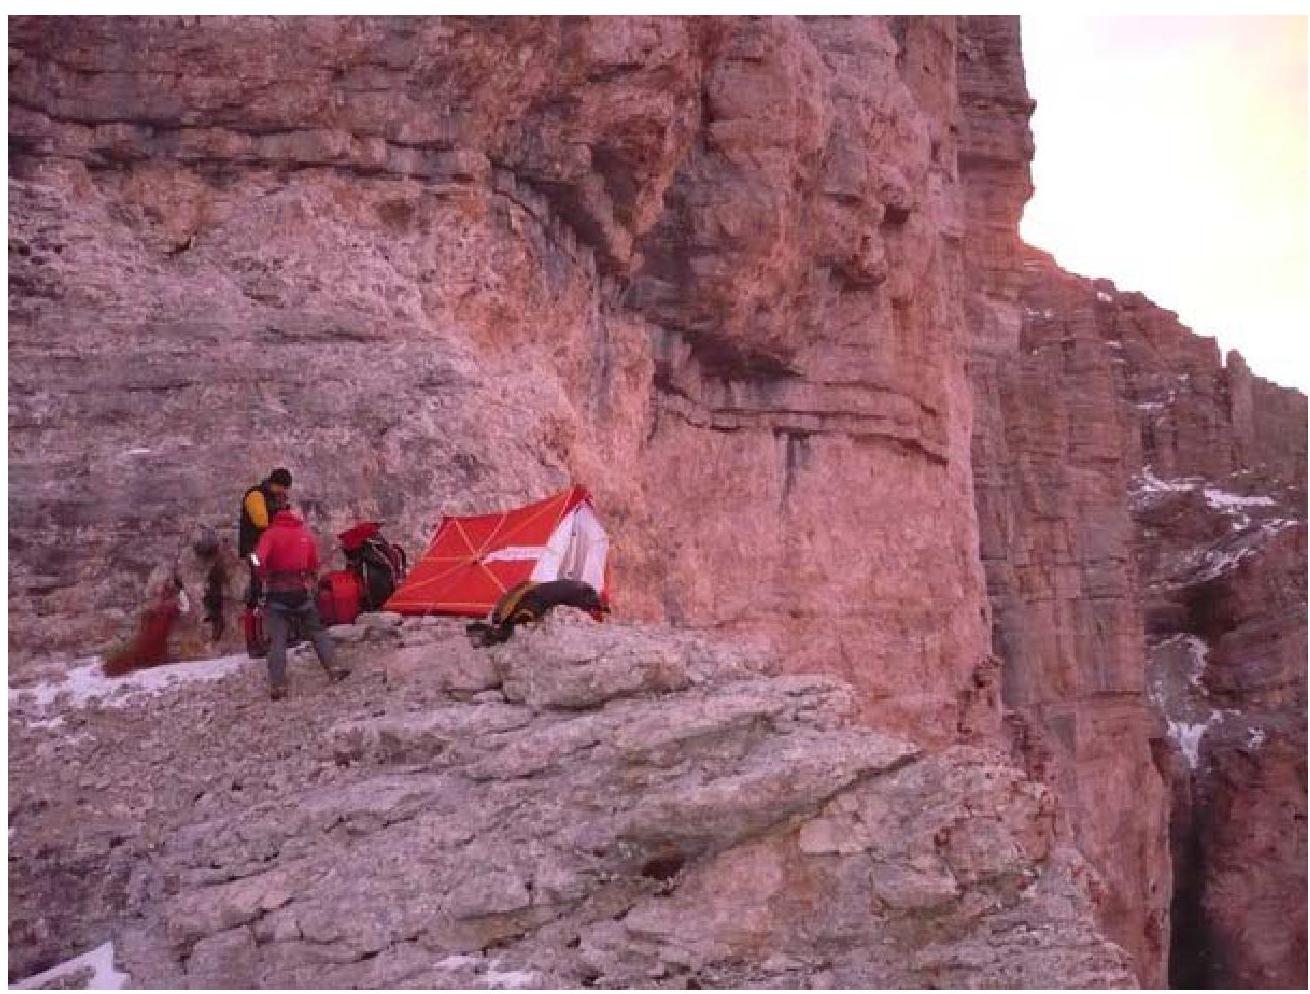 R19, overnight stay at the top of the second bastion
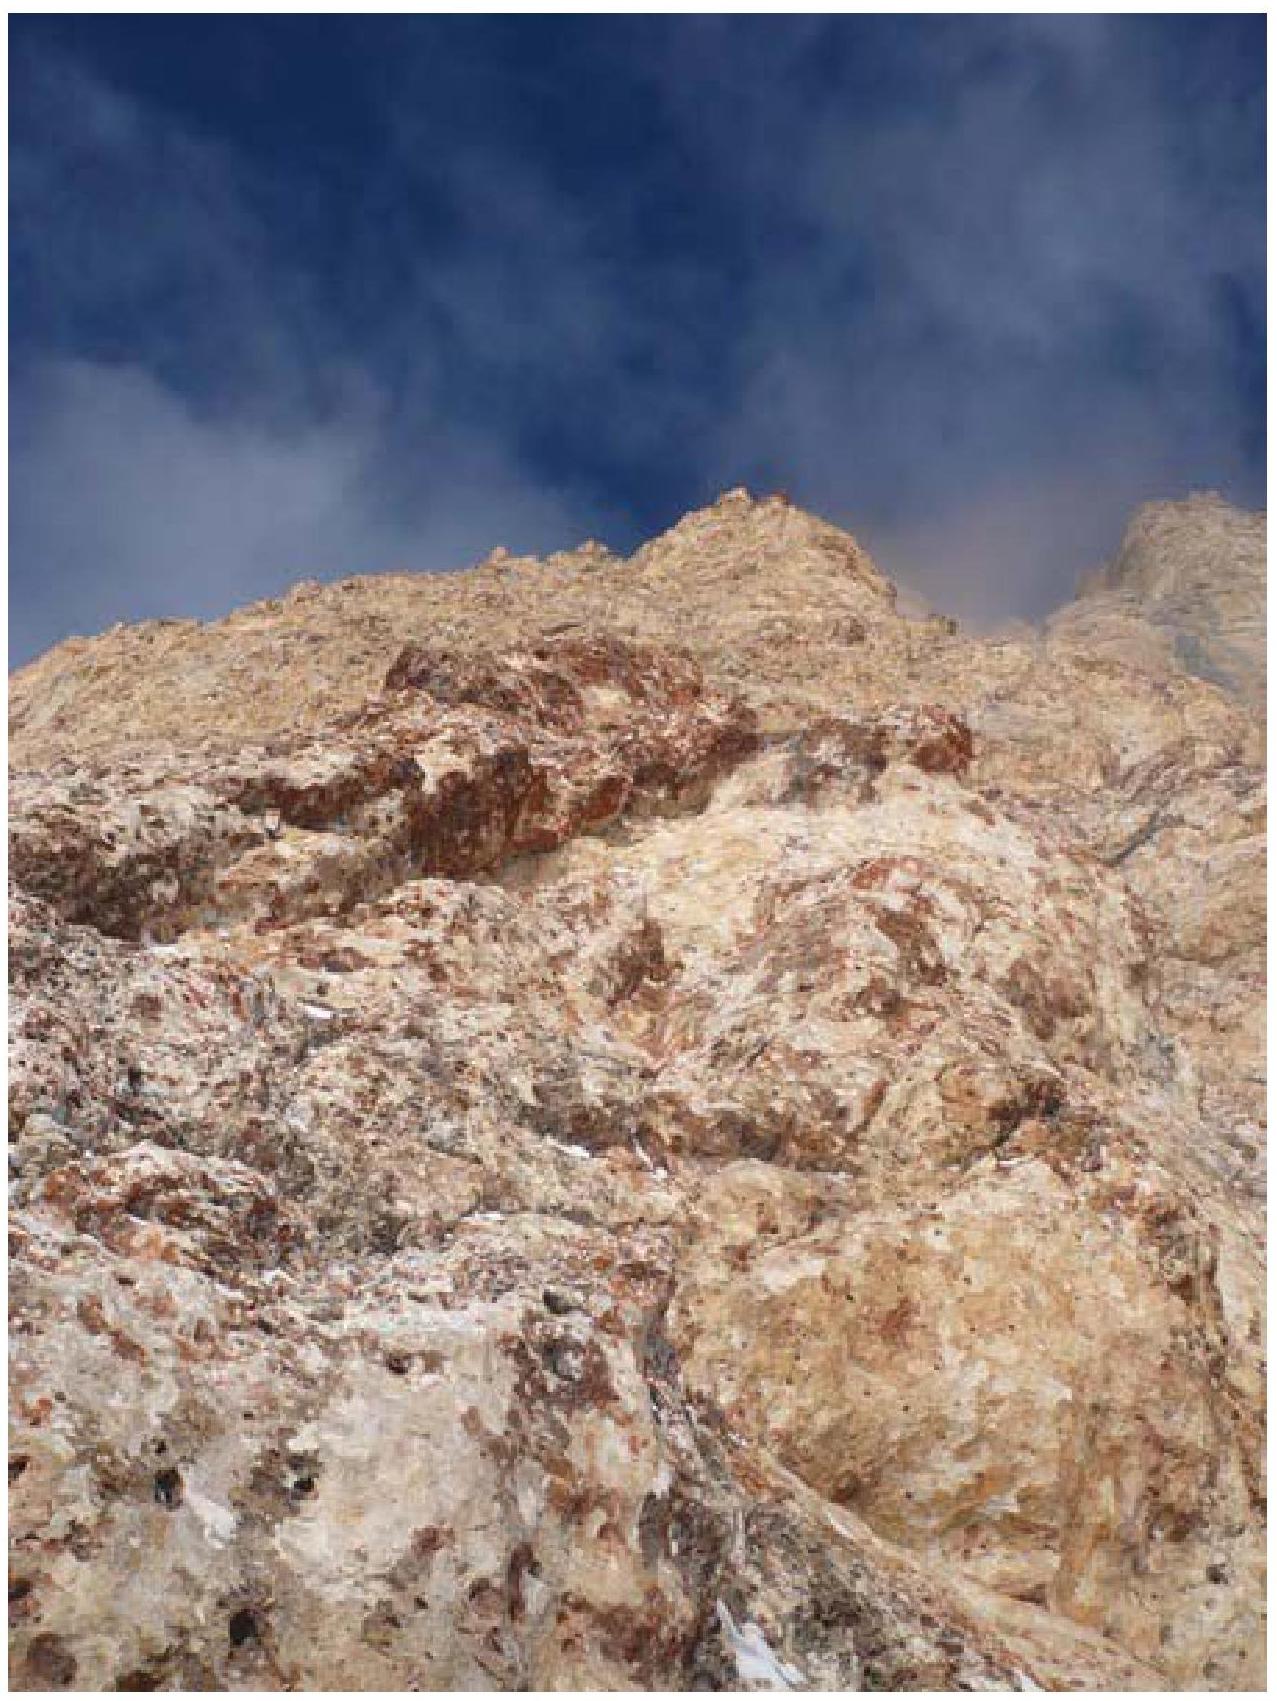
 R21–R22
 R23–R24
 R26–R27, summit towers
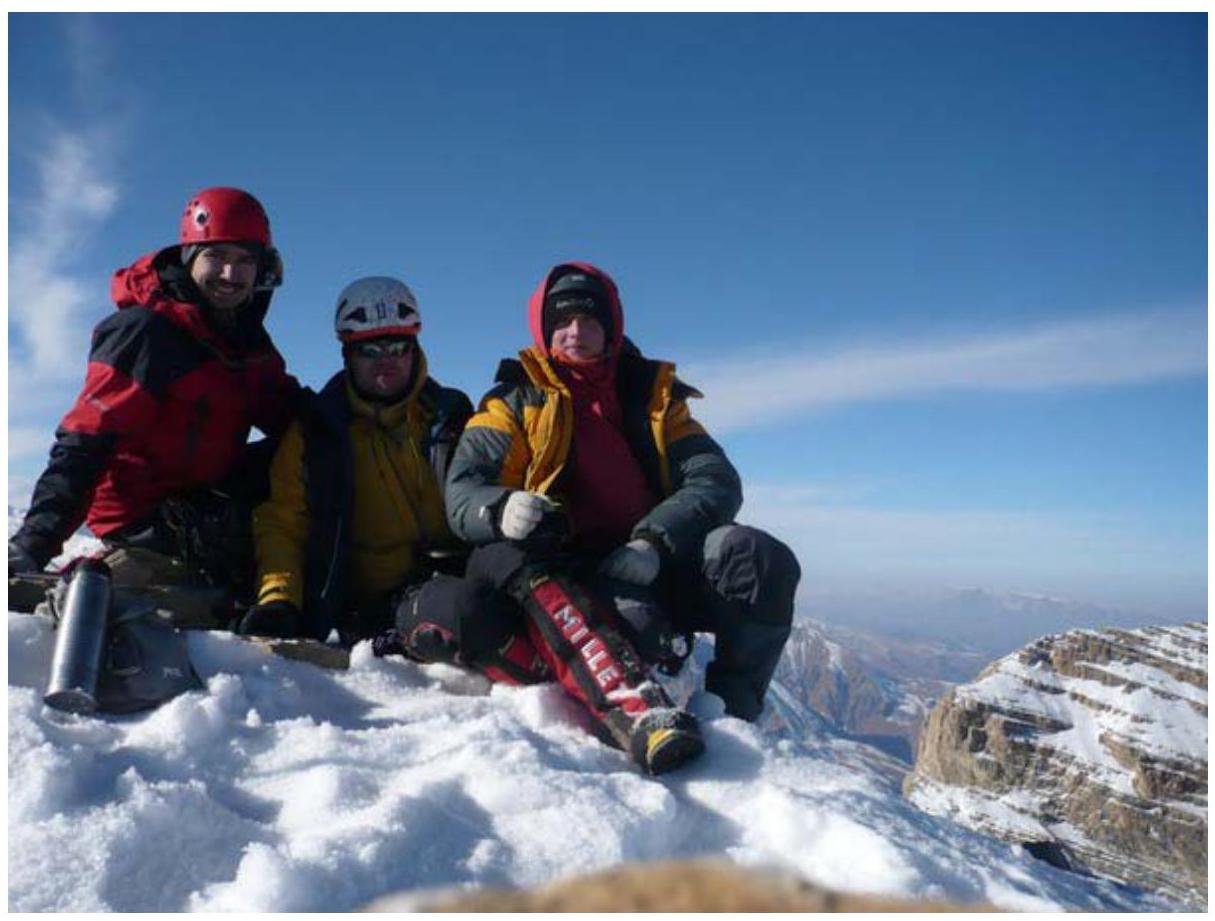 Team at the summit. Left to right:
- Lukovkin
- Molodozhen
- Teplov