Report
On the ascent via the center of the northern wall of Mt. Petreliusa. Estimated climbing category: 5B.
For classification purposes. (First ascent: Andreyev A.B., 2003)
Khibiny mountain range, Mt. Petreliusa, classification table section: 8.4.
Team coach: Kurdiy A.A. Team leader: Druzhkin A.S.
I. Ascent Report
1. General Information
| 1.1 | Full name, sports rank of the leader | Druzhkin Andrey Sergeyevich, 1st sports rank |
|---|---|---|
| 1.2 | Full names, sports ranks of participants | Kovalev Evgeniy Vladimirovich, 1st sports rank, Fedorishin Alexey Leonidovich, 1st sports rank |
| 1.3 | Full name of the coach | Kurdiy Alla Andreyevna, Candidate Master of Sports |
| 1.4 | Organization | Irbis mountaineering and rock climbing club, Murmansk |
2. Characteristics of the Ascent Object
| 2.1 | Region | Kola Peninsula, Khibiny mountain range |
|---|---|---|
| 2.2 | Valley | Mt. Petreliusa |
| 2.3 | Section number according to the classification table | 8.4 |
| 2.4 | Name and height of the summit | Mt. Petreliusa, 1141 m |
| 2.5 | Geographic coordinates of the summit (latitude/longitude), GPS coordinates | Latitude: 67°44′13.19″N Longitude: 33°31′45.28″E |
3. Route Characteristics
| 3.1 | Route name | Via the center of the northern wall of Mt. Petreliusa |
|---|---|---|
| 3.2 | Estimated category of difficulty | Winter: 6A Summer: 5B |
| 3.3 | Degree of route exploration | Unexplored route. Second ascent by the team. Traces of winter attempts on a variant of the route are present. |
| 3.4 | Relief characteristics of the route | Winter: combined Summer: rock |
| 3.5 | Elevation gain (altimeter or GPS data) | 470 m |
| 3.6 | Route length (in meters) | 560 m |
| 3.7 | Technical elements of the route (total length of sections of varying difficulty) | V cat. diff. – 250 m, VI cat. diff. – 50 m |
| 3.8 | Average slope of the route | 67° |
| 3.9 | Average slope of the main section | 79° |
| 3.10 | Descent from the summit | Via the eastern spur of Mt. Petreliusa (no mountaineering equipment required) |
| 3.11 | Additional route characteristics | Compared to similar routes in the Khibiny Mountains, the route is more challenging than "Lestnitsa" and "Steny otkola" but easier than the route "po tsentru steny poyasov". Winter conditions may pose challenges due to limited climbing opportunities and absence of ITO. The route features 3 control cairns, including a summit cairn. |
4. Tactical Actions of the Team
| 4.1 | Time taken (team's walking hours, in days) | 22 hours 0 minutes, 1 day |
|---|---|---|
| 4.2 | Route preparation time | No preparation |
| 4.3 | Departure for the ascent with overnight stays by the lake in the Malaya Belaya river valley | 11:00, July 18, 2020 |
| 4.4 | Start of the ascent | 14:00, July 18, 2020 |
| 4.5 | Reach the summit | 12:00, July 19, 2020 |
| 4.6 | Completed descent from the summit | 14:00, July 19, 2020 |
5. Technical Actions of the Team
| 5.1 | Hooks left on the route | None |
|---|---|---|
| 5.2 | Hooks used on the route: | |
| – stationary bolt hanger | Not used | |
| – removable bolt hanger | 3 | |
| – for ITO | 19 points | |
| 5.3 | Insurance points used: | |
| – rock hooks | about 20 | |
| – chocks | about 30 | |
| – camalots | more than 50 |
6. Weather Conditions
| 6.1 | Temperature, °C | 12–15 °C |
|---|---|---|
| 6.2 | Wind speed, m/s | 2–3 m/s |
| 6.3 | Precipitation | None |
| 6.4 | Visibility, m | Excellent |
7. Report Author
| 7.1 | Full name, e-mail | Druzhkin A.S., dalar08@mail.ru |
|---|
II. Description of the Ascent Area
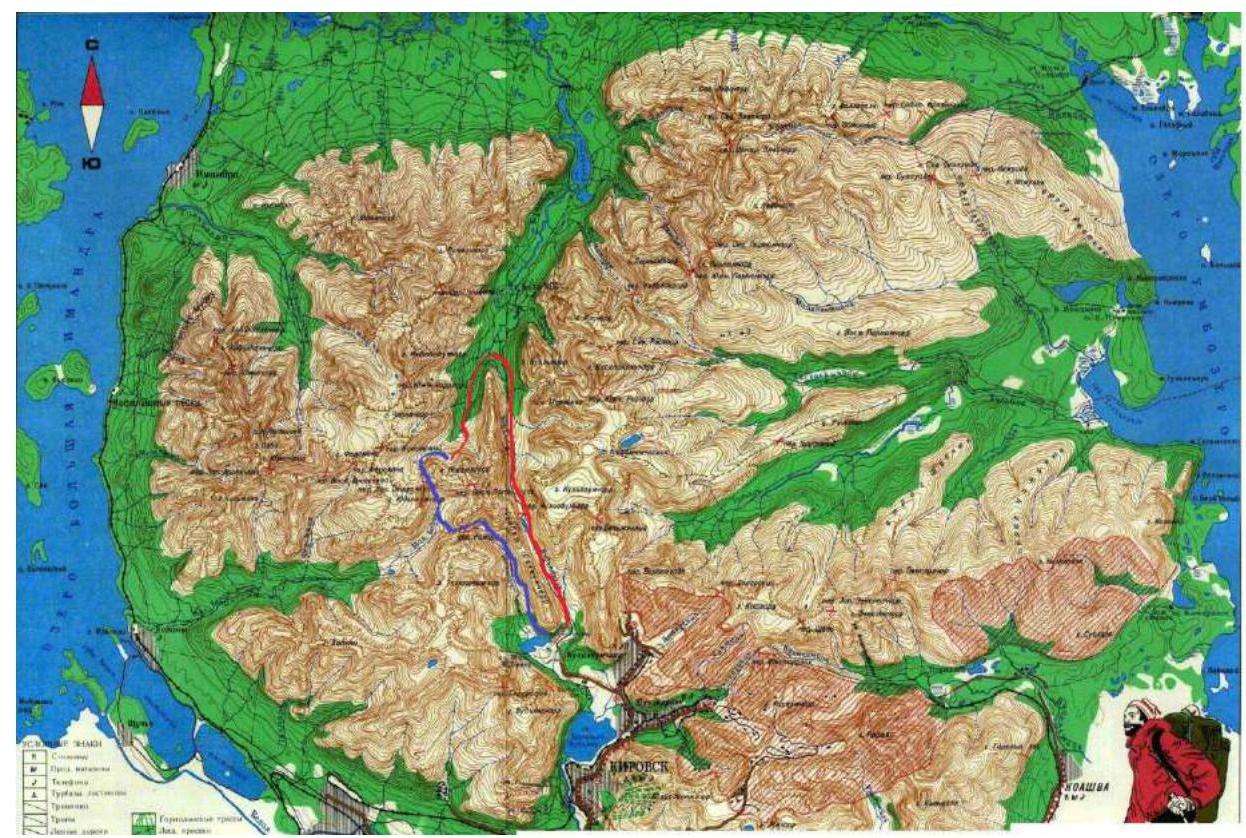
Fig. 1. Map of the area. Scale 1:100,000. The first approach option is shown in red (part of the path may be passable by a high-clearance vehicle).
The route taken by the team, shown in blue, passes through:
- Ramsay Pass
- Western Petreliusa.
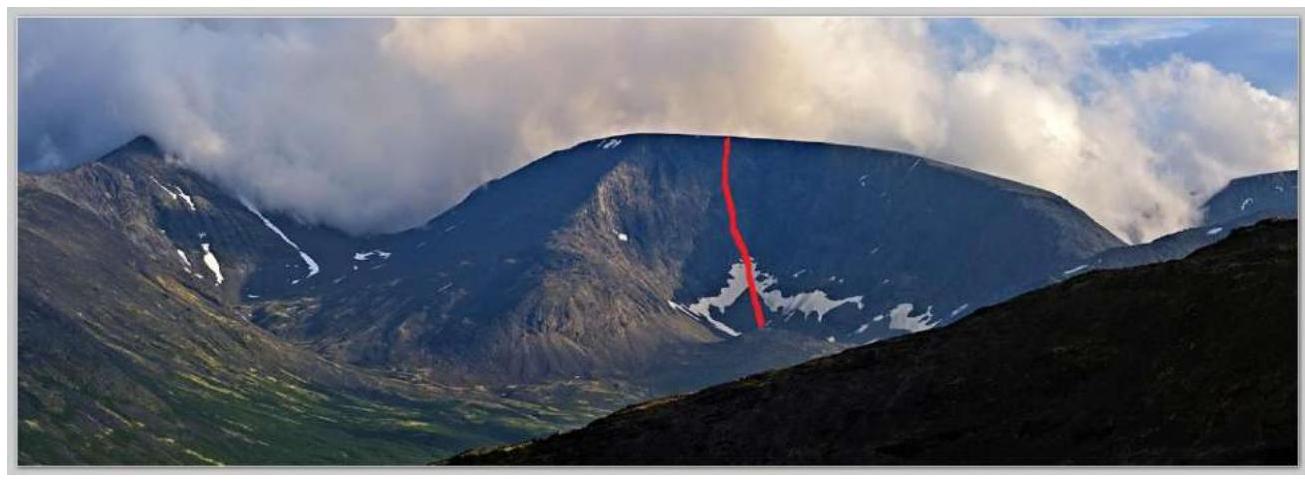
Fig. 2. Panorama of the area with the route line (summer photo).
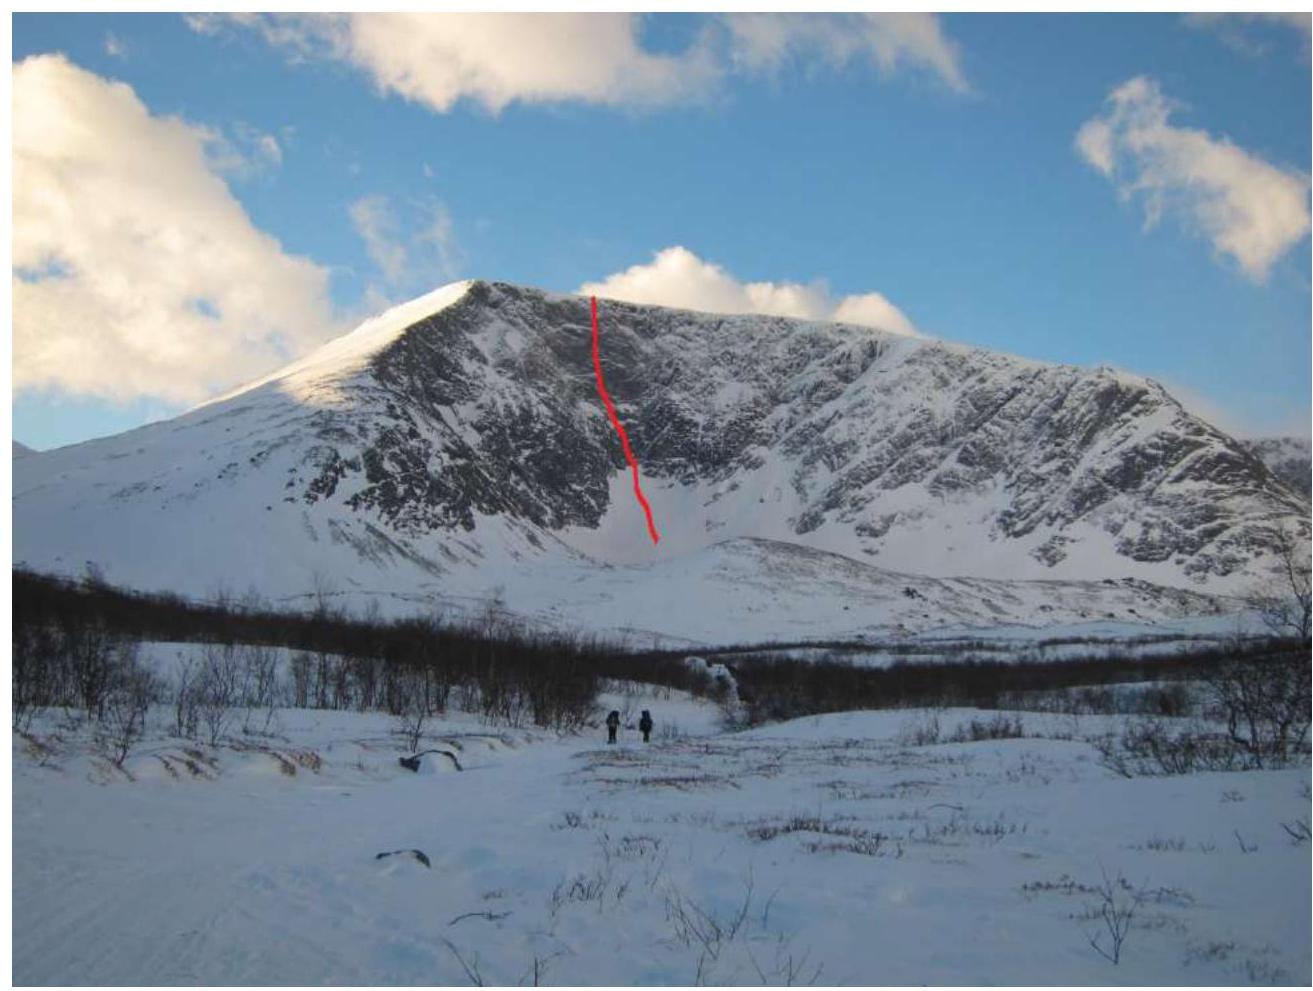
Fig. 3. Panorama of the area with the route line (winter photo).
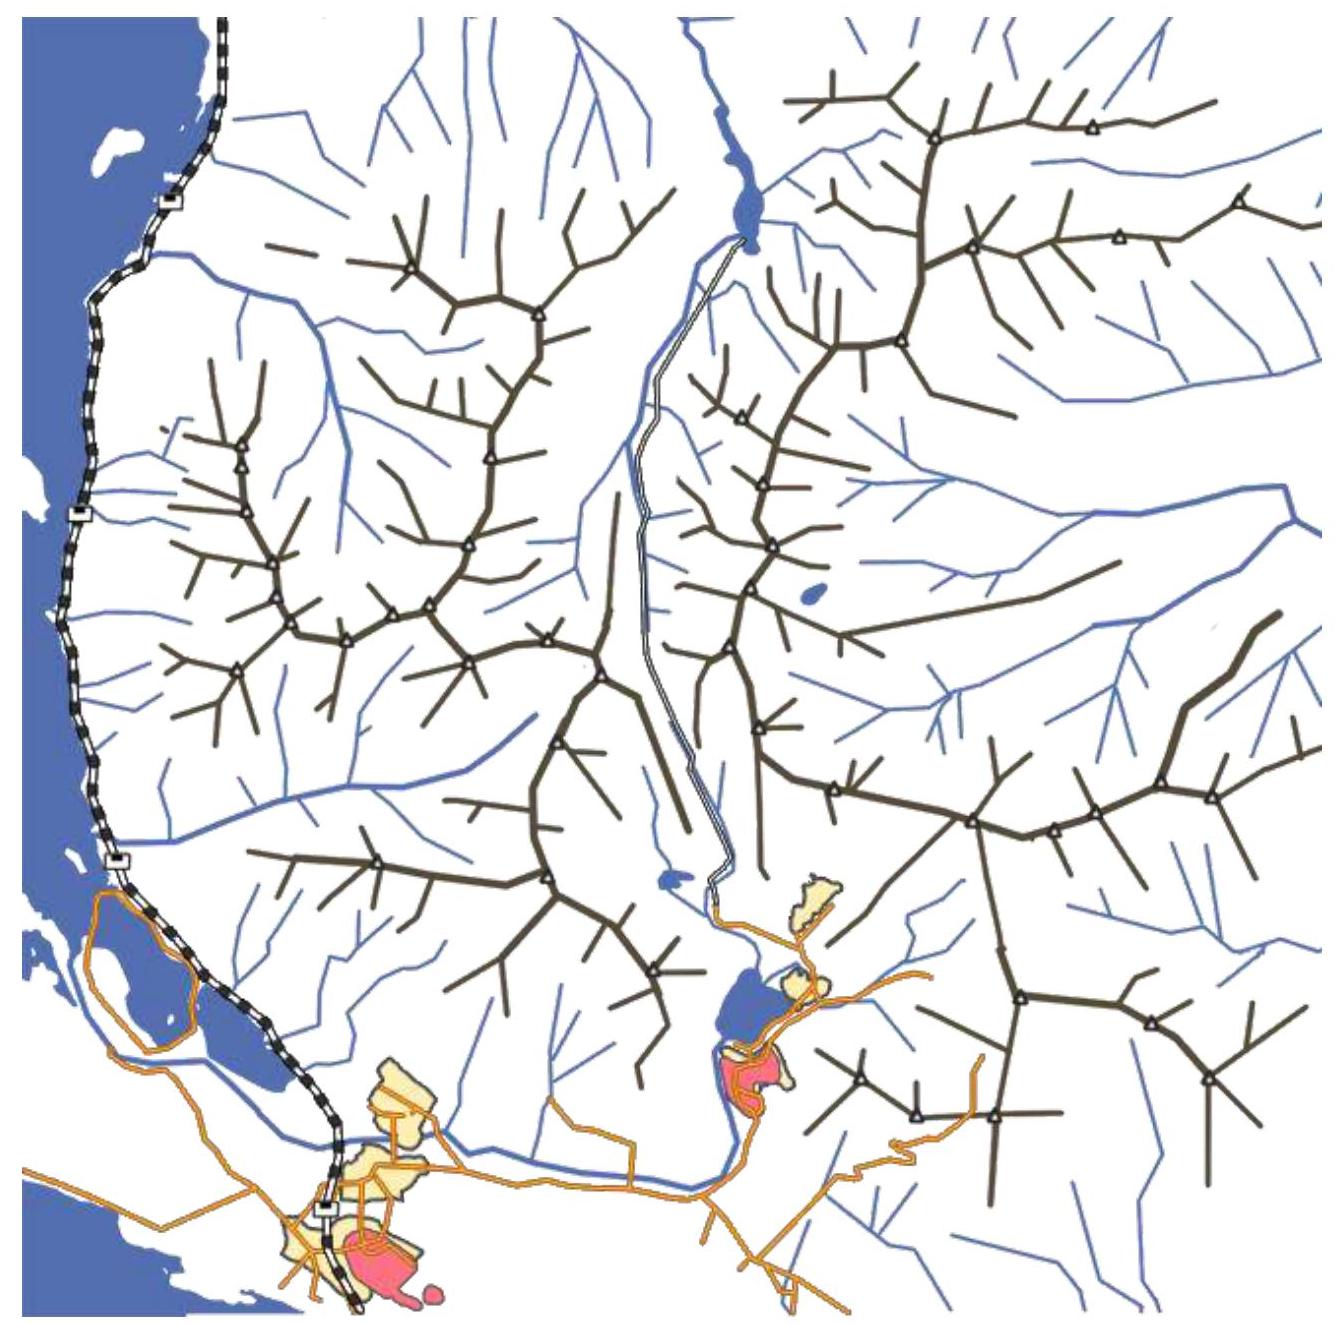
Fig. 4. Orographic diagram of the Khibiny Mountains.
III. Route Description
1. Route Profile
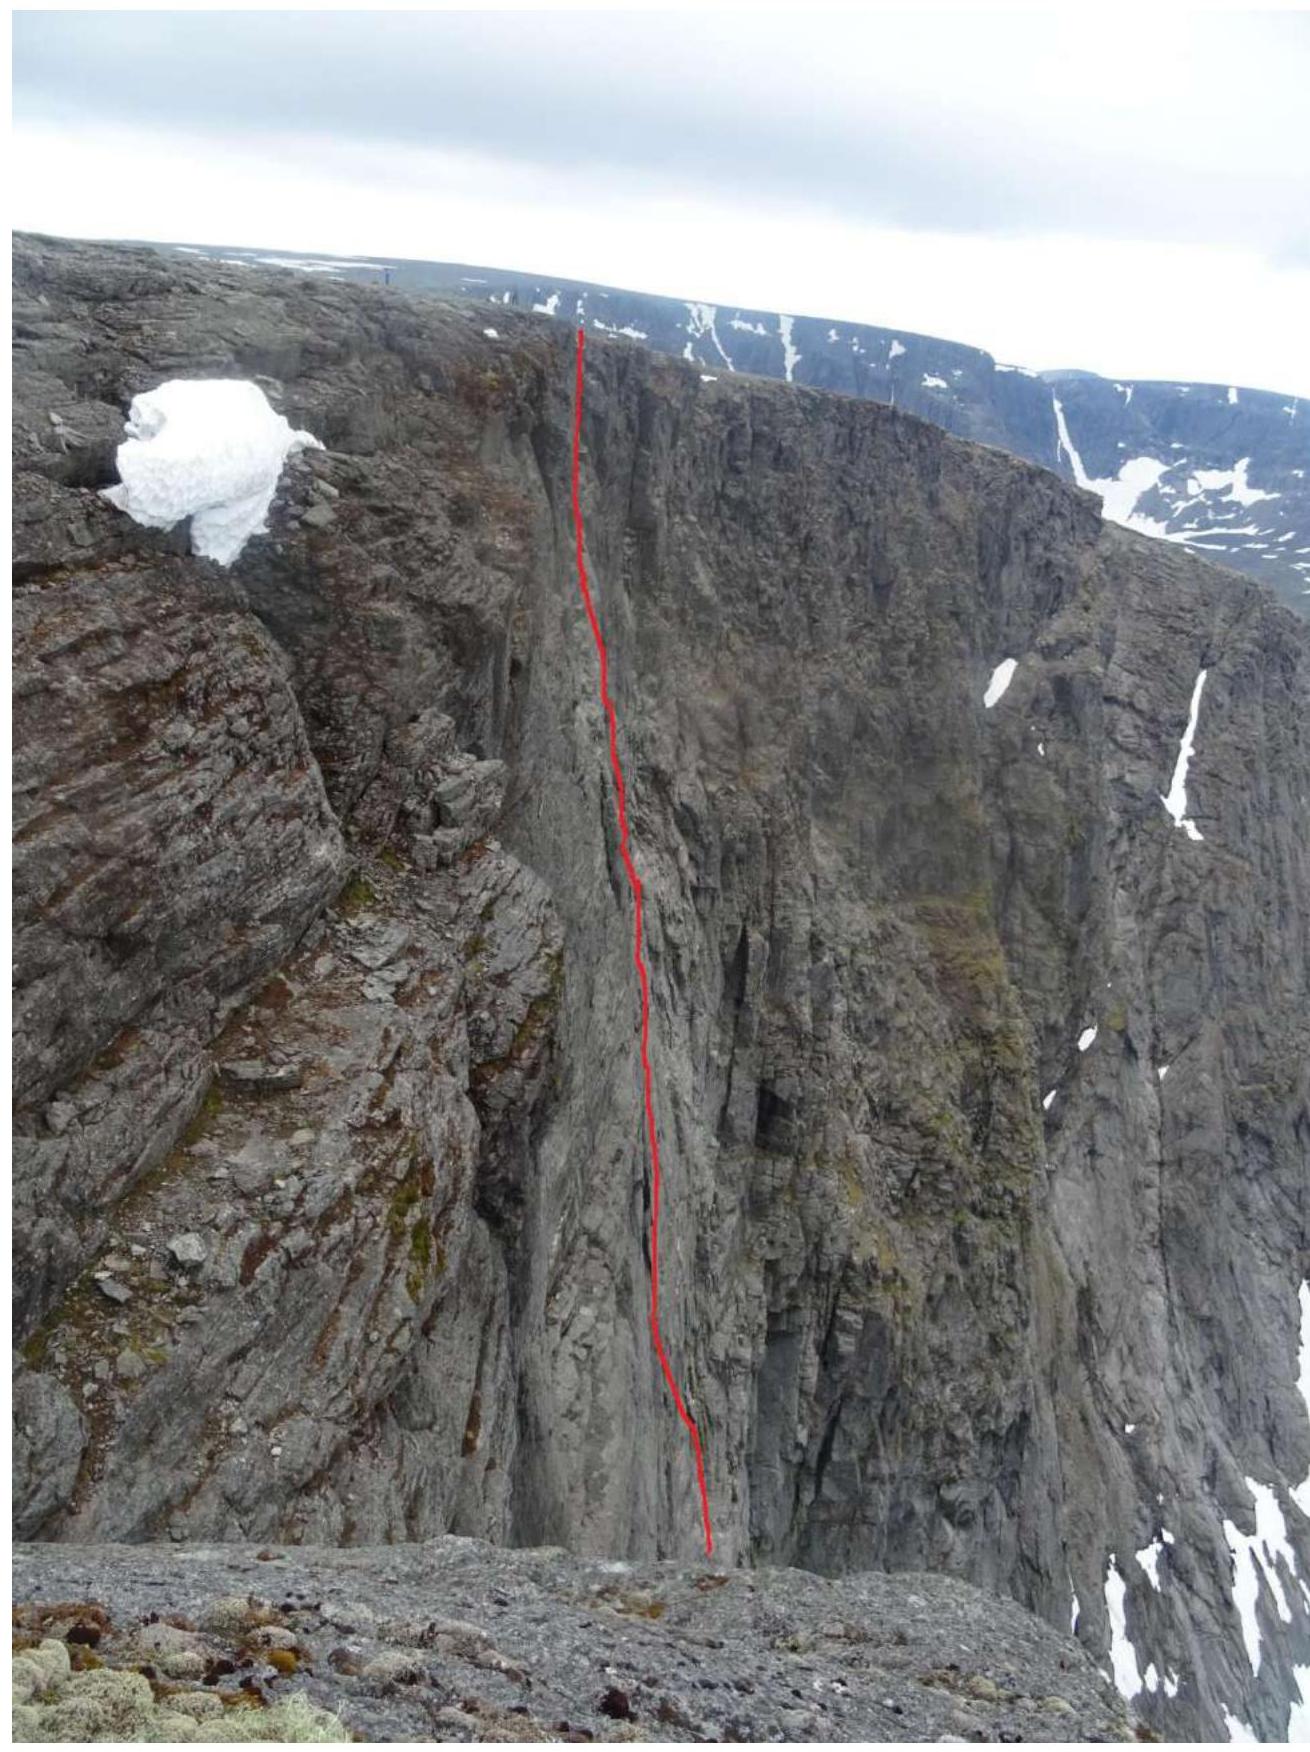
Fig. 5. Route profile and line. Photo taken on the day of ascent, July 19, 2020.
2. Technical Photography of the Route
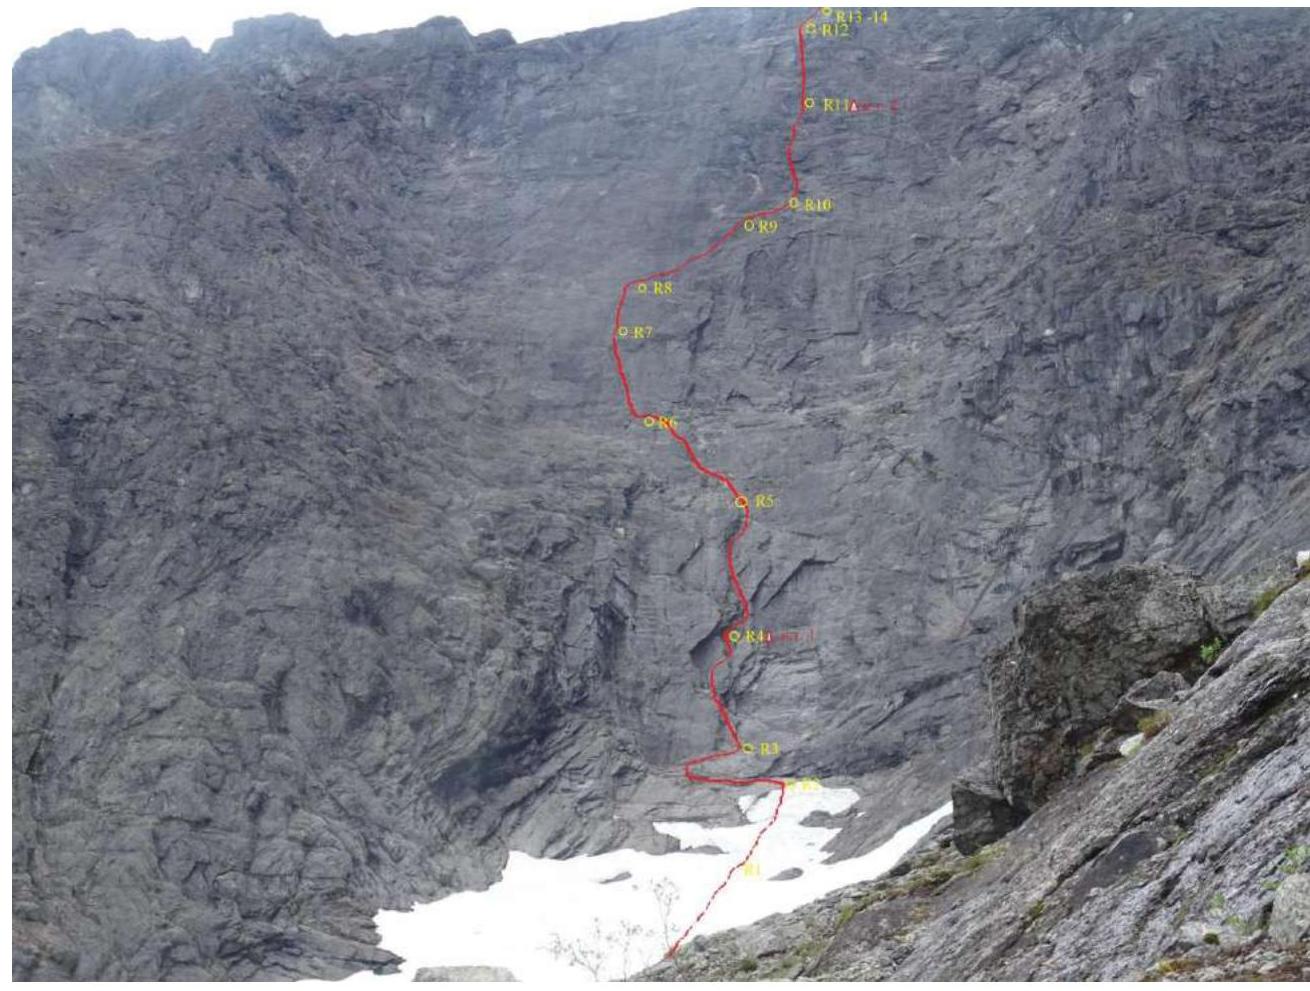
Fig. 6. Technical photo of the route.
3. Route Diagram in UIAA Symbols
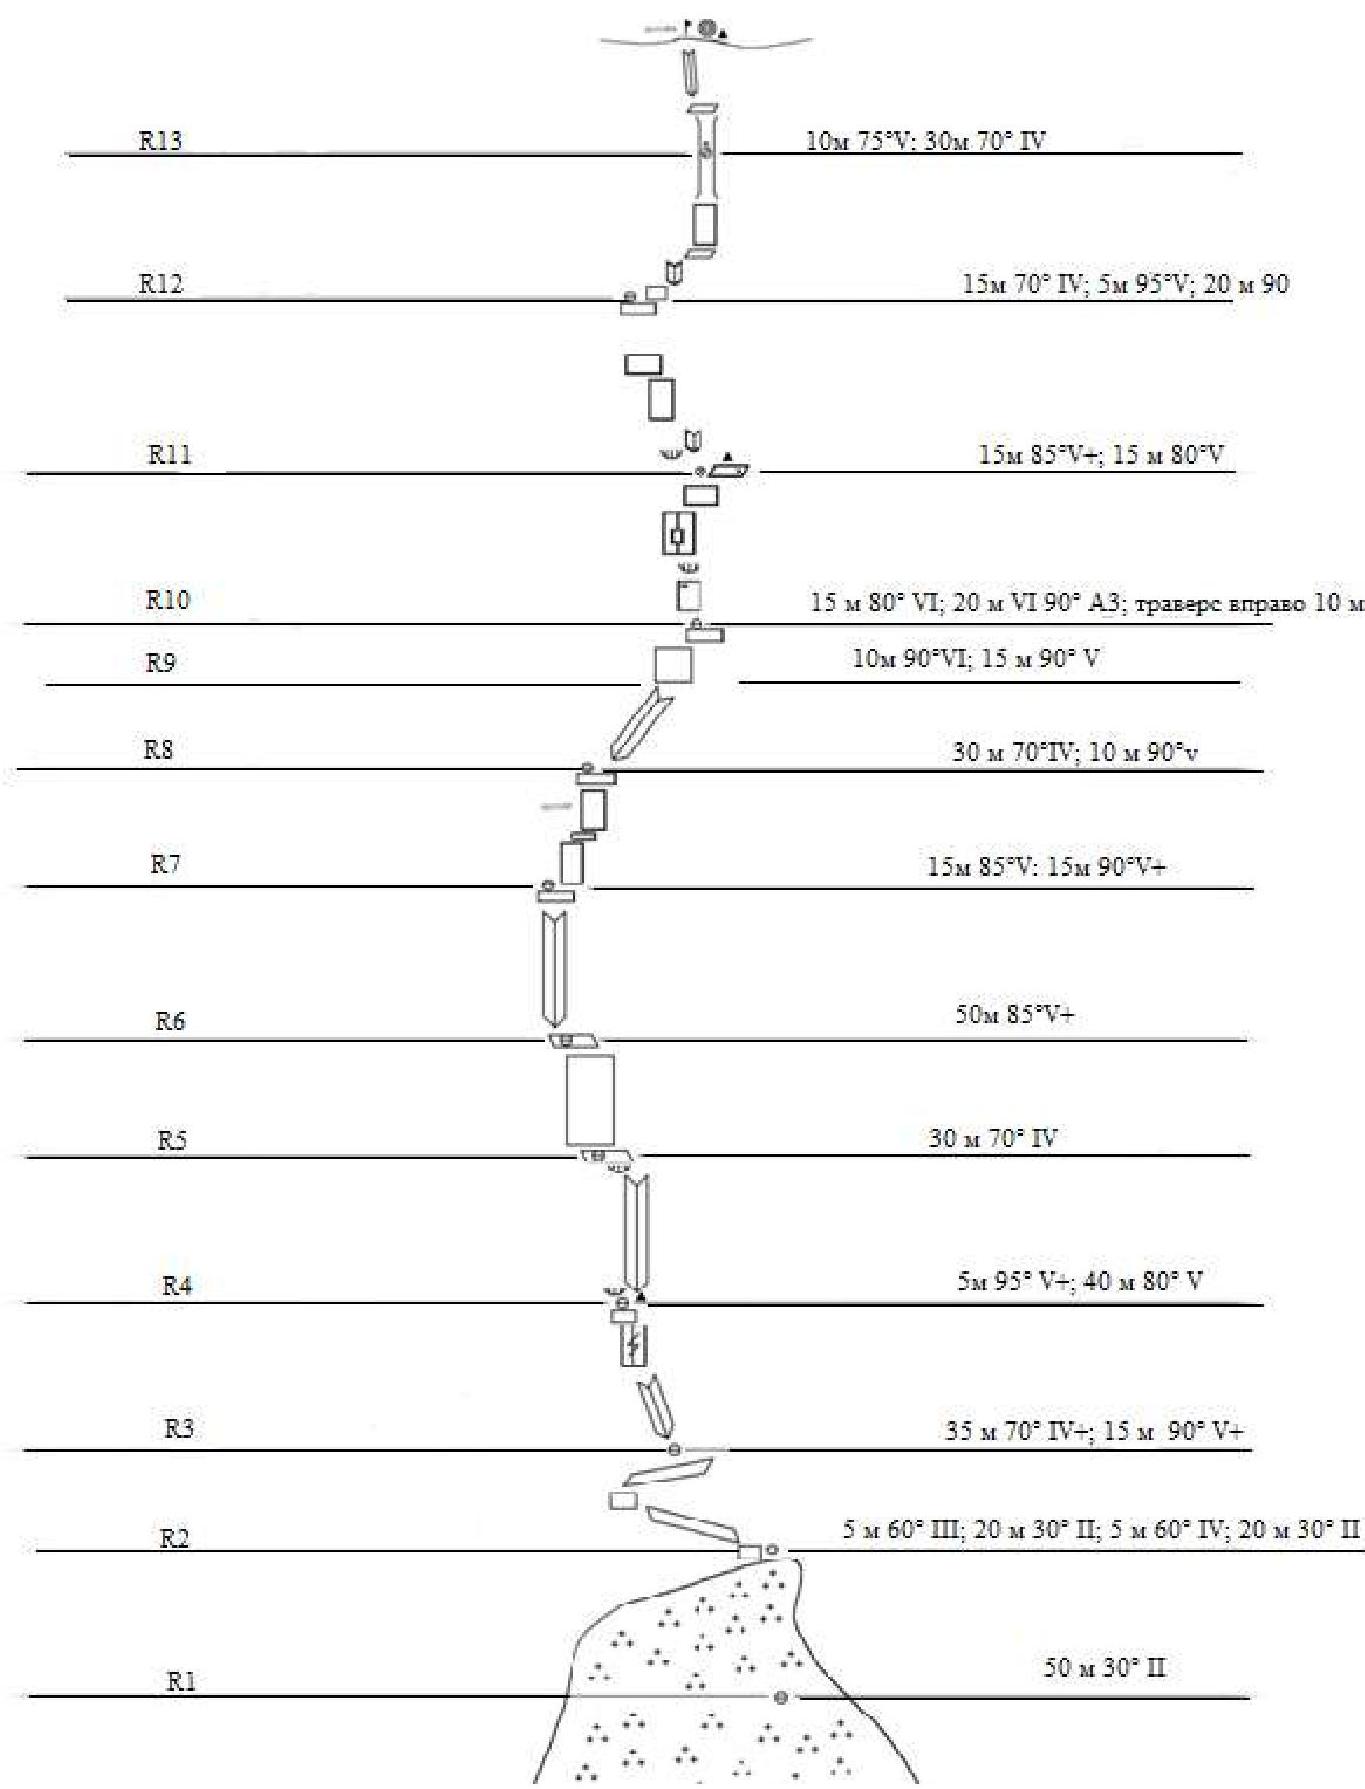
4. Route Description by Sections
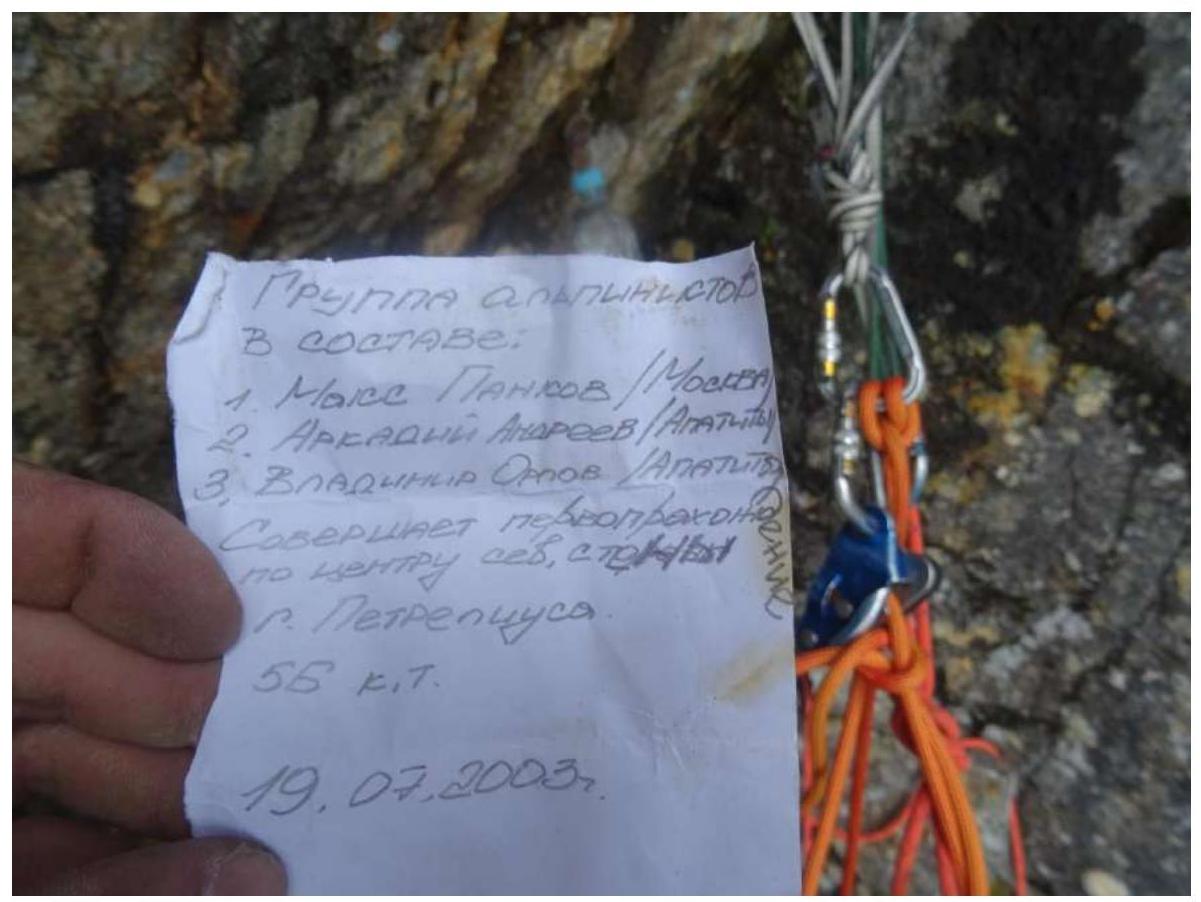
The provided UIAA diagram is from Andreyev A.B.'s 2003 description. It accurately describes the route line. Section lengths match the description, except for R9–R10. For ease of passage and belaying, it is advisable to split this section into two, as indicated on the diagram.
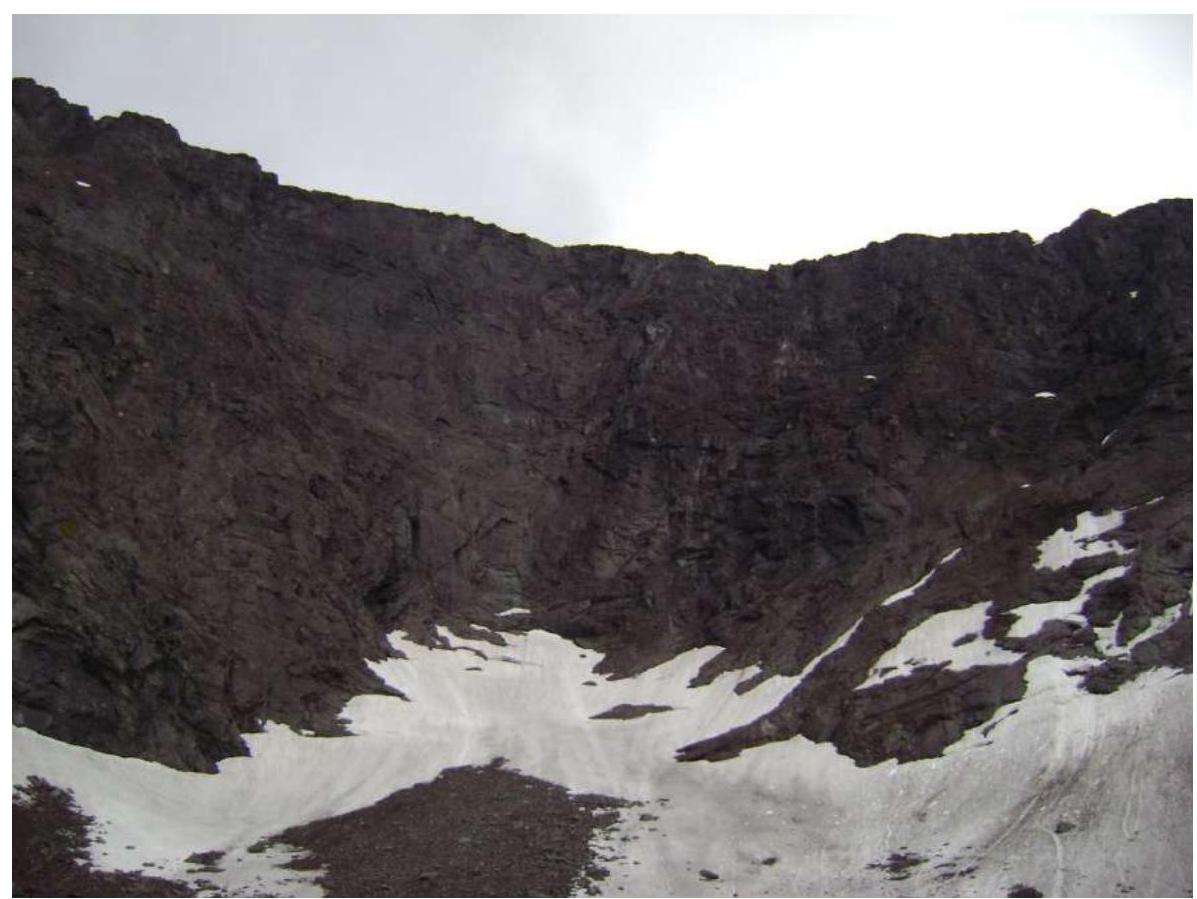
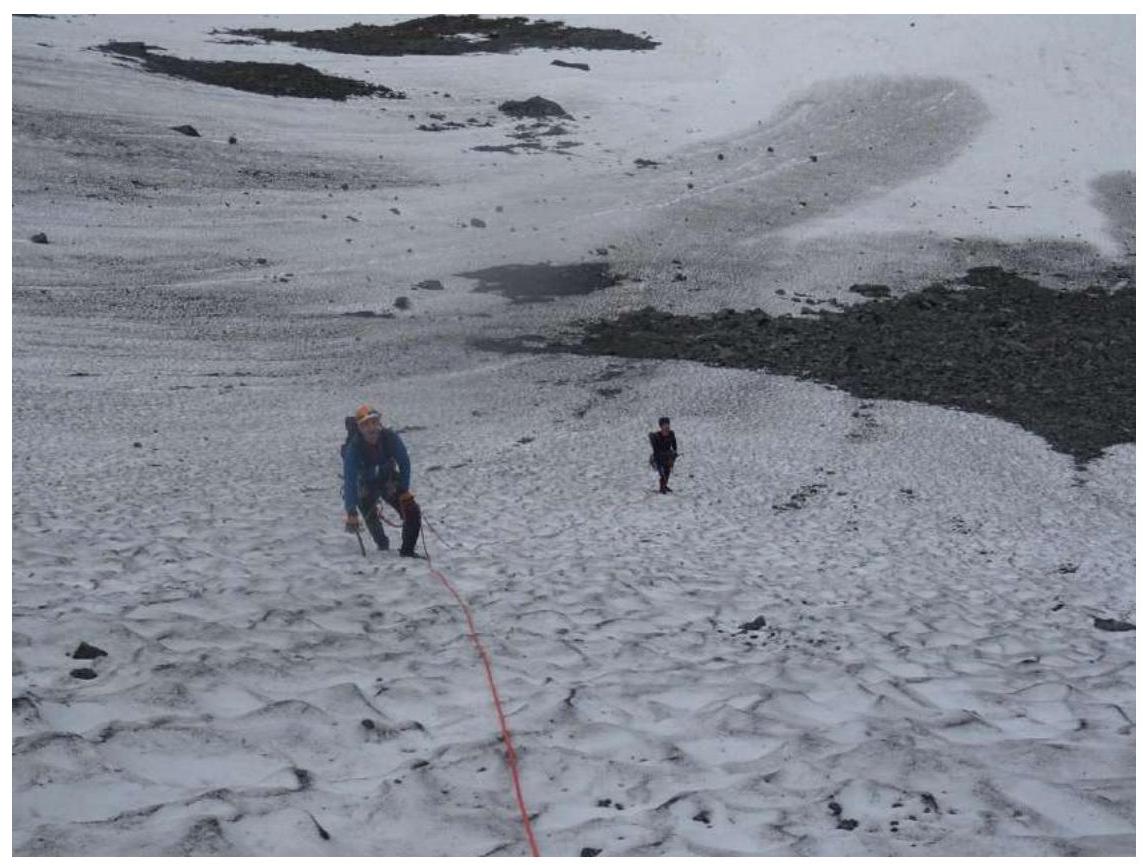
The route begins on a snowfield (hard snow in summer, with some ice).
R0–R2: Ascent up a steep snowfield towards the rocks. 200 m, 30°, II cat. diff.
R2–R3:
- Transition from snow to rock slab, 5 m, 60°, III cat. diff., to an inclined ledge.
- Traverse left along the ledge, 20 m, 30°, II cat. diff.
- Wall, 5 m, 60°, IV cat. diff.
- Traverse right and exit to a terrace, 20 m, 30°, II cat. diff.
Used: 4 hooks.
R3–R4: Ascend a damaged internal corner 35 m, 70°, IV+ cat. diff. to a vertical wall (right edge of the internal corner). Up the wall 15 m, 90°, V+ cat. diff., to an uncomfortable ledge under a cornice. Control cairn No. 1. Used:
- 8 hooks
- 4 chocks
- 3 friends
Climbing grade: 6A+ (French scale). Recommended: friends No. 4 and No. 5.
R4–R5: Bypass the cornice on the right 5 m, 95°, V+ cat. diff., enter an internal corner, ascend the corner and its right wall 40 m, 80°, V cat. diff., bypassing cornices on the right, exit to a large ledge. (Dangerous due to potential rockfall! Organizing reliable protection can be challenging.) The ledge is suitable for a bivouac. Used:
- 10 hooks
- 2 chocks
- 2 friends
Climbing grade: 6B (French scale).
R5–R6: Ascend the wall upwards to the left 30 m, 70°, IV cat. diff., exit to an inclined ledge. Used: 5 hooks, 1 chock, 2 friends.
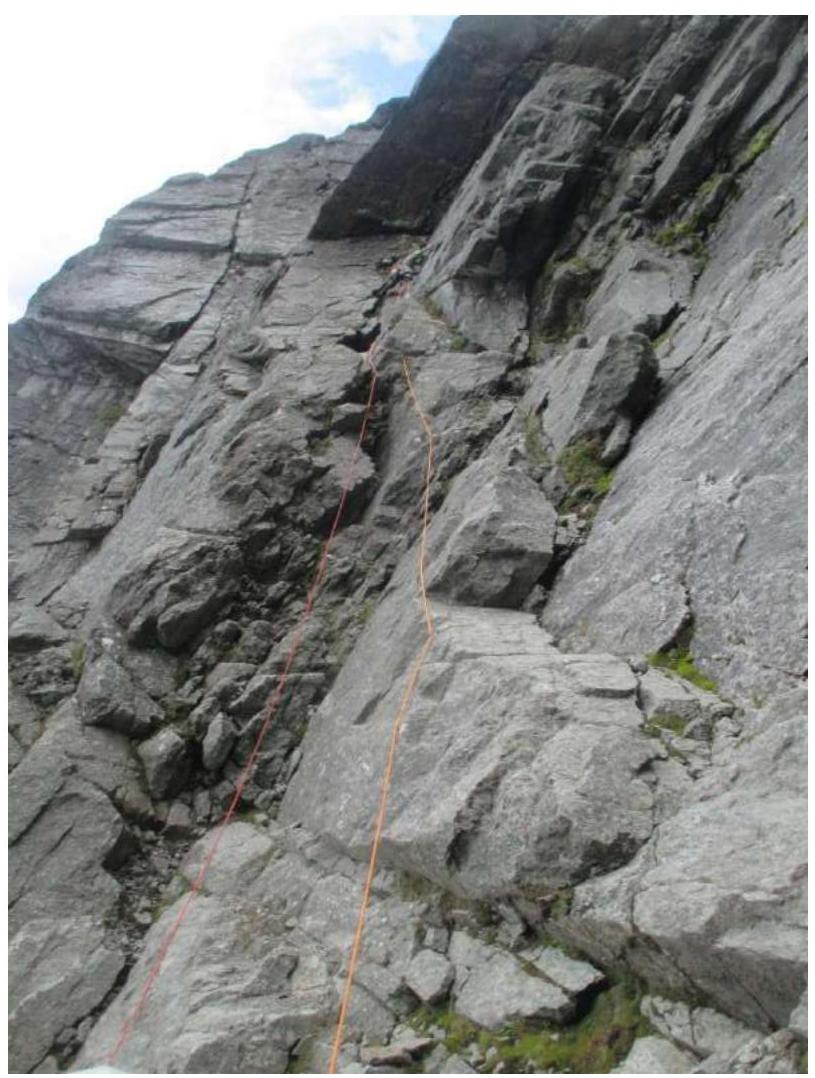
R6–R7: Ascend a characteristic vertical internal corner 40 m, 90°, V+ cat. diff., to a ledge. Used: 12 hooks, 4 chocks, 2 friends. Climbing grade: 5C+ (French scale).
R7–R8: Ascend the wall 30 m, 80°, V cat. diff., exit to a convenient ledge at the base of an internal corner. Used:
- 8 hooks
- 2 chocks
R8–R9: Ascend the internal corner (upwards to the right) 45 m, 65°, IV+ cat. diff. to a vertical internal corner. Used:
- 8 hooks
- 2 chocks
- 1 friend
R9–R10: From the internal corner, traverse a vertical wall to the right 10 m, 90°, VI cat. diff. Up the vertical wall 15 m, 90°, V+ cat. diff. to a ledge. Used:
- 4 hooks
- 4 friends
Climbing grade: 6A (French scale).
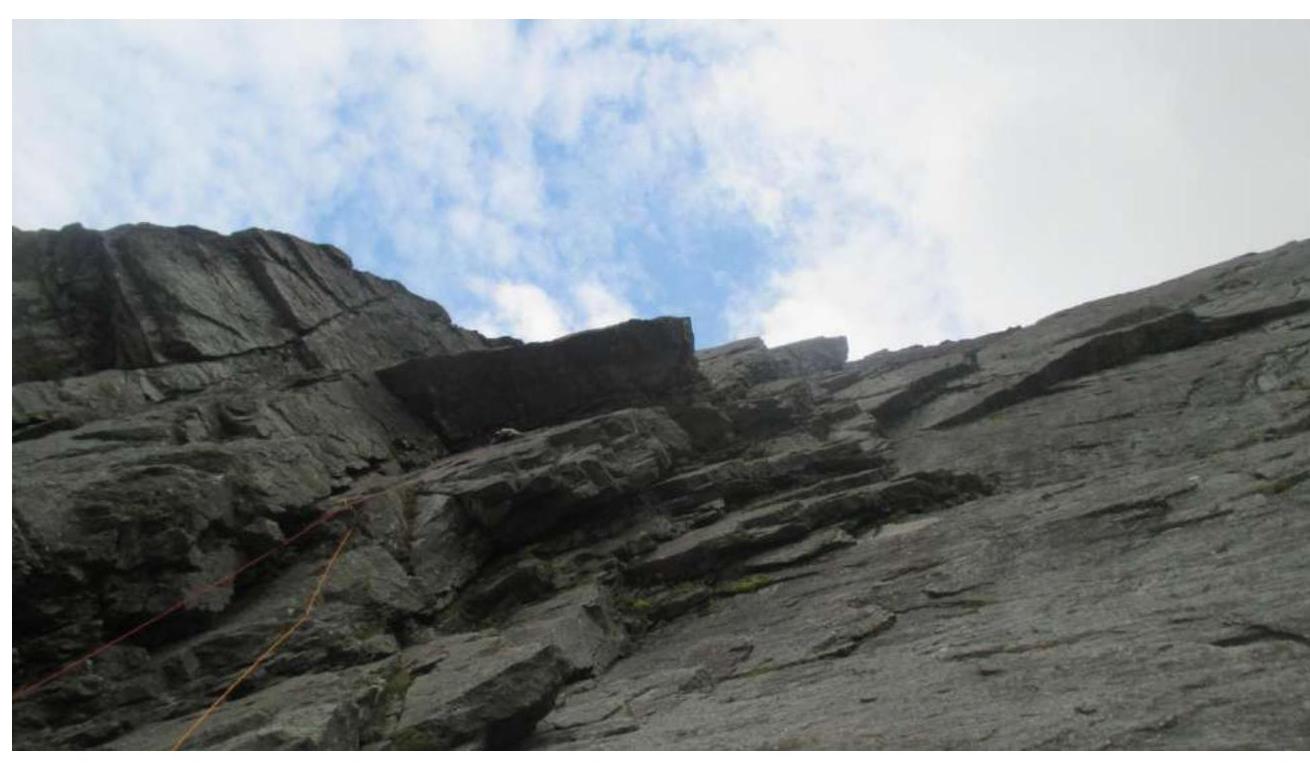
R10–R11: Ascend a vertical wall under a cornice 15 m, 90°, VI cat. diff. Through the cornice via a narrow, damp crack 20 m, 90°, A3 VI cat. diff., exit to a small ledge under a wall. Traverse right 7 m, 90°, V cat. diff., ascend the wall 10 m, 85°, V+ cat. diff. Narrow ledge, bolt hanger (removable). Control cairn No. 2. Used: 17 hooks, 2 chocks, 3 friends. For ITO: anchor hooks, fifi hooks, medium-sized friends. Climbing grade: 6B (French scale). Initially, organizing protection is challenging.
R11–R12: From the ledge, traverse left 5 m, 85°, V cat. diff., under the start of an internal corner. Ascend the internal corner formed by a series of flakes 10 m, 85°, V+ cat. diff. Then ascend the wall 15 m, 80°, V cat. diff. to a ledge. Used:
- 7 hooks
- 2 chocks
- 2 friends
R12–R13: Traverse right upwards along the ledge 15 m, 80°, IV cat. diff., under an overhanging internal corner. Ascend the corner 5 m, 95°, A1 VI cat. diff., exit to a ledge. From the ledge, ascend the wall 15 m, 90°, V+ cat. diff., enter the base of a damaged chimney. Ascend the chimney 15 m, 60°, III cat. diff. Station in the chimney, uncomfortable. Removable bolt hanger. Used:
- 10 hooks
- 2 chocks
- 3 friends
The ITO section is climbed at 6B (French scale).
R13–R14: Ascend the chimney 10 m, 75°, V cat. diff., to a ledge, then left along the internal corner 30 m, 70°, IV cat. diff. Exit to differentiate the summit.
Used:
- 5 hooks
- 2 chocks
- 1 friend
5. Route Recommendations and Safety Assessment
The route follows a logical, clear line tied to internal corners on the wall. The line is mostly free-climbed (up to 6B–6B+), except for the R10–R11 section, which involves a 20 m long, damp crack at grade A2+–A3 (ITO).
Orientation is challenging between R6–R7 due to a large, prominent internal corner ending in cornices, which is a false lead. The actual route goes left of this corner via a less pronounced but vertical internal corner. Further orientation is straightforward and follows the route description.
Organizing protection is sometimes difficult due to the monolithic nature of the rock. All belay stations are in safe locations, mostly on ledges. The team divided the R9–R10 section into two for easier management. Removable bolt hangers (spits) from the first ascent without lugs, some with rust, and lugs that do not fully screw on are encountered.
At the time of the ascent, this was the second passage of the route. Traces of an attempt (removable bolt hangers) ending near R6–R7 at the large internal corner were found. The frequency of bolt hangers suggests a winter attempt. No other information about the route's passage is available.
For a winter ascent, a pair of ice axes, a snow brush, and crampons for all participants are recommended. The lead climber should be prepared for "lean" terrain.
Under polar day conditions (summer), the route can be climbed by a pair in alpine style. There is no water on the route.
Descent from the summit: via the eastern spur of Mt. Petreliusa (no mountaineering equipment required).
Emergency exit: via the ascent route.
IV. Technical Photographs from the Route
Different angle.
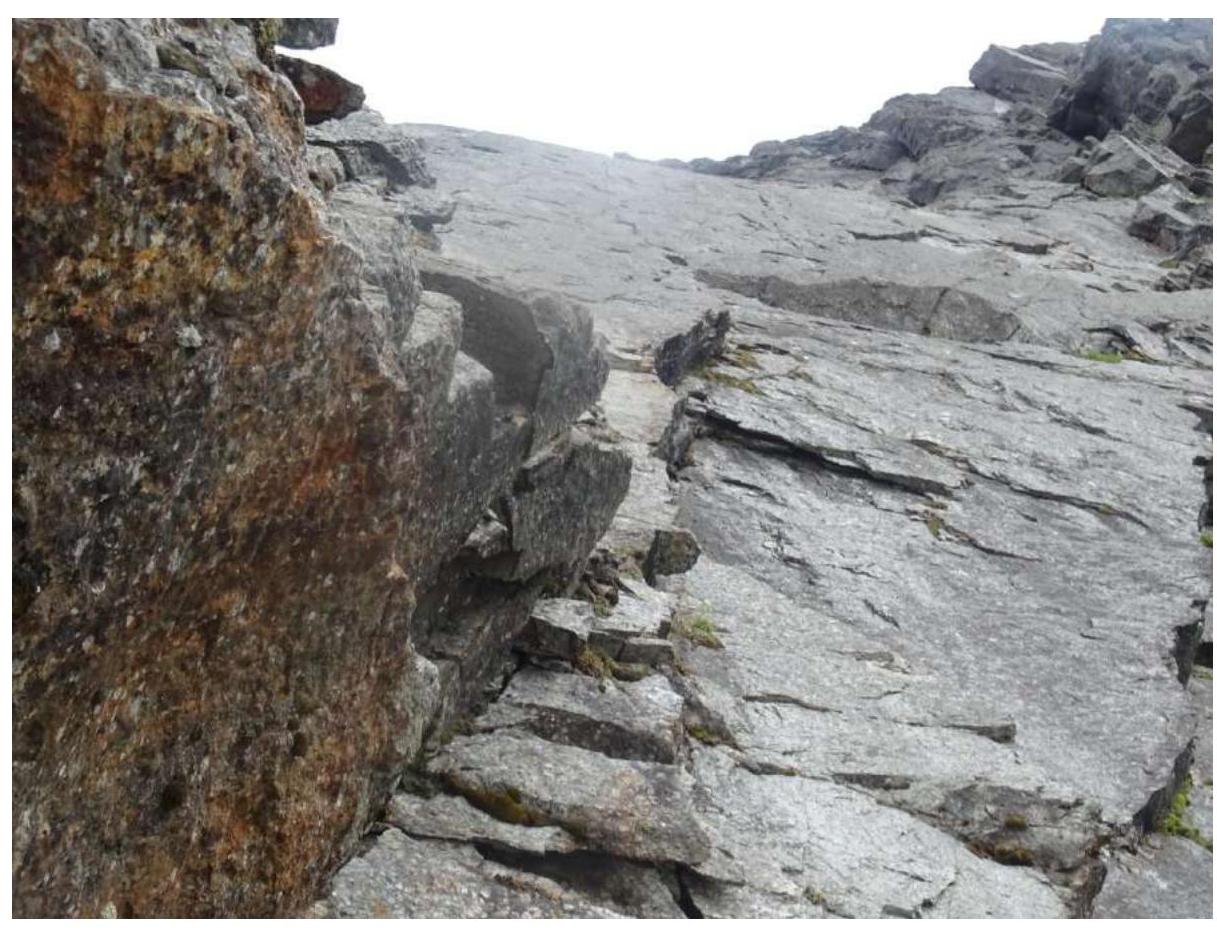
R1 Snowfield passage.
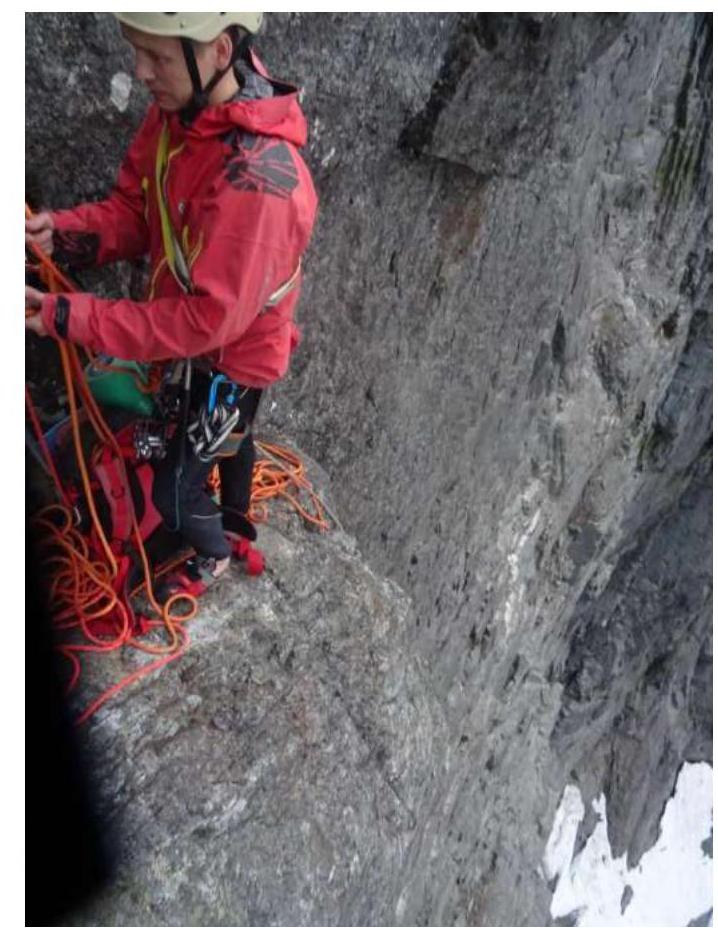
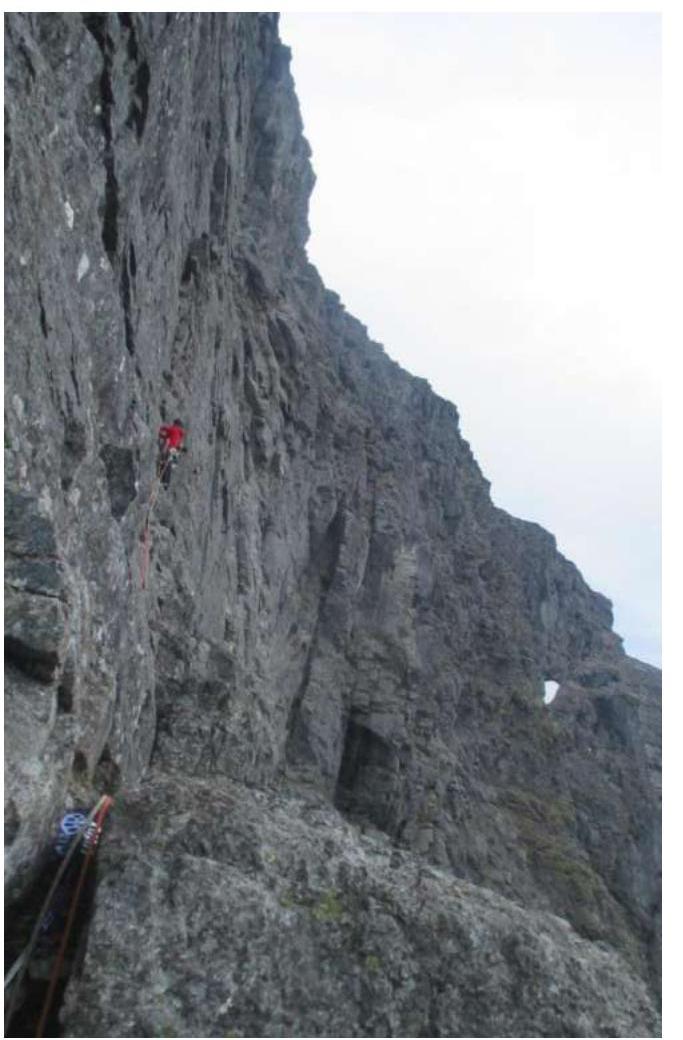
Section R3–R4. Druzhkin A.S. is climbing.
Different angle. Section R3–R4.
R4 Control cairn No. 1.
View of R4–R5 from the station.
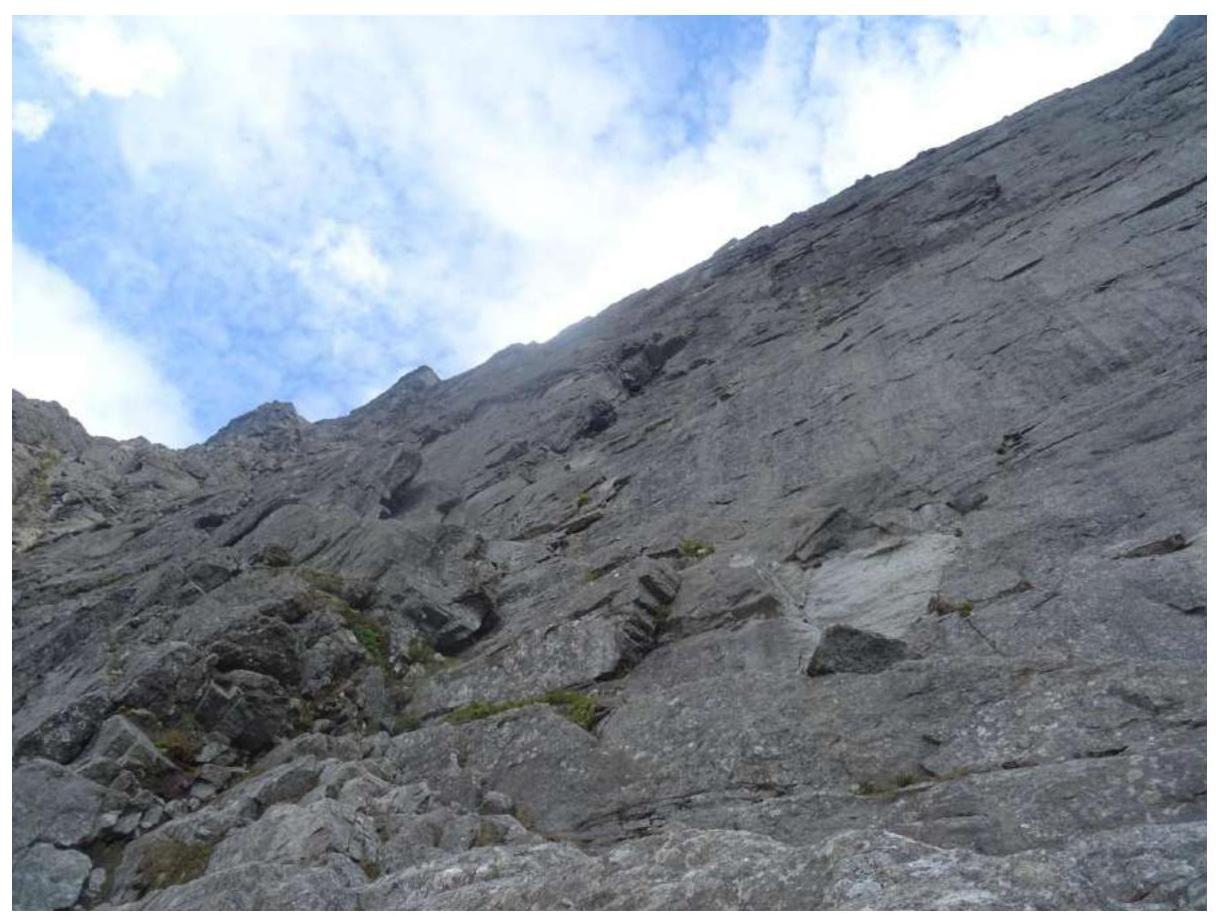
View of section R5–R6. The large, prominent "false" internal corner is visible.

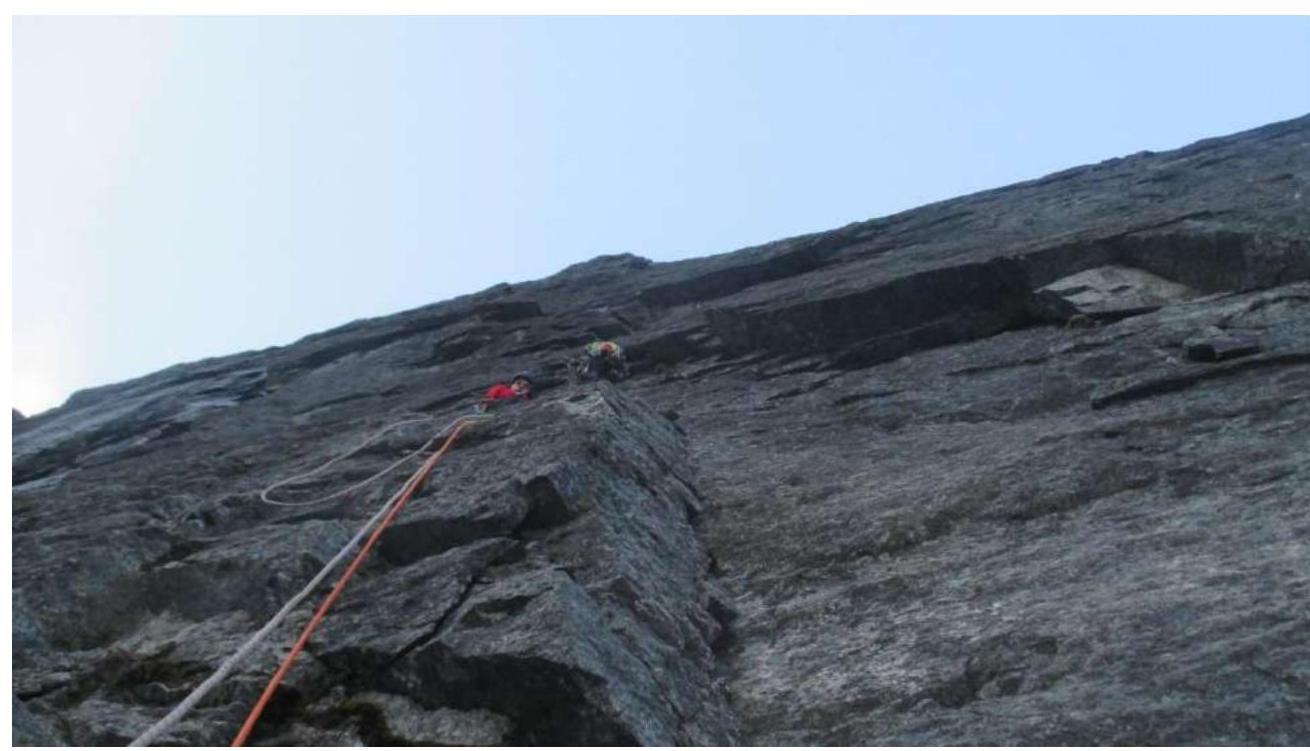
Section R6–R7. Kovalev E.V. is climbing.
Station on R7.
Station on R7 and view of section R7–R8.
Section R8–R9. Fedorishin A.L. is climbing.

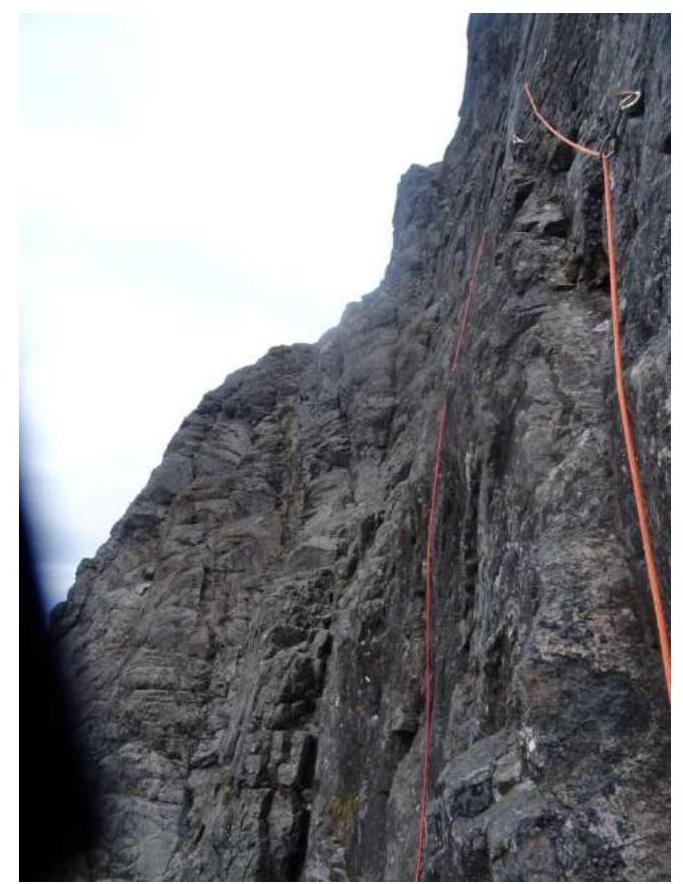
Section R8–R9 and traverse on R9–R10. Fedorishin A.L. is climbing.
Section R10–R11. Crossing the cornice and ITO section. Druzhkin A.S. is climbing.

The team at the summit.


