
Vladimir Balyberdin Peak (3500 m)
Report
Altai Regional Alpinism Federation (ARAF) team on the first ascent to Vladimir Balyberdin Peak. South-Chuya Ridge, Elangash valley.
Leader: Konstantin Bondarchuk, Candidate Master of Sports in Alpinism.
Participants:
- Zufar Akhatov
- Pavel Badanov
- Dmitry Grebennikov
- Evgeny Drugolev
- Vladimir Korneev
- Mikhail Nikiforenko
Barnaul 2014
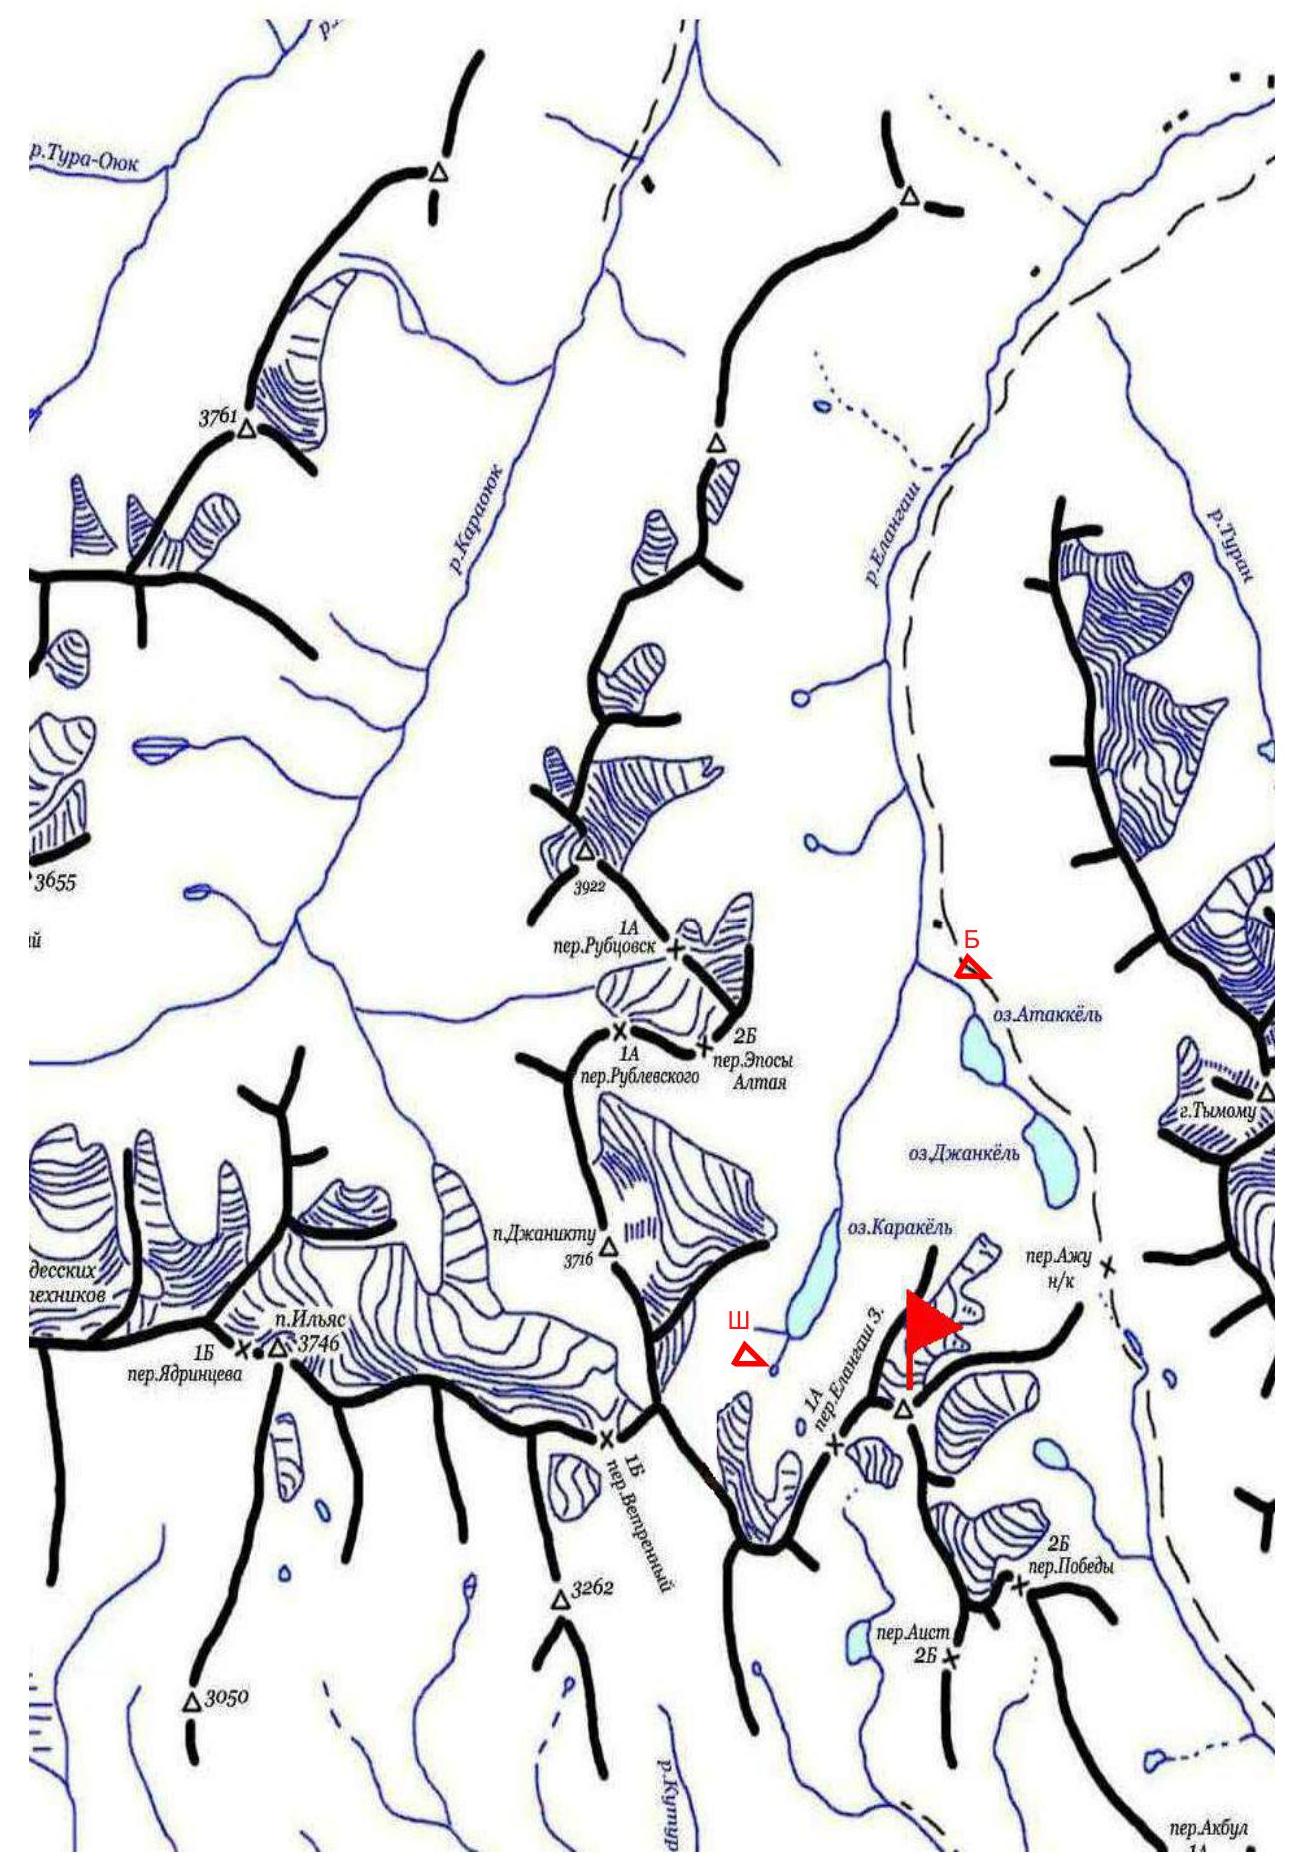
Map of the area
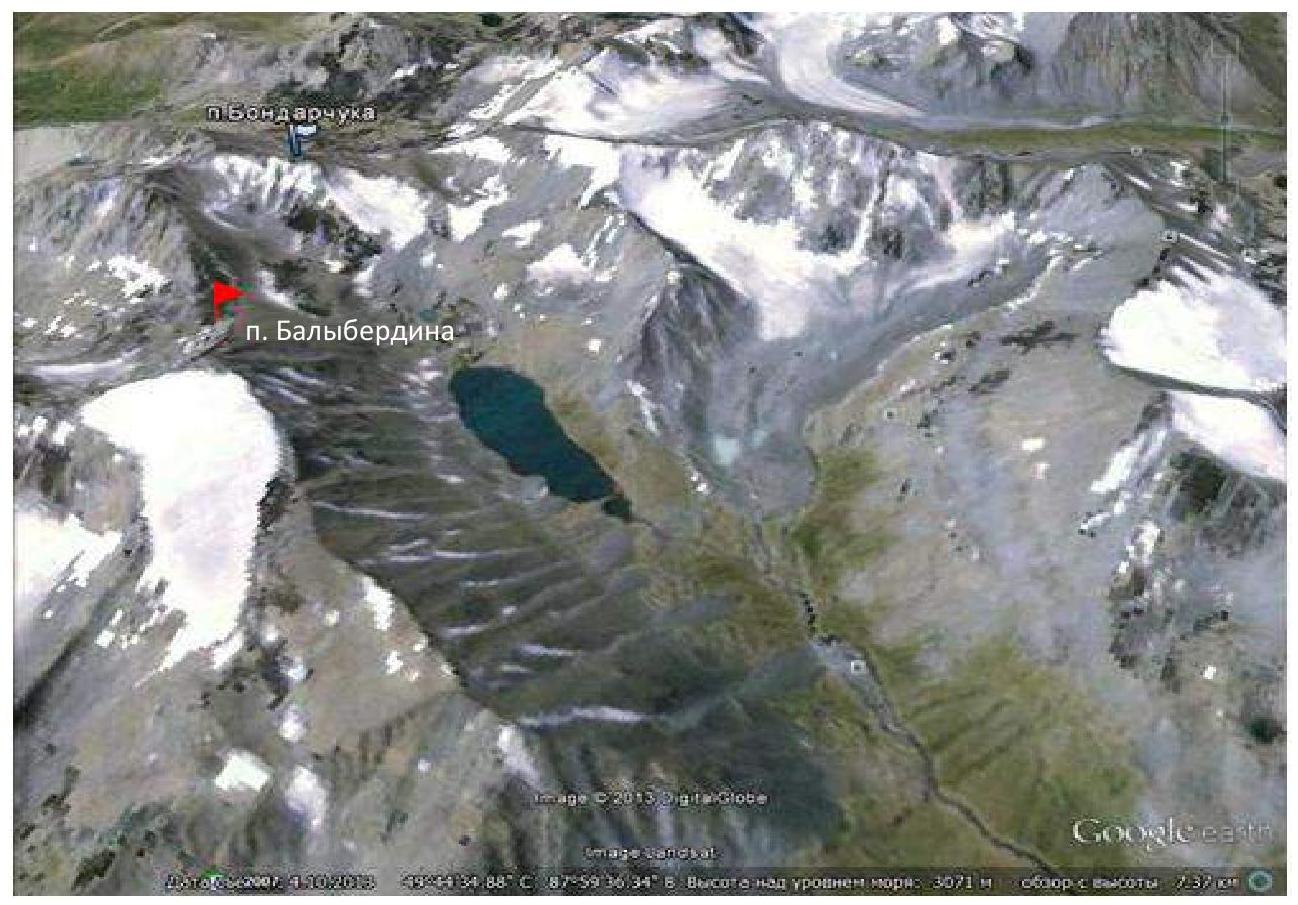
Satellite View
Ascent Passport
- South-Chuya Ridge, Elangash valley.
- Vladimir Balyberdin Peak, via the left part of the NW slope.
- First ascent, presumably 3B category of difficulty.
- Route type: combined.
- Height difference — 500 m.
- Route length — 1500 m.
- Length of sections: 1st category of difficulty — 500 m, 2nd category of difficulty — 300–400 m, 3rd category of difficulty — 150 m, 4th category of difficulty — 50 m.
- Average steepness: main part of the route — 50°; key part of the route — 70°.
- Equipment used on the route: stationary loops — 3 pcs., rock hooks type "petal" — 6 pcs., chocks — 7 pcs., ropes — 2 × 50 m.
- Team's climbing hours — 1 day from the "Medvezhya" lake camp.
- Leader: Konstantin Bondarchuk — Candidate Master of Sports in Alpinism, 3rd category instructor, "Rescue in the Mountains" badge.

Participants:
- Pavel Badanov
- Dmitry Grebennikov
- Evgeny Drugolev
- Vladimir Korneev
- Mikhail Nikiforenko.
- Senior coach: Zufar Akhatov, Candidate Master of Sports in Alpinism, 2nd category instructor, "Rescue in the Mountains" badge.
- Organization: RSSO "Altai Regional Alpinism Federation".
- Departure from the assault camp — "Medvezhya" camp 6:00, August 8, 2014. Start of work on the route: 8:00, August 8, 2014. Reaching the key section: 10:00, August 8, 2014. Reaching the summit: 15:00, August 8, 2014. Return to the assault camp: 20:00, August 8, 2014.
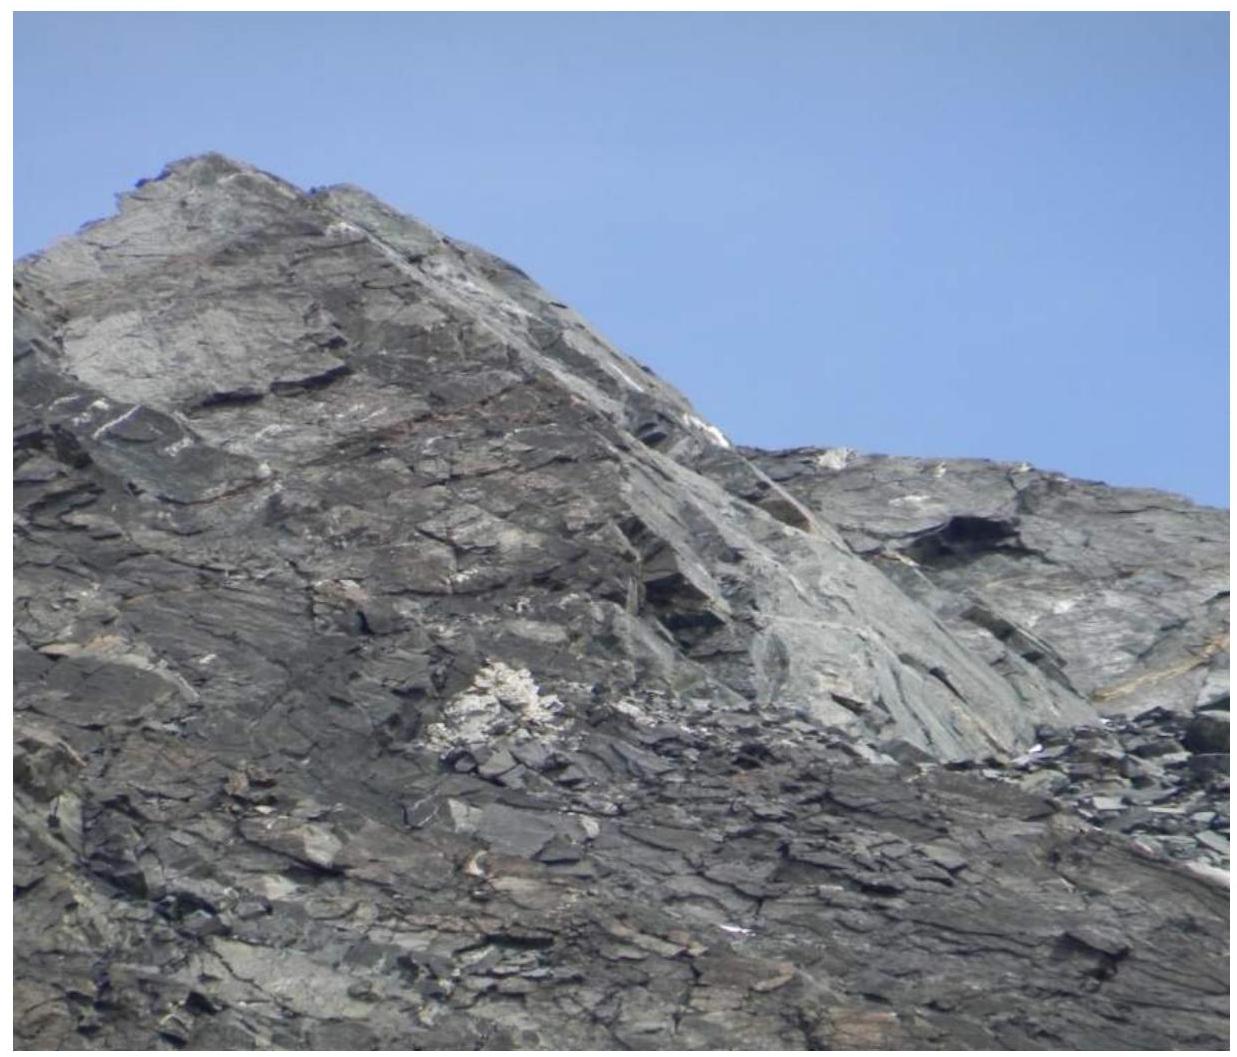
Photo 1. Pre-summit tower
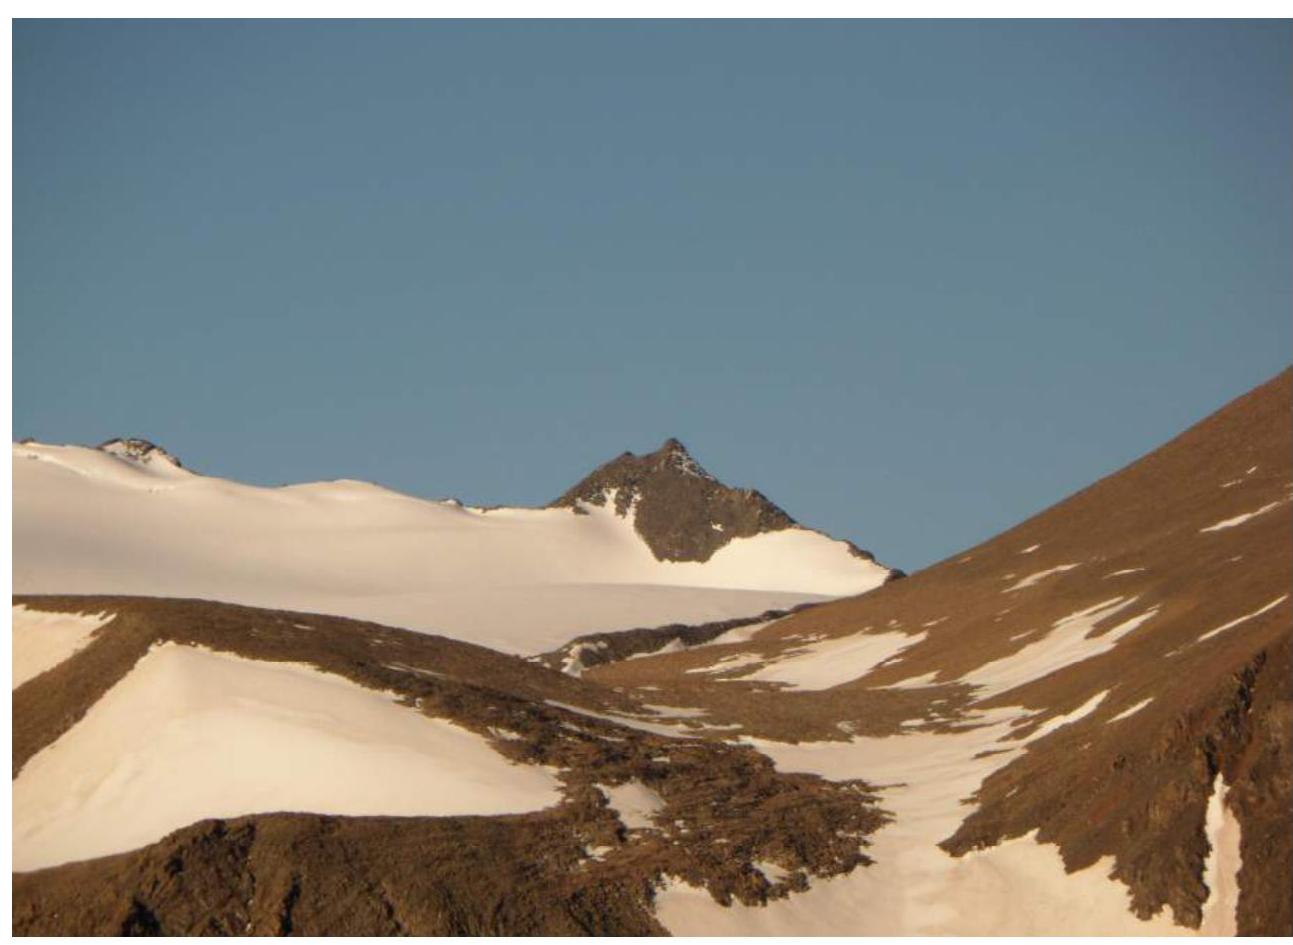
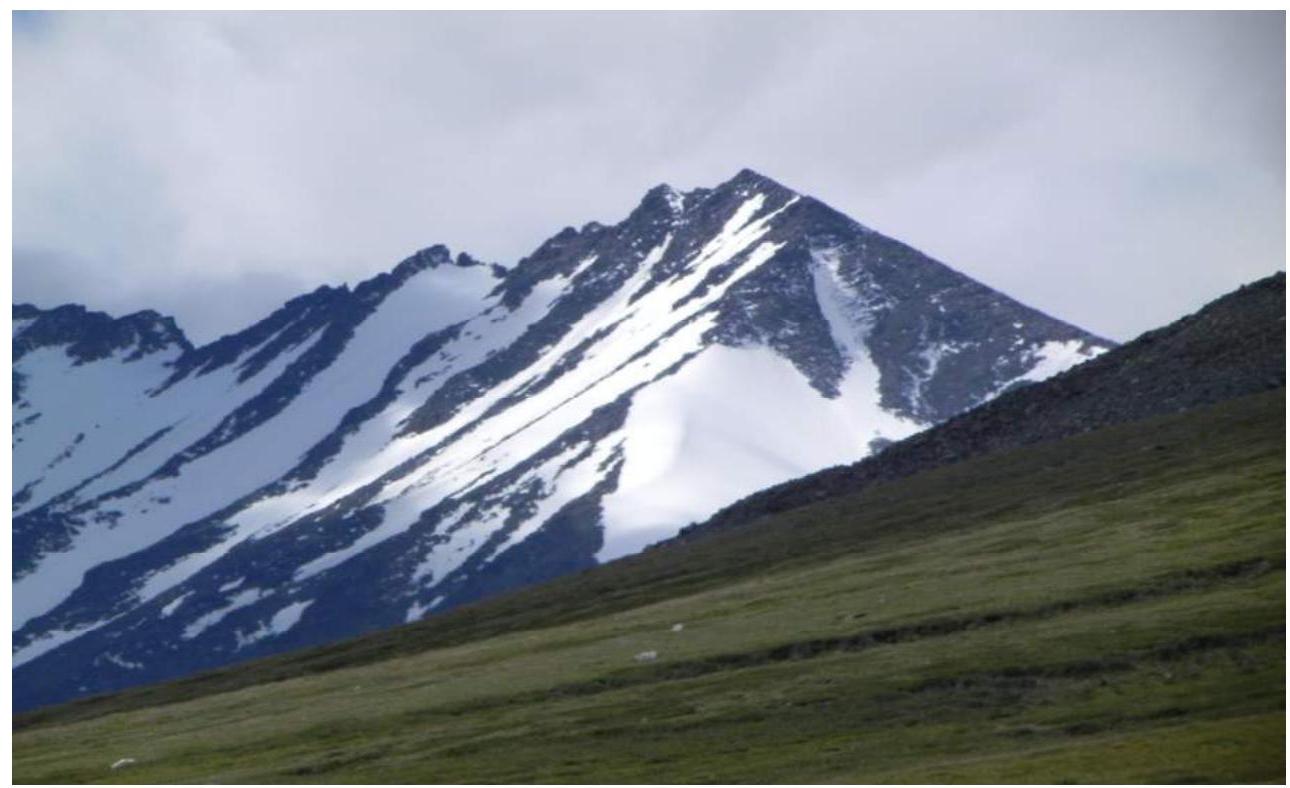
Photo 2. Balyberdin Peak, view from the southwest
- To get to the Elangash valley, follow this route: from Barnaul, drive along the Chuya highway to Kosh-Agach. Here, it is recommended to hire a local guide and a high-clearance vehicle. Continue along the road (there are signs) to the settlement of Beltir. From Beltir, turn left and drive to the nomad camp. From the nomad camp, head up through the heavily boggy terrain. It is convenient to set up a base camp slightly above the upper shepherd's camps.
Photo 3. General view of the route
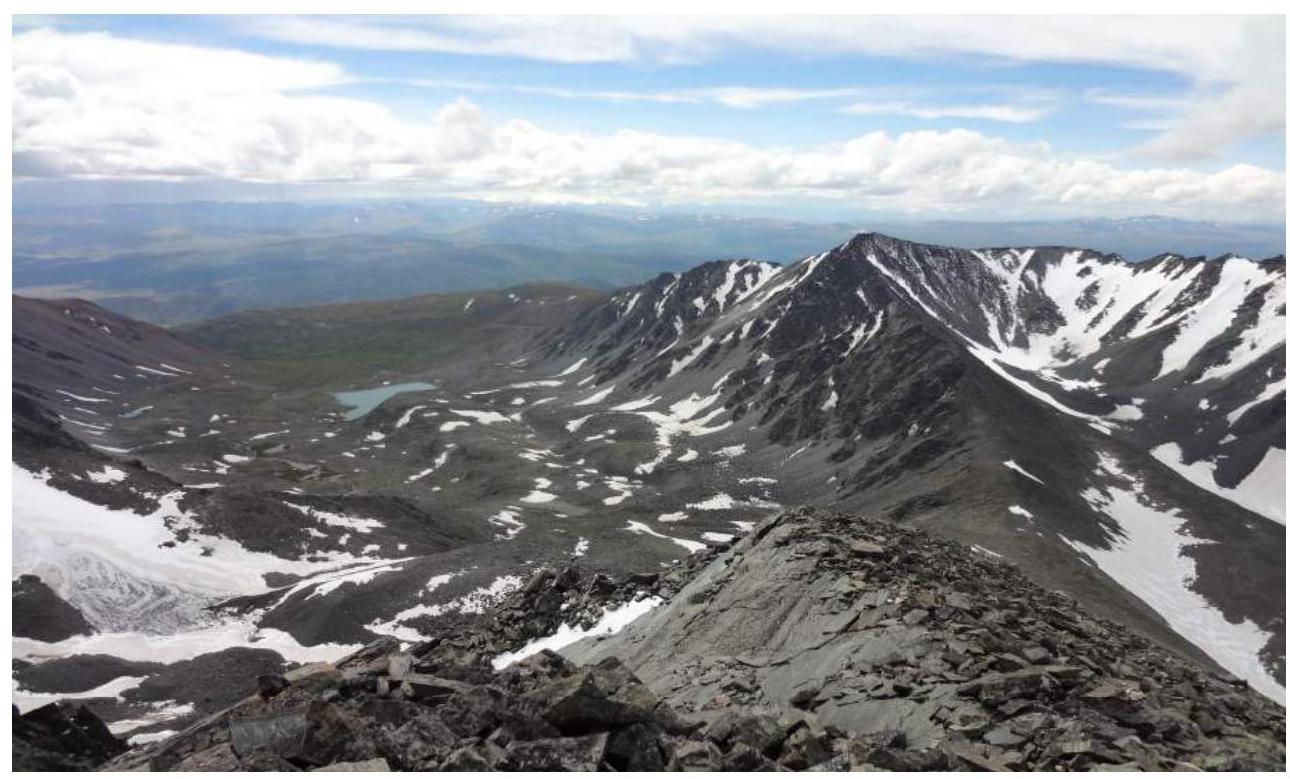
Photo 4. Route profile
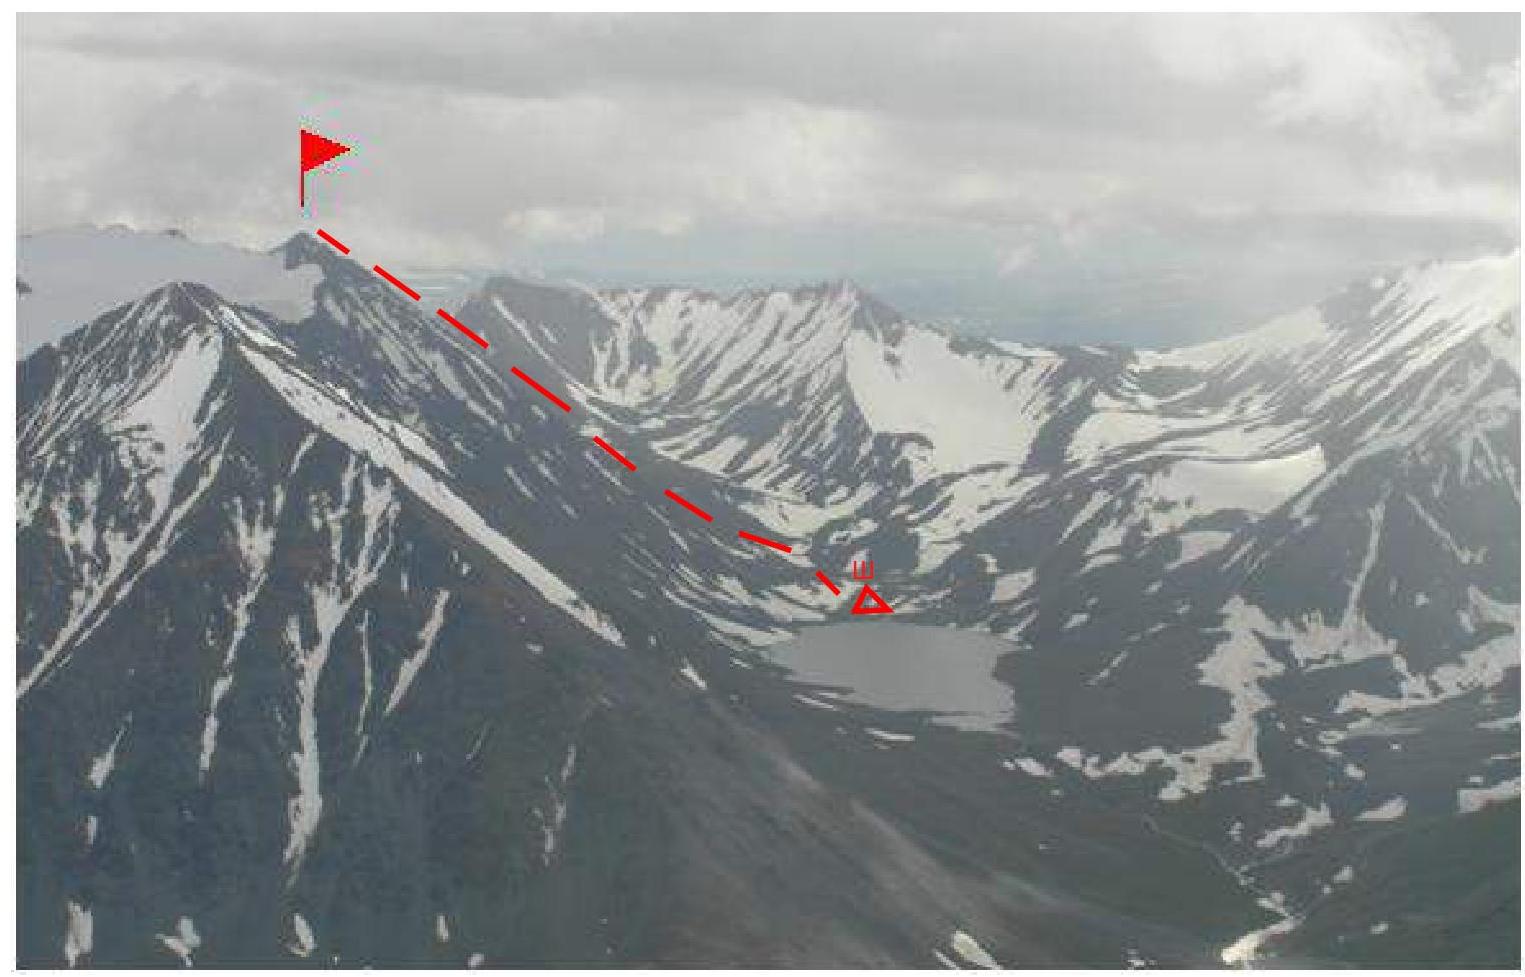
Photo 5. Panorama of the area from Medvezh'ya Peak
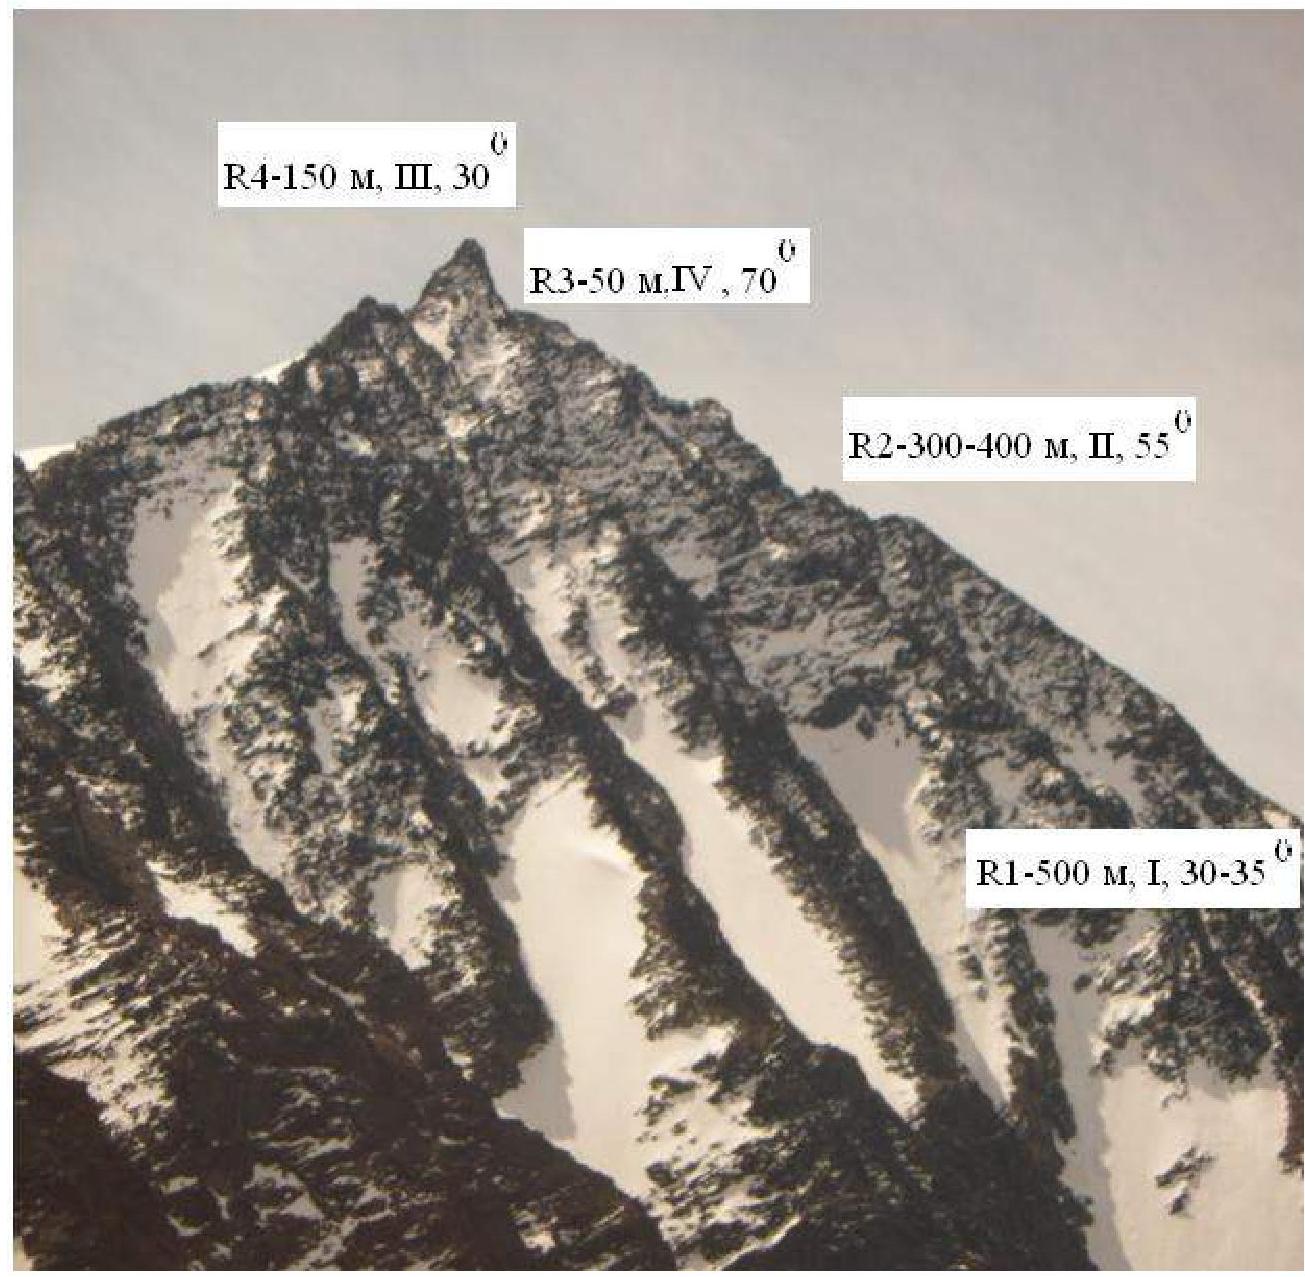
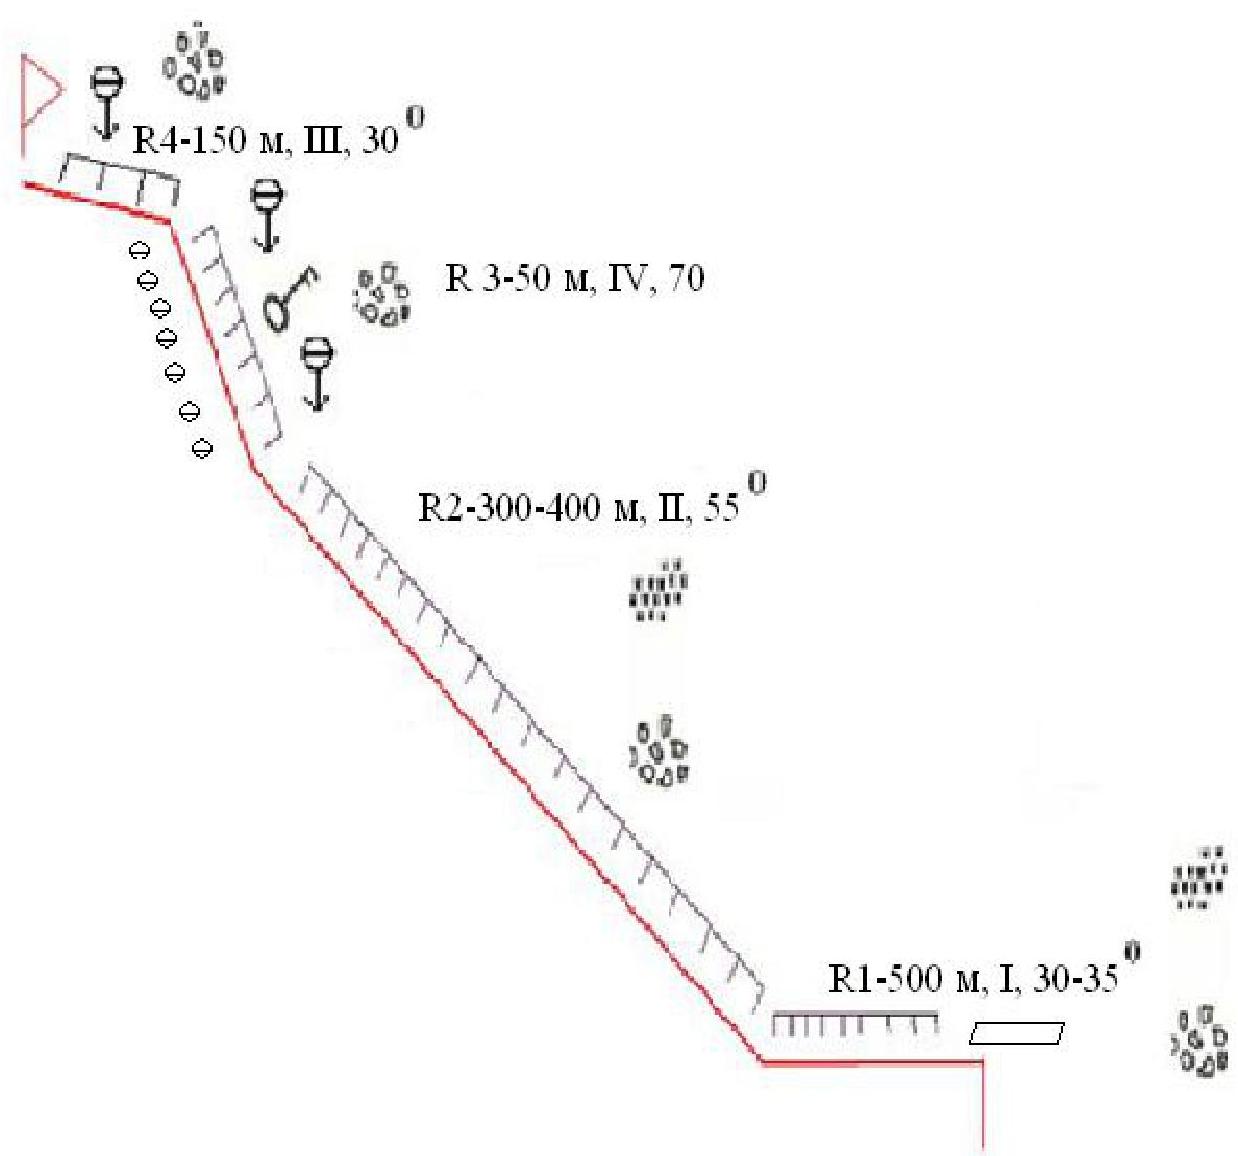
Photo 6. Route diagram in sections, Vladimir Balyberdin Peak (3500 m)
Route Diagram in UIAA Symbols
Route Description
From the base camp, located above the shepherd's camps in the Elangash valley, move with a slight gain in altitude along the left (orographic) bank of the Elangash River to Karakol Lake (about 3 hours).
Before reaching the lake:
- ford the stream that flows out of the lake;
- head right — to the opposite bank.
Go around Karakol Lake, on the right bank of which there are grassy terraces — the "Medvezh'ya" camp, a convenient location for an assault camp. Here, you can pitch tents and leave excess gear.
From the "Medvezh'ya" camp, along the large scree of the moraine ridge, bypassing two small lakes, we head towards Elangash Pass 3 for about 2 hours. On the snowfield to the left, we see a third lake. We go around it on the right bank, from where the pass saddle is visible. We ascend to the pass along the crest of the moraine ridge. From the pass to the left, a clearly defined ledge is visible, which takes 1.5–2 hours to reach. The ridge narrows, and this is the start of the route.
Photo 7. Route profile by sections
R1 — 500 m, 1, 30–35° The ledge is the start of the key section of the route and can accommodate 4 people. It is a convenient place to set up belays. Further movement is in rope teams with reliable belays.
R2 — 300–400 m, 2, 55°. A sharp rocky ridge, about 15 m of moderate complexity. Alternating movement, belaying through ledges. On the way, a 2-meter rock "tooth" serves as a landmark. Further, the ridge becomes very sharp. We hit a rib. We followed this rib, stepping onto the wall.
- To the left are vertical drops.
- To the right is an inclined slab.
- To the right, a triangular wall consisting of reliable rock slabs, oriented southeast, will be visible.
Move very carefully!
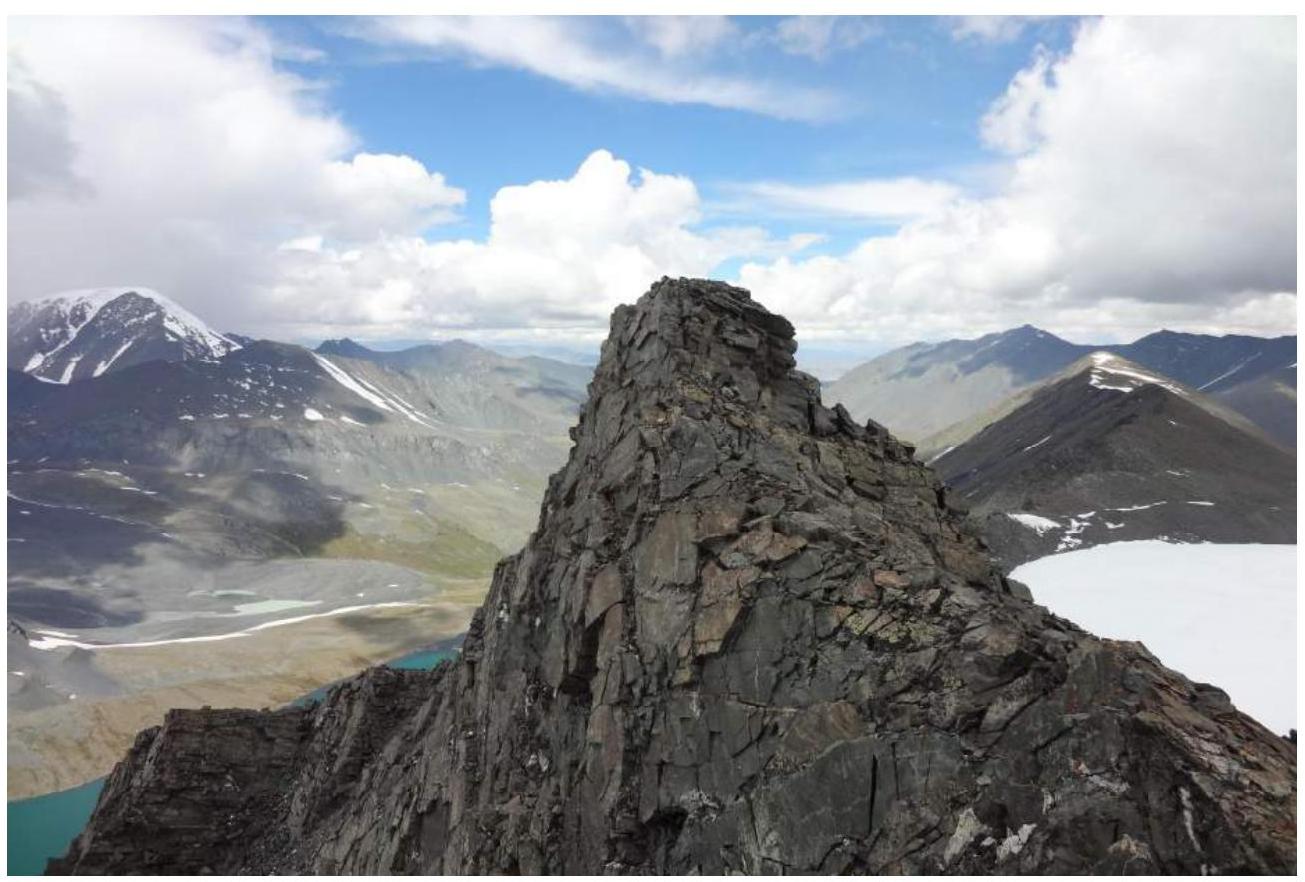
Photo 8. Rock tooth R3 — 50 m, 4, 70°
The first belay station was set under the rib of the rocky ridge — this is the start of the "key" section.
Rock climbing of the 4th category of difficulty, rocks are heavily destroyed. The most thorough belaying is necessary!
On the "key" section, we organized 7 belay points using chocks. One 50-meter rope was passed.
At the top, there is now a belay station for future ascents, consisting of:
- two hooks
- a loop
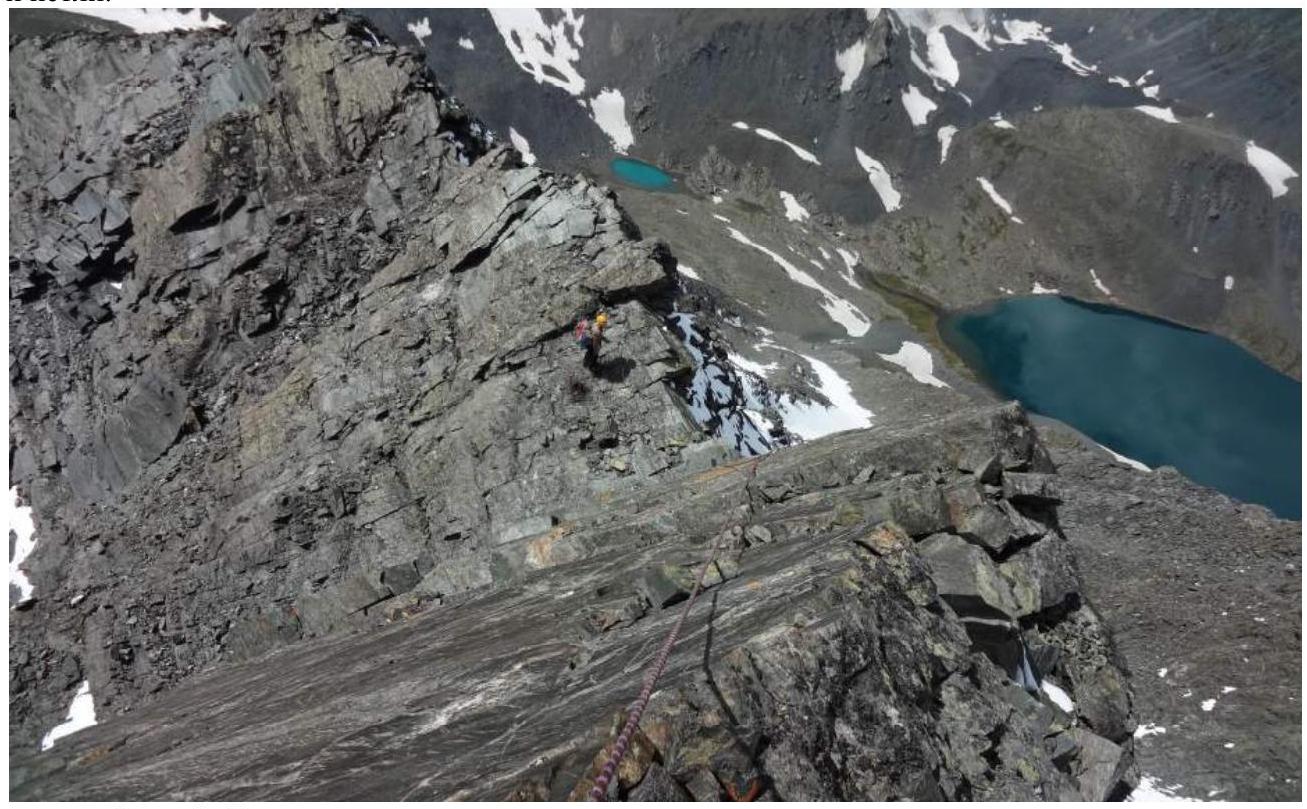
Photo 9. Key section
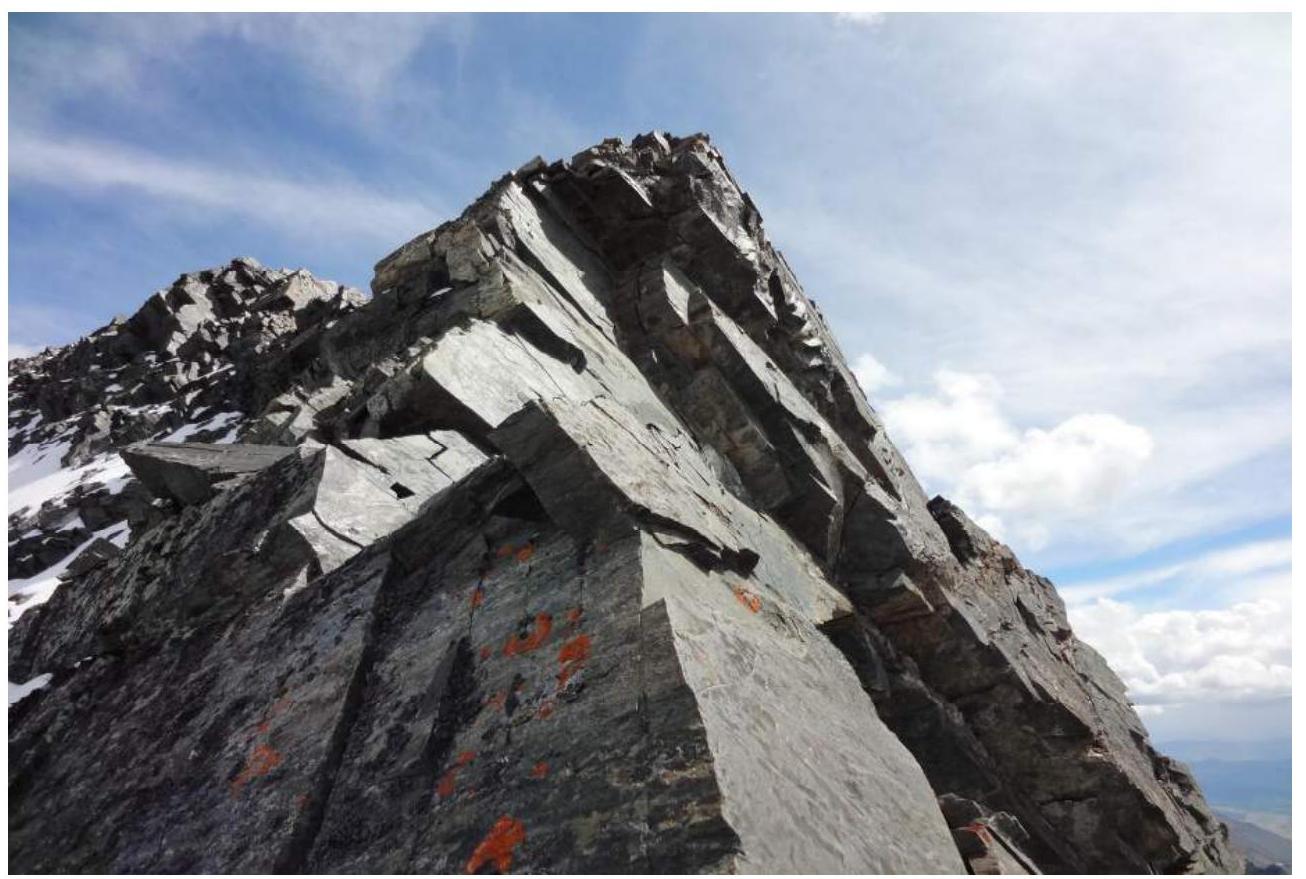
Photo 10. Pre-summit tower "rock tooth", key section R4 — 150 m, 3, 30°. Further, the ridge becomes more gentle, but it is heavily destroyed.
1.5 ropes — simultaneous movement and belaying.
Then we set up a belay station, from which it is about 30 m to the "pre-summit".
A fairly gentle but heavily destroyed ridge was traversed with thorough hook belaying. Large rocks came loose! Further, 2 ropes with belaying through ledges — and we are at the summit.
We built a cairn in the form of a well and placed a capsule with a note inside. Bad weather set in — a typical phenomenon for these places. At the summit, we were severely battered by a thunderstorm, with lightning strikes very close by. It felt like the summit was "attracting" lightning discharges.
Descent followed the ascent route. Three ridges lead to the summit tower; the one we climbed appears to be the safest and most logical. It is not possible to bypass the route. There remains an unexplored section visible from the valley.
Recommendations: Five ropes of challenging climbing, with plenty of exposure. Participants must be prepared to work on a technically complex rock route, having relevant experience and equipment. The optimal option is a "pair" of rock climbers.
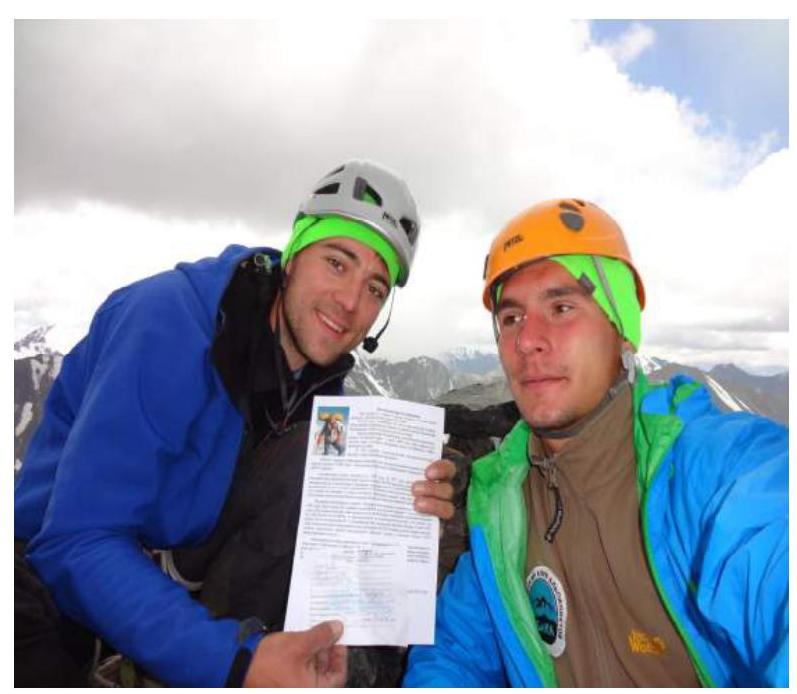
Photo 11. Capsule placement
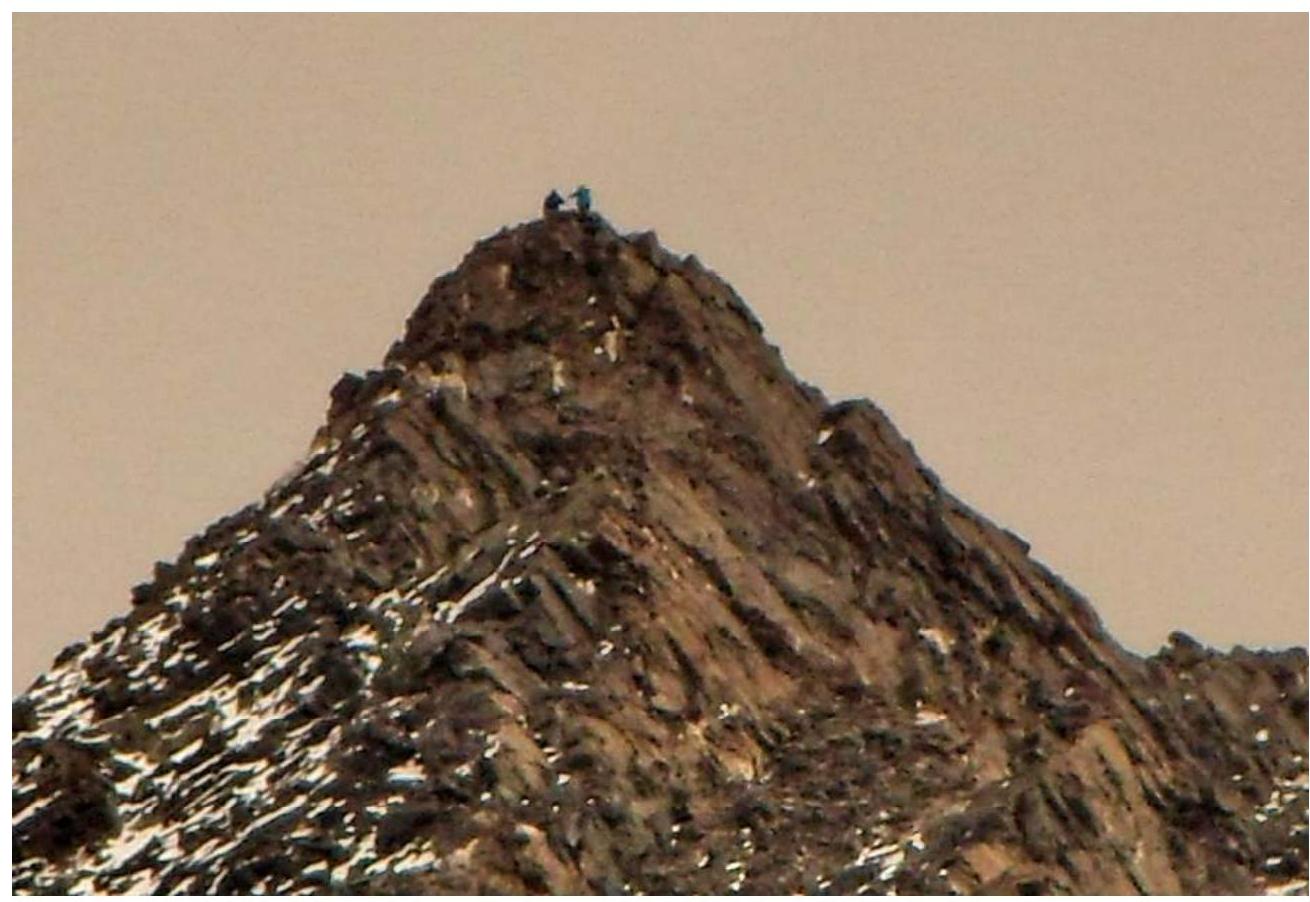
Photo 12. At the summit
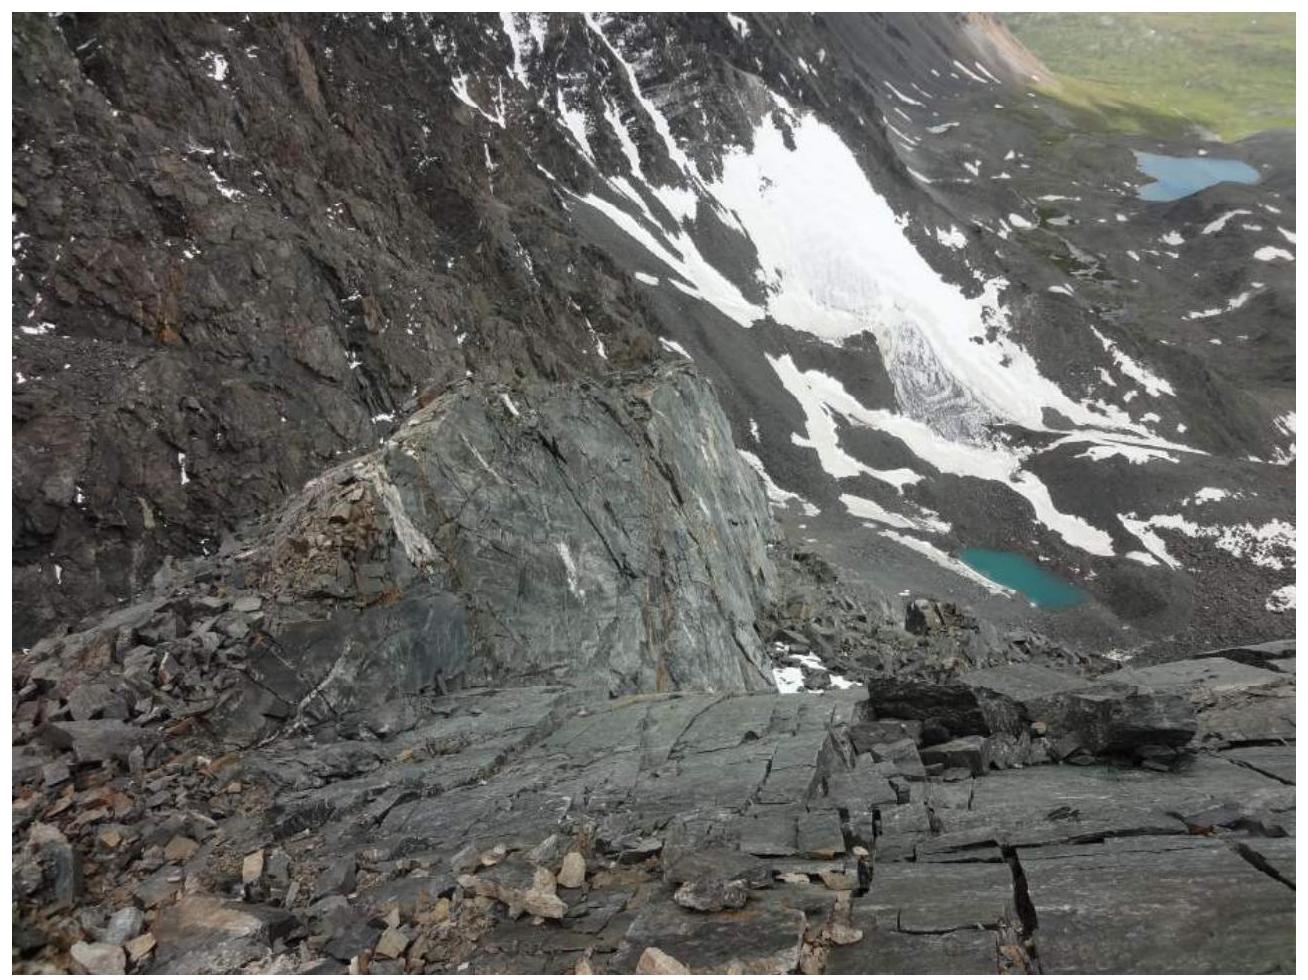
Photo 13.

Photo 14.

Photo 15. Pavel Budanov at the summit
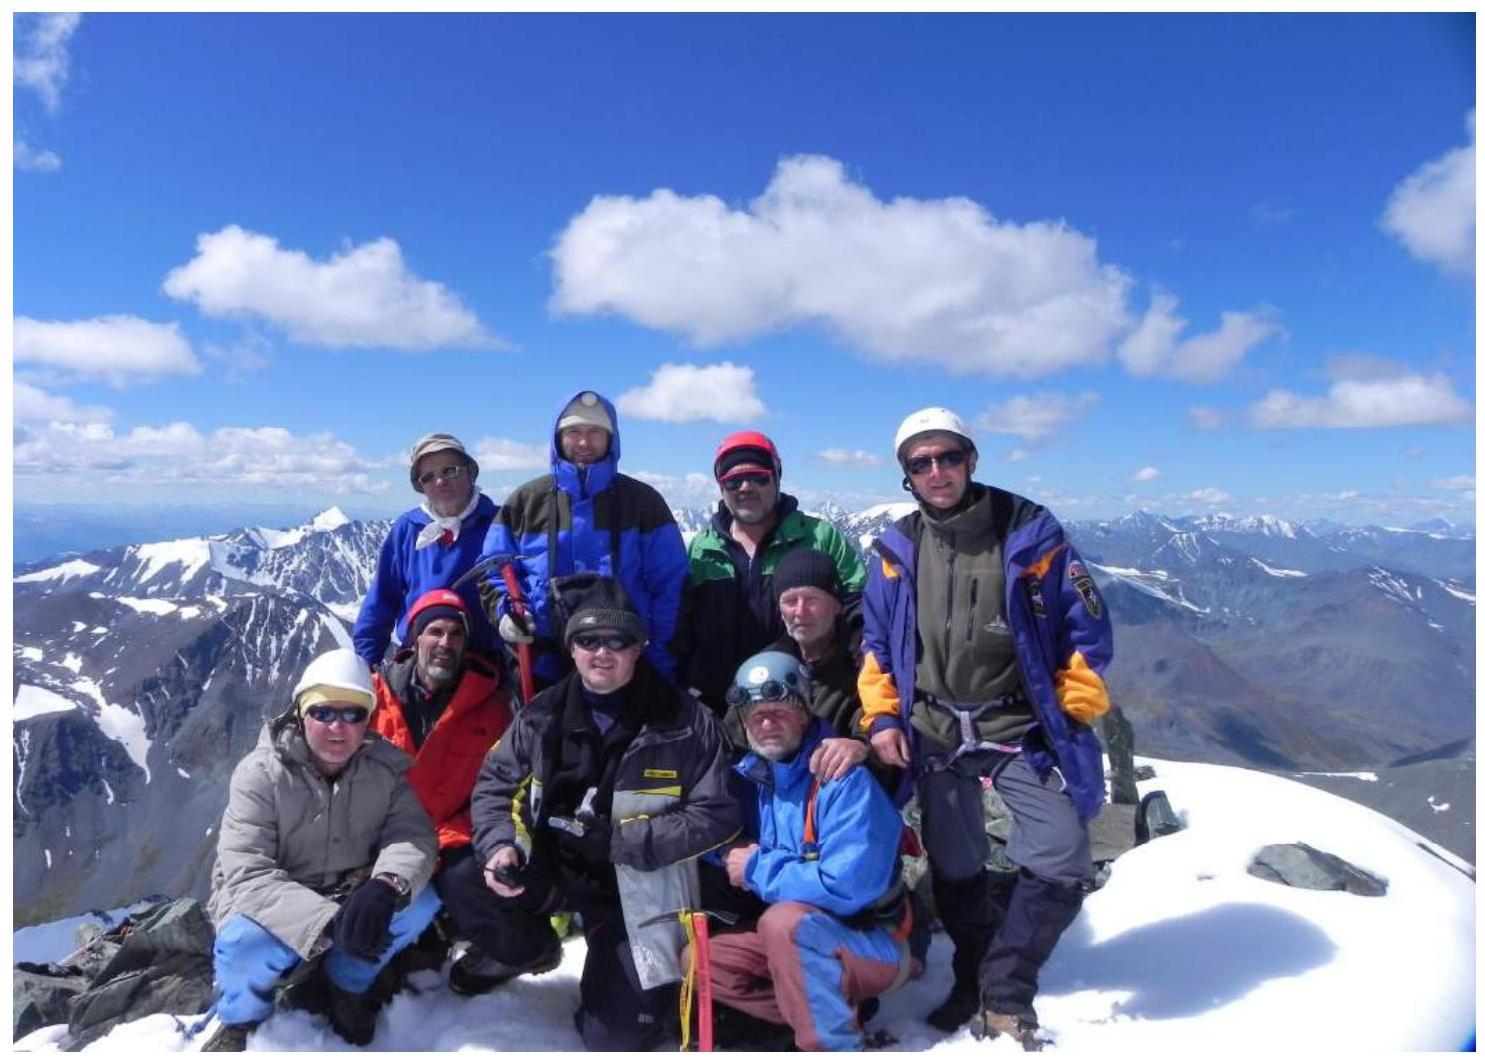
Photo 16. Team photo