RUSSIAN ALPINISM FEDERATION
RUSSIAN CHAMPIONSHIP 2004, WINTER ASCENTS CLASS
Report
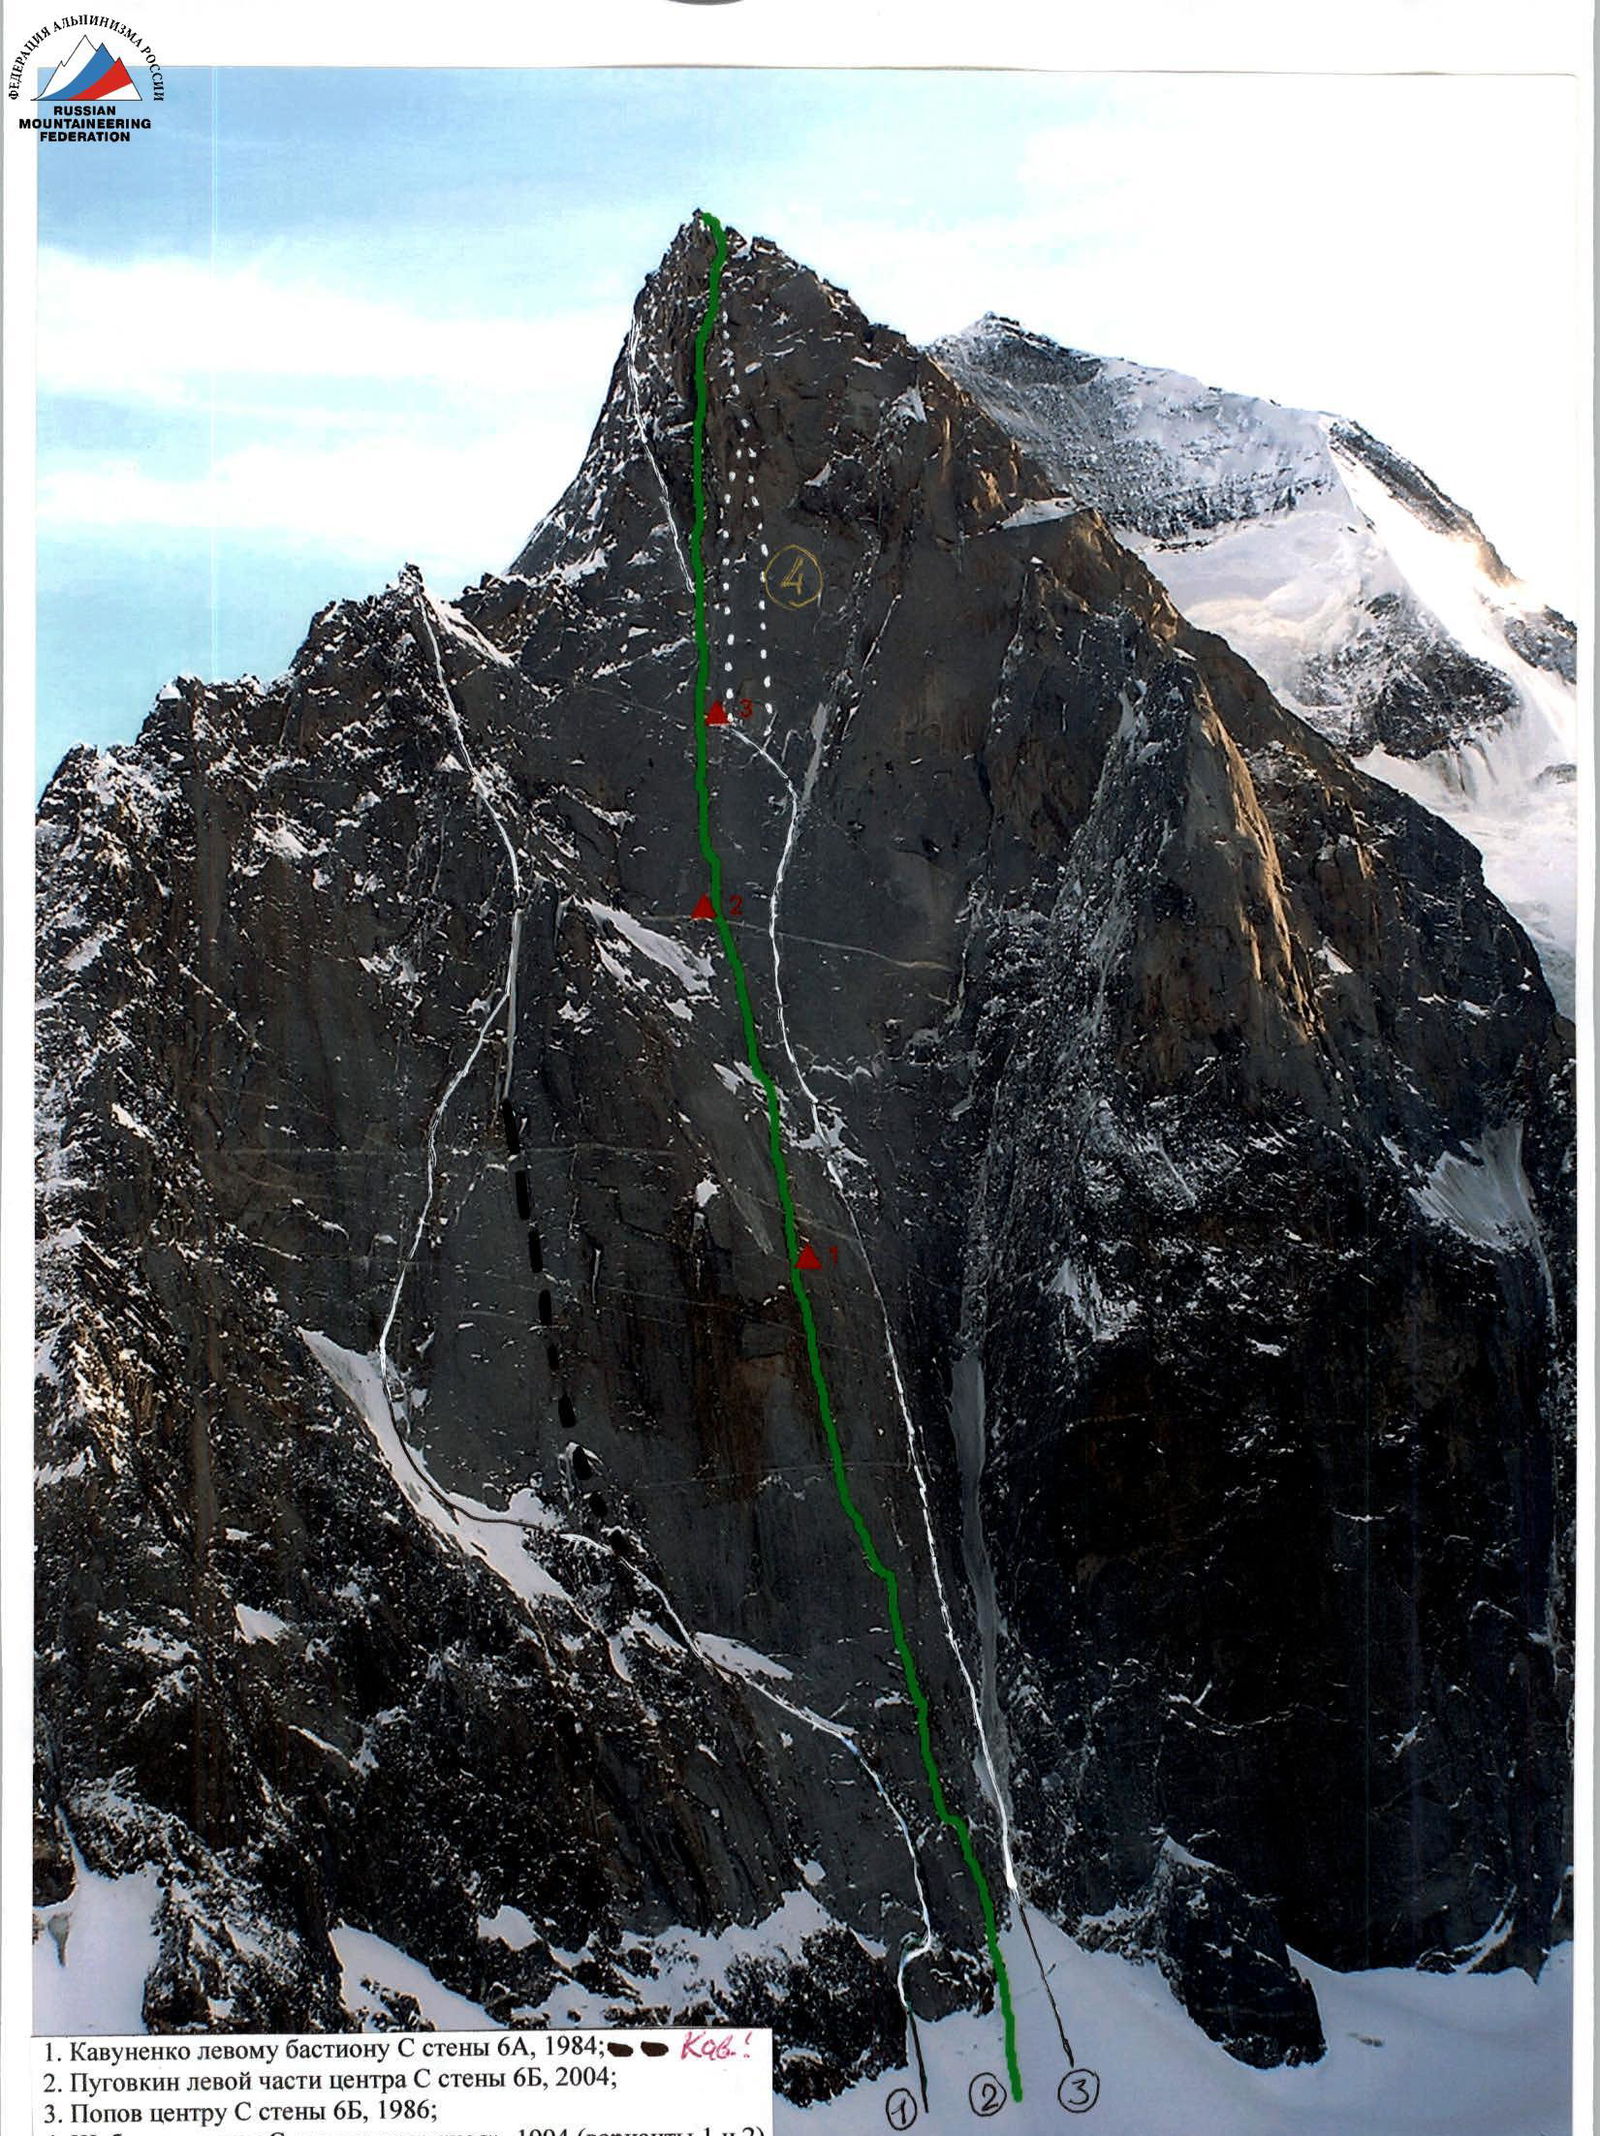
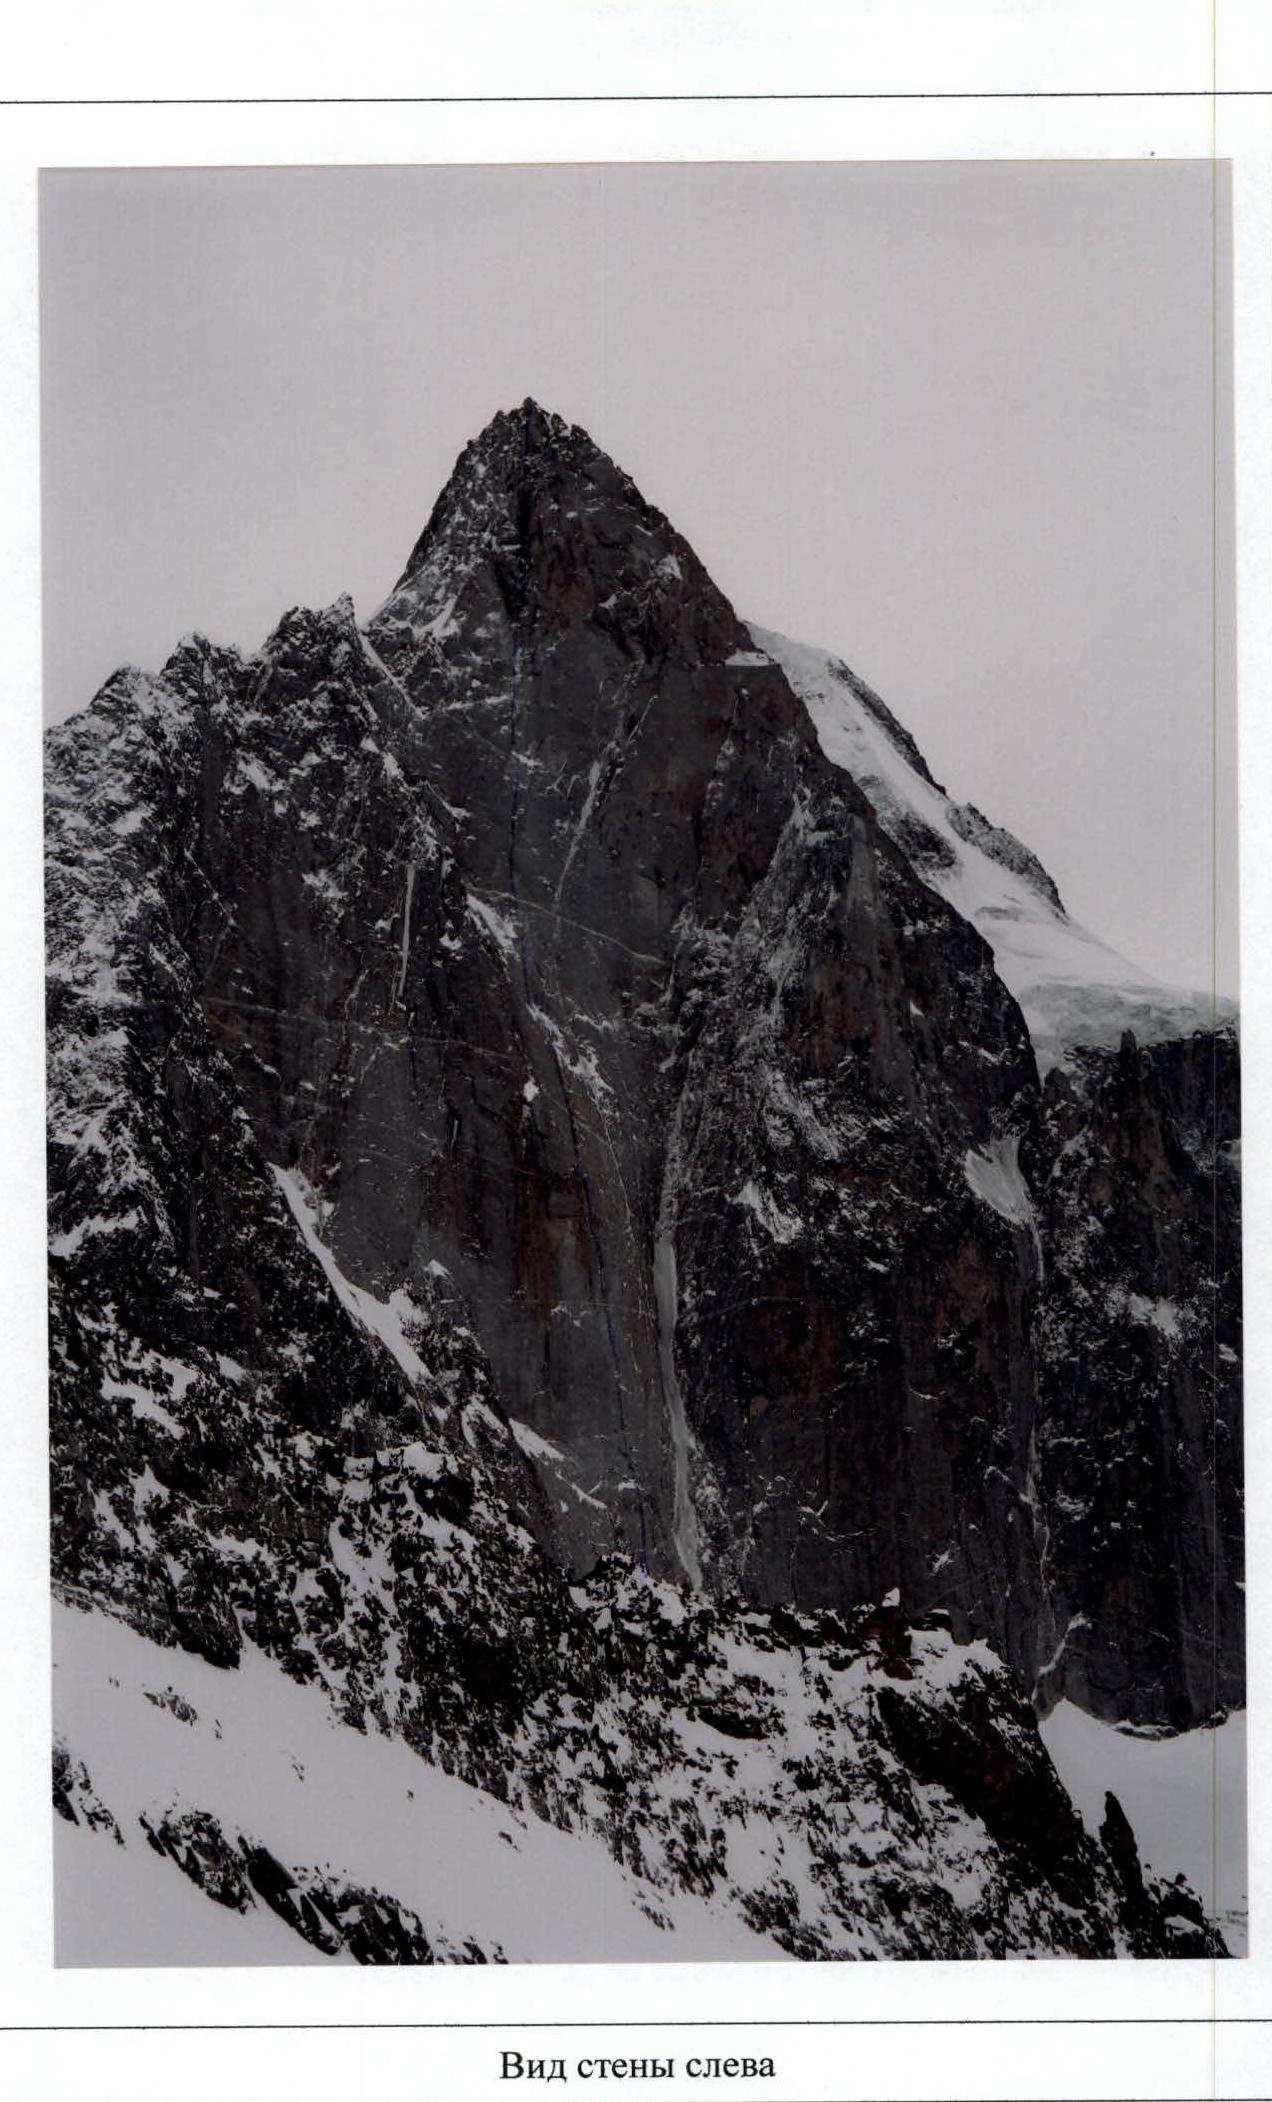
The combined team of the Krasnoyarsk Krai Sports Committee ascended Peak Ak-Su (C) 5217 m via the "mirrors" of the central part of the north face. The route is considered to be a first ascent with an estimated difficulty of 6B.
Ascent Details
- Region — Pamir-Alay, Laylyak region, №5.4.2.
- Peak — Ak-Su (C) 5217 m. Ascent via the "mirrors" of the central part of the north face.
- Proposed difficulty — 6B, first ascent.
- Route type — combined.
- Route characteristics: height difference — 1420 m, wall section height difference — 1360 m, route length — 1600 m, sections of 6B difficulty — 1215 m, sections of 5B difficulty — 295 m, average steepness of the wall section — 72°.
- Equipment left on the route: 50 pitons; including 40 bolts (on belay stations).
Pitons Used on the Route:
40 stationary bolts (on belay stations). Total pitons and other equipment (including skyhooks and fiffies) used ≈ 1000.
- Total climbing hours — 153, total days — 21, climbing days — 18, including acclimatization.
- Team leader — Anton Nikolayevich Pugovkin, Master of Sports.
Team members:
- Yevgeny Vladimirovich Dmitriyenko, Master of Sports
- Sergey Vladimirovich Cherezov, Master of Sports
- Dmitry Valeryevich Tsyganov, Candidate for Master of Sports
- Andrey Dmitriyevich Litvinov, Candidate for Master of Sports
- Pavel Andreyevich Malygin, Candidate for Master of Sports
-
Team coaches: Nikolay Nikolayevich Zakharov, Honored Master of Sports, Honored Coach Valery Viktorovich Balezin, Honored Master of Sports
-
Departure date:
Acclimatization 3–7 February 2004, ascent 10–23 February (13 February — rest day); reached the summit on 23 February 2004 at 12:00; descended on 24 February 2004 at 17:00.
-
Organization: Krasnoyarsk Krai Sports Committee.
-
Kavunenko — left bastion of the north face, 6A, 1984.
-
Pugovkin — central part of the north face, 6B, 2004.
-
Popov — center of the north face, 6B, 1986.
-
Shabalin — center of the north face via the "nose", 1994 (options 1 and 2).
Route profile illustration.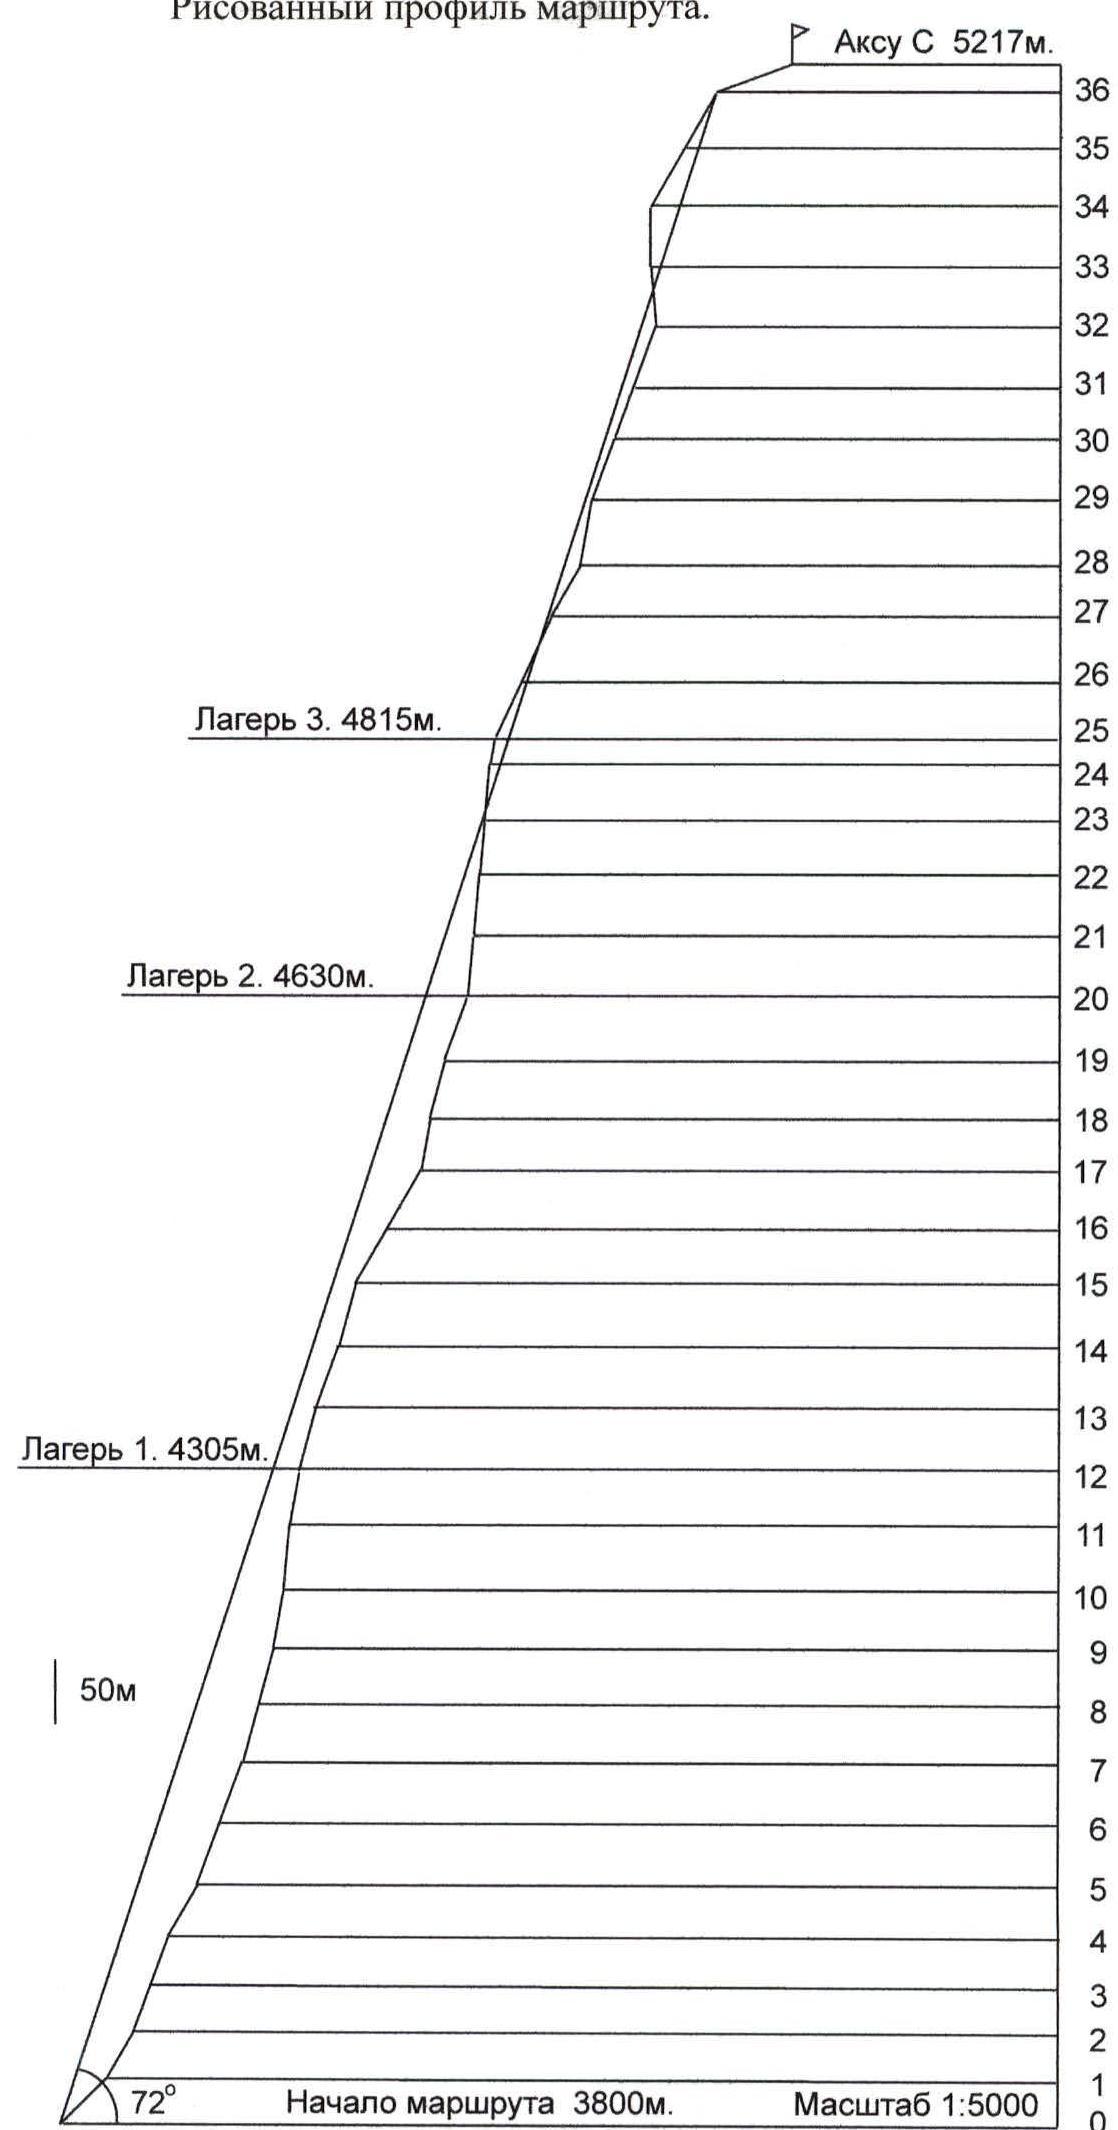
 Panorama of the Ak-Su massif
Brief Description of the Region
Winters in the Ak-Su region are characterized by unstable and rapidly changing weather. The most favorable weather for winter ascents is in December, after which it deteriorates, with February being the worst. The first attempts to ascend Ak-Su in the 90s were made in February and were unsuccessful. The first successful winter ascent was made in December 1998.
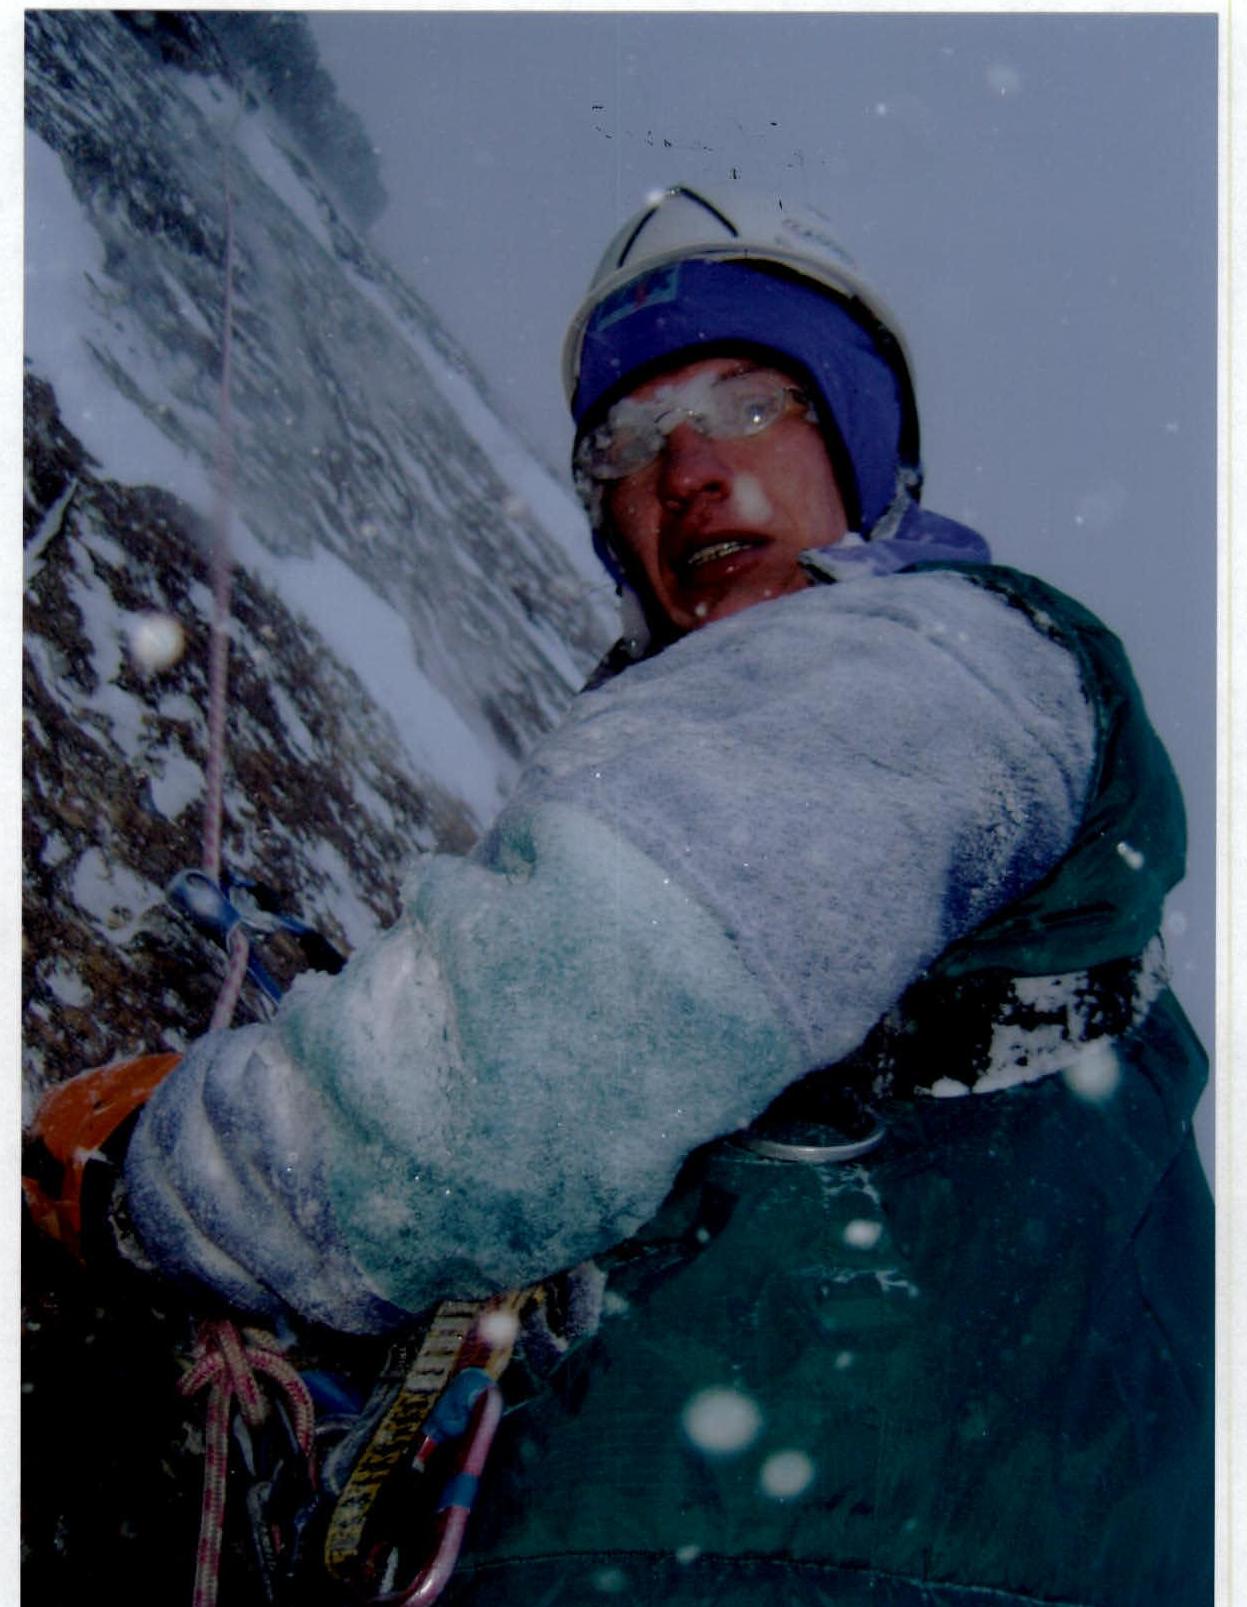
Our team was lucky with the weather at the beginning of the ascent, with clear, windless conditions allowing us to process the lower part of the route at a high pace. However, as soon as we progressed, snowfall began, lasting 11 days and often accompanied by very strong winds. Temperatures did not drop below -25 °C, mostly around -15 °C, with wind speeds sometimes reaching 30 m/s. Despite the poor weather, the team only lost one day due to potentially hazardous micro-avalanches.
Regarding the technical aspects of the ascent, the team primarily used fiffies and anchor pitons for protection, minimizing the use of bolts. Only 4 bolts were used for intermediate belays, while the rest were used on stations. Since the team descended via the same route, all bolts were left in place. During the ascent, 5 fixed ropes were left on diagonal sections, all of which were retrieved during the descent.
The team followed a "capsule style" tactic, transporting two three-person platforms as they processed the wall. Three camps were established on the wall.
The ascent from Camp 3 (4815 m) to the summit and back was completed in one day.
Ascent Schedule

Route diagram in UIAA symbols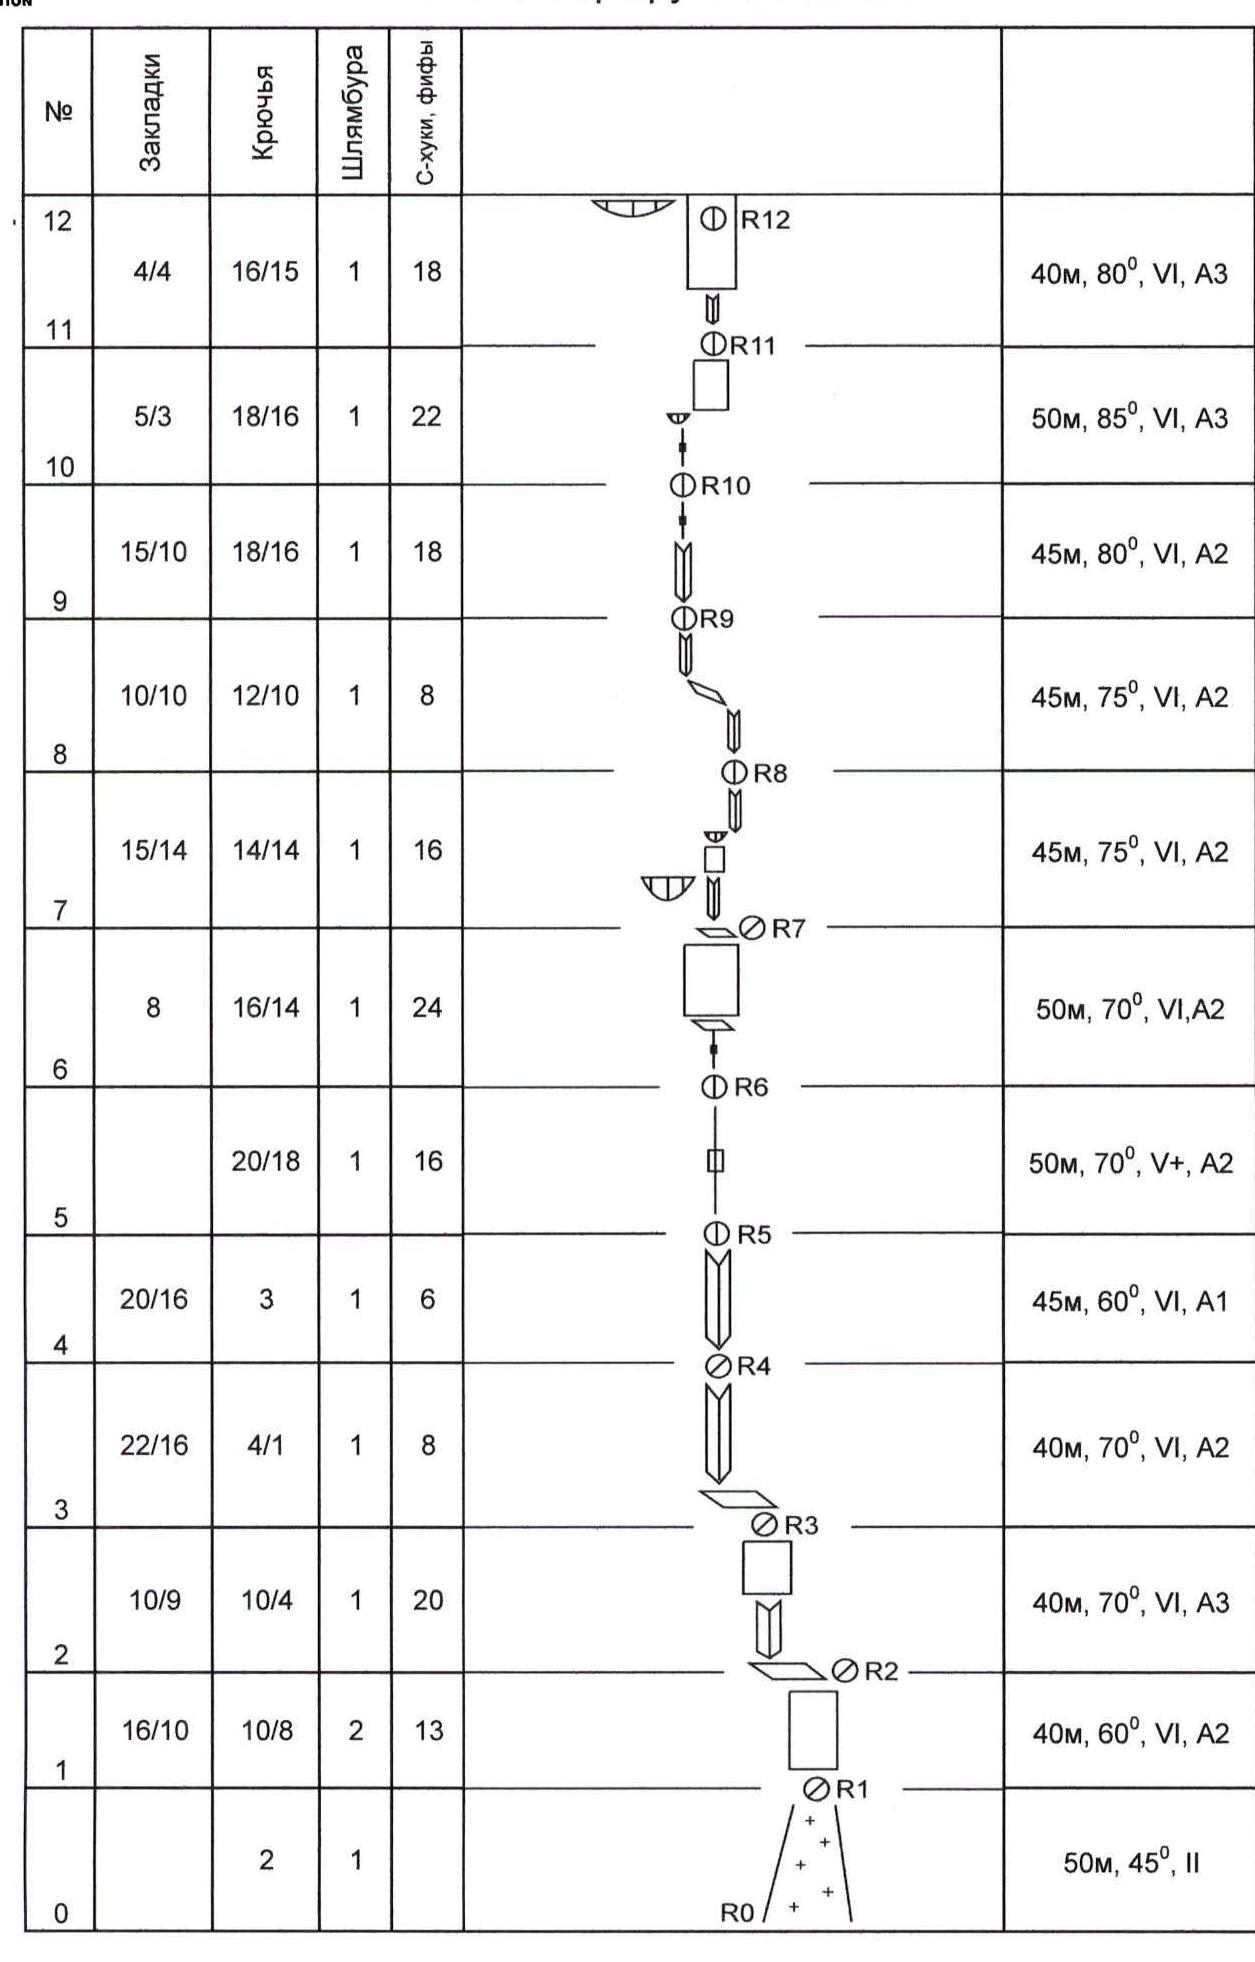
| № | Chocks | Pitons | Bolts | Skyhooks, Fiffies | Length, Steepness, Difficulty |
|---|---|---|---|---|---|
| R0 | 50 m, 45°, II | ||||
| R1 | 16/10 | 10/8 | 2 | 13 | 40 m, 60°, VI, A2 |
| R2 | 10/9 | 10/4 | 1 | 20 | 40 m, 70°, VI, A3 |
| R3 | 22/16 | 4/1 | 1 | 8 | 40 m, 70°, VI, A2 |
| R4 | 20/16 | 3 | 1 | 6 | 45 m, 60°, VI, A1 |
| R5 | 20/18 | 1 | 16 | 50 m, 70°, V+, A2 | |
| R6 | 8 | 16/14 | 1 | 24 | 50 m, 70°, VI, A2 |
| R7 | 15/14 | 14/14 | 1 | 16 | 45 m, 75°, VI, A2 |
| R8 | 10/10 | 12/10 | 1 | 8 | 45 m, 75°, VI, A2 |
| R9 | 15/10 | 18/16 | 1 | 18 | 45 m, 80°, VI, A2 |
| R10 | 5/3 | 18/16 | 1 | 22 | 50 m, 85°, VI, A3 |
| R11 | 4/4 | 16/15 | 1 | 18 | 40 m, 80°, VI, A3 |
| R12 | 5/3 | 12/9 | 1 | 30 | 50 m, 75°, VI, A3 |
| R13 | 1/1 | 18/16 | 1 | 32 | 50 m, 70°, VI, A3 |
| R14 | 2/2 | 15/15 | 59 | 1 | 26 |
| R15 | 14/12 | 1 | 8 | 50 m, 60°, VI, A1 | |
| R16 | 5 | 3 | 1 | 50 m, 60°, V+ | |
| R17 | 3/2 | 19/17 | 1 | 18 | 40 m, 80°, VI, A3 |
| R18 | 12/9 | 10/9 | 1 | 14 | 45 m, 75°, VI, A3 |
| R19 | 18/18 | 2 | 20 | 50 m, 70°, VI, A3 | |
| R20 | 2/2 | 6/6 | 1 | 36 | 45 m, 85°, VI, A4 |
| R21 | 10/9 | 12/11 | 2 | 14 | 45 m, 85°, VI, A3 |
| R22 | 7/7 | 10/9 | 1 | 20 | 40 m, 85°, VI, A3 |
| R23 | 3/2 | 16/15 | 1 | 20 | 45 m, 85°, VI, A3 |
| R24 | 12/10 | 4/3 | 2 | 10 | 20 m, 80°, VI, A2 |
| R25 | 16/13 | 5/3 | 1 | 7 | 50 m, 65°, V+, A2 |
| R26 | 14/13 | 9/9 | 1 | 5 | 50 m, 65°, VI, A2 |
| R27 | 15/15 | 8/8 | 1 | 45 m, 60°, V, A2 | |
| R28 | 4/3 | 16/15 | 1 | 25 | 50 m, 80°, VI, A4 |
| R29 | 14/13 | 10/9 | 1 | 14 | 50 m, 70°, VI, A2 |
| R30 | 10/10 | 15/14 | 1 | 18 | 45 m, 70°, VI, A2 |
| R31 | 16/15 | 13/12 | 1 | 17 | 45 m, 70°, VI, A2 |
| R32 | 24/23 | 9/9 | 1 | 12 | 45 m, 95°, VI, A3 |
| R33 | 26/24 | 14/14 | 1 | 5 | 45 m, 85°, VI, A2 |
| R34 | 12/7 | 6/2 | 1 | 10 | 50 m, 60°, V+, A1 |
| R35 | 16 | 5 | 1 | 50 m, 60°, V | |
| R36 | 5 | 40 m, 20°, III | |||
| Total | 359/275 | 410/354 | 40 | 530 |
Night 1: R12, 11, 12, 13, 14 February. Night 2: R20, 15, 16, 17, 18 February. Night 3: R25, 19, 20, 21, 22, 23 February.
Route Description by Sections
R0–R1. Snow and ice slope with a bergschrund at the beginning. R1–R2. Rock slab with a 60° slope and small notches and cracks. Movement direction is from left to right. R2–R3. Move left on a ledge for 5 m, then up an internal corner that leads to a wall. Ascend the wall using profiled skyhooks for 25 m. Station on a snow ledge. R3–R4. Traverse left on the ledge for 10 m, then up an internal corner. R4–R5. Continue up the internal corner. R5–R6. Slab with a good crack for chocks. R6–R7. Continue up the crack to a ledge, followed by a 35 m wall with good protection points in small cracks. R7–R8. Internal corner with decent terrain; left of the corner, there are overhanging cornices. After the corner, a wall is ascended using profiled skyhooks, ending in a 1 m cornice. Move right under the cornice into an internal corner with a crack. R8–R9. Internal corner for 20 m, leading to a snow ledge. Traverse left on the ledge for 10 m to another internal corner with a crack. R9–R10. Internal corner for 25 m; the first 10 m are icy. After the corner, a slab with a deep crack. R10–R11. Continue up the deep crack to a sickle-shaped feature, then 10 m along it. Followed by a slab with several vertical cracks. R11–R12. Internal corner for 10 m, followed by a system of vertical narrow cracks in a monolithic slab. R12–R13. Wall with poor, deep cracks, about 20 m. Then, a large corner starts, with big cornices hanging on the left. Caution! There are "living" flakes in the corner. R13–R14. Ascend the corner for 20 m, then the corner overhangs and goes from left to right. Move under the overhang along the wall from left to right. R14–R15. Steep wall with poor terrain; many profiled skyhooks were used. R15–R16. "Ram's foreheads," some areas are iced. R16–R17. Snow with ice, then a steep wall, followed by more ice until reaching the rock where a "spit" is anchored at the station. R17–R18. Wall with a deep crack for fiffies and anchor pitons. R18–R19. Continue up the deep crack for 10 m, then a wall without terrain, ascended using skyhooks. Followed by a good crack from left to right. R19–R20. Beginning of the key sections of the route. Very poor terrain; a bolt was placed in the middle of the pitch for safety. R20–R21. Station in an internal corner that leads to a wall under skyhooks after 5 m. Station under a small cornice. R21–R22. After the cornice, continue up the wall using fiffies and skyhooks. R22–R23. Station on a small ledge before a steep 30 m wall (fiffies, skyhooks), followed by a ledge, then 15 m up cracks on fiffies to a small ledge. R24–R25. Crack under fiffies for 15 m to a ledge, then right 3 m and up an internal corner 10 m to an inclined snowfield under the "nose." Camp 3 was established here on the right side. R25–R26. Join Popov's route. Internal corner with rich terrain. R26–R27. Continue up the corner for 40 m, then a cornice is bypassed on the left, and the corner continues. Warning: many loose rocks in the corner! R27–R28. 20 m up the 60° corner to a ledge, then a 15 m wall, followed by another corner filled with ice. R28–R29. Slab with a crack for 30 m, a ledge, then a crack under fiffies and anchors. R29–R30. Approach under the left part of the cornice, then right 10 m under the cornice, and exit onto a gentle (50°) wall. R30–R31. Internal corner with ice. R31–R32. Wall for 15 m, 50°, then an internal corner partially filled with ice, followed by a 20 m, 80° wall. R32–R33. Right 5 m along the corner, then 6 m along the wall under a cornice with a 5 m overhang. Followed by a 20 m wall. R33–R34. Internal corner. R34–R35. Exit onto the "roof." System of internal corners with walls. Challenging free climbing. R35–R36. Internal corner leading to a couloir filled with ice after 25 m, which exits onto the ridge. R36–R37. Ascend the ridge to the summit.
Technical photo of the route.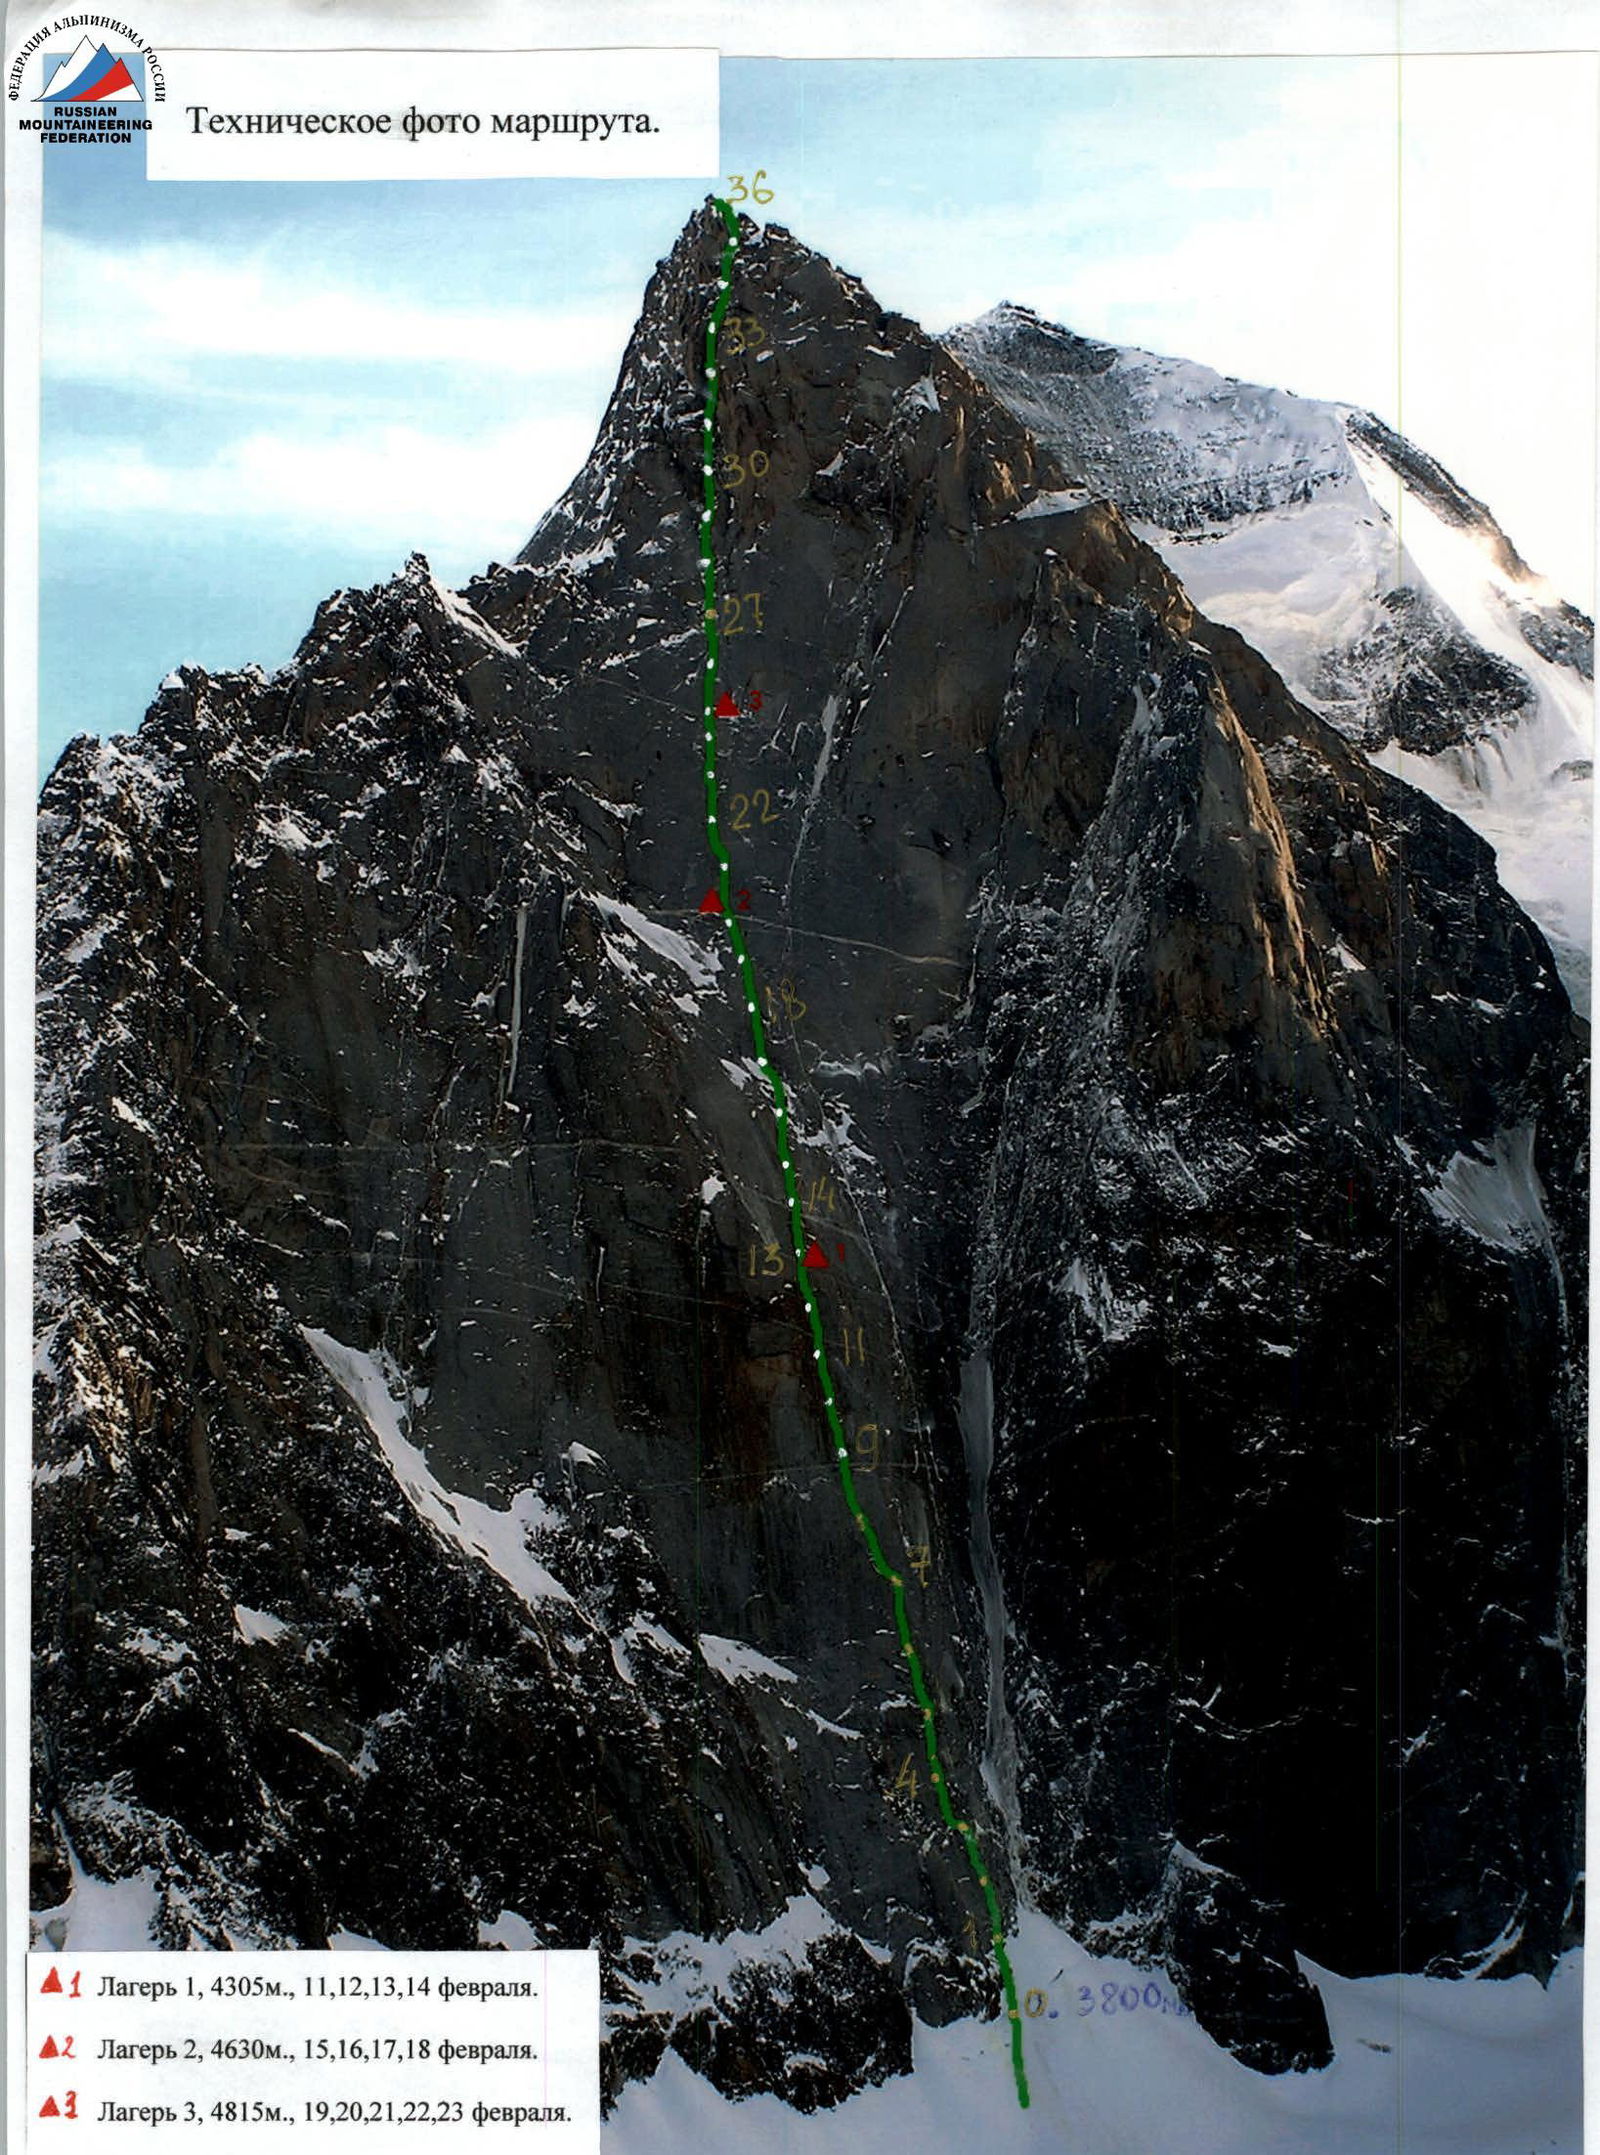
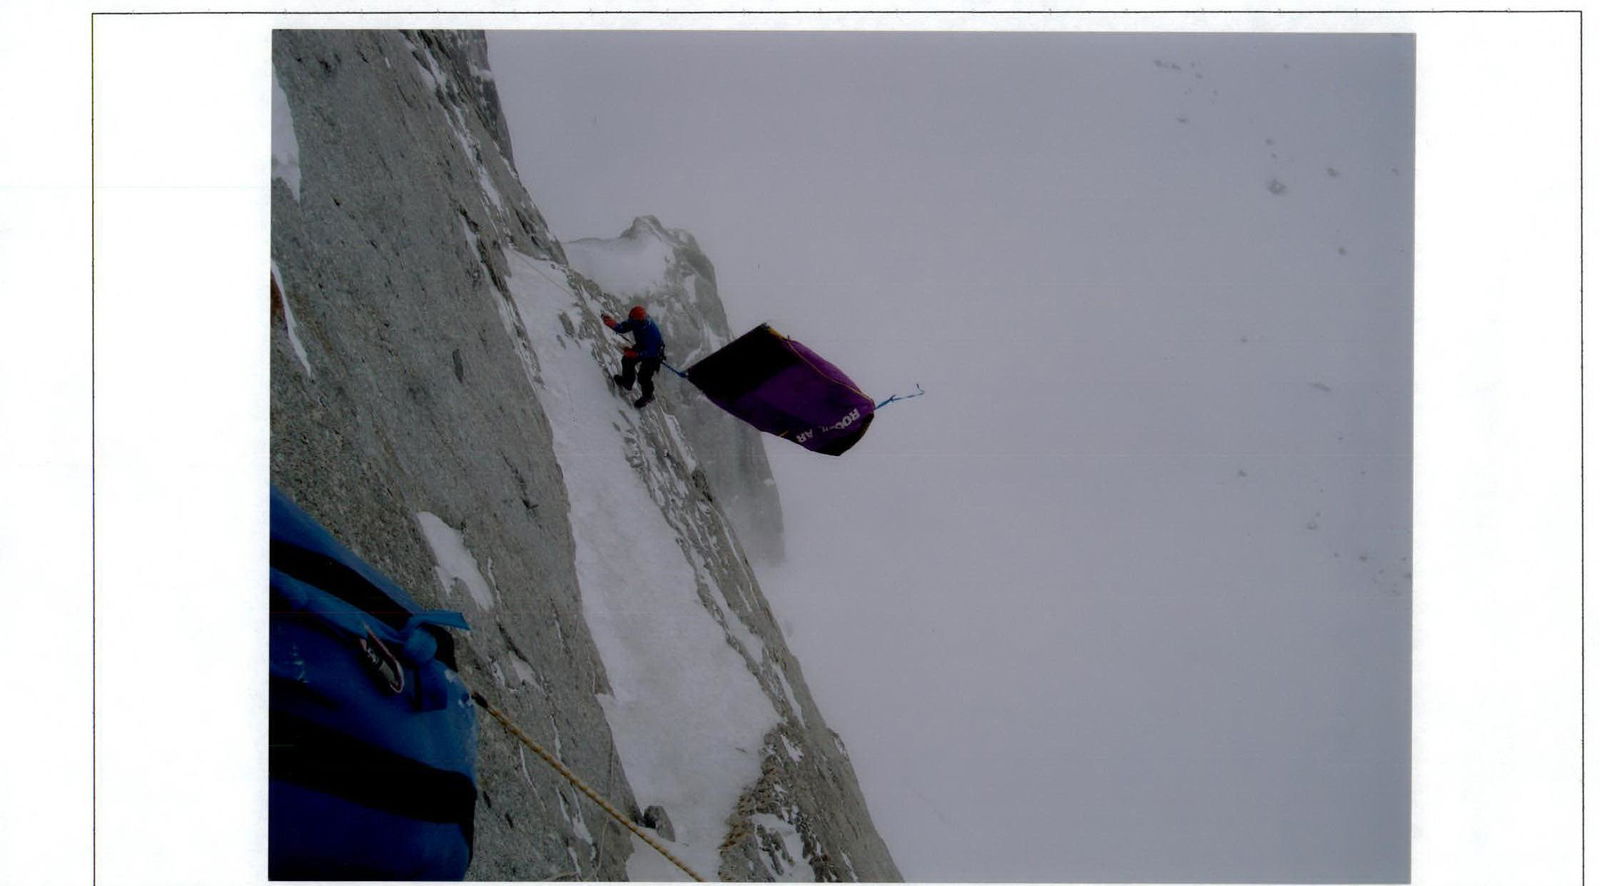
Section R3–R4, transporting the platform

Section R4–R5. Y. Dmitriyenko

Section R5–R6. Y. Dmitriyenko
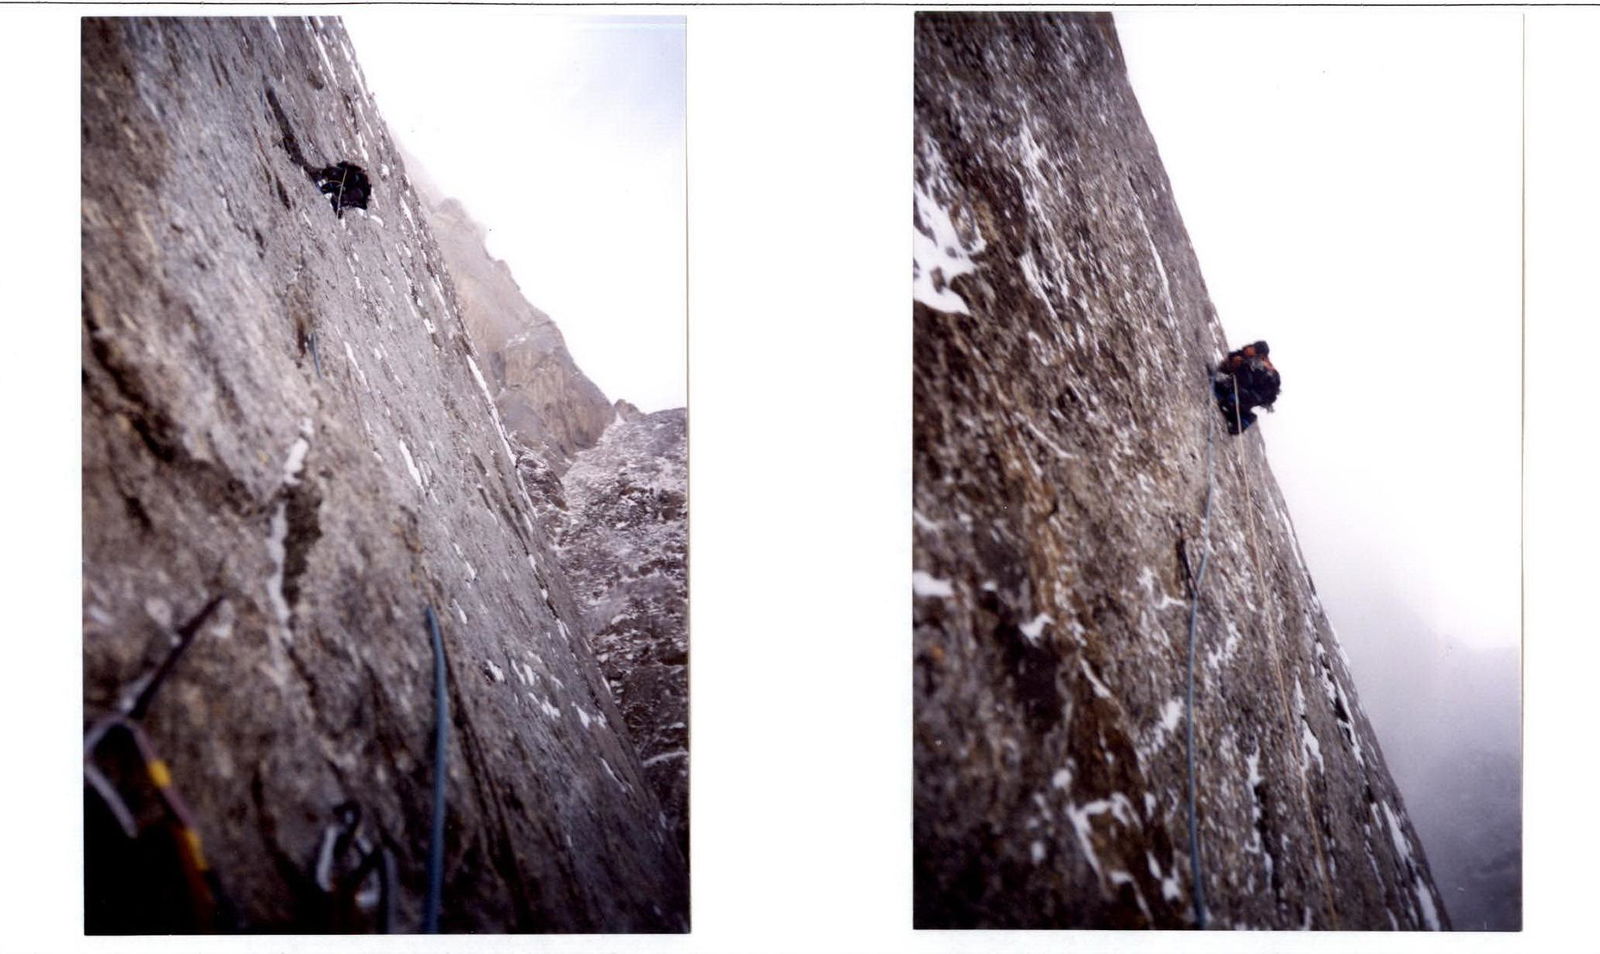
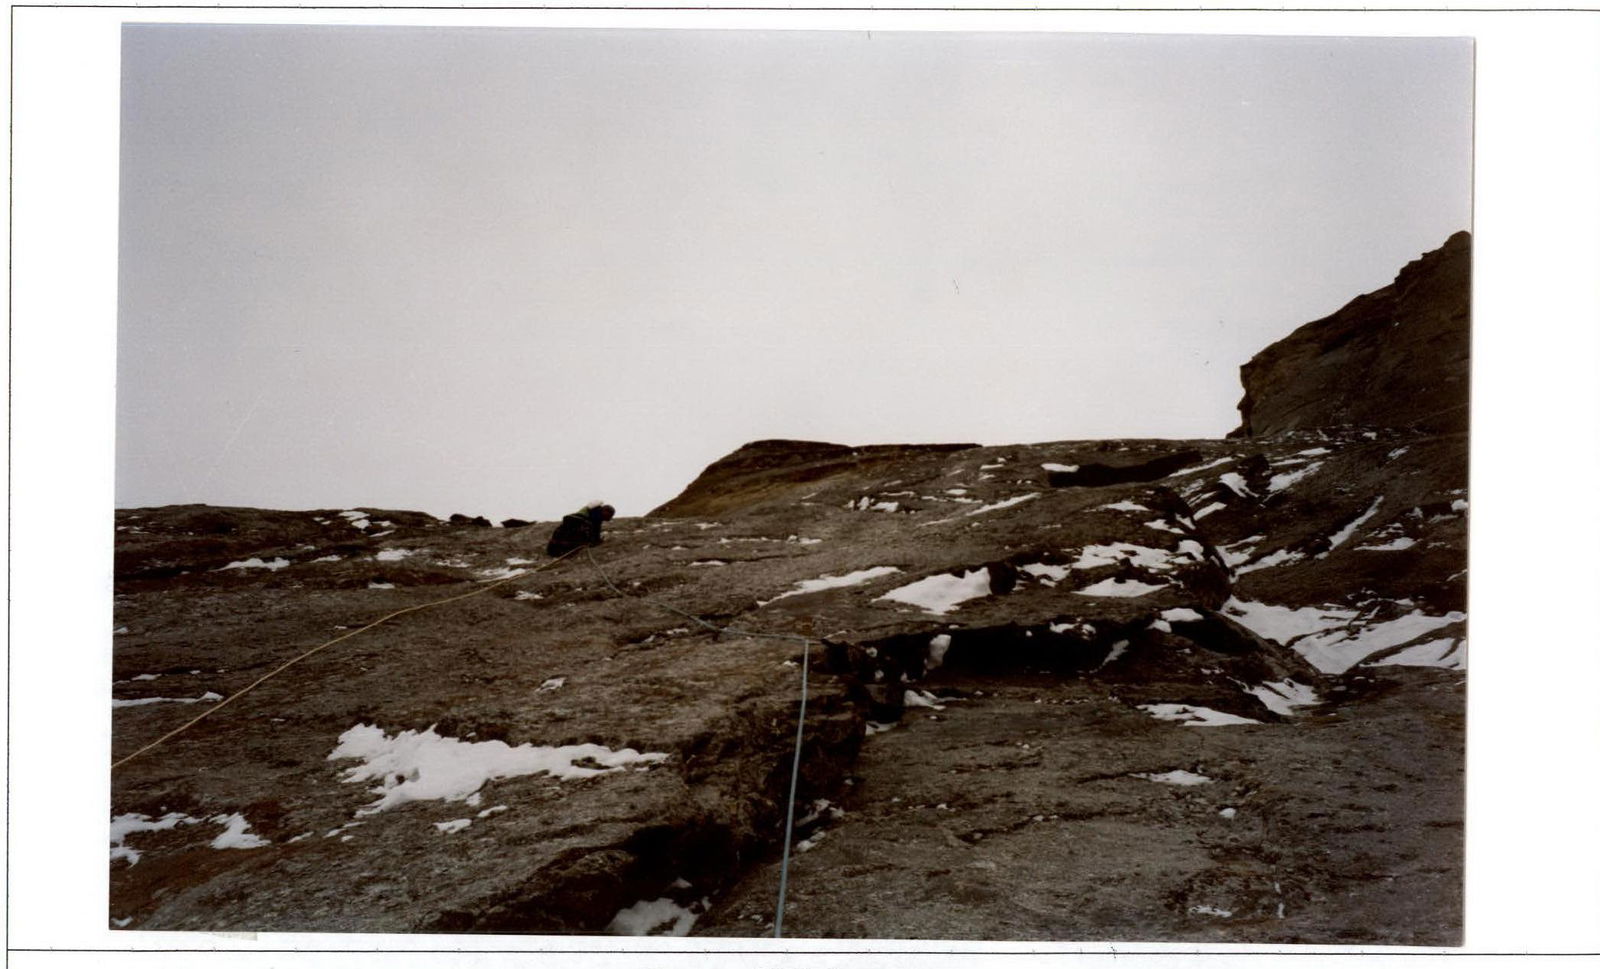
Section R9–R10 Section R10–R11
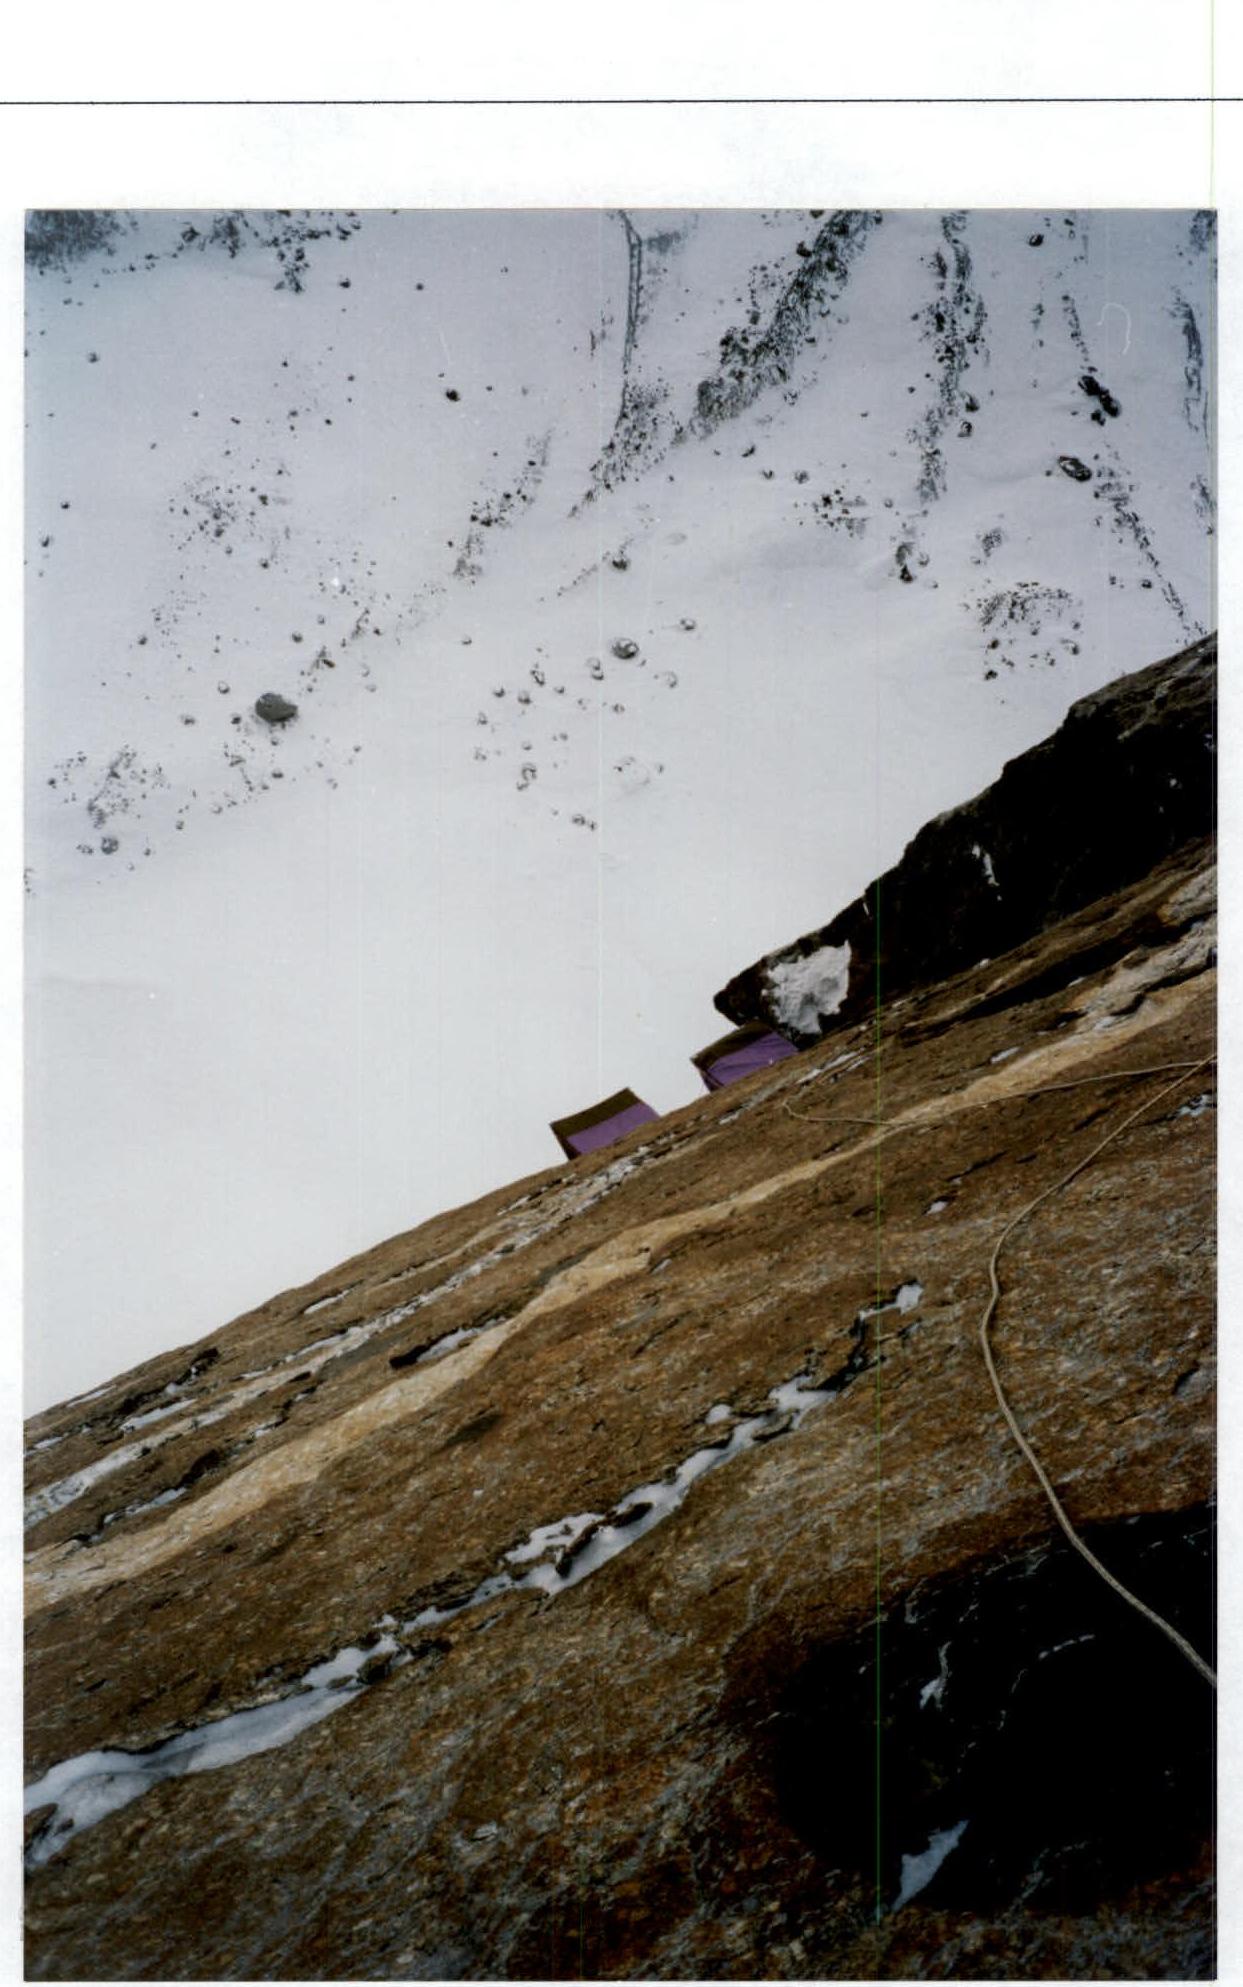
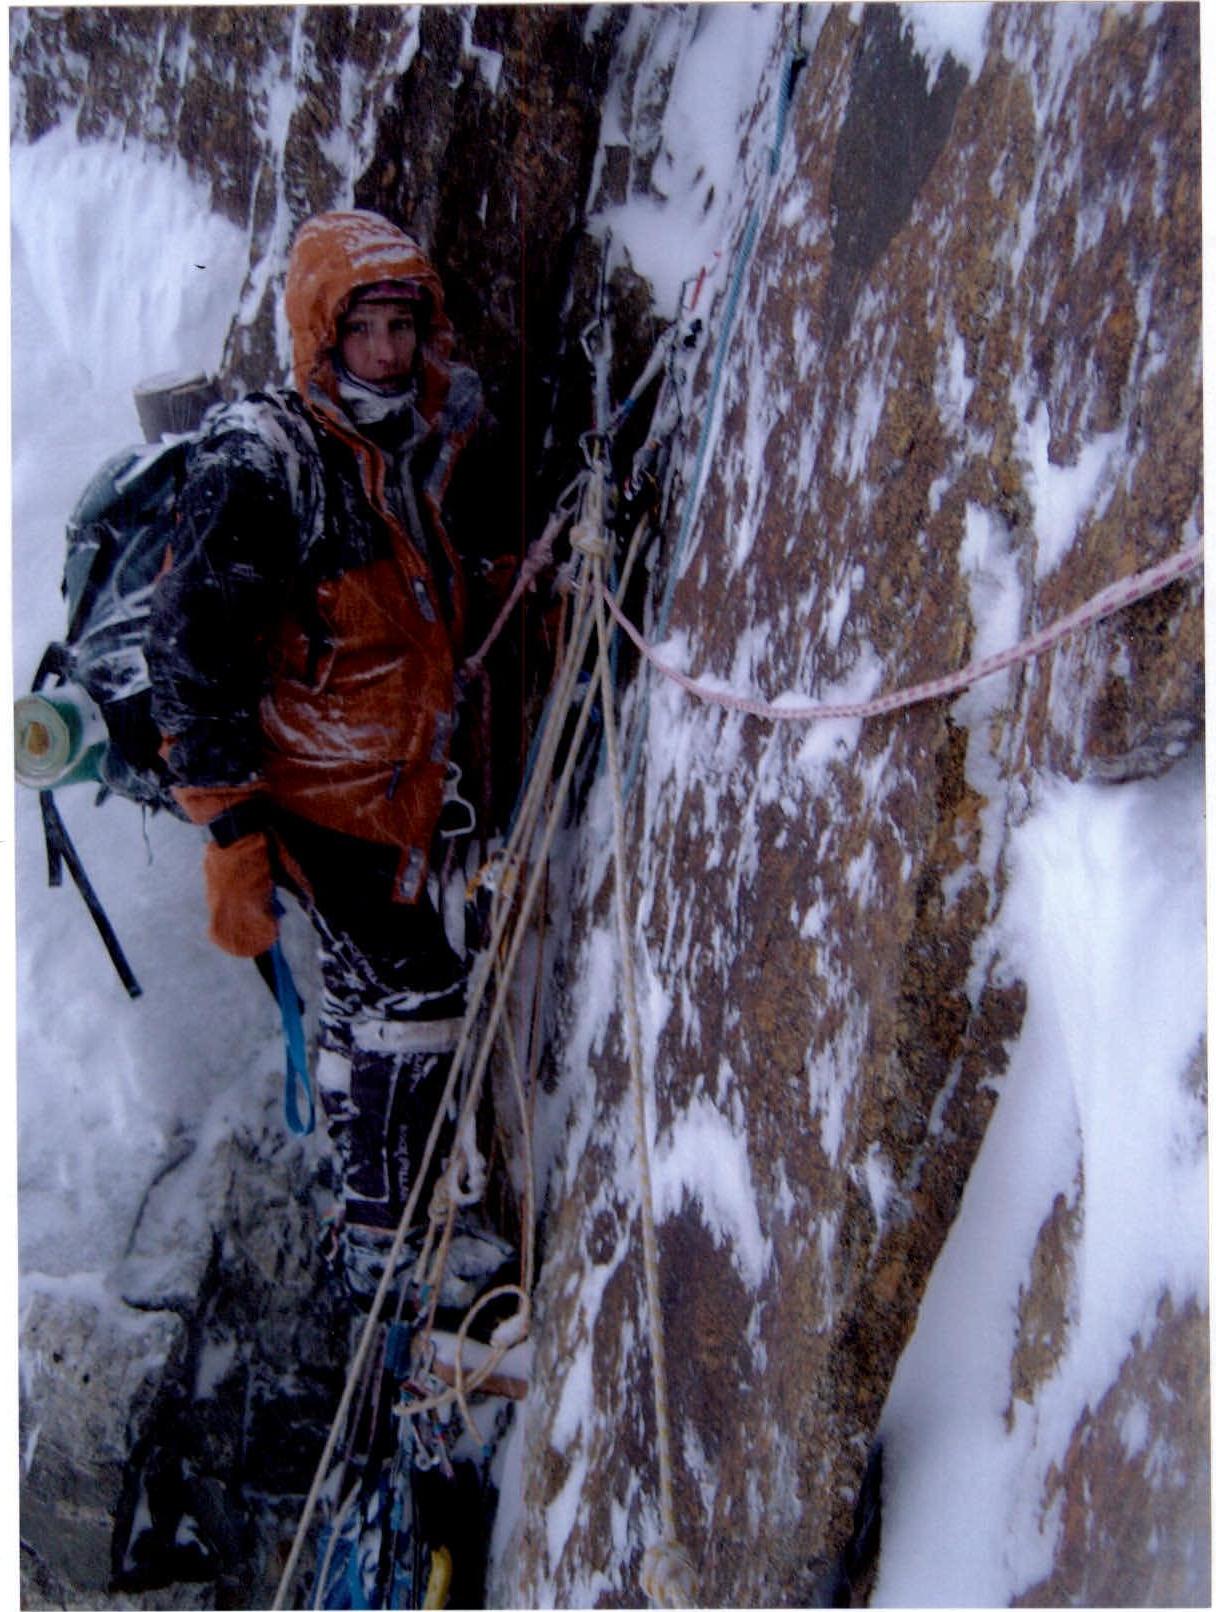
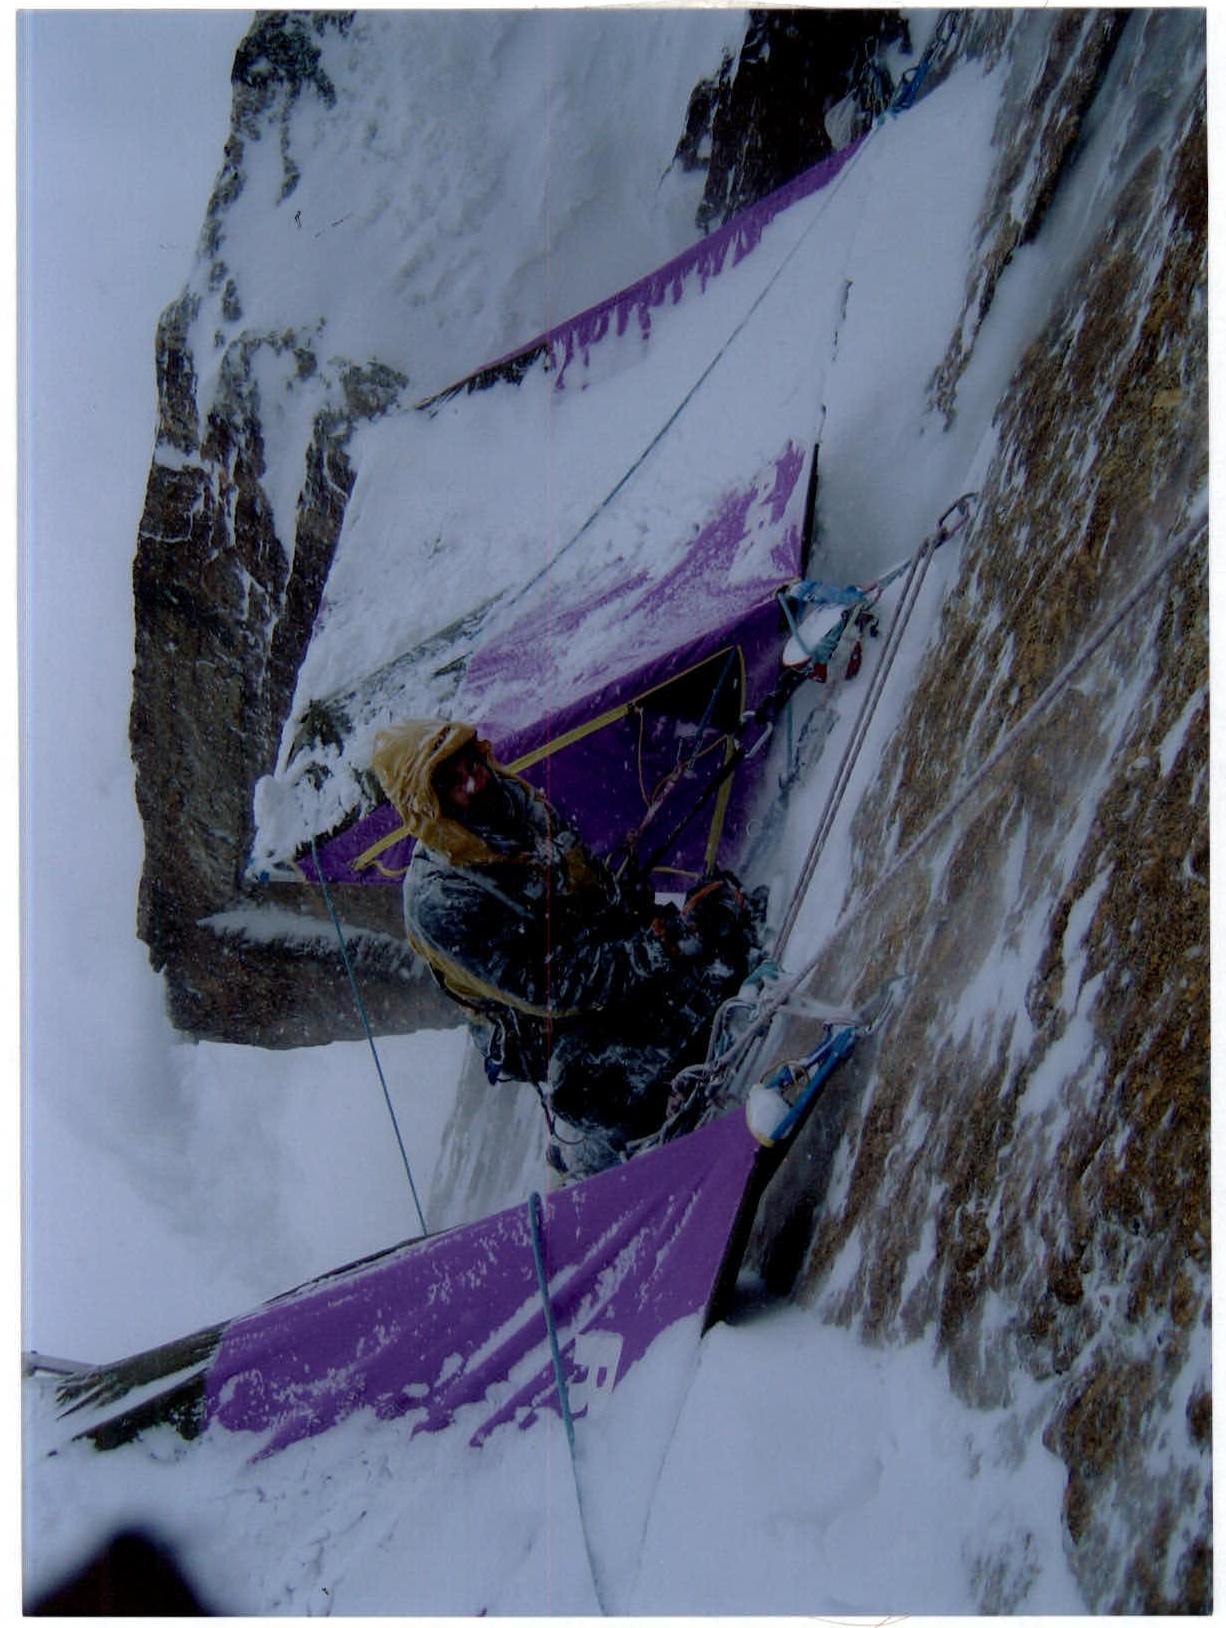
Camp 1, sections R12–R14
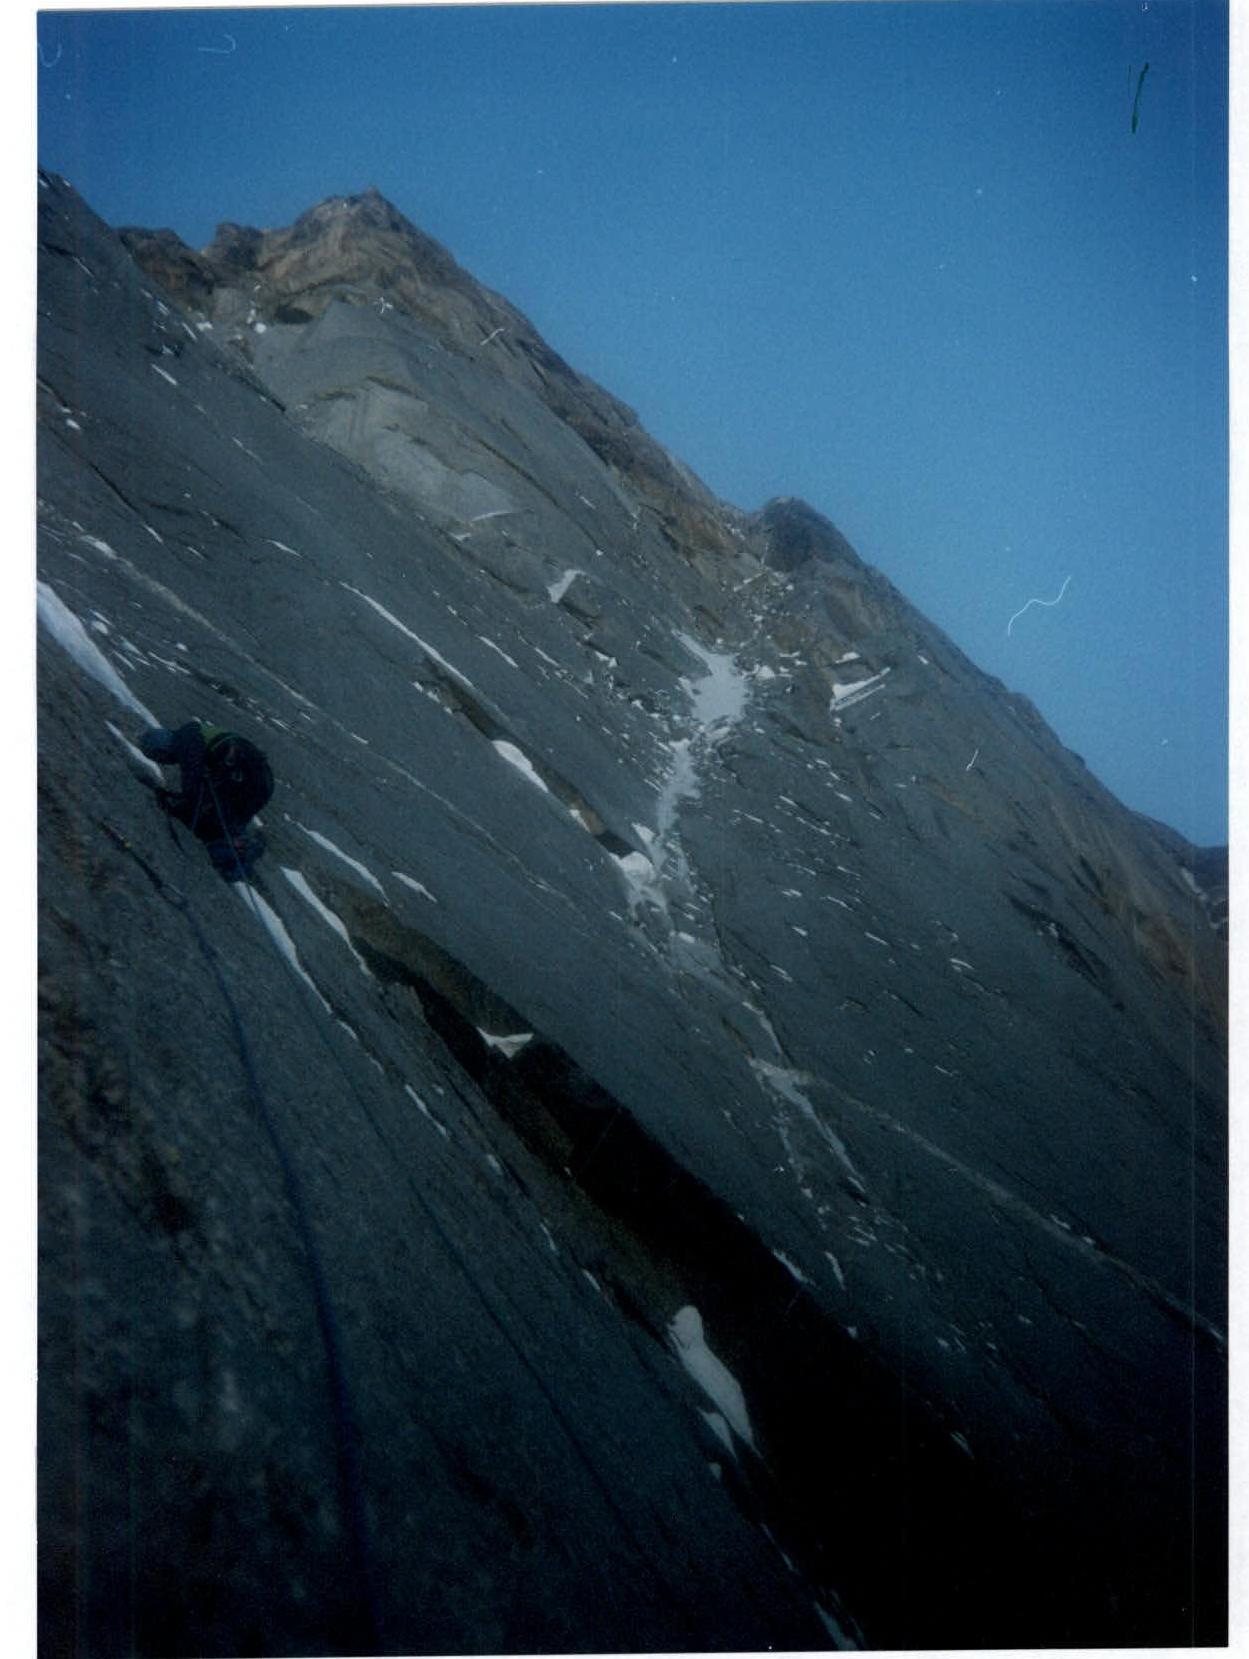
Section R18–R19. Y. Dmitriyenko. Visible: "Popov's Cross" "Chaplynsky's Corner"
Section R19–R20. P. Malygin. Start of the key section. Visible: a horizontal quartz inclusion "Cross".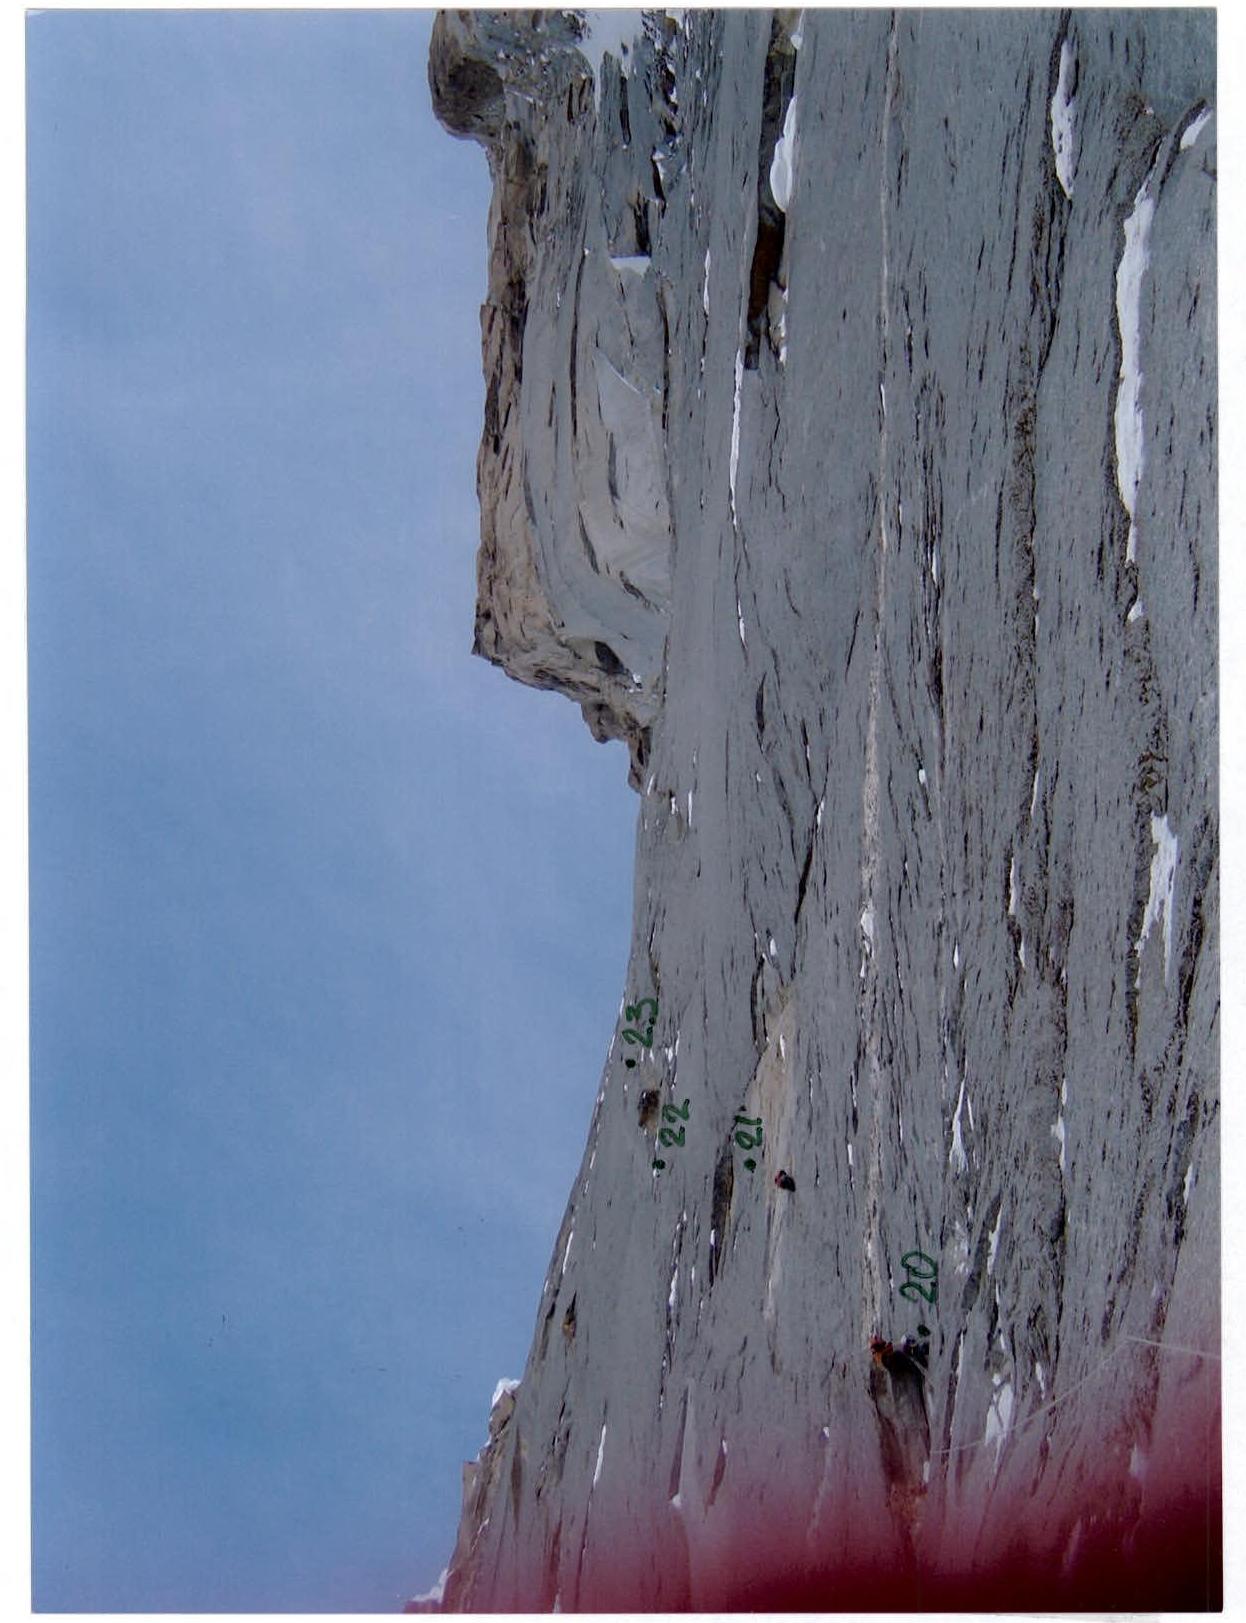
Section R20–R21. P. Malygin. Above "Cross" level.
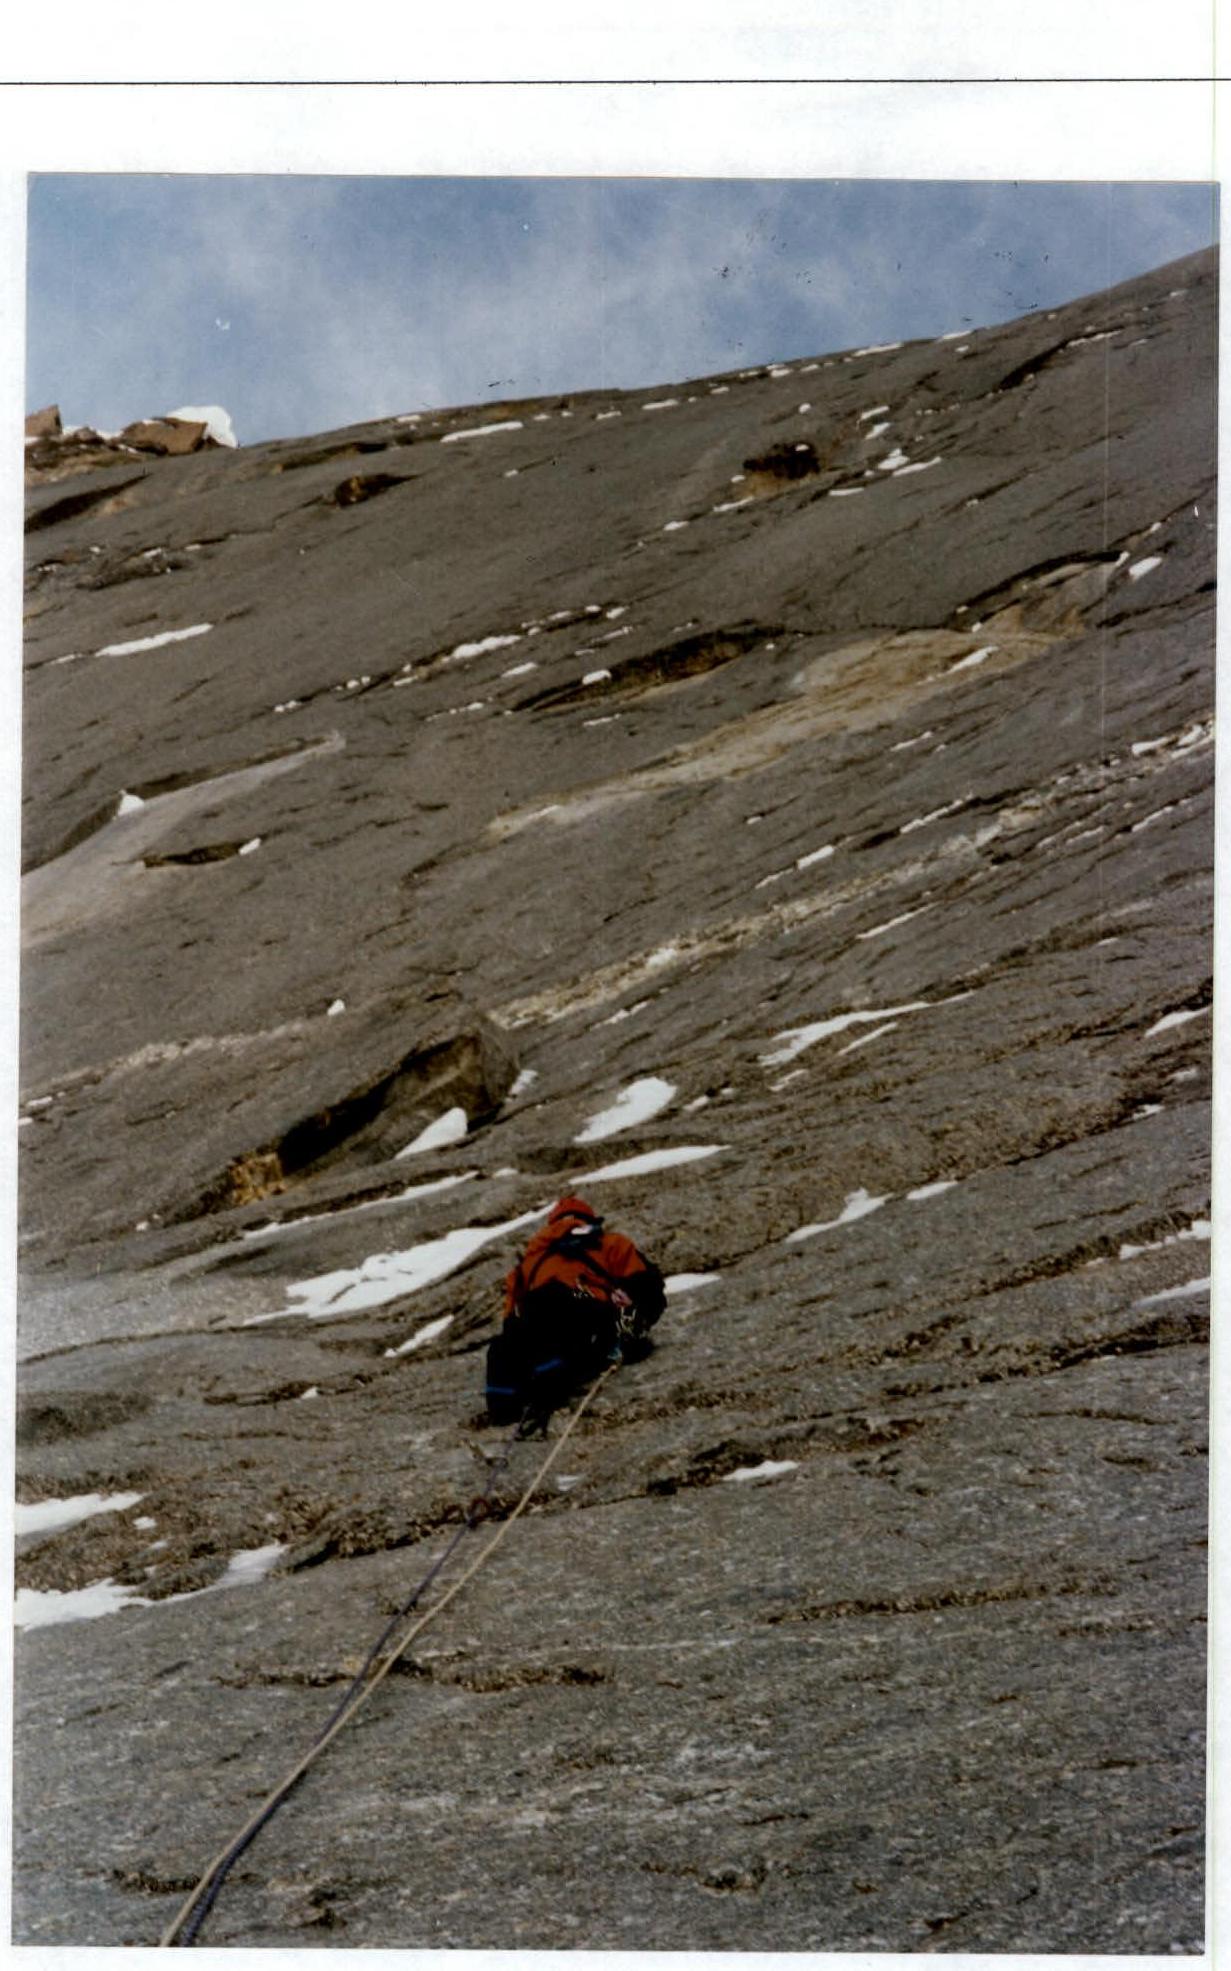
Section R22–R23. Y. Dmitriyenko.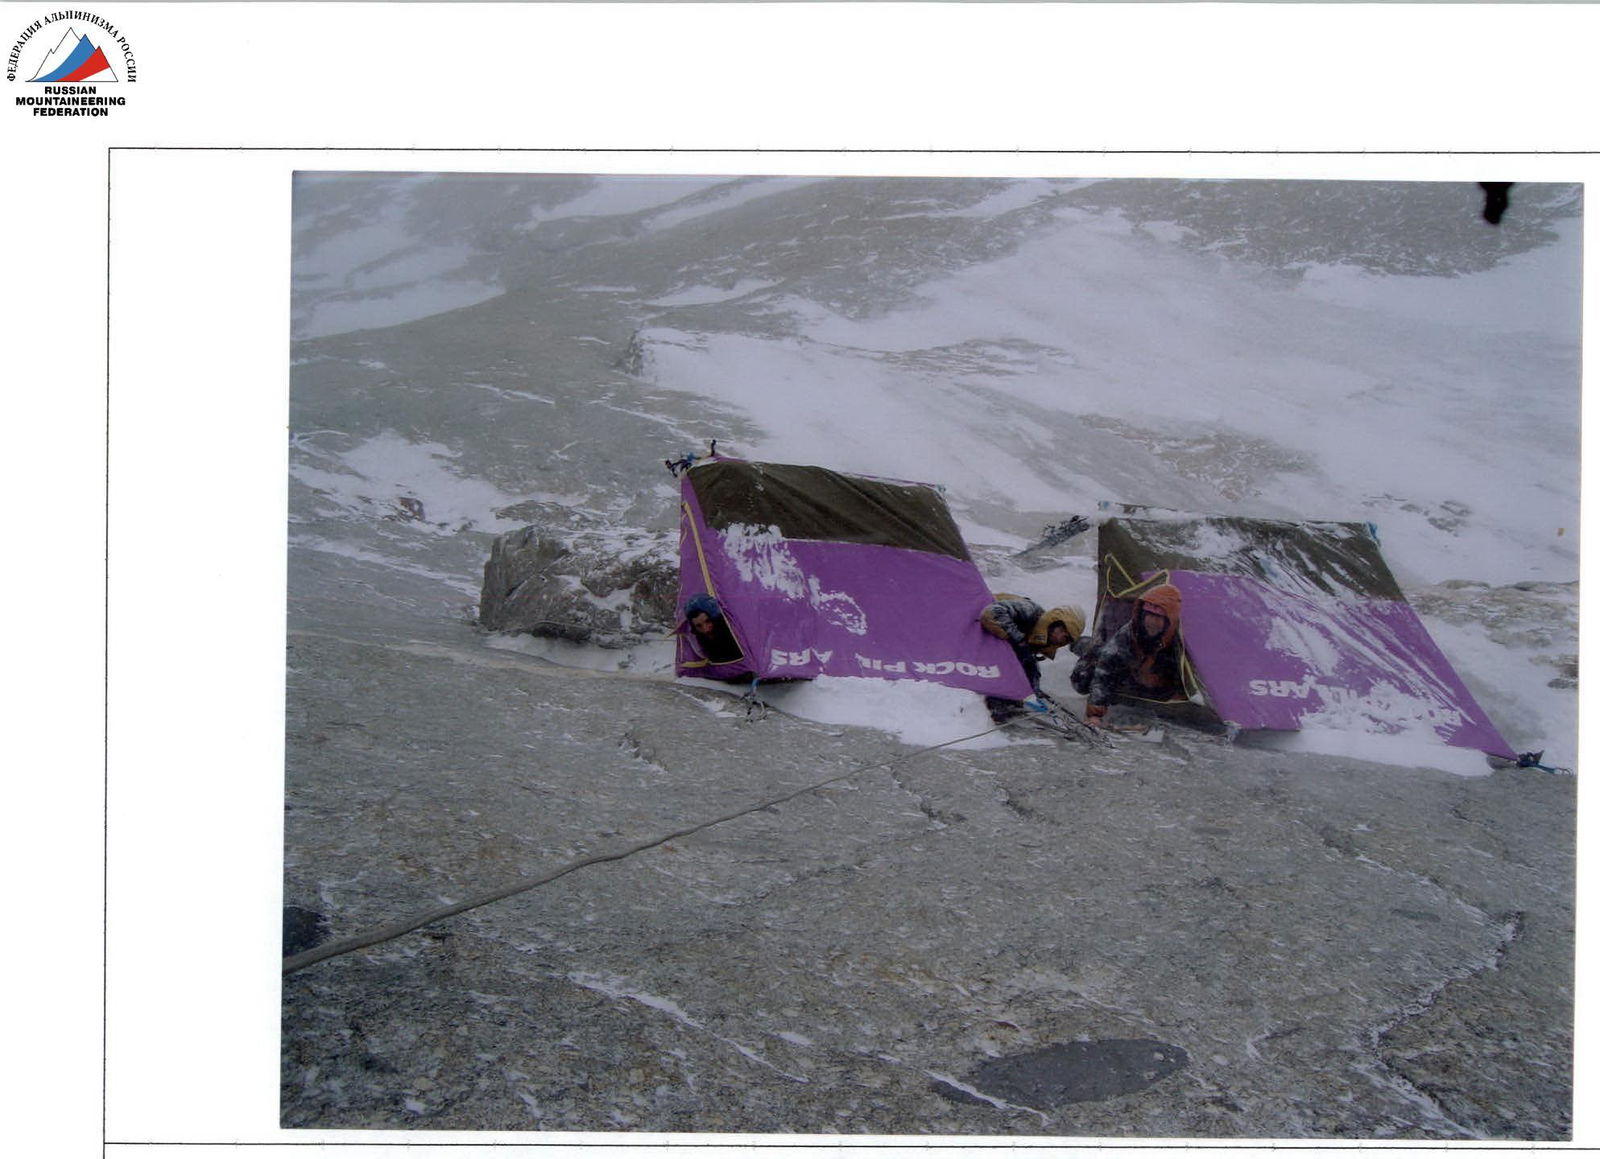
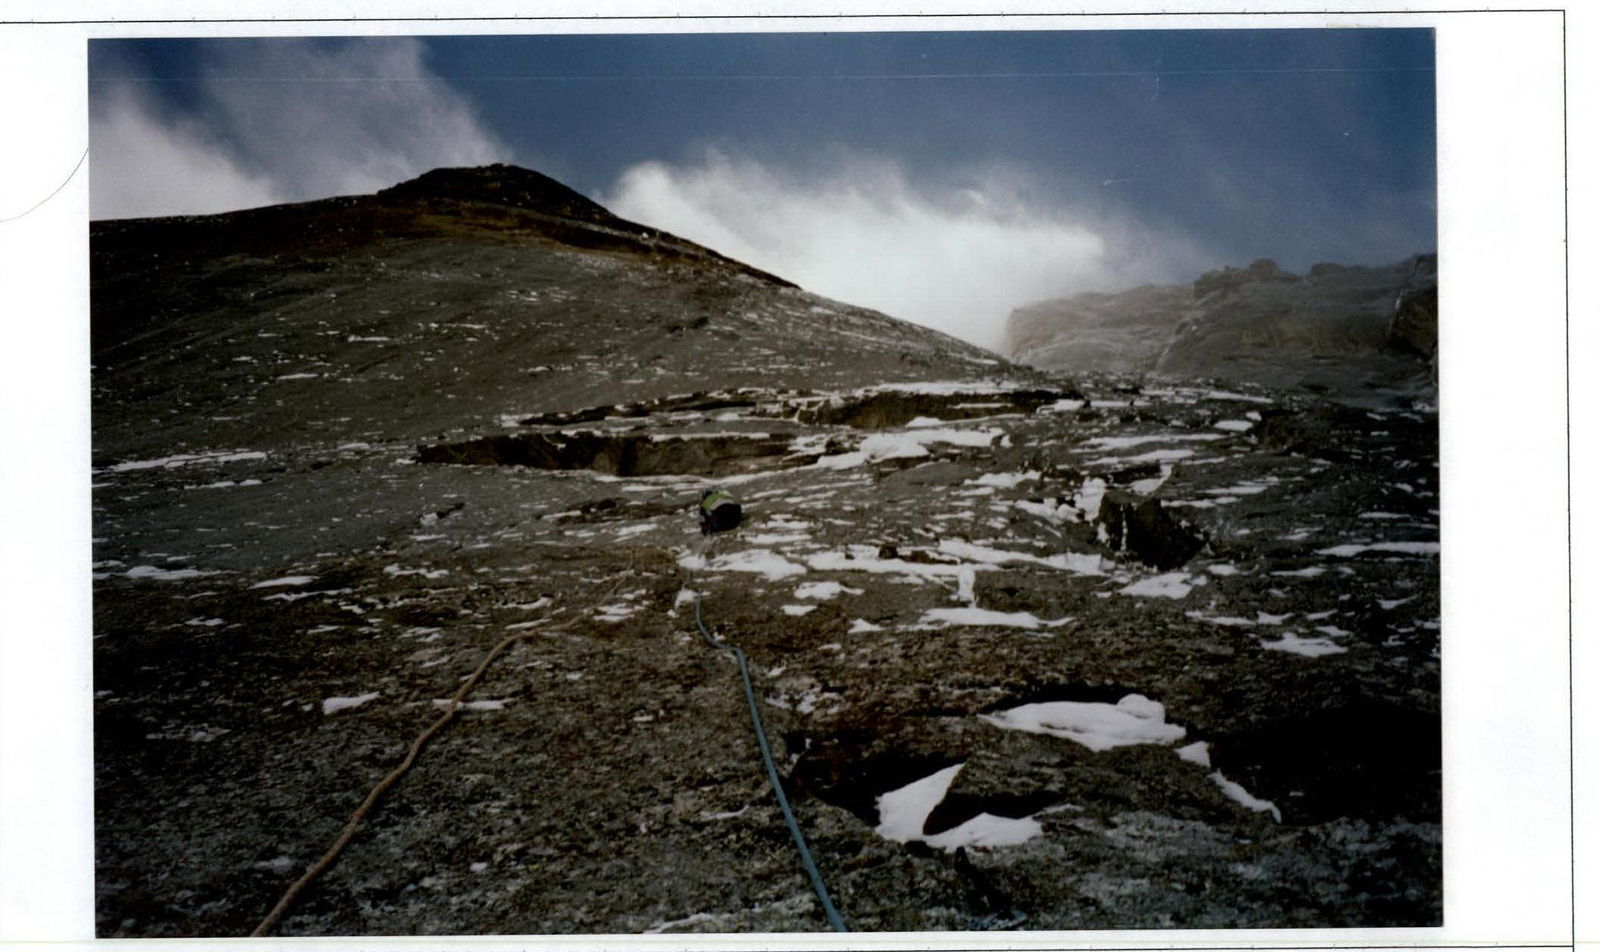
Camp 2, section R20.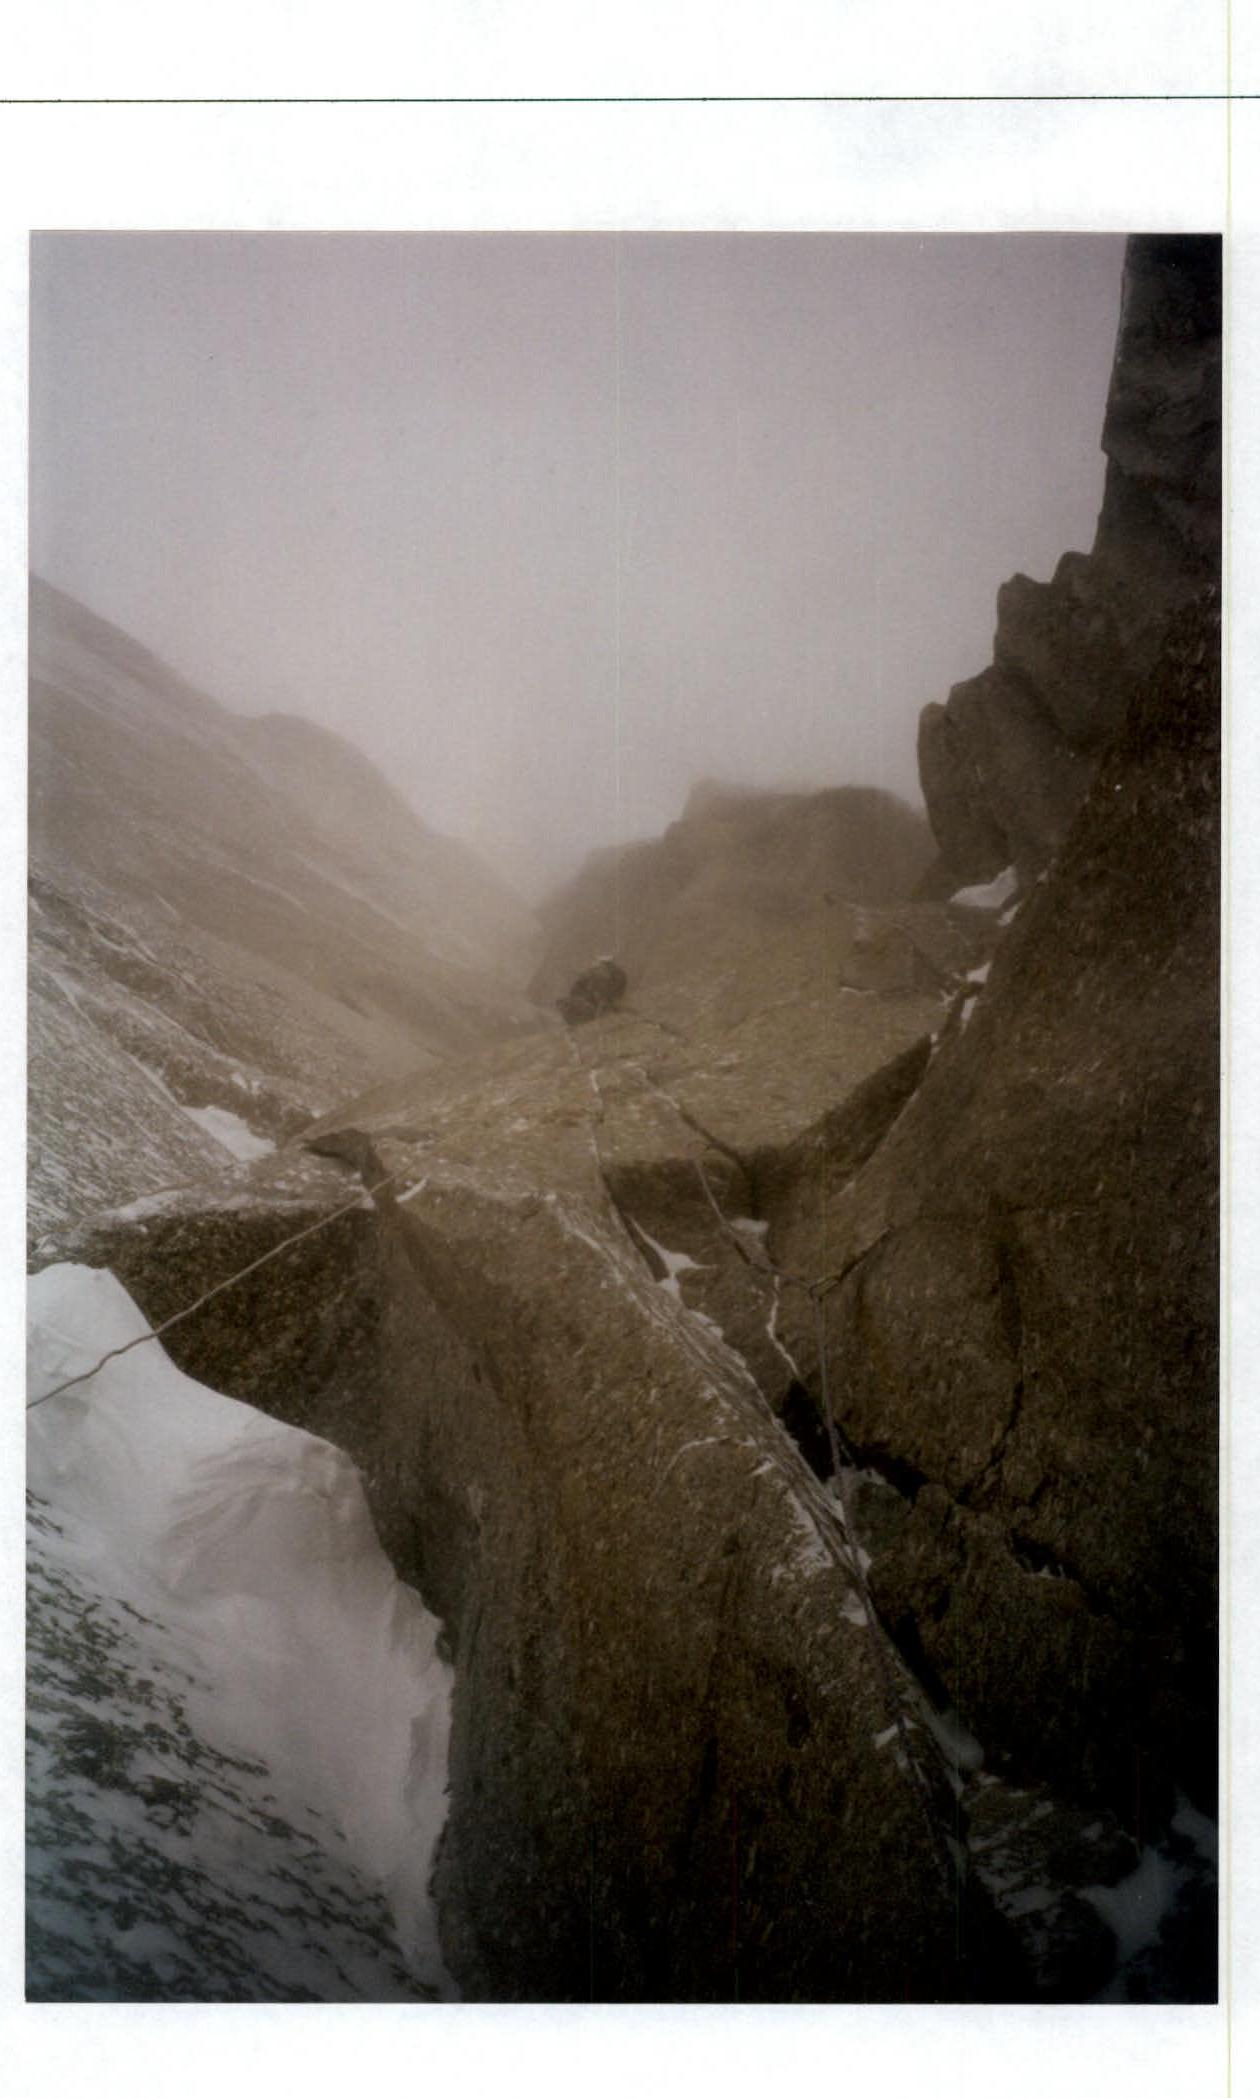
Section R27–R28. Follows Popov's route.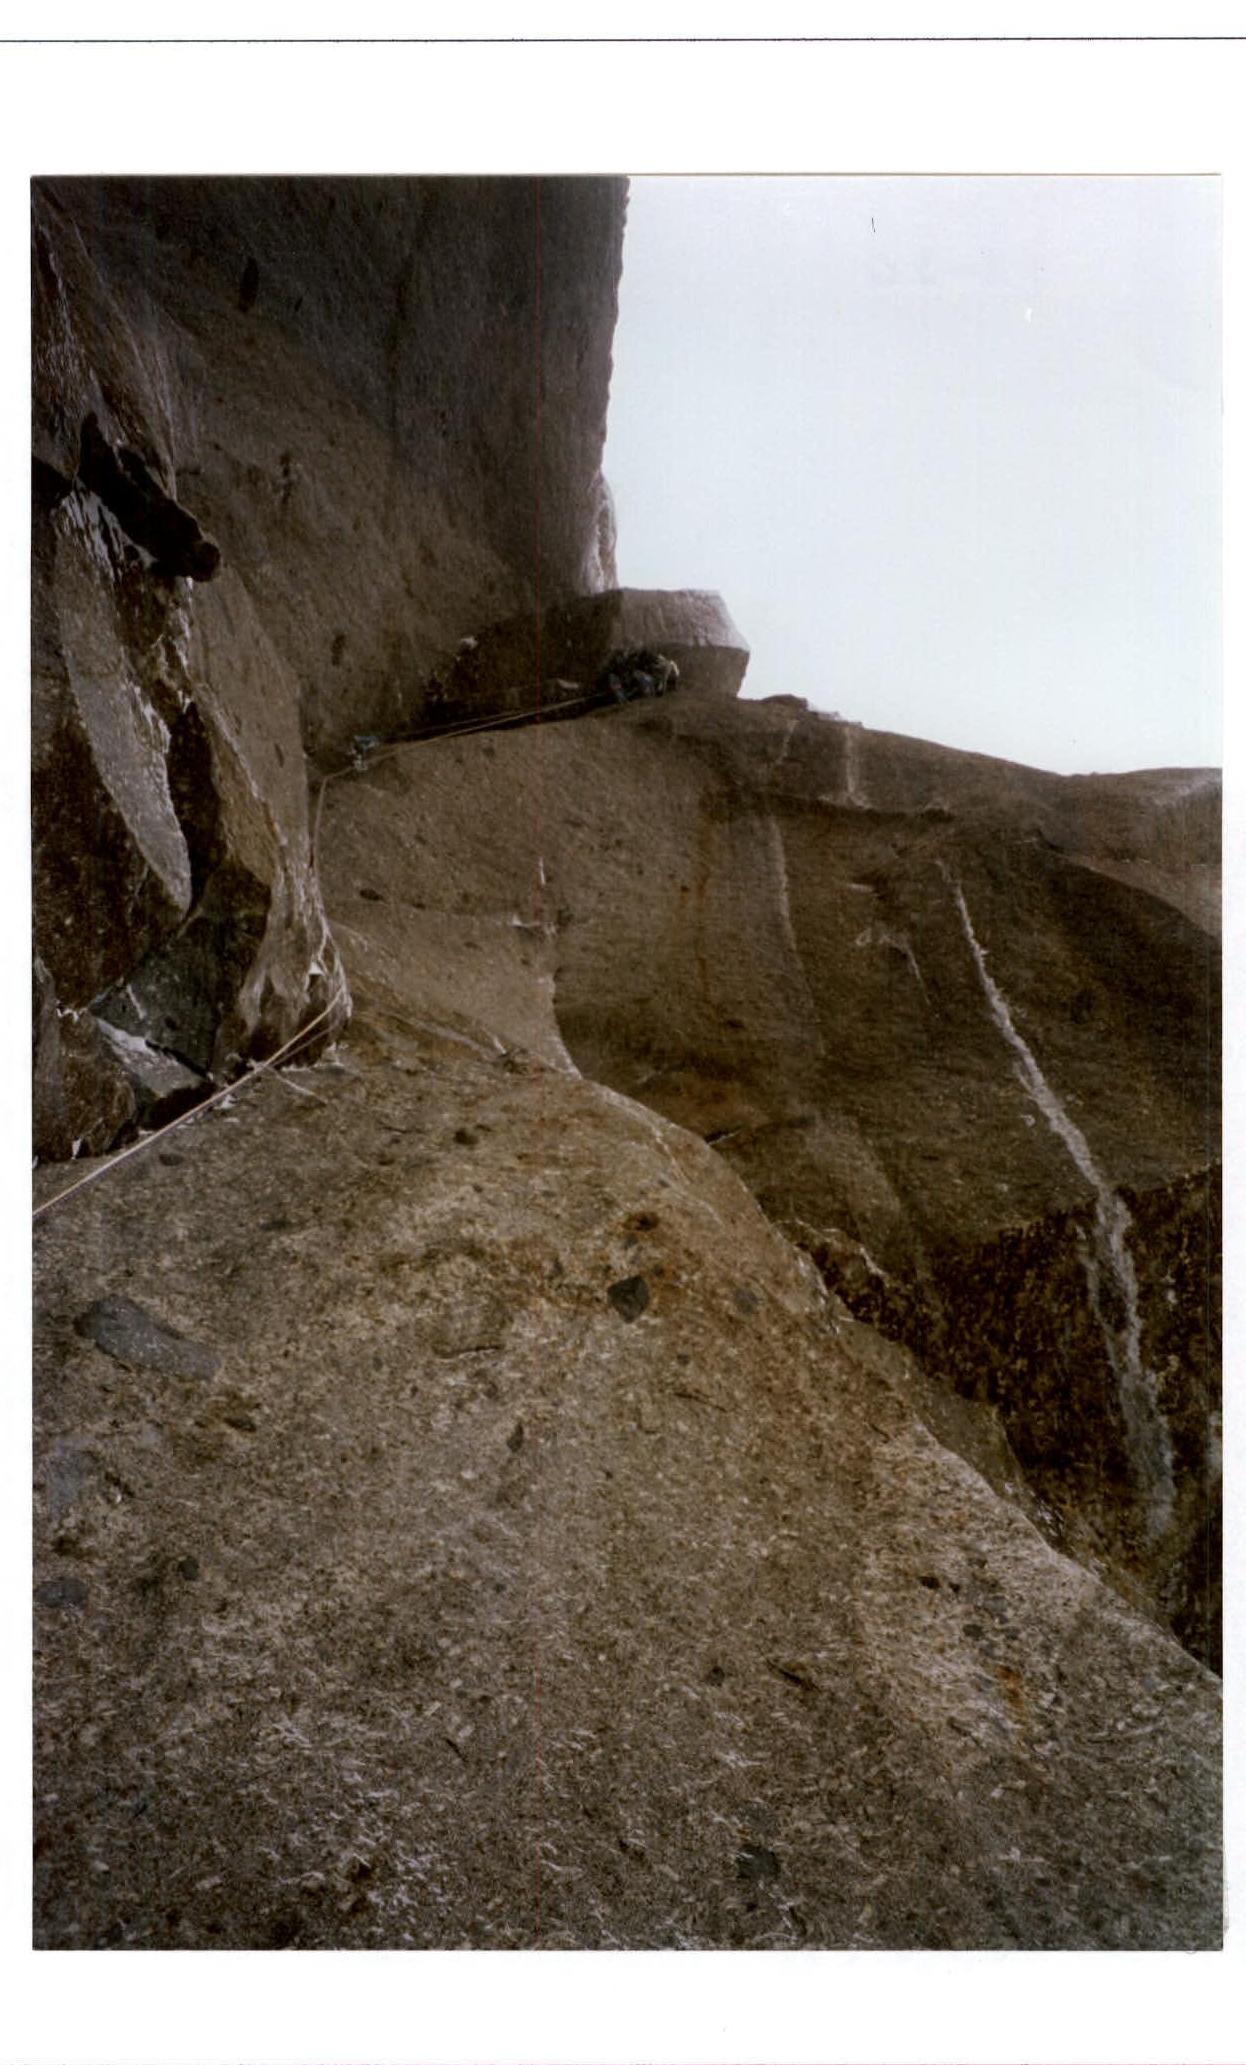
Section R29–R30. Cornice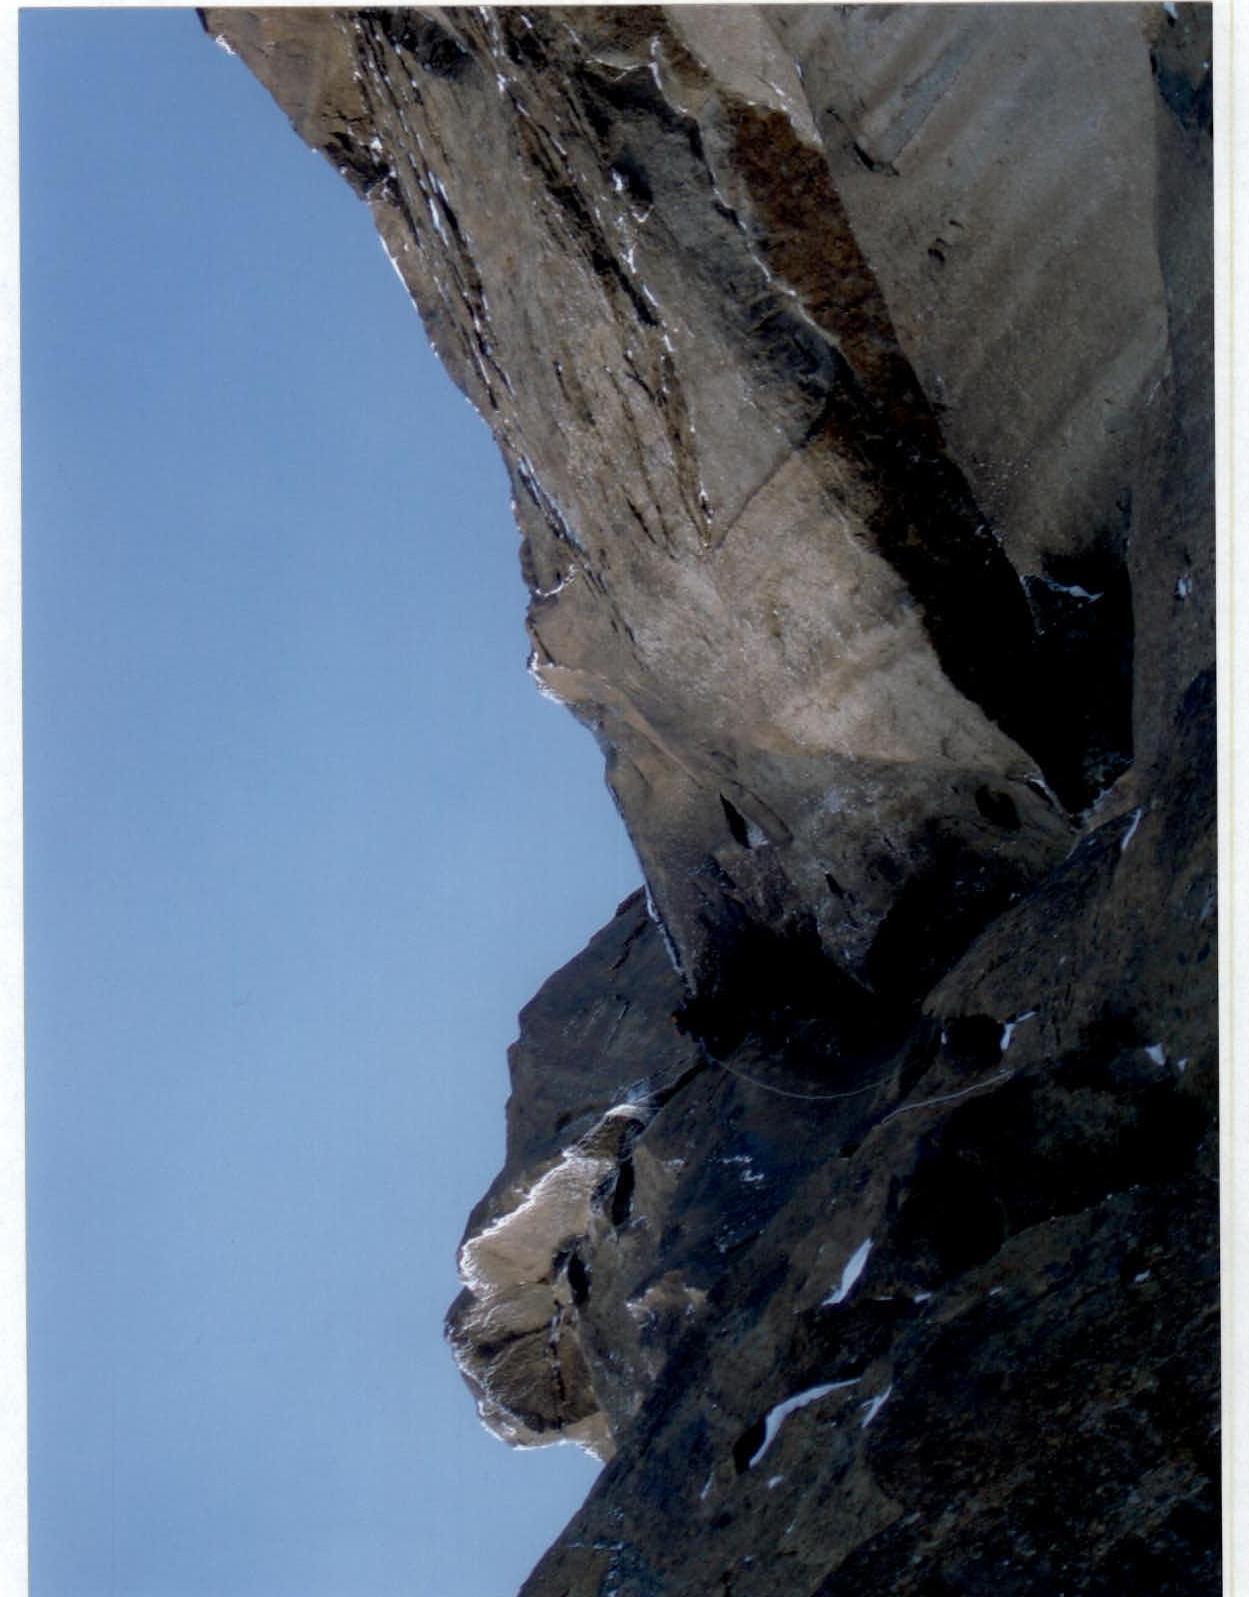
Section R32–R33. Y. Dmitriyenko, passing a large cornice.
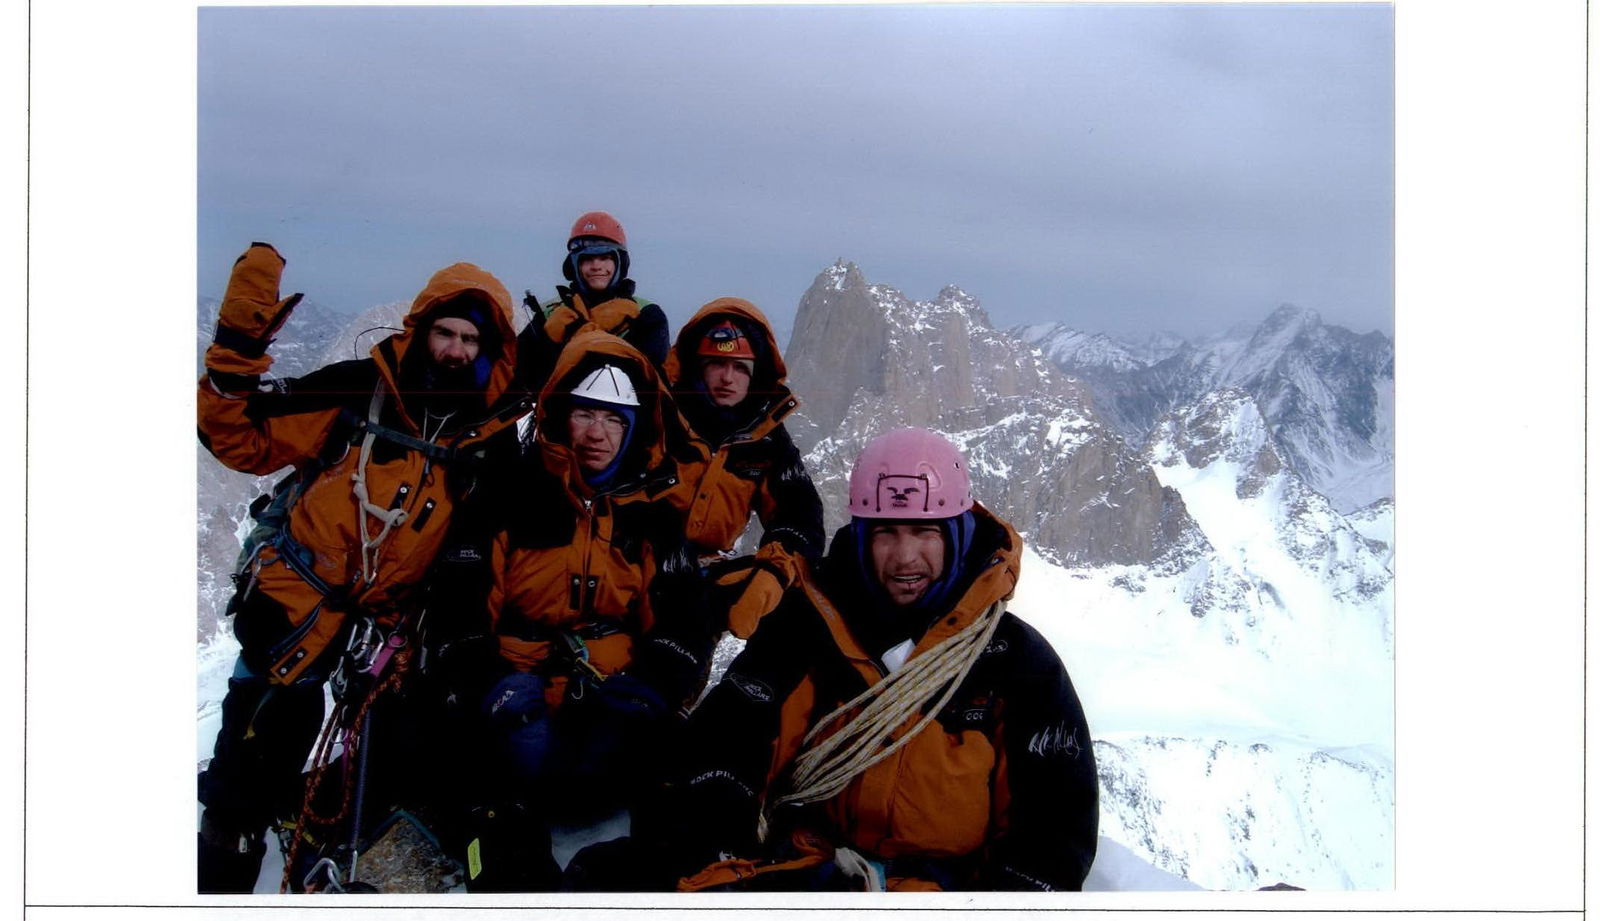
Team on the summit, with Peak Blokh in the background, photo by A. Pugovkin

 S. Cherezov
 A. Litvinov
Camp 1 after bad weather