XIX Open Russian Alpinism Championship, Winter Class of Mountaineering
Report
on the first ascent to the summit of Erydag via the North edge of the North-West wall by the team of Mountaineering Club "Mauntex", St. Petersburg
Sheet 1, page 2
General photo of the summit (February 13, 2001)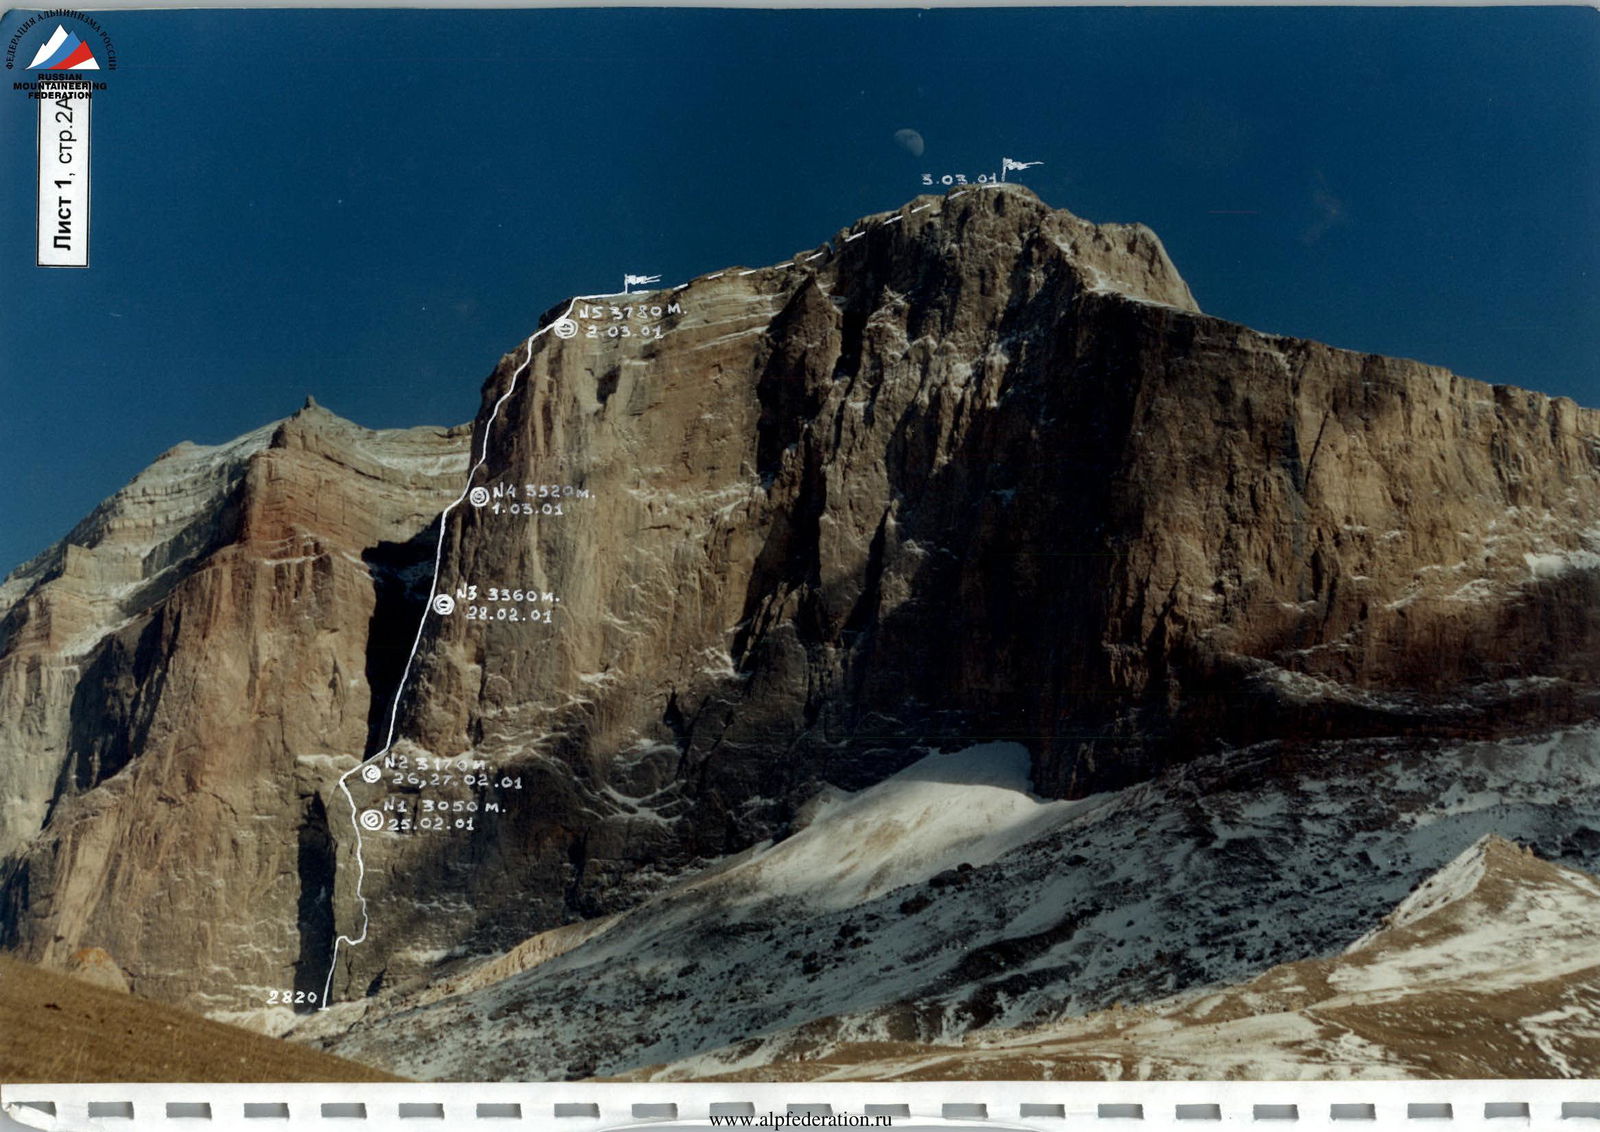
Hand-drawn route profile
Summit 3925 m M 1:5000
Bivouac 5 3780 m R34 — 10 m/85° R33 40 m/85° R32 40 m/85° R31 45 m/80° R30 40 m/80° R29 45 m/80° R28 25 m/75° R27 25 m/60° R26 Bivouac 4 50 m/75° 3520 m R25 40 m/70° R24 45 m/85° R23 50 m/85° R22 Bivouac 3 25 m/75° 3360 m R21 25 m/55° R20 40 m/65° R19 40 m/80° R18 45 m/70° R17 50 m/80° R16 Bivouac 2 40 m/90° 3170 m R15 15 m/75° R14 50 m/70° R13 — 10 m/70° R12 40 m/90° R11 Bivouac 1 40 m/75° 3050 m R10 50 m/80° R9 25 m/70° R8 25 m/85° R7 50 m/75° R6 45 m/75° R5 77° 35 m/70° R4 — 15 m/50° R3 35 m/90° R2 45 m/80° R1 40 m/70° R0 2820 m
Hand-drawn route profile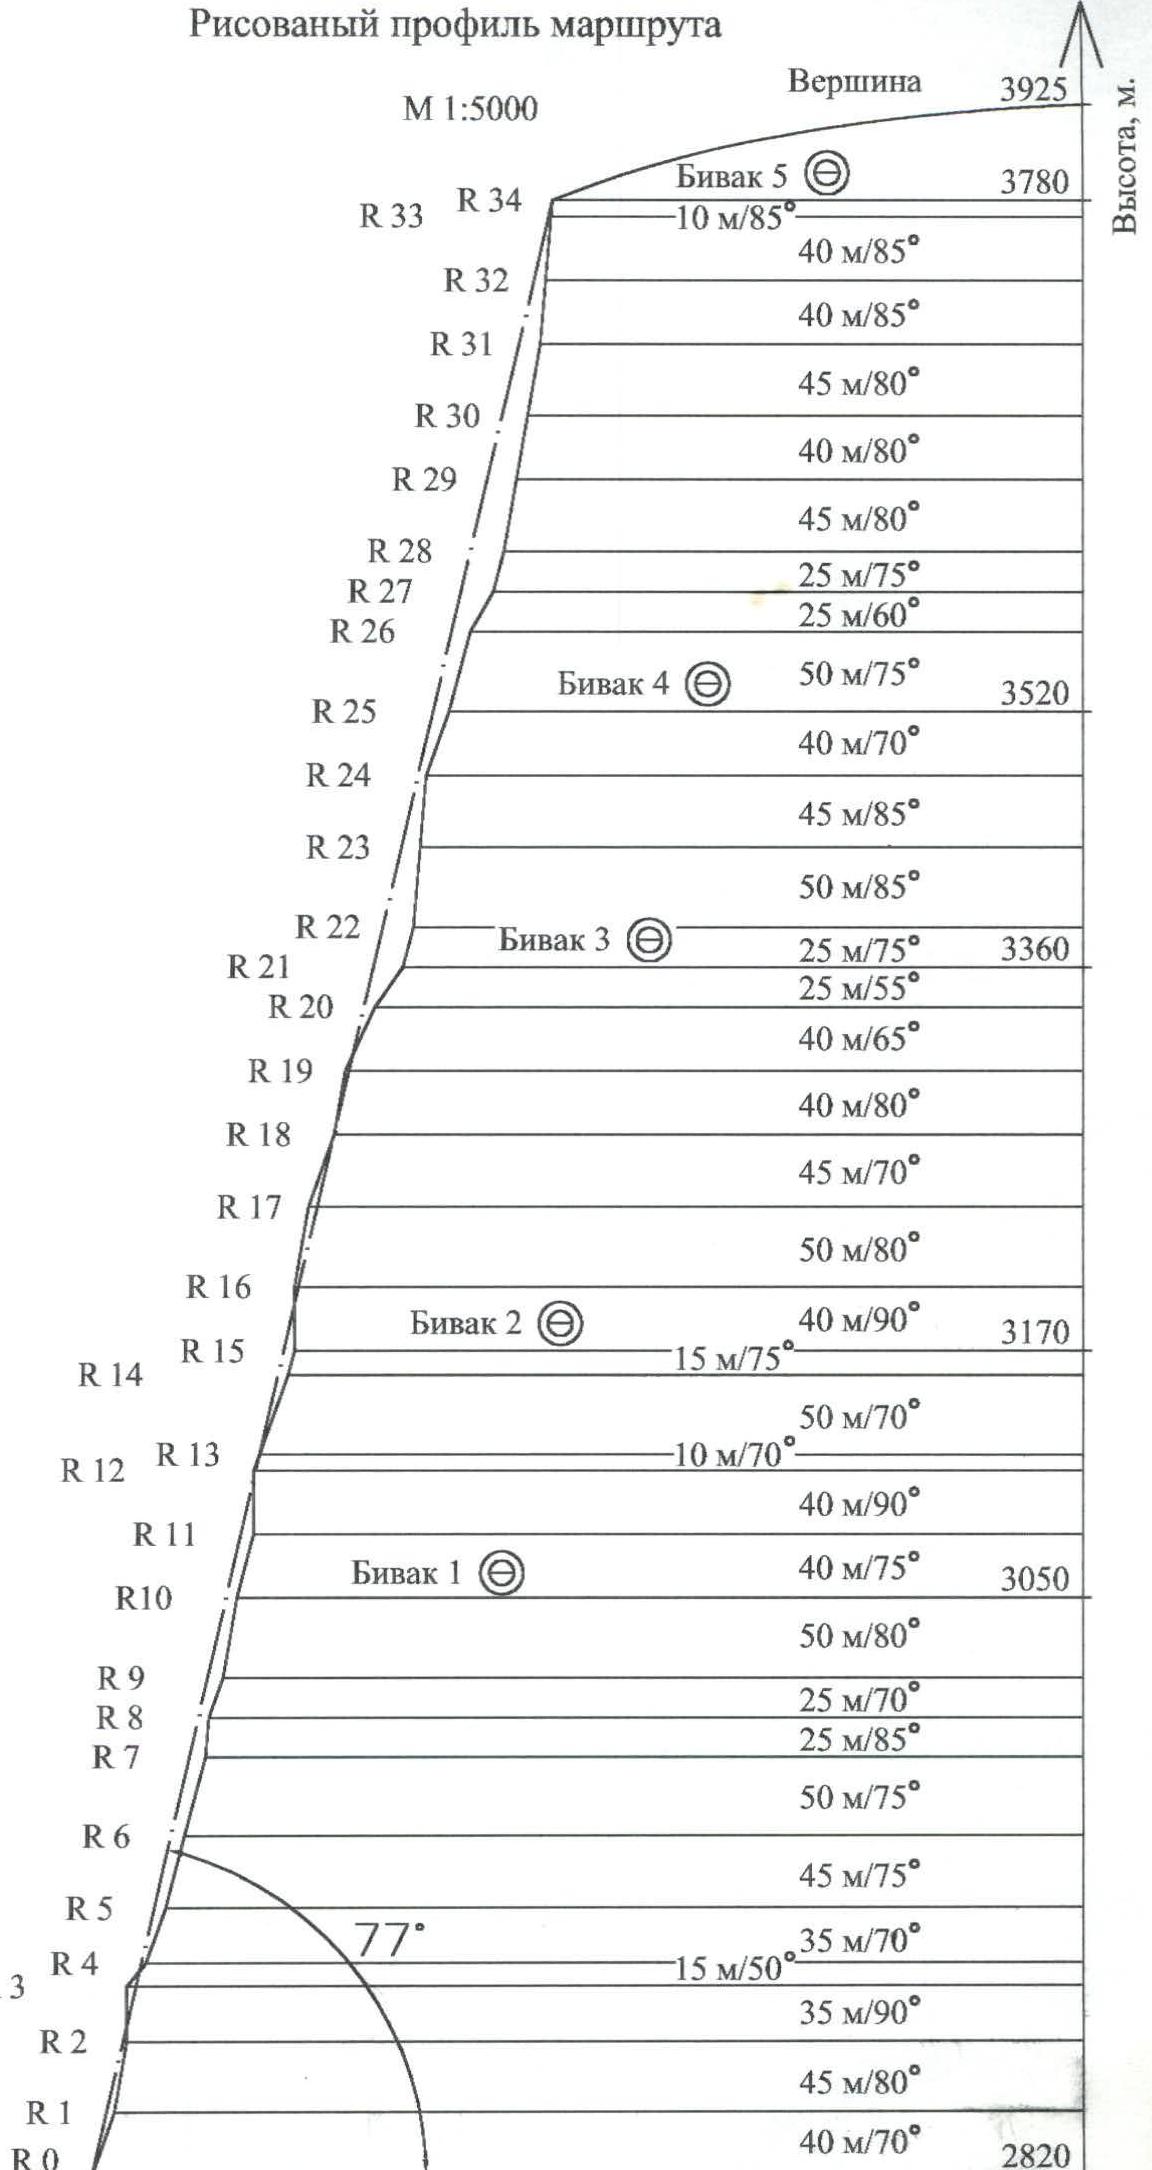
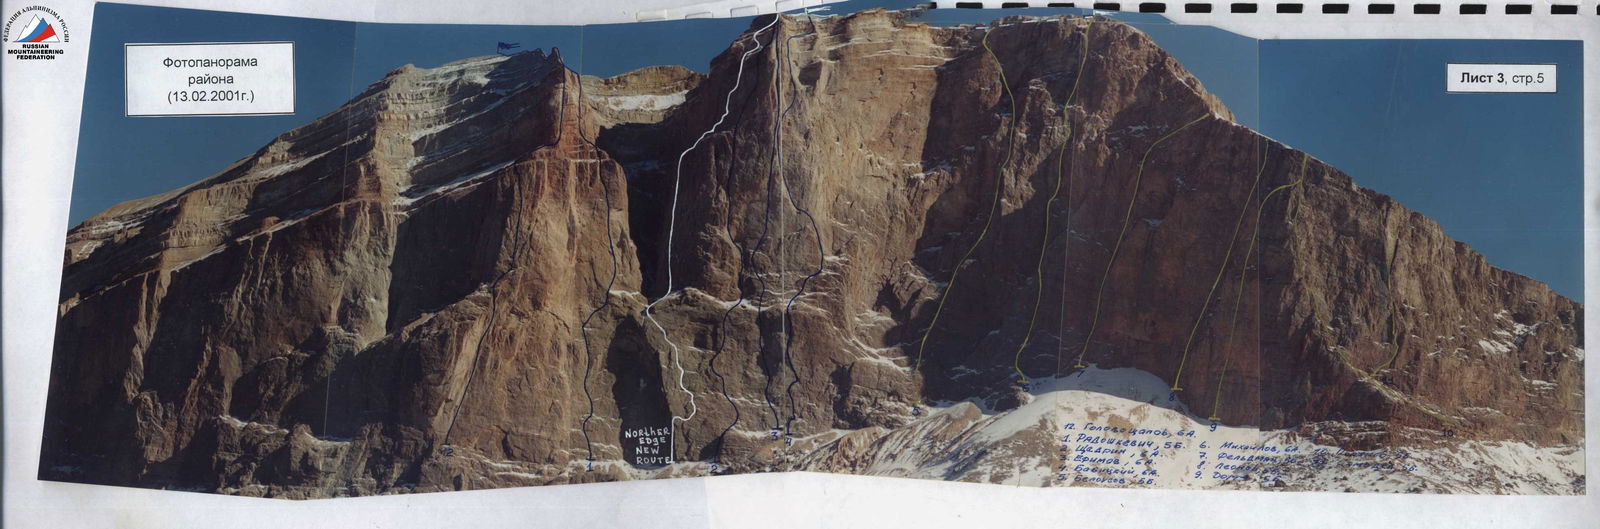
Overview of the climbing area
The massif of Erydag (3925 m), located on the border between Russia (South Dagestan) and Azerbaijan, is a high-altitude plateau that drops steeply to the Chekhychai River.
The massif is situated in the Lateral Ridge and is composed of strong marbled limestones. The high-altitude village of Kurush (2560 m) is located on the south-eastern slope of Shalbuzdag (4142 m) opposite the North-West wall of Erydag. From Derbent, it takes 3-4 hours by car on an asphalt road to reach the village of Usukhchai (district center of Dokuzparinsky district of Dagestan Republic). From Usukhchai, follow the signpost to the left on a good dirt road through the villages of Mikrakh and Tekipirkent to the village of Kurush. The base of the Dagestan Rescue Service of the Russian Emergency Ministry (5 houses of the "KUNG" type) is located near the village, lower down the slope (2350 m). From the base to the routes on Erydag, it takes 2-4 hours to ascend via gentle and visually observable slopes.
The "Kurush" border post is located upstream of the Chekhychai River, a 50-minute walk from the village along the road.
The relatively dry and stable climate allows for climbing year-round. Multiple routes range from 1st to 6th category of difficulty. The wall has a height difference of up to 1300 m. The huge "Big Well" separates the massif into Erydag proper (3925 m) and Erydag NNW (3887 m).
The southern "stern" of the wall is formed by the mountain of Sel'dy (3664 m), with routes of 1st-4th category of difficulty.
The highest point of Dagestan and Azerbaijan, Bazarduzu (4466 m), is located in the Main Caucasian Ridge (combined and ice-rock routes of 1st-4th category of difficulty).
Route scheme in UIAA symbols. M 1:2000
| Pitons | Nuts | Bolts | Skyhooks | Route scheme | Section | Length | Difficulty | Steepness |
|---|---|---|---|---|---|---|---|---|
| 1 | 2 | 3 | 4 | 5 | 6 | 7 | 8 | 9 |
| End of processing. (February 25, 2001) | ||||||||
| 14 | 68 | 13 | 6 | Bivouac 1 3050 m | 0–10 | 365 m | III–VI (140 m) | 76° |
| 2 | 11 | 3 | 4 |  | 9–10 | 50 m | V–VI (25 m) A2 | 80° |
| 1 | 3 | 1 | 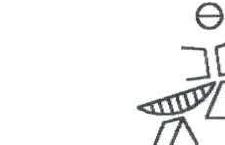 | 8–9 | 25 m | V | 70° | |
| 10 | 1 | Photo on page 14 | 7–8 | 25 m | VI | 85° | ||
| 2 | 8 | 1 | 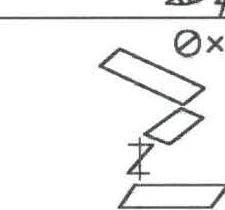 | 6–7 | 50 m | V–VI (10 m) | 75° | |
| 1 | 6 | 1 | Photo on page 13 | 5–6 | 45 m | V–VI (10 m) | 75° | |
| 1 | 3 | 1 | Photo on page 12 | 4–5 | 35 m | V– | 70° | |
| 1 |  | 3–4 | 15 m | III | 50° | |||
| 1 | 9 | 3 | 2 |  | 2–3 | 35 m | VI, A2 | 90° |
| 2 | 11 | 1 | Photo on page 11 | 1–2 | 45 m | V–VI (25 m) | 80° | |
| 4 | 7 |  | 0–1 | 40 m | V–VI (10 m) | 70° |
Route scheme in UIAA symbols. M 1:2000 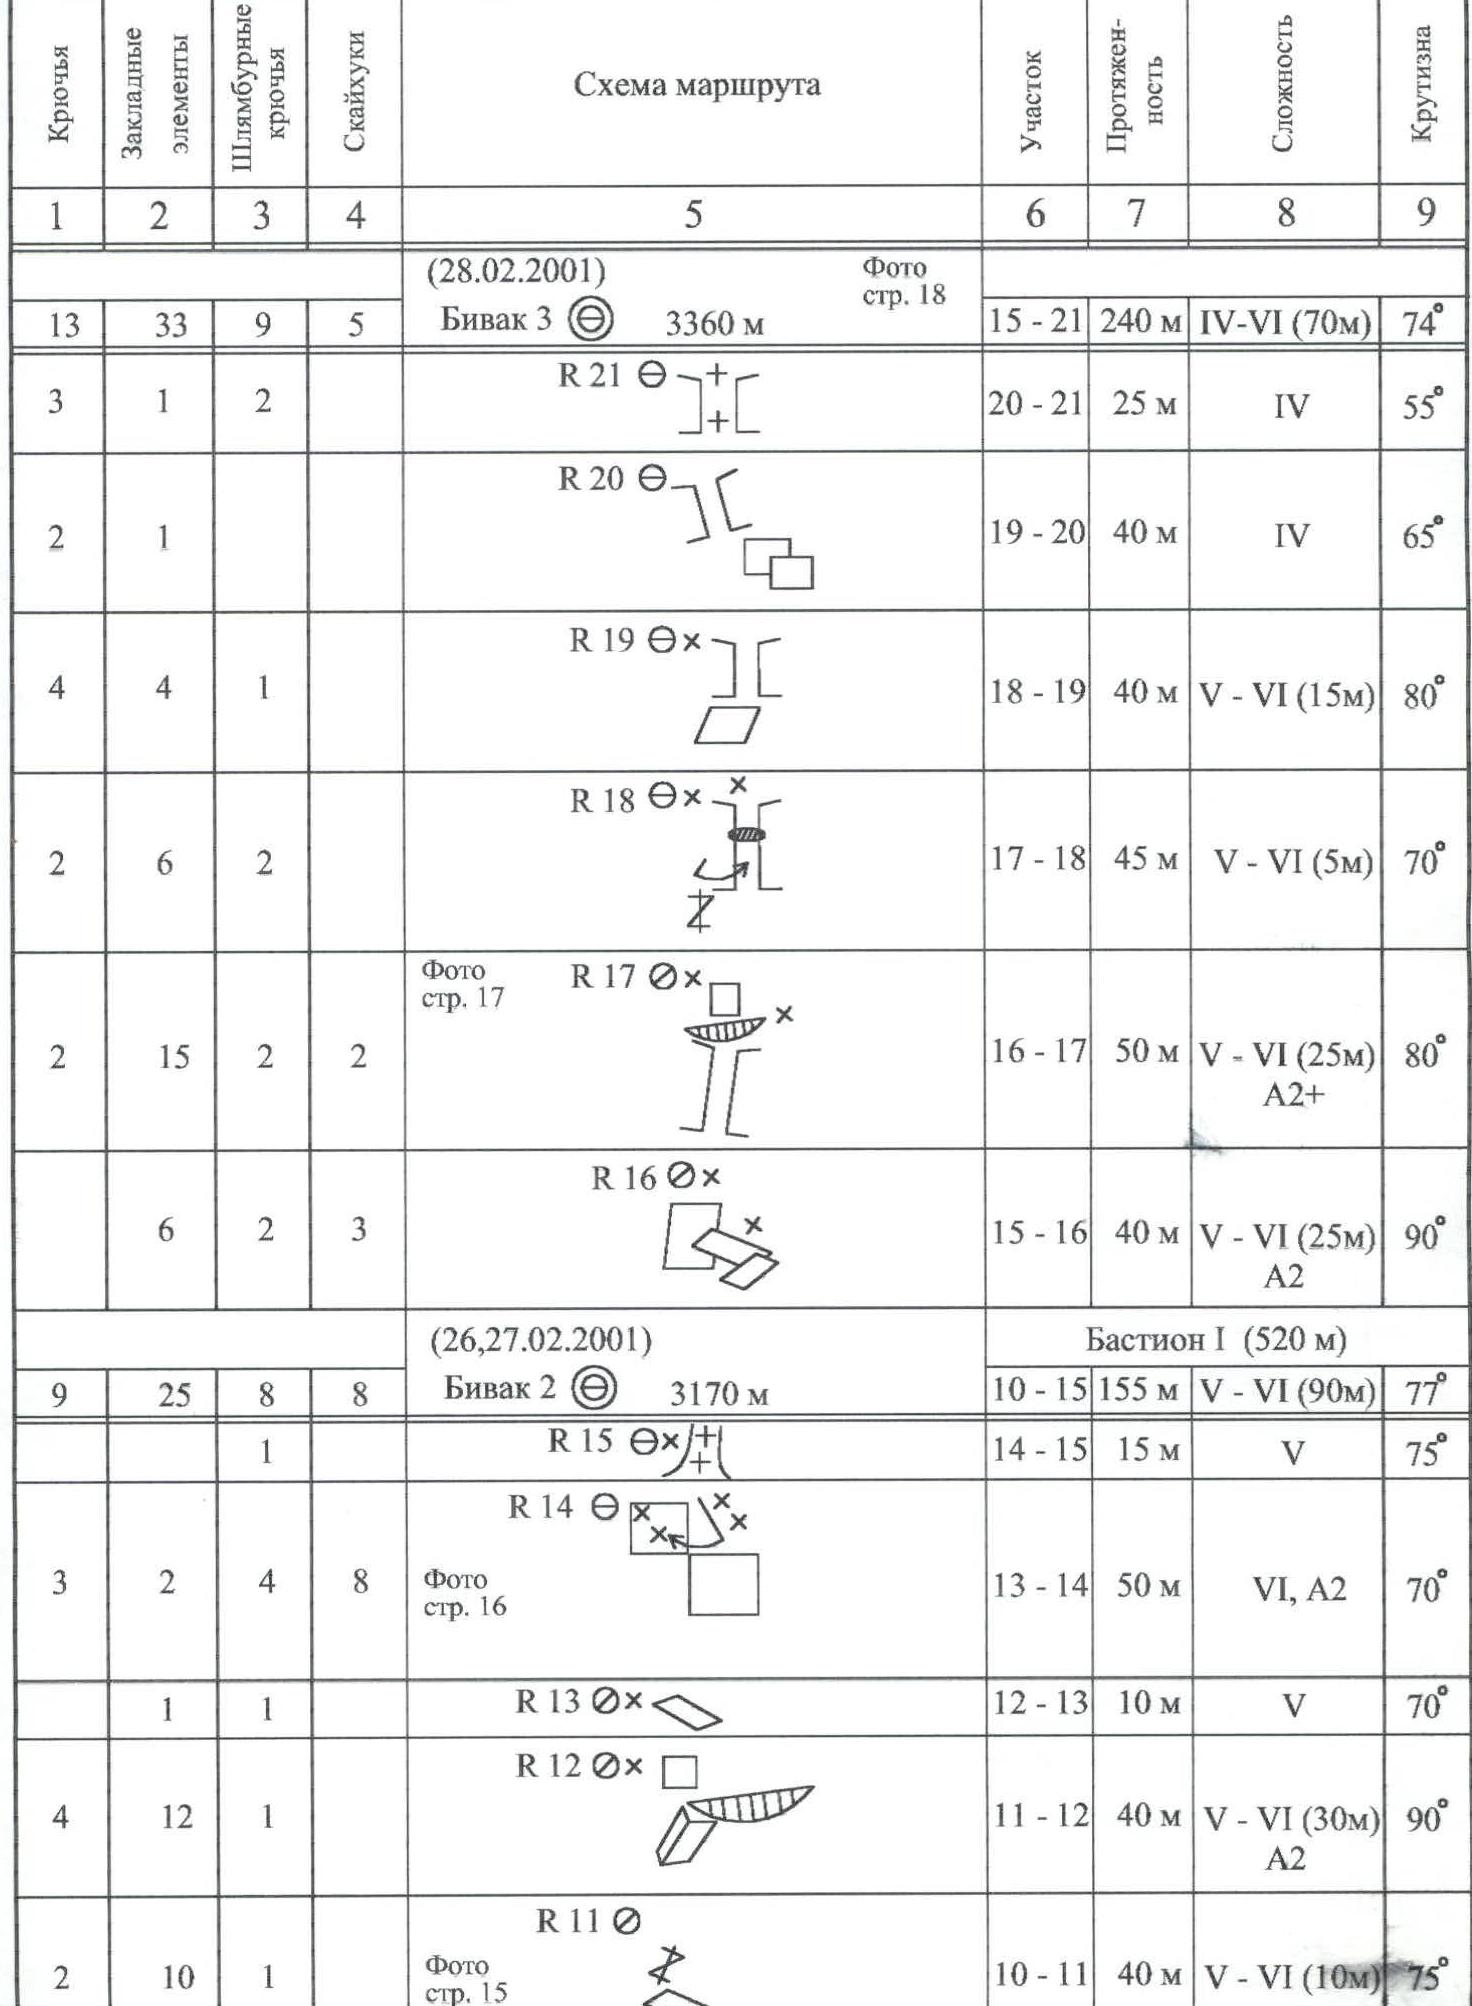
| Pitons | Nuts | Bolts | Skyhooks | Route scheme | Section | Length | Difficulty | Steepness |
|---|---|---|---|---|---|---|---|---|
| 1 | 2 | 3 | 4 | 5 | 6 | 7 | 8 | 9 |
| (February 28, 2001) | ||||||||
| 13 | 33 | 9 | 5 | Bivouac 3 3360 m | 15–21 | 240 m | IV–VI (70 m) | 74° |
| R21 (bolt) | ||||||||
| 3 | 1 | 2 | (symbol) | 20–21 | 25 m | IV | 55° | |
| R20 (pitons) | ||||||||
| 2 | 1 | (symbol) | 19–20 | 40 m | IV | 65° | ||
| R19 (bolt, pitons) | ||||||||
| 4 | 4 | 1 | (symbol) | 18–19 | 40 m | V–VI (15 m) | 80° | |
| R18 (bolt, pitons) | ||||||||
| 2 | 6 | 2 | (symbol) | 17–18 | 45 m | V–VI (5 m) | 70° | |
| Photo on page 17 R17 (bolt, pitons) | ||||||||
| 2 | 15 | 2 | 2 | (symbol) | 16–17 | 50 m | V–VI (25 m) A2+ | 80° |
| R16 (bolt, pitons) | ||||||||
| 6 | 2 | 3 | (symbol) | 15–16 | 40 m | V–VI (25 m) A2 | 90° | |
| (February 26–27, 2001) | ||||||||
| Bastion I (520 m) | ||||||||
| 9 | 25 | 8 | 8 | Bivouac 2 3170 m | 10–15 | 155 m | V–VI (90 m) | 77° |
| R15 (bolt, pitons) | ||||||||
| 1 | (symbol) | 14–15 | 15 m | V | 75° | |||
| R14 (bolt, pitons) | ||||||||
| 3 | 2 | 4 | 8 | Photo on page 16 (pitons) | 13–14 | 50 m | VI, A2 | 70° |
| R13 (bolt, pitons) | ||||||||
| 1 | 1 | (symbol) | 12–13 | 10 m | V | 70° | ||
| R12 (bolt, pitons) | ||||||||
| 4 | 12 | 1 | (symbol) | 11–12 | 40 m | V–VI (30 m) A2 | 90° | |
| R11 (bolt) | ||||||||
| 2 | 10 | 1 | Photo on page 15 (symbol) | 10–11 | 40 m | V–VI (10 m) | 75° | |
| Photo on page 22 (pitons, bolt) | ||||||||
| 16 | 1 | (symbol) | 31–32 | 40 m | VI, A2 | 85° | ||
| R31 (bolt, pitons) | ||||||||
| 7 | 1 | (symbol) | 30–31 | 45 m | V–VI (25 m) | 80° | ||
| R30 (pitons, bolt) | ||||||||
| 2 | 4 | 2 | (symbol) | 29–30 | 40 m | VI | 80° | |
| Photo on page 21 R29 (bolt) | ||||||||
| 1 | 7 | 1 | (symbol) | 28–29 | 45 m | V–VI (15 m) | 80° | |
| R28 (pitons, bolt) | ||||||||
| 2 | 3 | 1 | (symbol) | 27–28 | 25 m | V– | 75° | |
| R27 (bolt) | ||||||||
| 1 | 3 | (symbol) | 26–27 | 25 m | IV | 60° | ||
| R26 (bolt, pitons) | ||||||||
| 2 | 6 | 1 | (symbol) | 25–26 | 50 m | V–VI (15 m) | 75° | |
| (March 1, 2001) | ||||||||
| Bastion II (400 m) | ||||||||
| 10 | 33 | 2 | Bivouac 4 3520 m | 21–25 | 160 m | V–VI (55 m) | 80° | |
| R25 (bolt) | ||||||||
| 2 | 1 | (symbol) | 24–25 | 40 m | V | 70° | ||
| Photo on page 20 R24 (bolt) | ||||||||
| 3 | 12 | (symbol) | 23–24 | 45 m | V–VI (25 m) A2 | 85° | ||
| R23 (bolt, pitons) | ||||||||
| 4 | 14 | 1 | (symbol) | 22–23 | 50 m | V–VI (30 m) A2 | 85° | |
| Photo on page 19 R22 (bolt) | ||||||||
| 3 | 5 | (symbol) | 21–22 | 25 m | V | 75° | ||
| VI category — 540 m | Total length | |||||||
| Bastion I — 230 m | of wall part 1240 m | |||||||
| Height difference of wall 960 m. | Bastion II — 125 m | (without terraces). | ||||||
| Bastion III — 185 m | ||||||||
| V category — 585 m | ||||||||
| 62 | 214 | 41 | 19 | R0–R34 | 0–34 | 1240 m | III–VI (540 m) | 77° |
| (March 2, 2001) | ||||||||
| Bastion III (320 m) | ||||||||
| 16 | 55 | 9 | Bivouac 5 3780 m | 25–34 | 320 m | IV–VI (185 m) | 78° | |
| (bolt, pitons) R34 | ||||||||
| 2 | 1 | (symbol) | 33–34 | 10 m | VI | 85° | ||
| (bolt, pitons) R33 | ||||||||
| 8 | 7 | 1 | (symbol) | 32–33 | 40 m | VI, A2 | 85° |
Sheet 5, page 9

Notes on mandatory requirements for the ascent report.
- To sheet 5, page 10. No notes were found on the summit of Erydag.
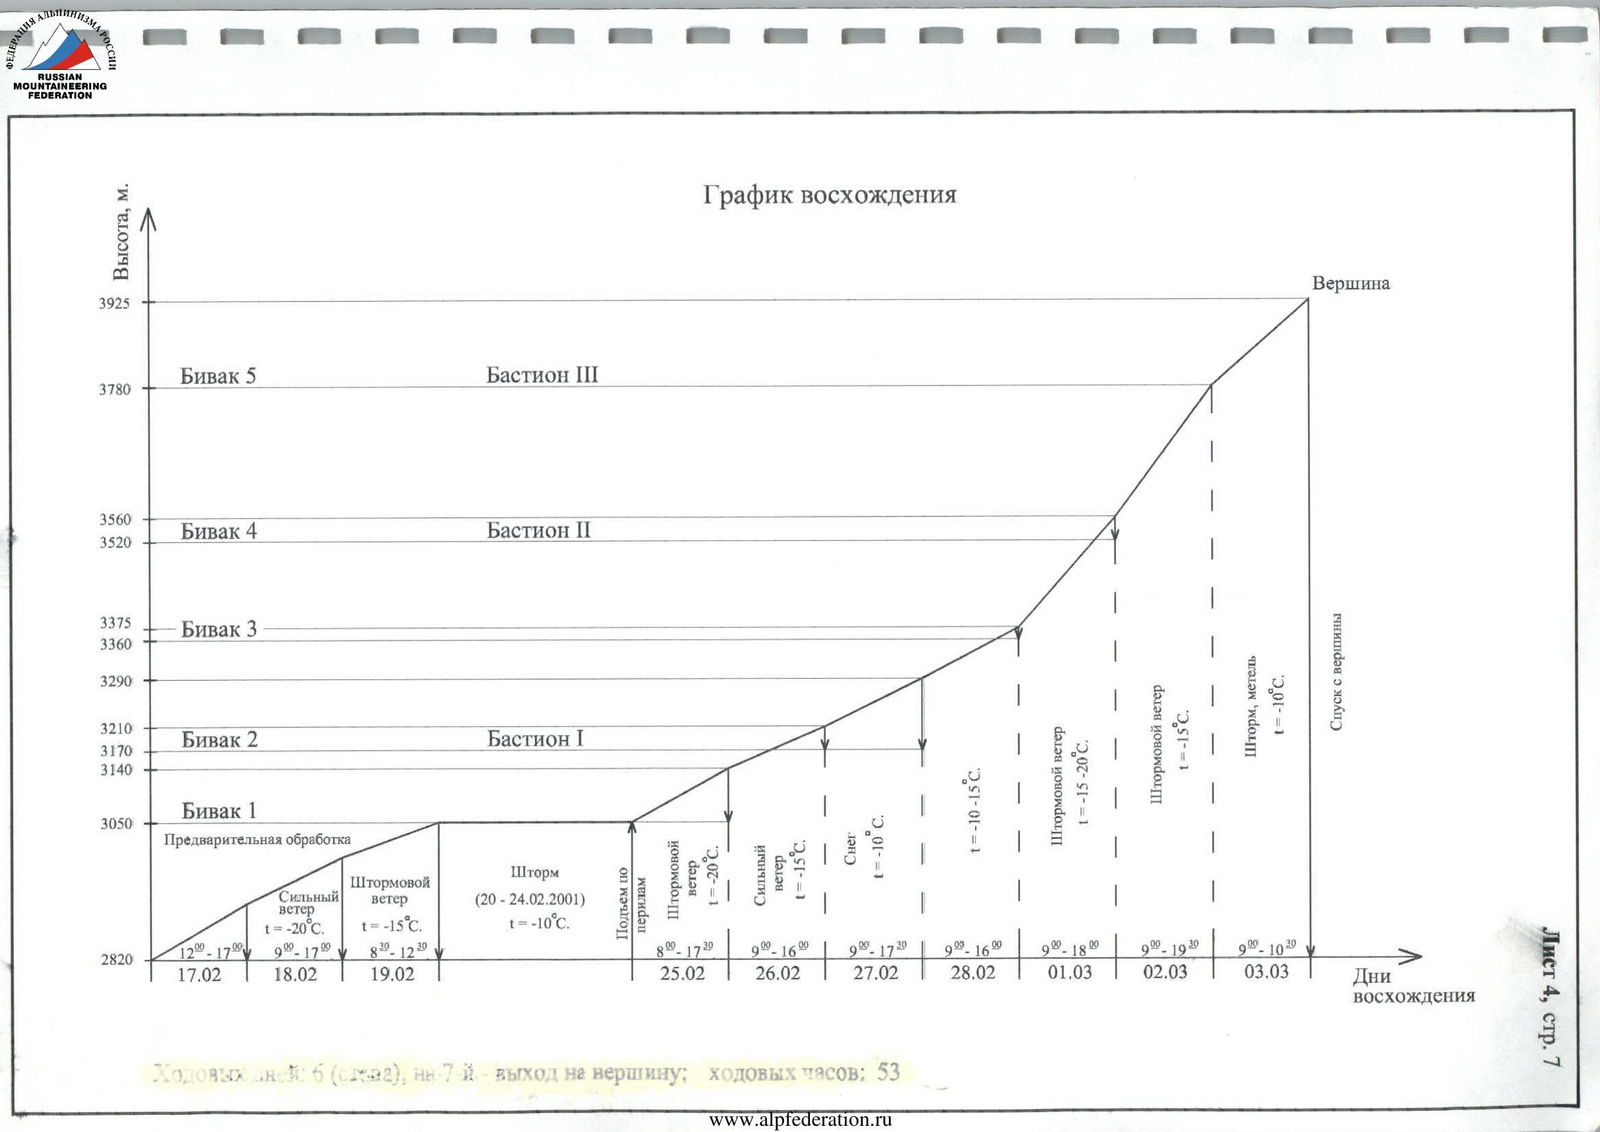
- To sheet 4, page 7. Weather conditions in the ascent schedule are indicated in text (not with conventional symbols) for better visibility of the schedule.
- To sheet 6 3.1. The report is supplemented with some additional photos for a more complete illustration of the route. 3.2. The presented photos without indication of the movement section reflect the nature of the ascent relief but are not always in full accordance with the shown route scheme in UIAA symbols. This circumstance is related to the fact that photography was carried out from prepared "perils", i.e., with straightened ropes. 3.3. The mandatory photo of the group on the summit at the control tour is presented in the form of two photos of reduced size to demonstrate all team members.
Commentary on the report.
During the first ascent, control tours were left at the bivouac sites. The Mauntex Mountaineering Club team did not leave a note on the summit due to extremely unfavorable weather conditions.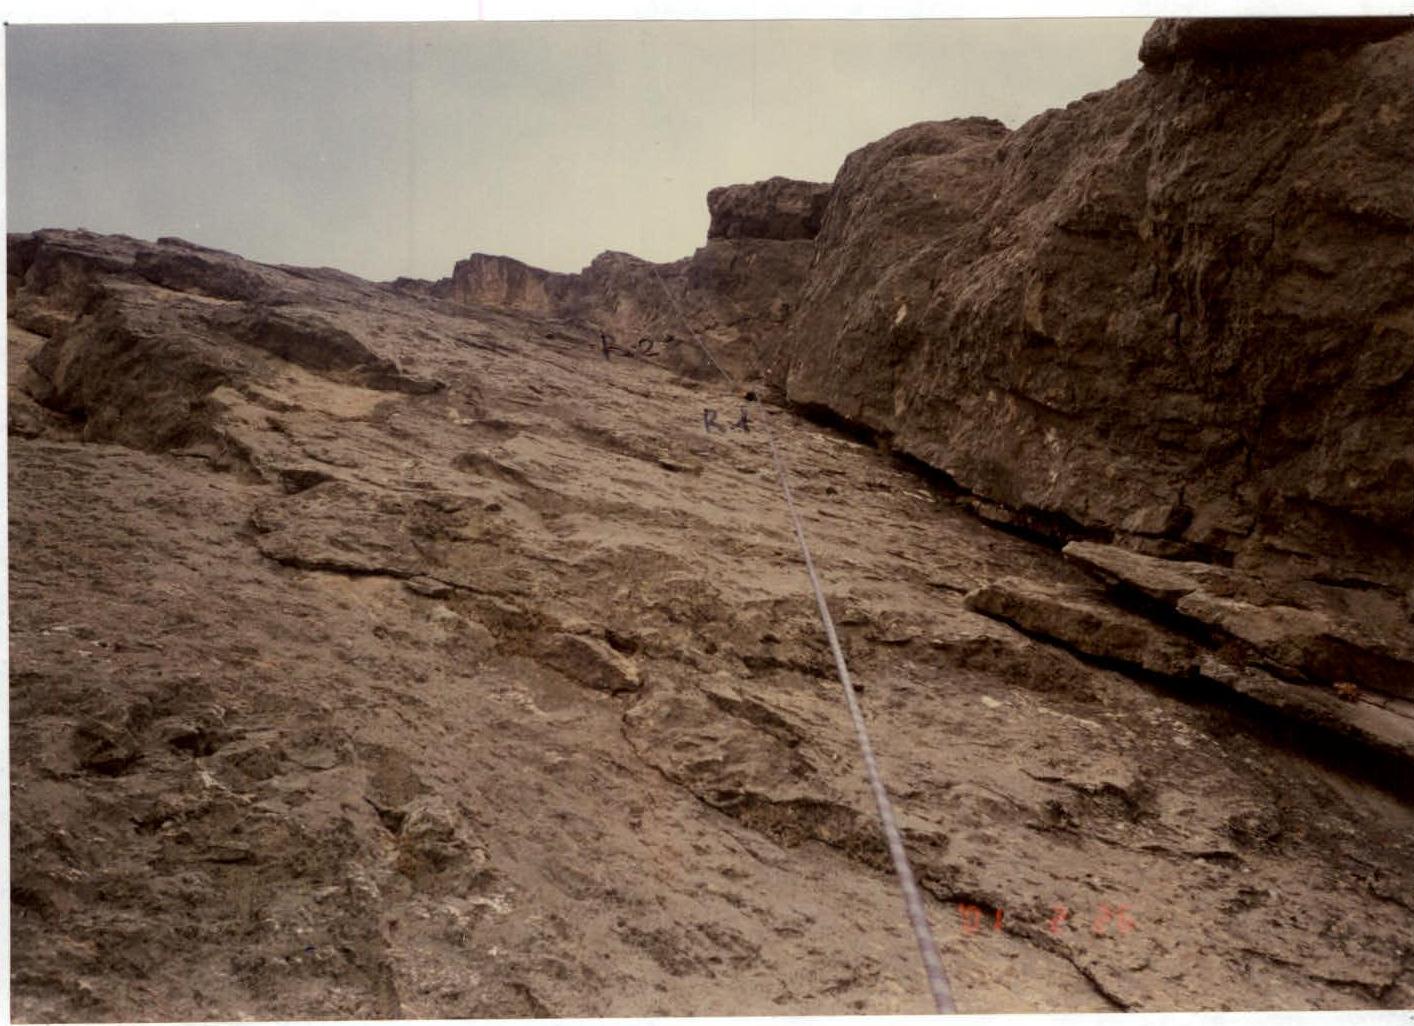
Sections R0–R3. Start of the route
Section R4–R5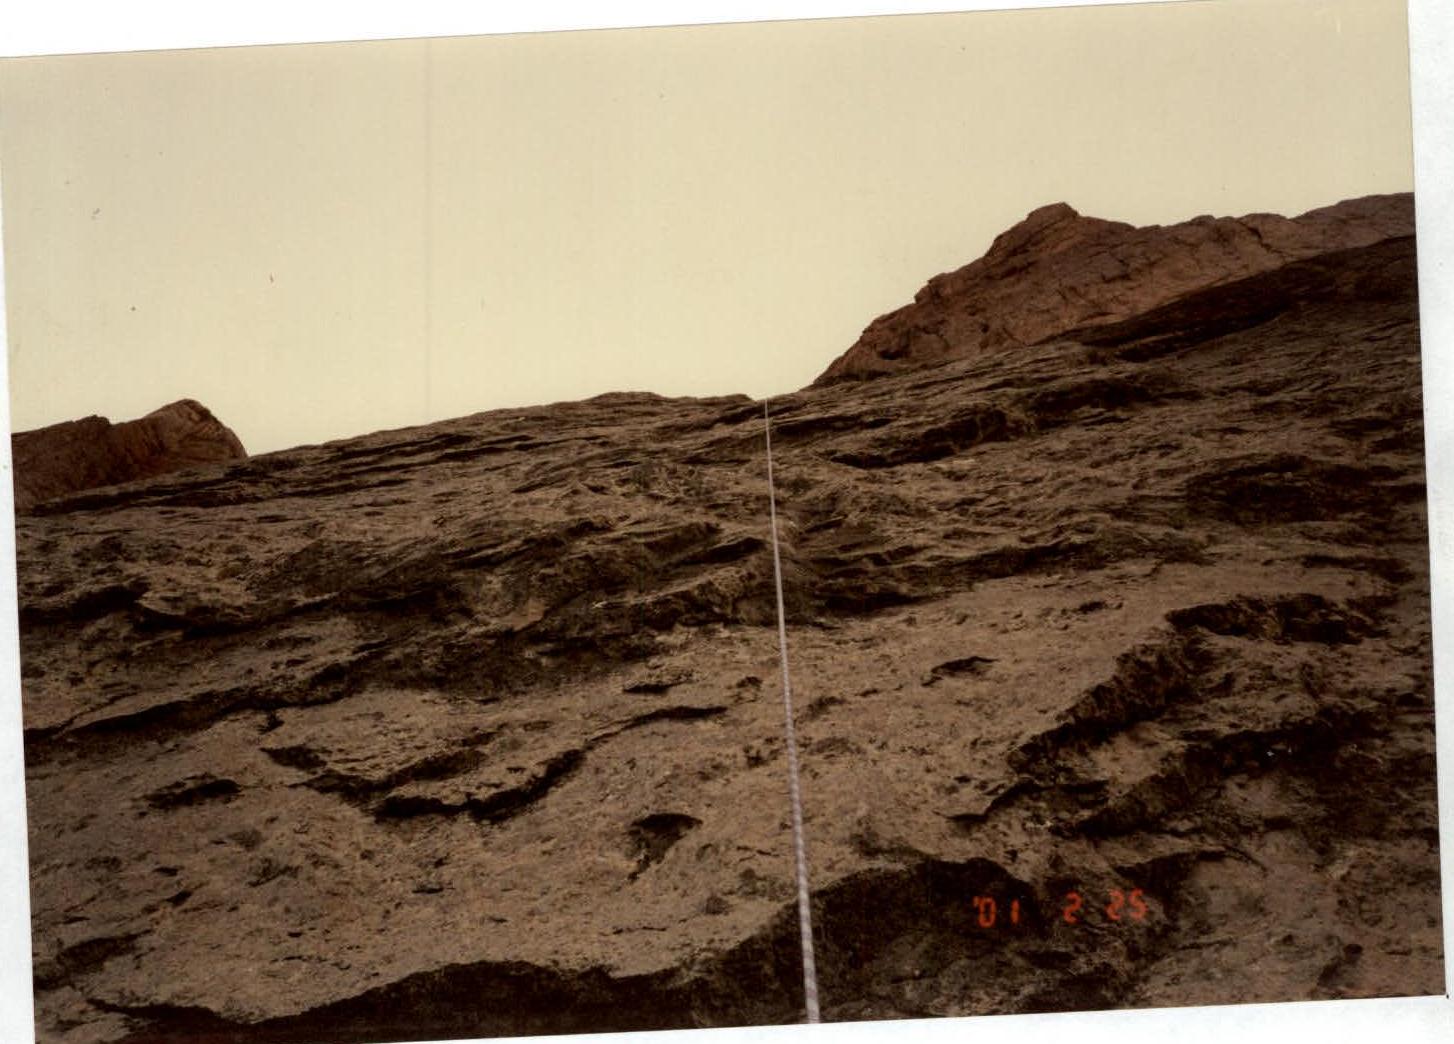
Section R5–R6
Section R7–R8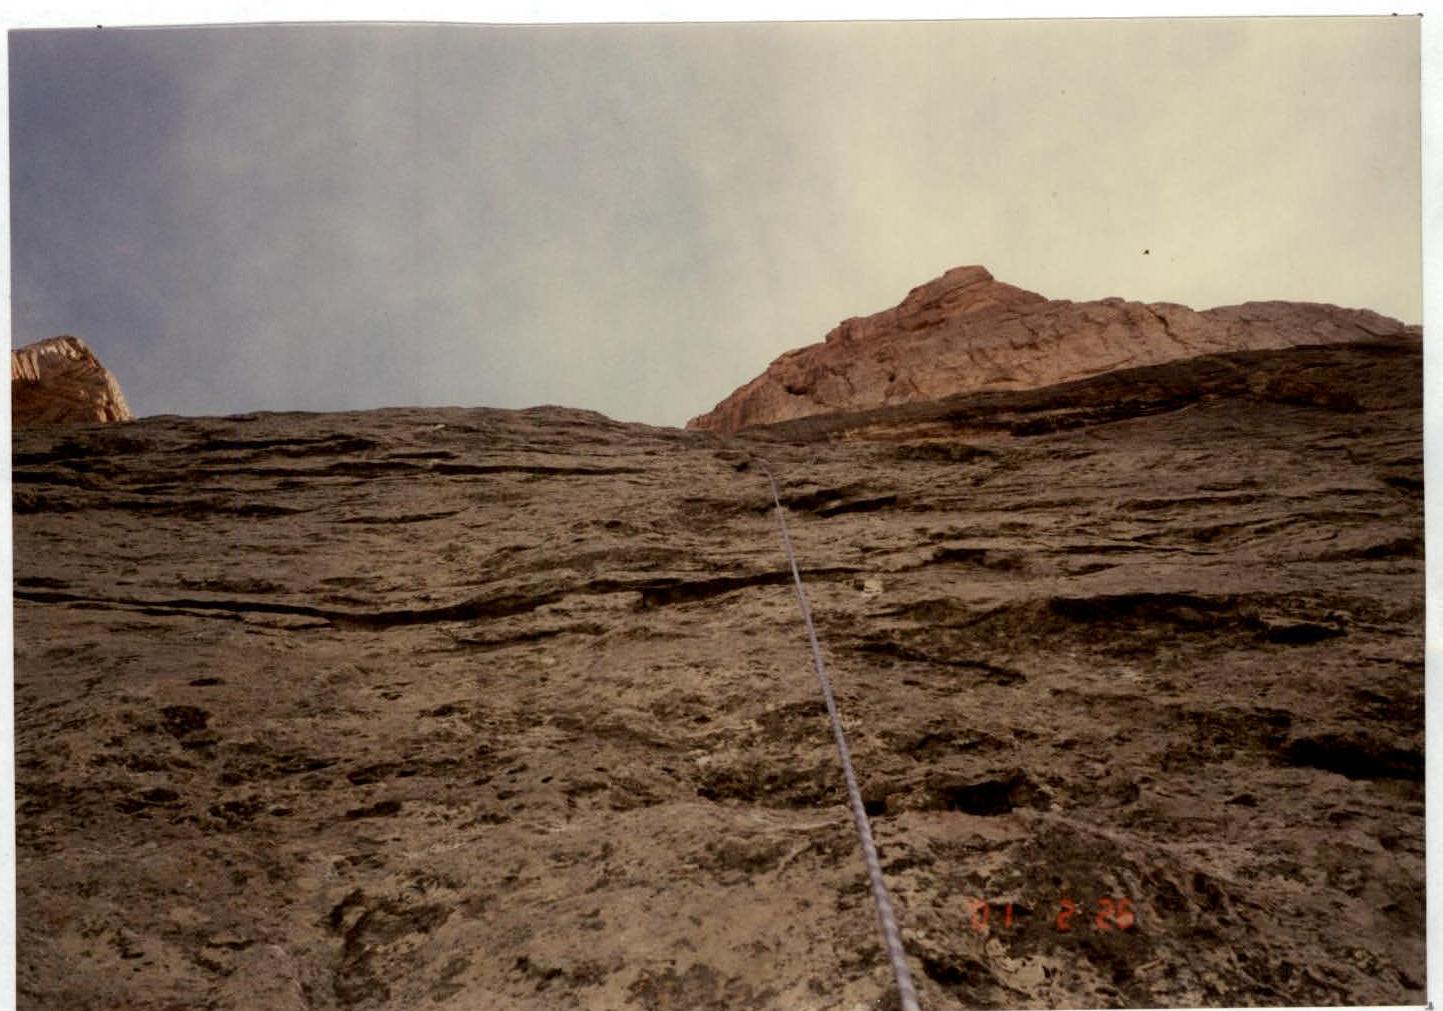
Bivouac 1 (February 25, 2001). Sections R10–R12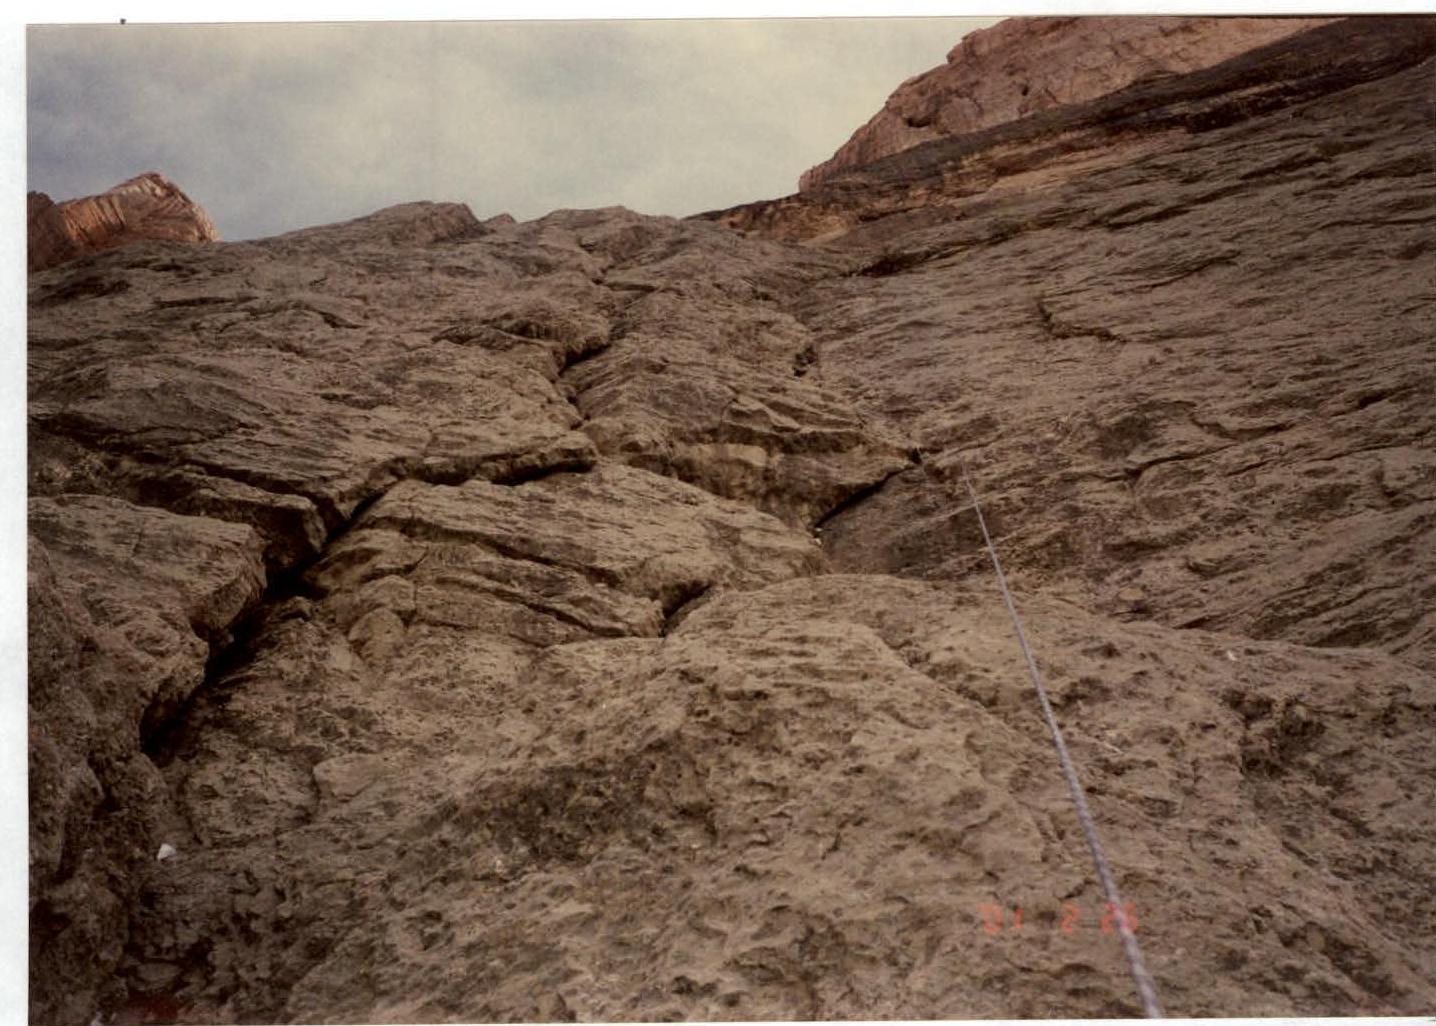
Section R13–R14
Sections R16–R17. Start of Bastion II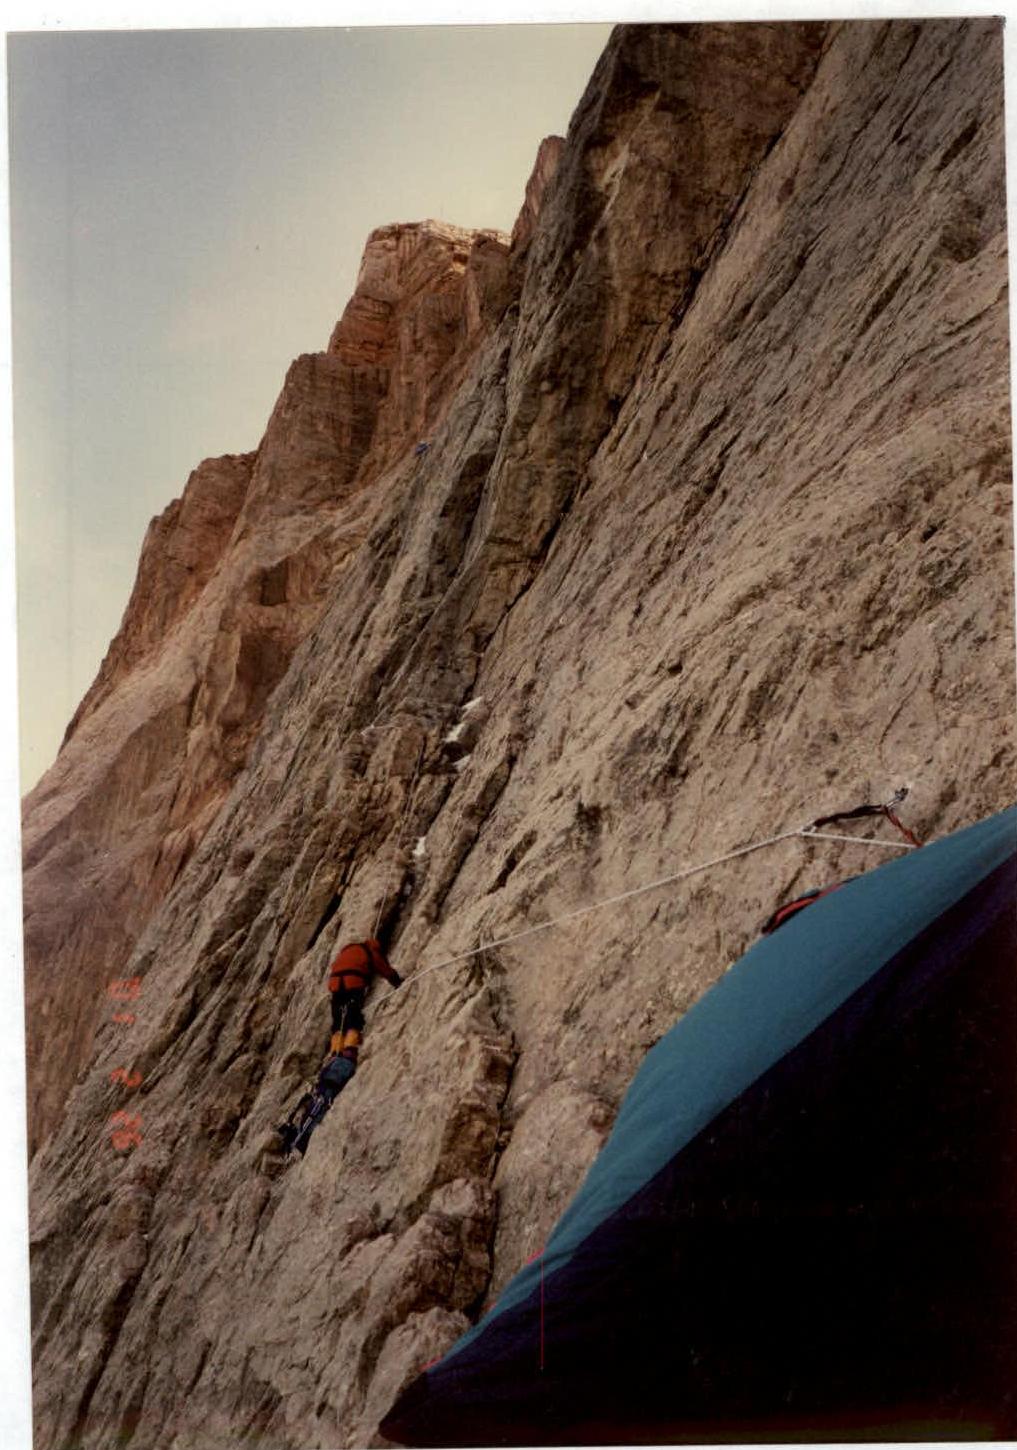
Bivouac 3 (February 28, 2001)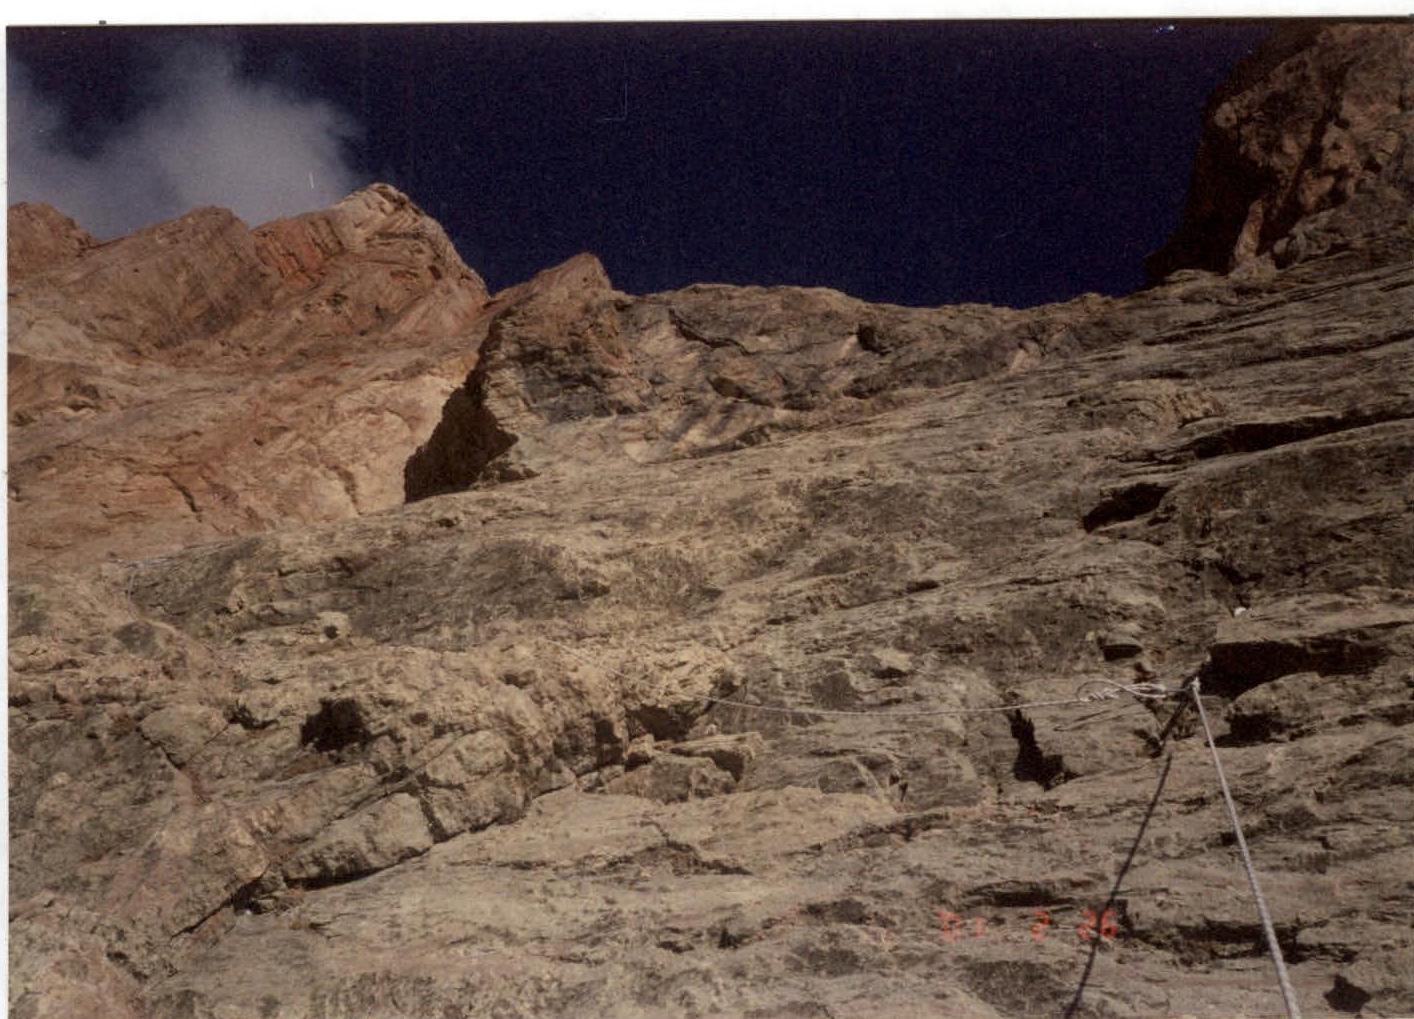
Section R21–R22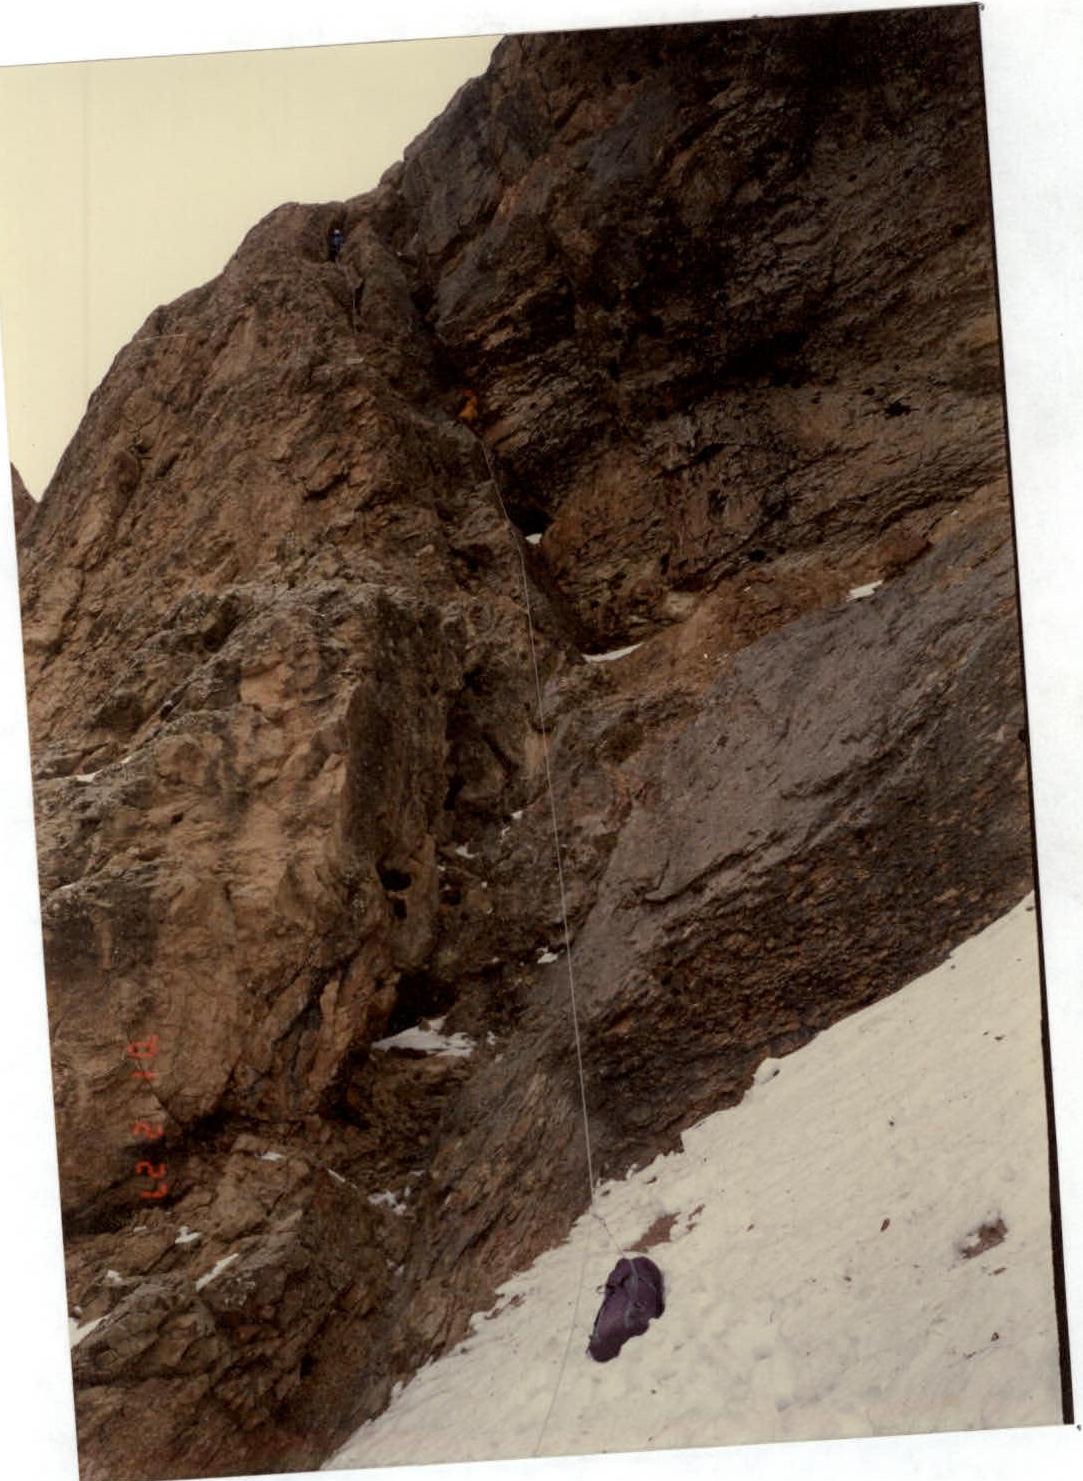
Section R23–R24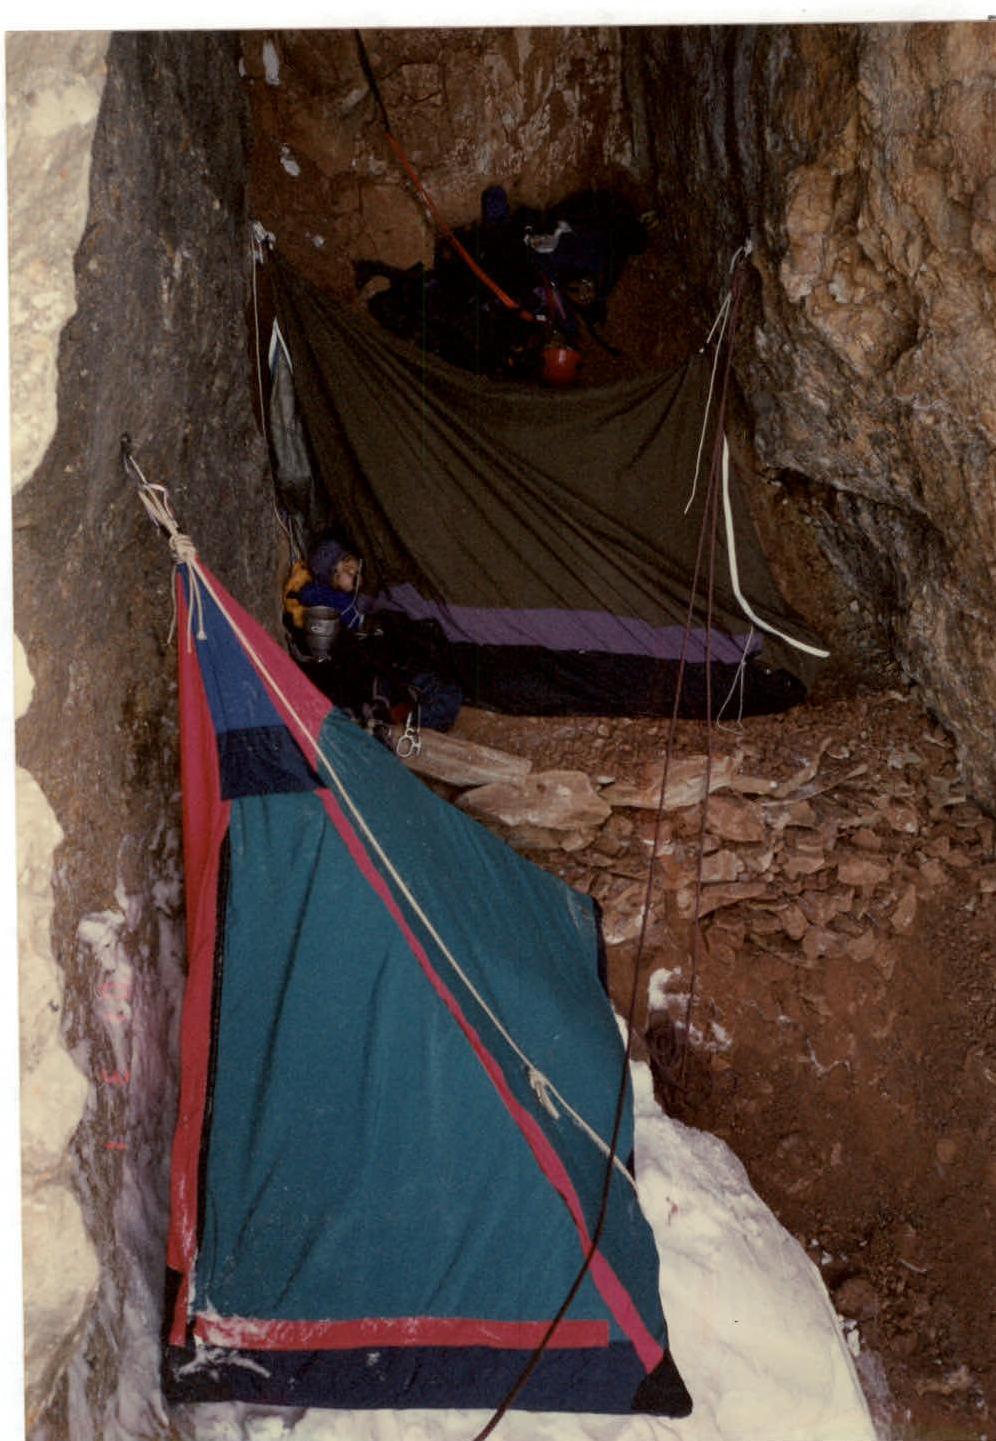
Section R28–R29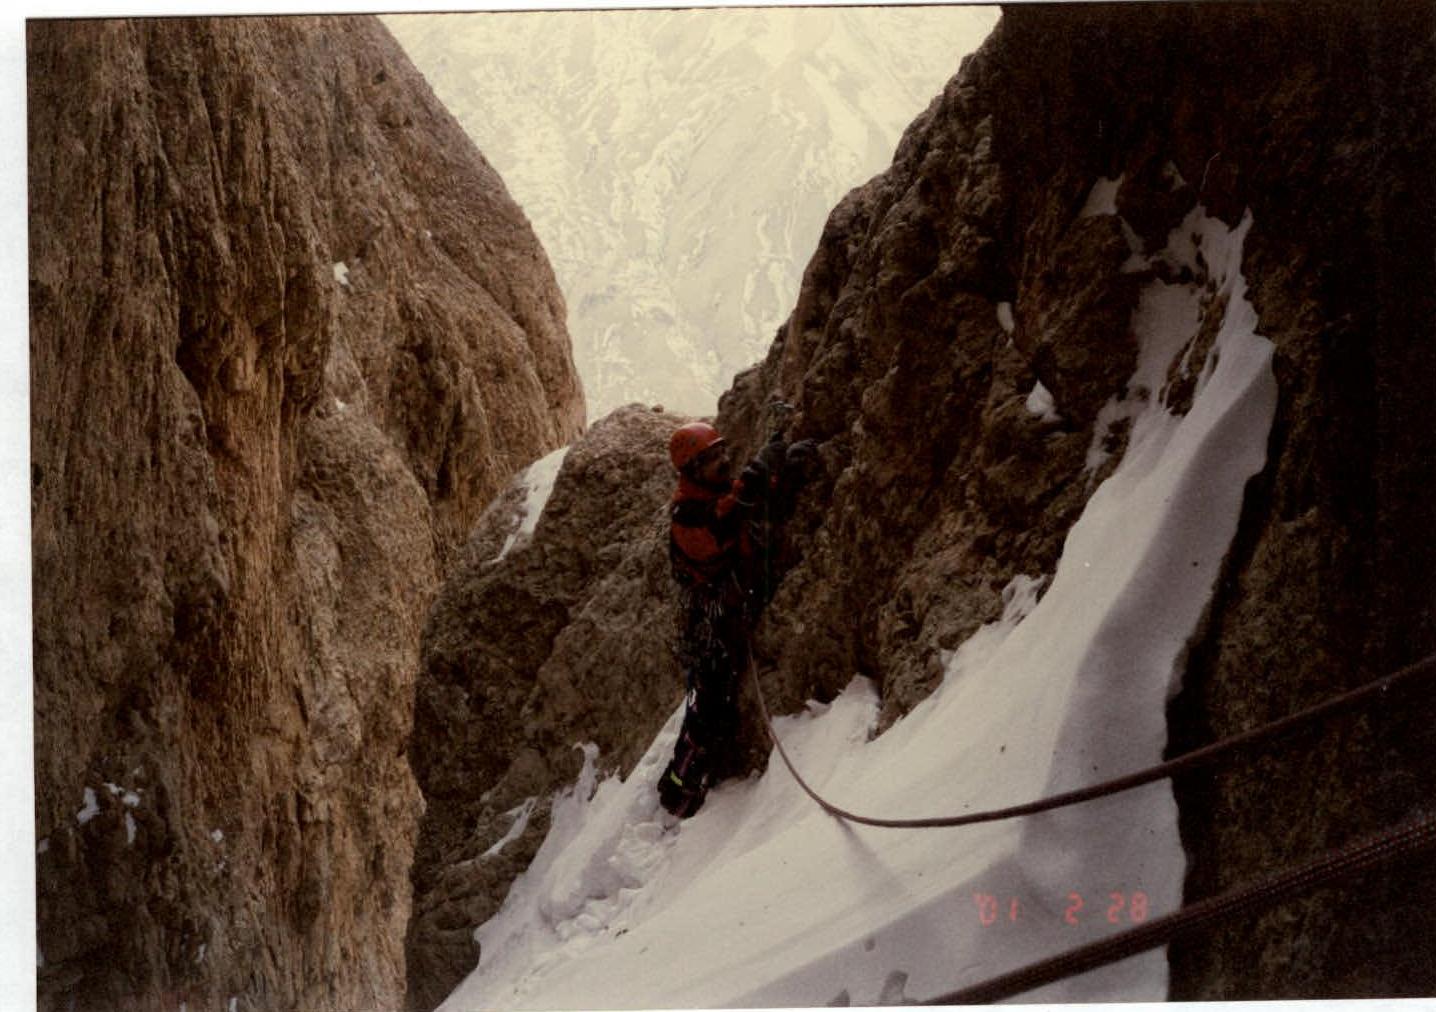
Section R31–R32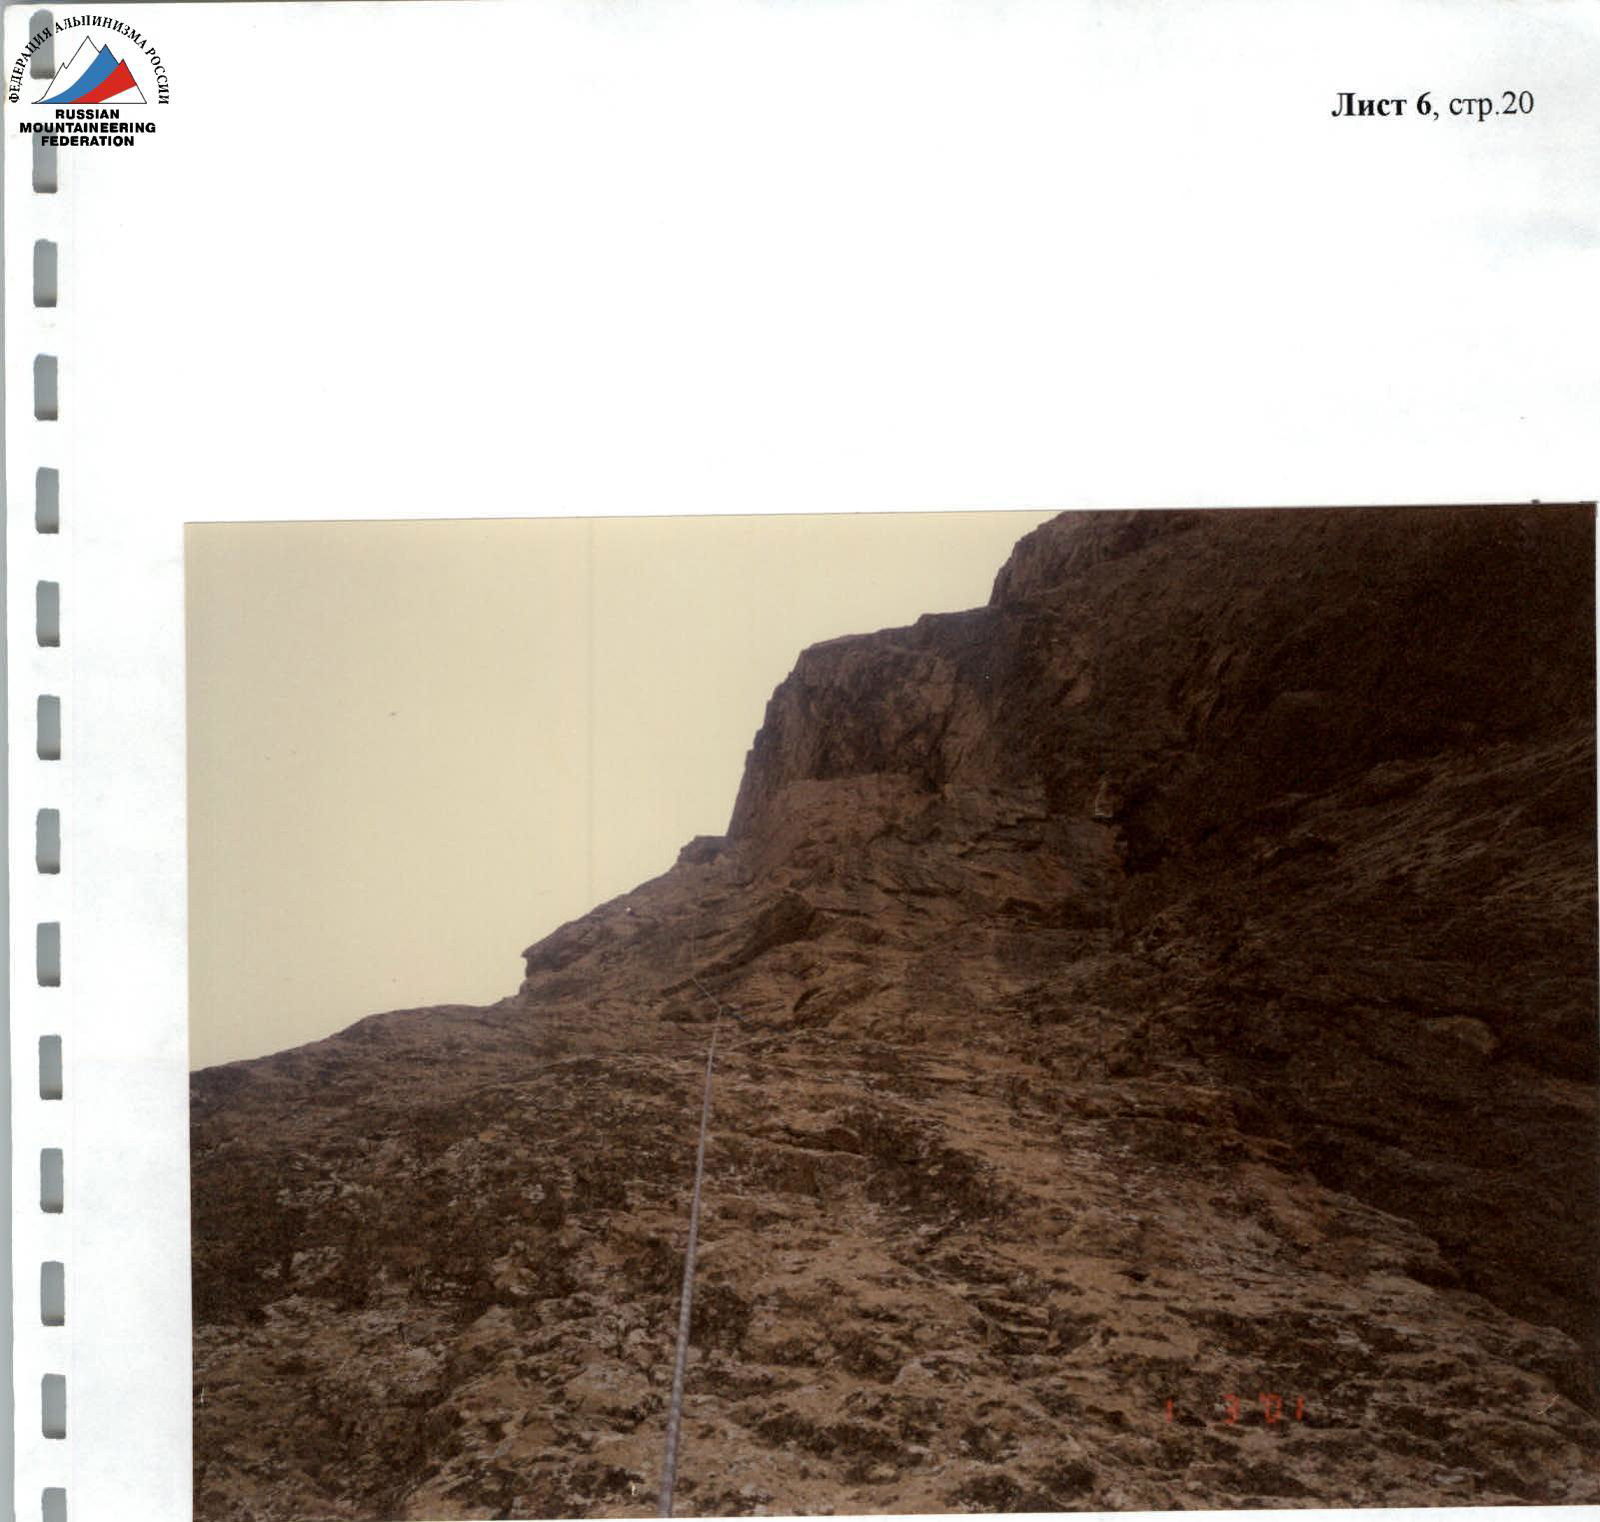
Photo of the group on the summit at the control tour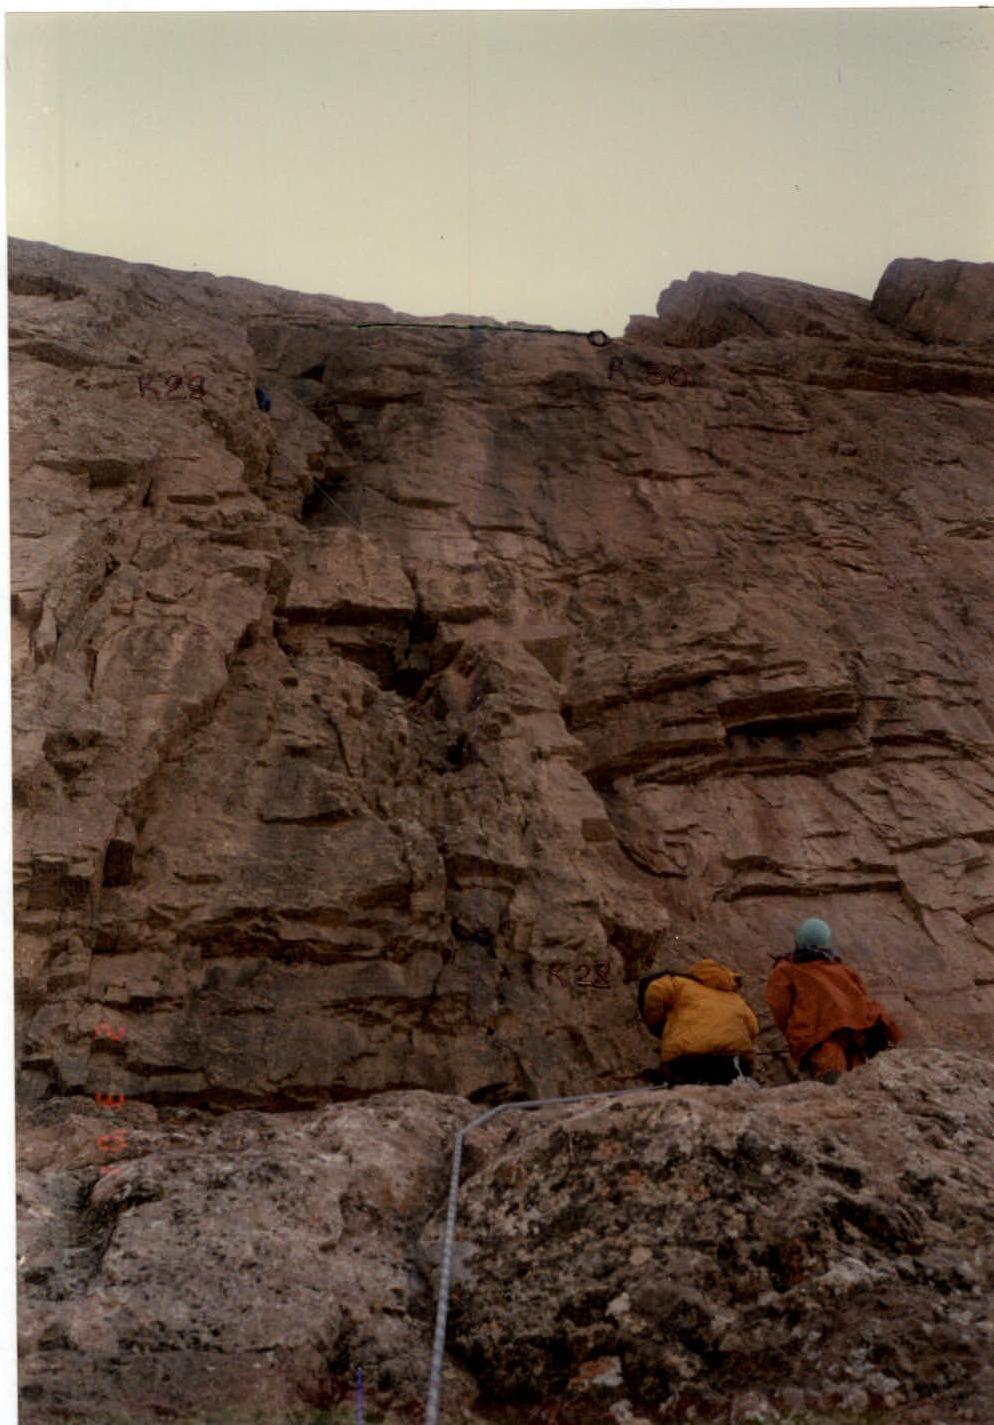
Photo by Yu. Koshelenko
In the frame (left to right):
- Krivitsky A. N.
- Andreev A. V.
- Voronin S. V.
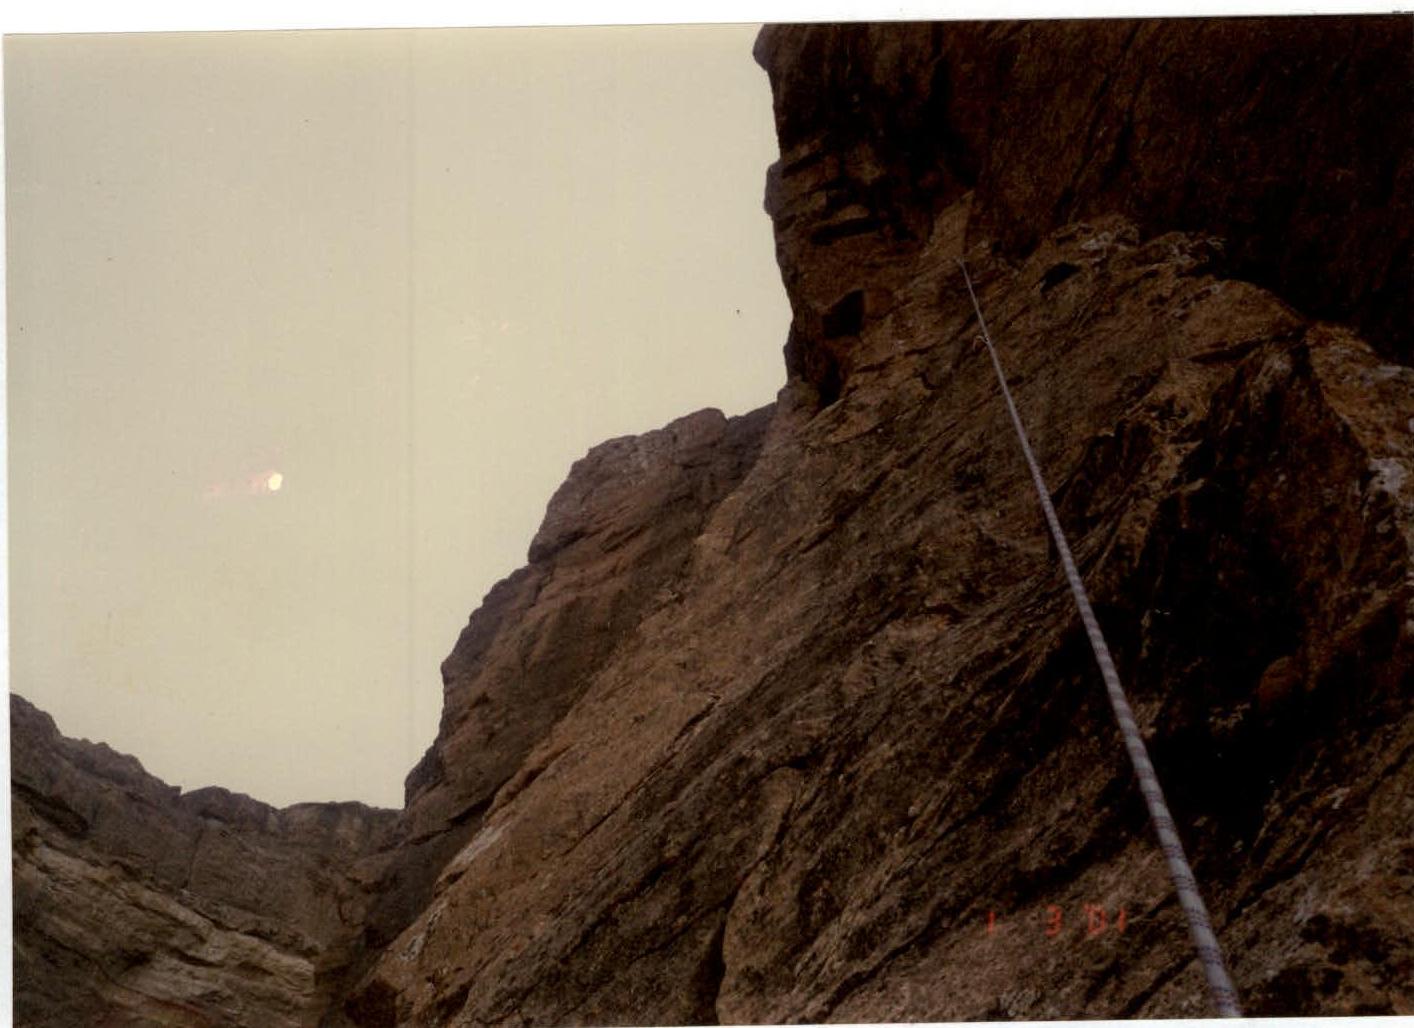
Photo by S. Voronin
In the frame (left to right):
- Krivitsky A. N.
- Koshelenko Yu. V.
- Andreev A. V.
Photo of the group on the summit at the control tour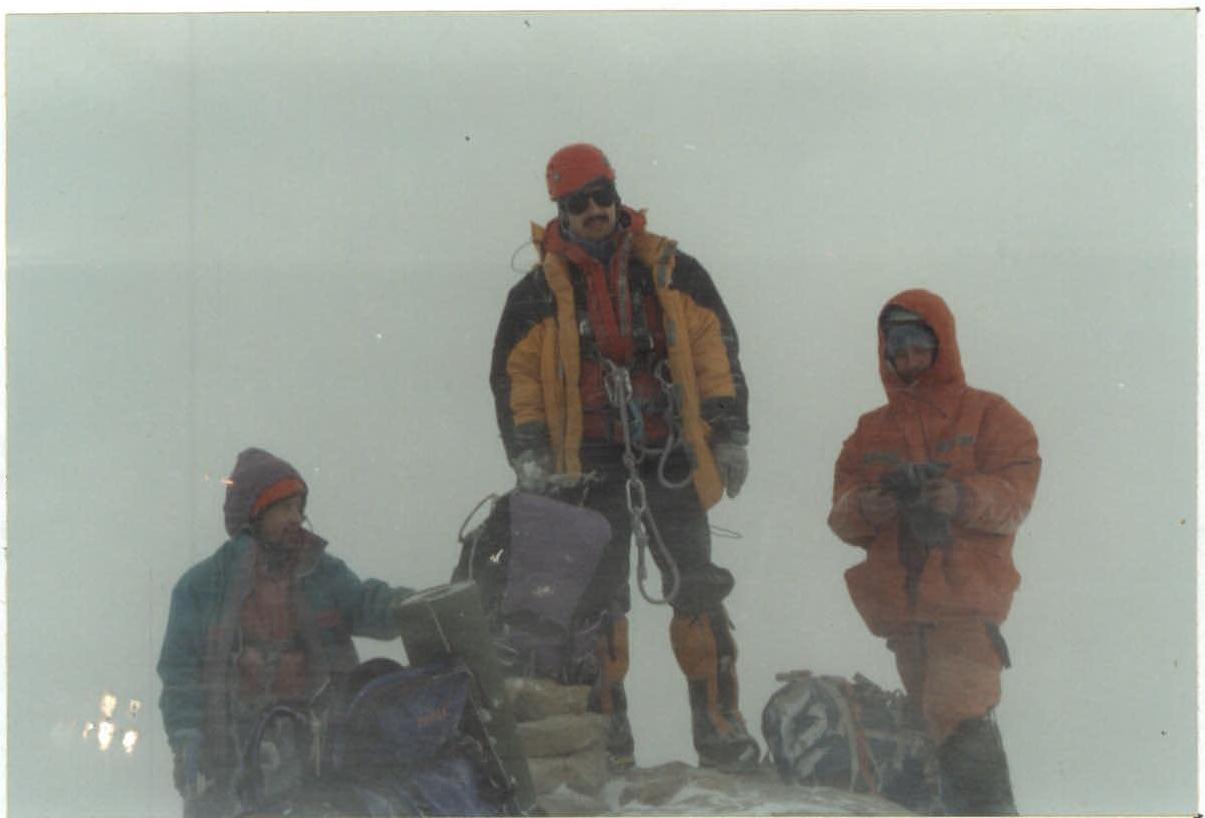
Photo by Yu. Koshelenko
In the frame (left to right):
- Krivitsky A. N.
- Andreev A. V.
- Voronin S. V.
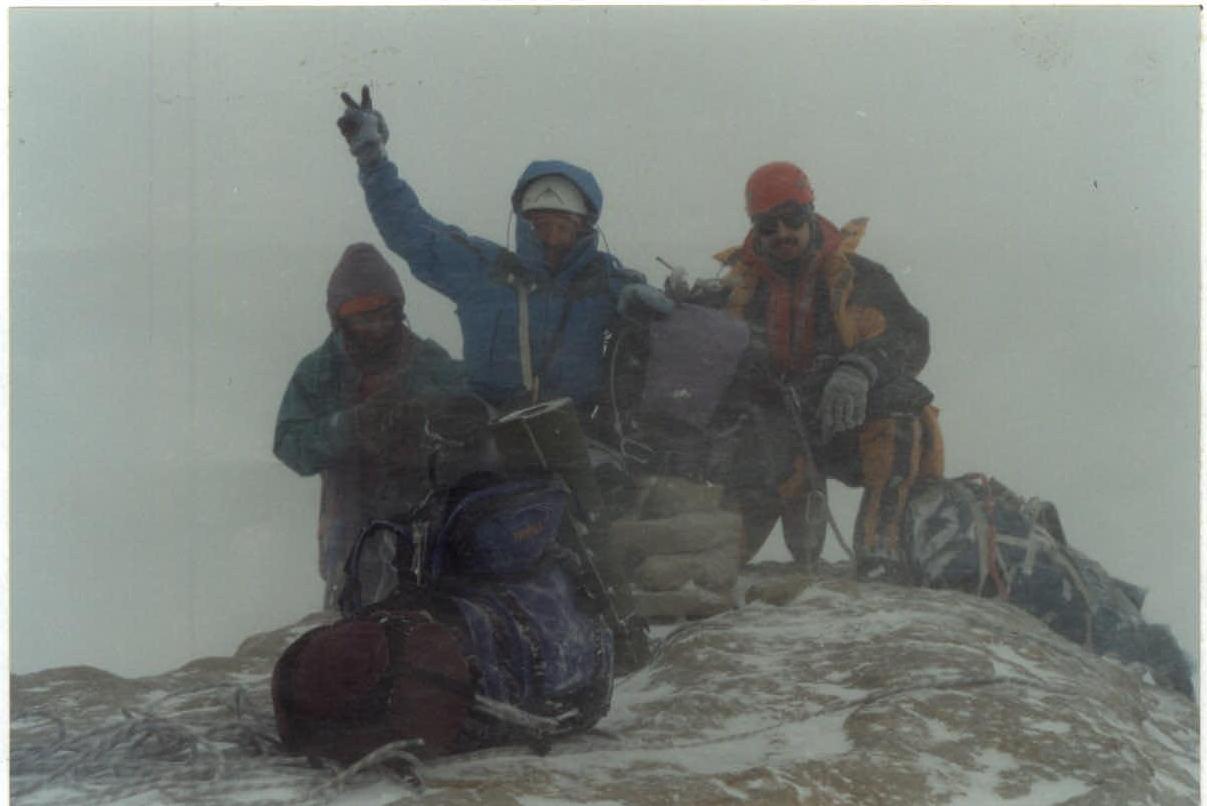
Photo by S. Voronin
In the frame (left to right):
- Krivitsky A. N.
- Koshelenko Yu. V.
- Andreev A. V.