Ascent Passport
-
Western Caucasus, Uzunkol area, Myrdy gorge, section number according to the classification table 2.3
-
Kirpich peak, via the "diamond" on the Western wall (Yu. Manoylov's route)
-
6A category of complexity
-
Route type: rock
-
Route height difference: 800 m Route length: 1010 m Length of sections: 5th category of complexity — 155 m, 6th category of complexity — 125 m Average steepness: main part of the route — 80° entire route — 62°
-
No hooks were left on the route Hooks used on the route — 27 Hooks hammered: rock — 65; chocks — 82; ice — none
-
Team's travel hours: 20 h, 3 days
-
Leader: Yuri Alexandrovich Gaidamakin, Candidate for Master of Sports
Participants:
- Sergey Vladimirovich Glukhov, 1st sports rank
- Alexander Anatolyevich Gribtsov, 1st sports rank
- Alexey Vyacheslavovich Nedelín, 1st sports rank
- Vladimir Ivanovich Shmatov, 1st sports rank
-
Coach: Yuri Alexandrovich Gaidamakin
-
Departure to the route: 07:00 July 24, 2007 Reaching the summit: 10:00 July 26, 2007 Return to Uzunkol ASC: 17:00 July 26, 2007
Coach and team leader: Yu.A. Gaidamakin
General photo of the summit Taken from the southern slope of Karabashi peak on July 23, 2007 Routes:
- "diamond" on the 3rd wall (Yu. Manoylov), climbed by the team
- NW wall (S. Sogrin)
- along the gutters on the 3rd wall (G. Sedov)
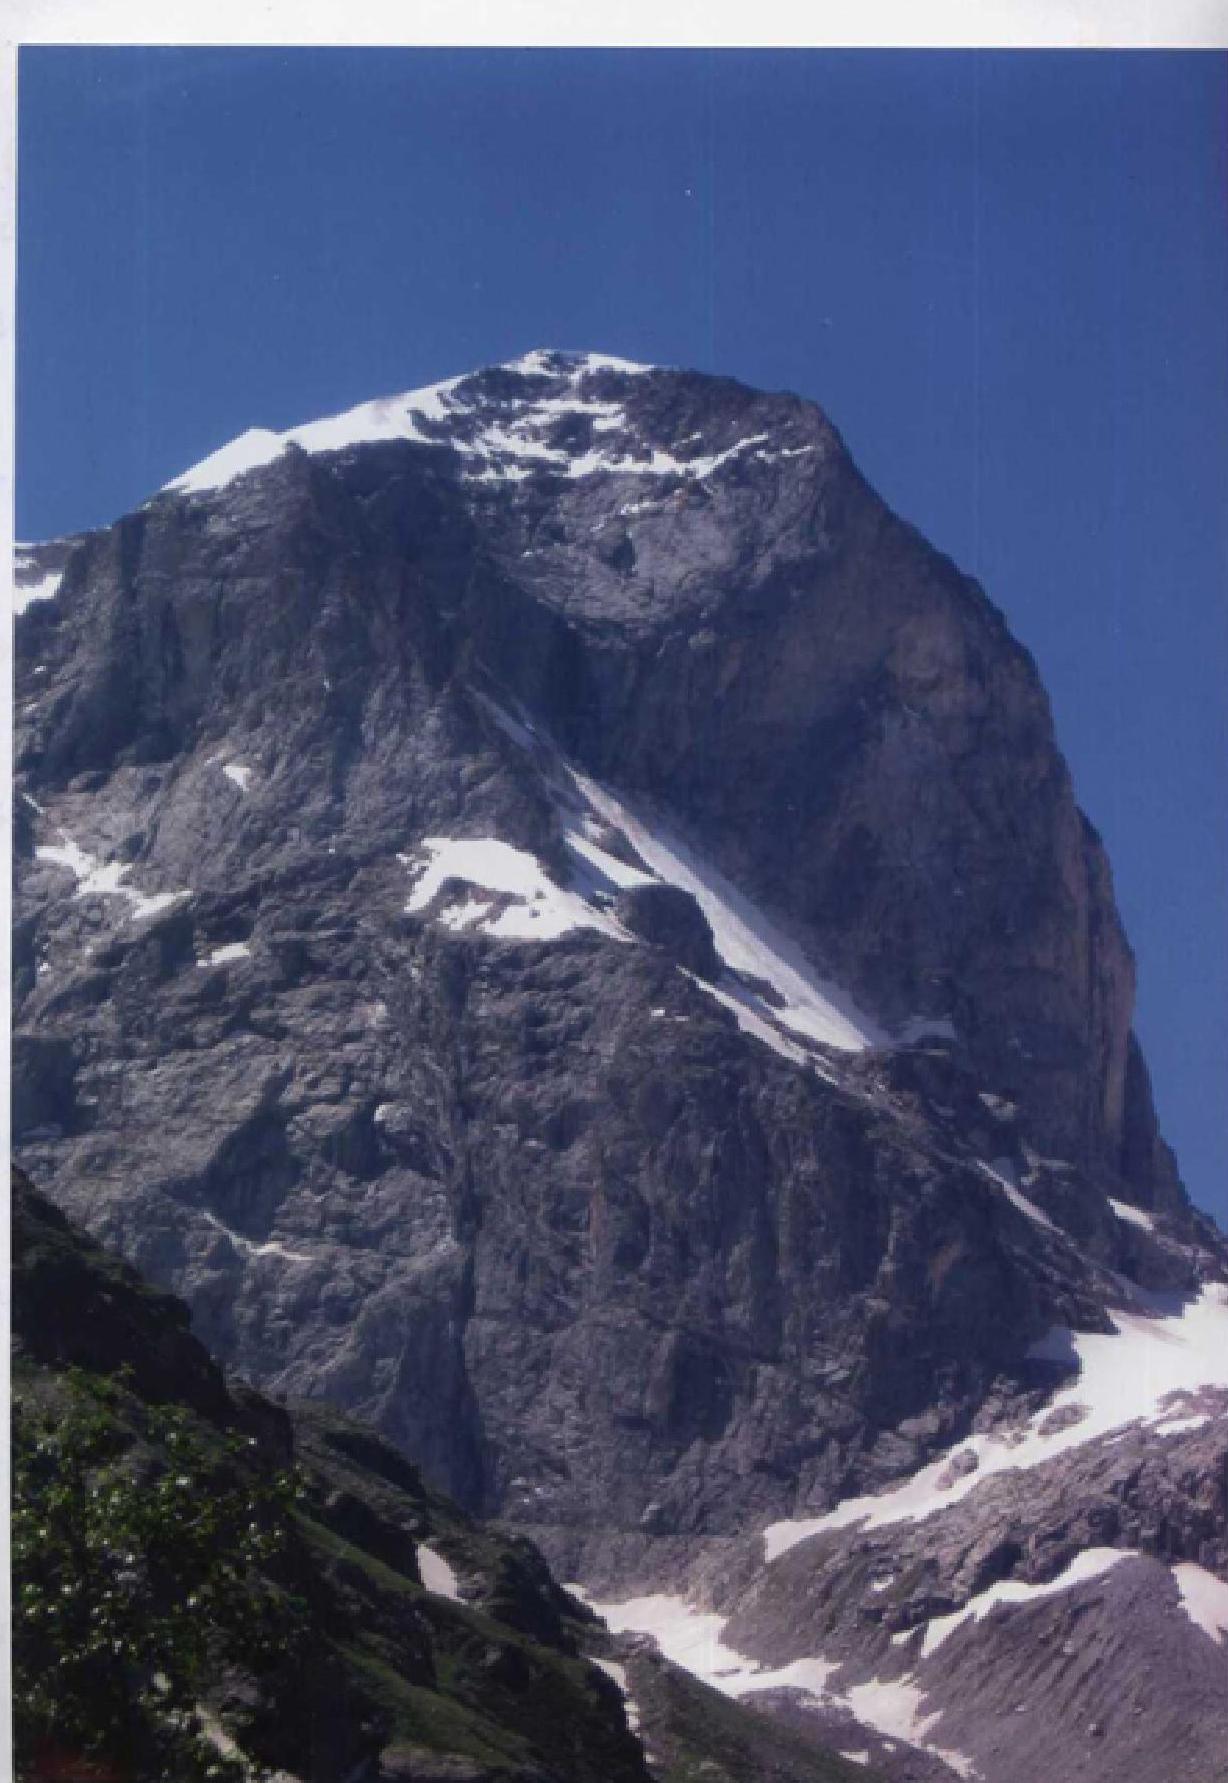
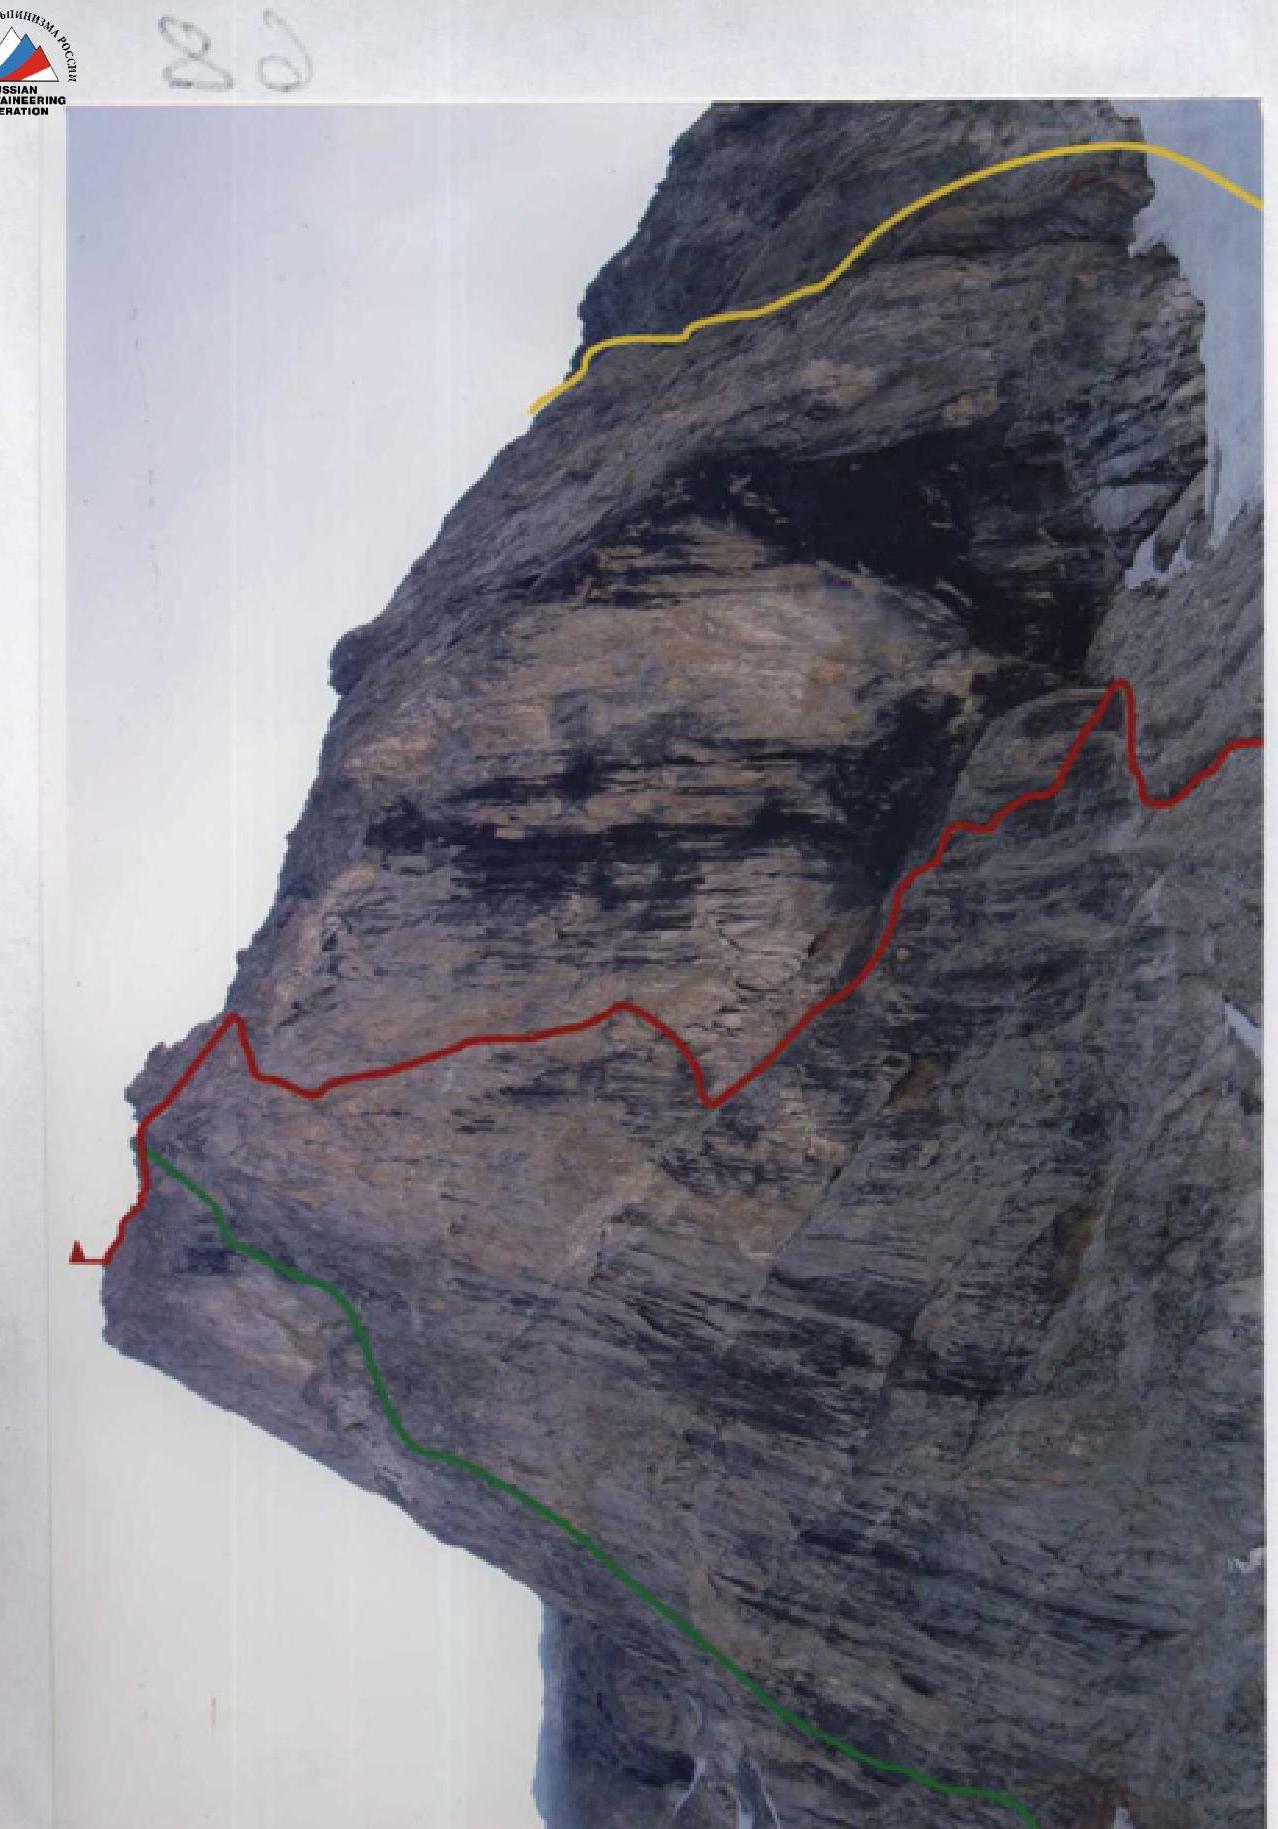
Photo of the wall profile from the left. Taken on July 23, 2007 from the moraine of the Western Dalar glacier
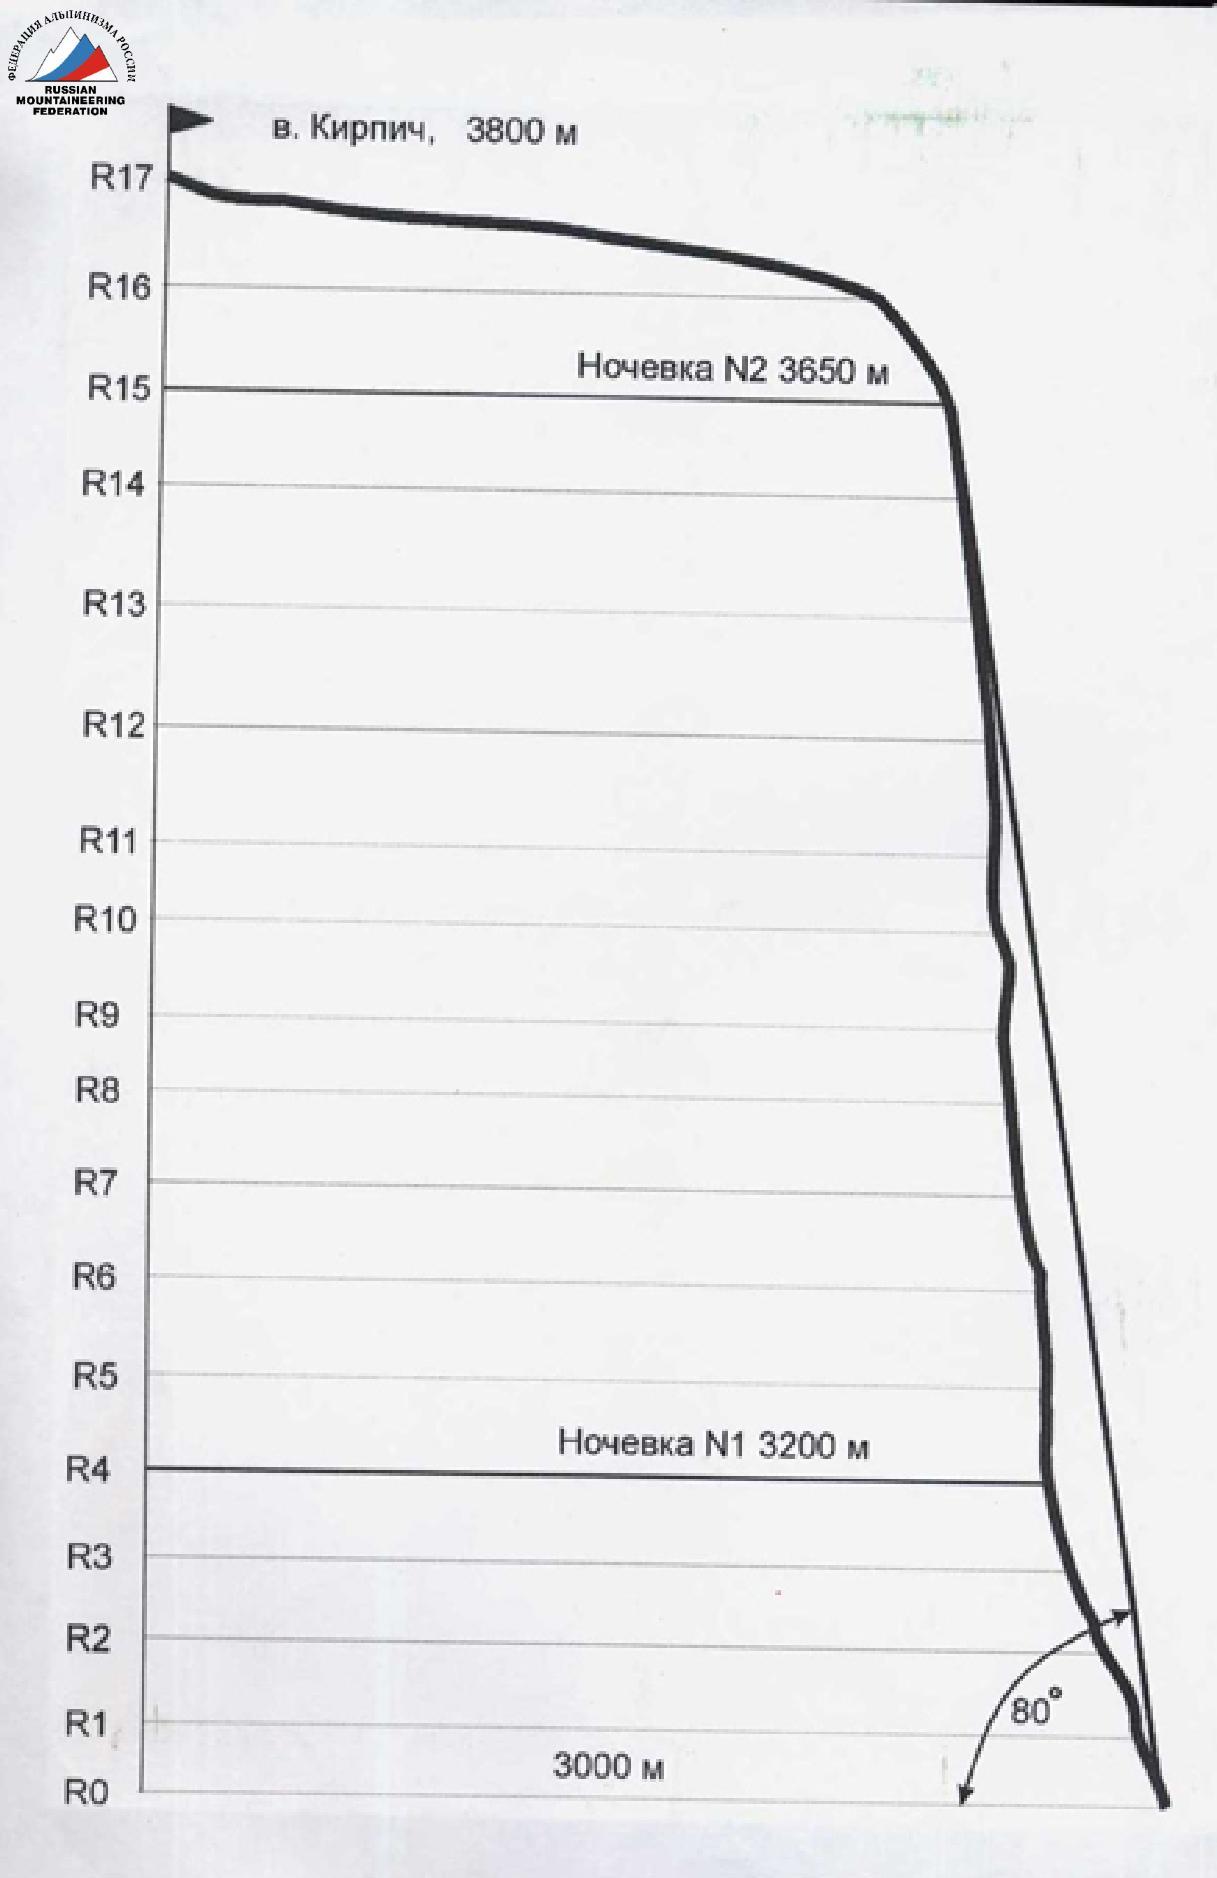
Route profile. Scale 1:6000
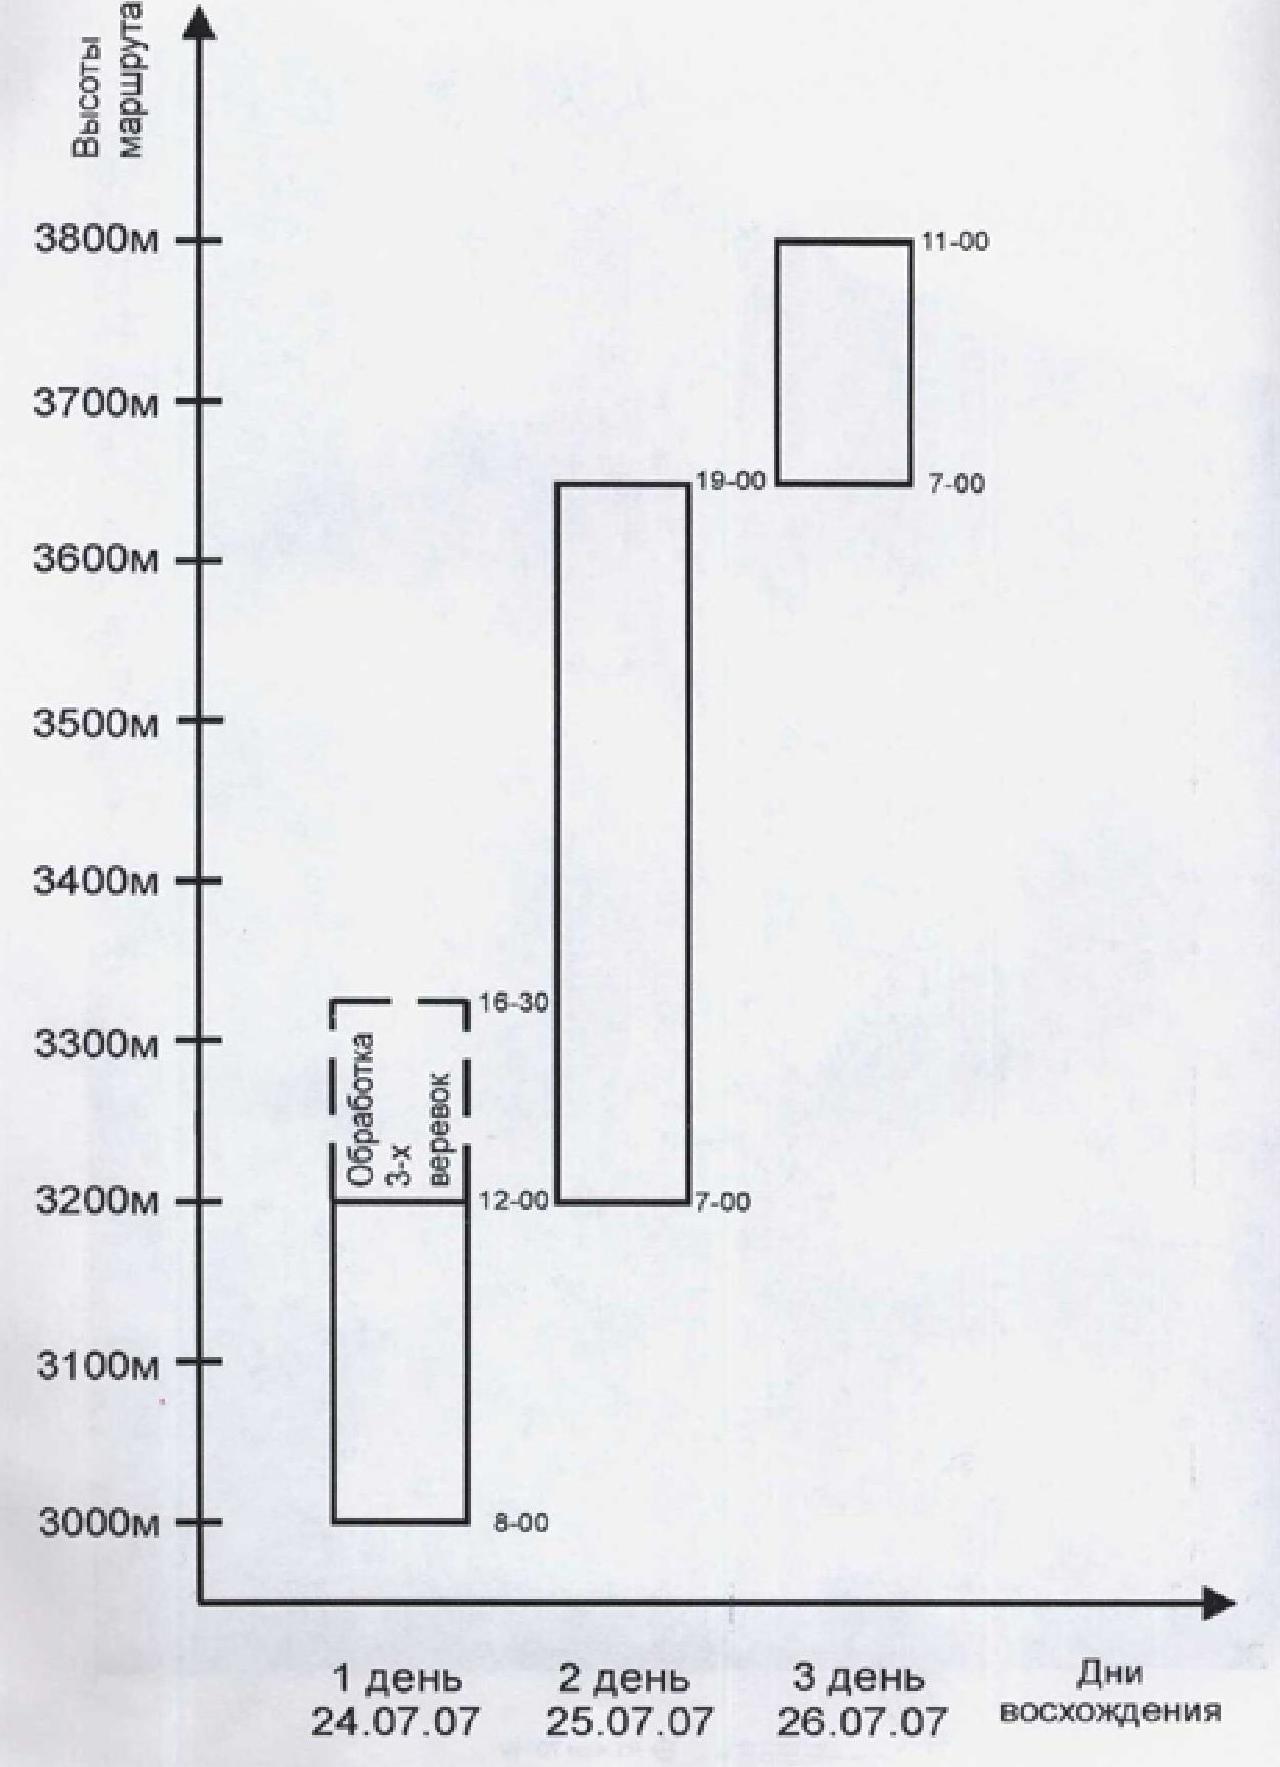
Ascent graph
Route diagram in UIAA symbols
Technical photo of the route Taken on July 23, 2007 from the southern slope of Karabashi peak
Note from the control tour: "July 19, 2004. Climbing duo Fyodorov V.V. — Ivanovo, Shlyapin A.V. — Moscow. Making an ascent to Kirpich peak via the "diamond" on the 3rd wall, 6A category. Fursov — Ivanov's note was removed. Good luck to all!"
Note from the summit: "July 24, 2007 14:00 Group from Minsk gatherings at Uzunkol ASC consisting of:
- Korbut F.S. — team leader instructor
- Zaitsev P.I. — instructor
- Ignatova N.K.
- Belova V.V. made an ascent to Kirpich peak via route 3B class. (right part of the 3rd wall) Removed Saveliev's note from July 21, 2007. Weather is good. Good luck! Ascent made by Kulbchenko A.E."
Processing of the R5–R6 section Taken on July 24, 2007 from the first overnight stay
Passing the chimney before the cornice (R6–R7 section)

Ascending via fixed ropes (R8–R9 section)
Passing the inner corner (R10–R11 section)
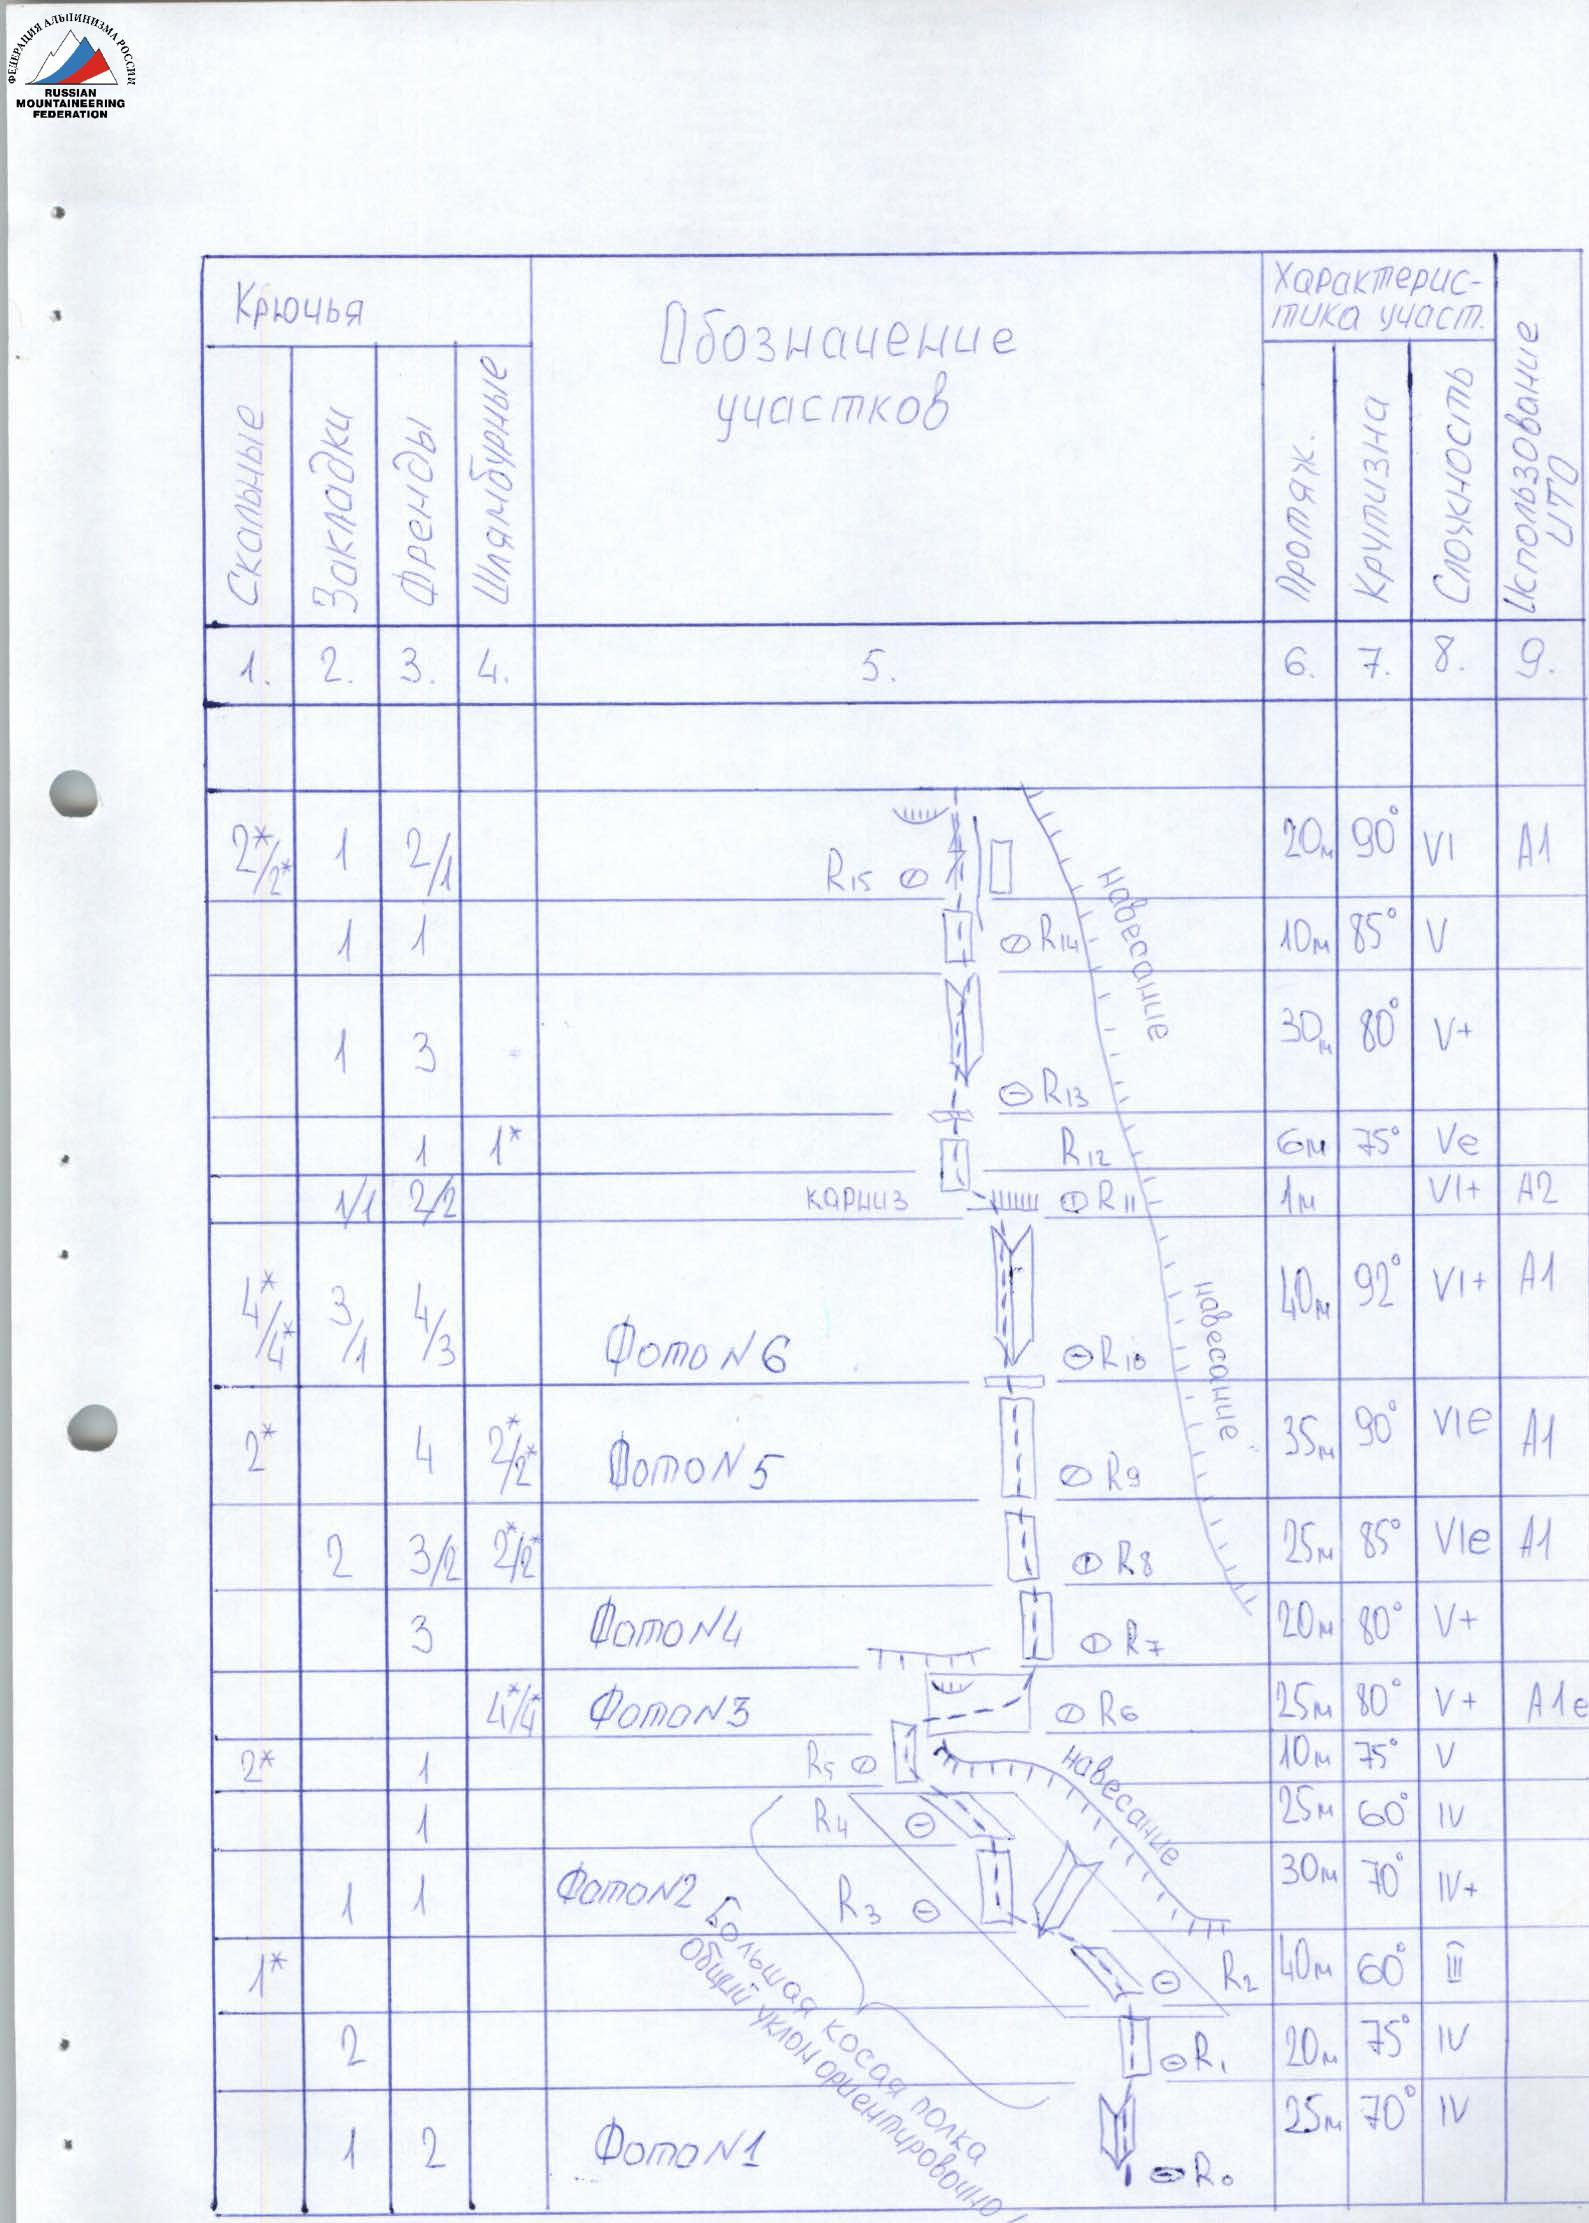
Technical data by sections
| Pitons (rock) | Chocks | Friends | Bolts | Section designation | Section characteristics (Length) | Section characteristics (Steepness) | Section characteristics (Difficulty) | Section characteristics (Use of artificial aids) |
|---|---|---|---|---|---|---|---|---|
| 2* | 1 | 2 | 1 | R15 | 20 m | 90° | 6 | A1 |
| 1 | 1 | R14 | 10 m | 85° | 5 | |||
| 1 | 3 | R13 | 30 m | 80° | 5 | |||
| 1* | 1 | R12 (cornice) | 6 m | 75° | 5 | A2 | ||
| 1 | 1 | 2 | R11 | 1 m | 6 | A1 | ||
| 1* | 3 | 4 | 3 | R10 (Photo №6) | 40 m | 92° | 6 | A1 |
| 2* | 4 | 2 | 2 | R9 (Photo №5) | 35 m | 90° | 6 | A1 |
| 2 | 3 | 2 | R8 | 25 m | 85° | 6 | A1 | |
| 3 | R7 (Photo №4) | 20 m | 80° | 5 | ||||
| 1* | 4 | R6 (Photo №3) | 25 m | 80° | 5 | A1 | ||
| 2* | 1 | R5 | 10 m | 75° | 5 | |||
| 1 | R4 | 25 m | 60° | 4 | ||||
| 1 | 1 | R3 (Photo №2) | 30 m | 70° | 4 | |||
| 1* | 1 | R2 | 40 m | 60° | 3 | |||
| 2 | R1 | 20 m | 75° | 4 | ||||
| 1 | 2 | R0 (Photo №1) | 25 m | 70° | 4 | |||
| R24 (P. Kirpich) | 40 m | 40° | 2 | |||||
| R23 | 160 m | 50° | 3 | |||||
| 4 | R22 | 20 m | 65° | 4 | ||||
| 3 | 3 | R21 (Cornice) | 1 m | 6 | A2 | |||
| 4* | 1 | R20 | 25 m | 75° | 5 | |||
| 1 | R19 | 10 m | 60° | 4 | ||||
| 2 | 3 | R18 | 30 m | 75° | 5 | |||
| 2 | 4 | R17 (Photo №7) | 40 m | 80° | 5 | |||
| 2 | 2 | R16 (Flake) | 25 m | 85° | 5 |
* — Use of previously left equipment on the route
Route Description
By sections
R0–R1 — Not clearly defined inner corner, passing through the center of a rounded rock outcrop. Smooth rock structure.
R1–R2 — Rock wall with rich microrelief. Photo №1.
R2–R5 — Large oblique ledge. Rocks are simple but heavily damaged. Many loose stones. Photo №2.
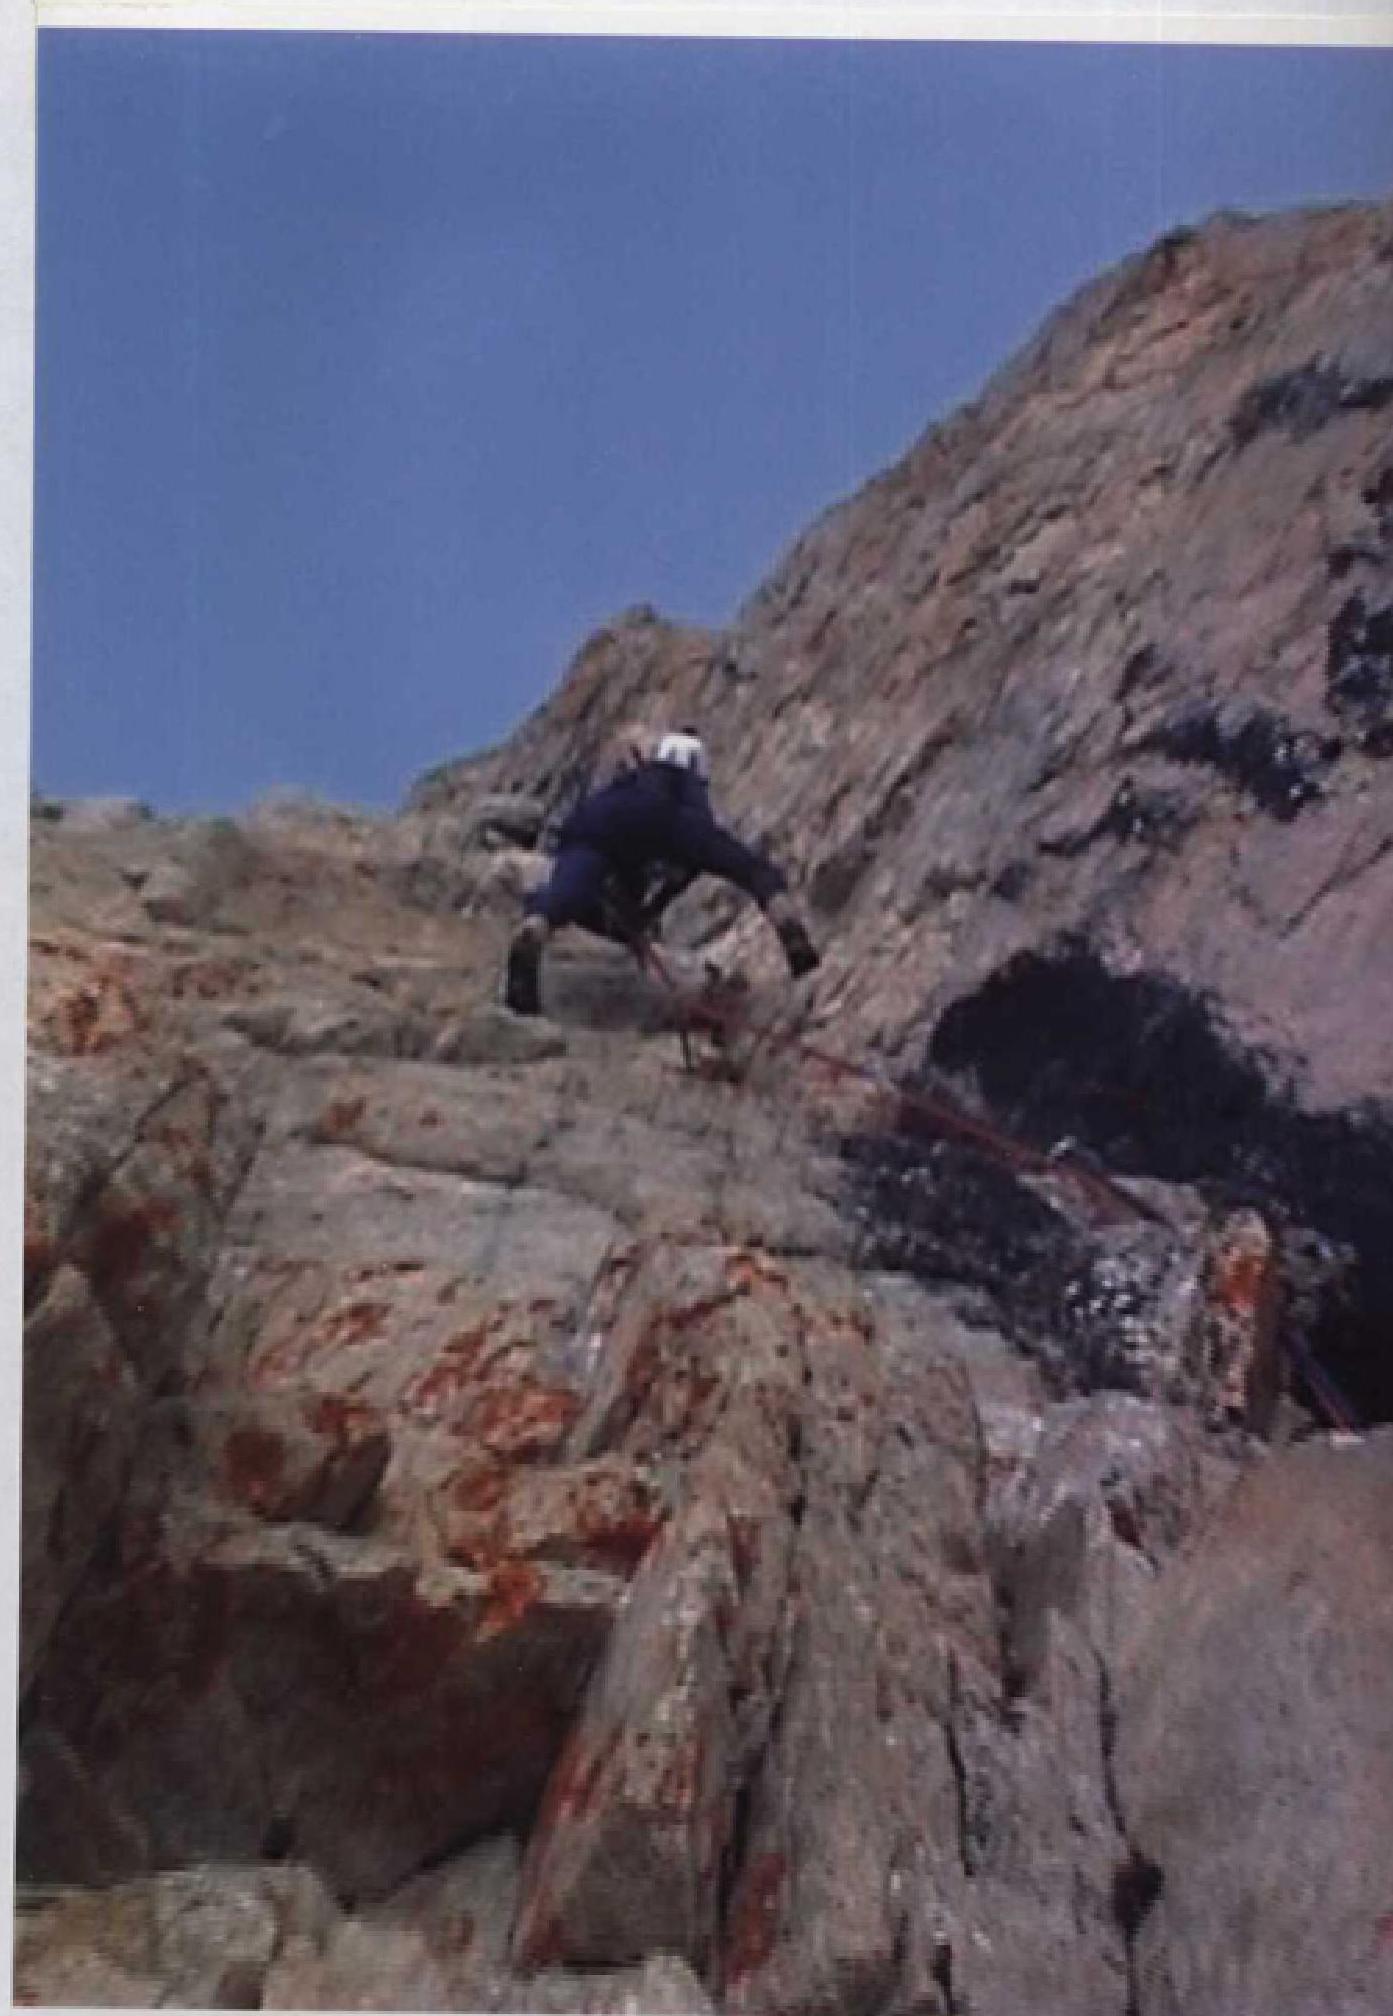
R5–R6 — Ascent up a short wall under an overhang. Then a very complex traverse to the right along a monolithic vertical wall, using artificial aids on bolts. The last participant must pass this place only on double ropes with rope retrieval. Photo №3.
R6–R10 — Series of steep monolithic walls. Very poor microrelief. However, it's still possible to use medium-sized friends. Some places have earth- and grass-filled cracks. Climbing is difficult. Photo №4, Photo №5.
R10–R11 — Overhanging inner corner. Some parts are damp. Passed in a stemming position. The left side of the corner has a more convenient structure for climbing and organizing protection. Use of artificial aids. Photo №6.
R11–R15 — Cornice crowning the inner corner is passed head-on. Rocks are unreliable. It's recommended to use the smallest-sized friends. Immediately after the cornice, a short wall leads left and up to a small inclined ledge. Here is an excellent belay station equipped with two bolts.
R15–R16 — Monolithic inner corner. Very few cracks and holds. Climbing is difficult.
R16–R17 — Vertical wall. Relief similar to the previous section.
R17–R19 — One of the most critical parts of the route. The main landmark here is a large flake; this 45-meter section should lead to it. However, the difficulty lies in the fact that the flake is not visible from below. Thus, the group can easily be drawn into a seemingly simpler and more appealing direction to the right and up, as it's guided by a series of old pitons, chocks, and loops left by other groups. This path is a dead end; however, from here, the flake and the correct path to it are visible.
R17–R18 — Traverse left along a ledge between the wall and the flake. Then ascend 40 meters up a steep wall with diverse relief to a small ledge under an overhang. Photo №7.
R18–R19 — Move right along the ledge to exit from under the overhang into the base of the wall. Then ascend the wall. On the right and left of the wall are small rock ridges. The lower part of the wall contains unreliable blocks.
R19–R20 — Ascend along an inclined slab to the base of a monolithic vertical slab.
R20–R22 — Ascend directly up the slab under a small cornice. Directly under the cornice, the rocks are damp and very slippery. The cornice is passed head-on along a narrow rock crack using horizontal pitons.
R22–R23 — Inclined inner corner leading to the roof of the wall.
R23–R24 — Section of simple, inclined rocks. In dry weather, it's possible to move with simultaneous protection.
R24 — Ascent to the summit via scree slopes.

Photo №1. R0–R2 section (Route start)
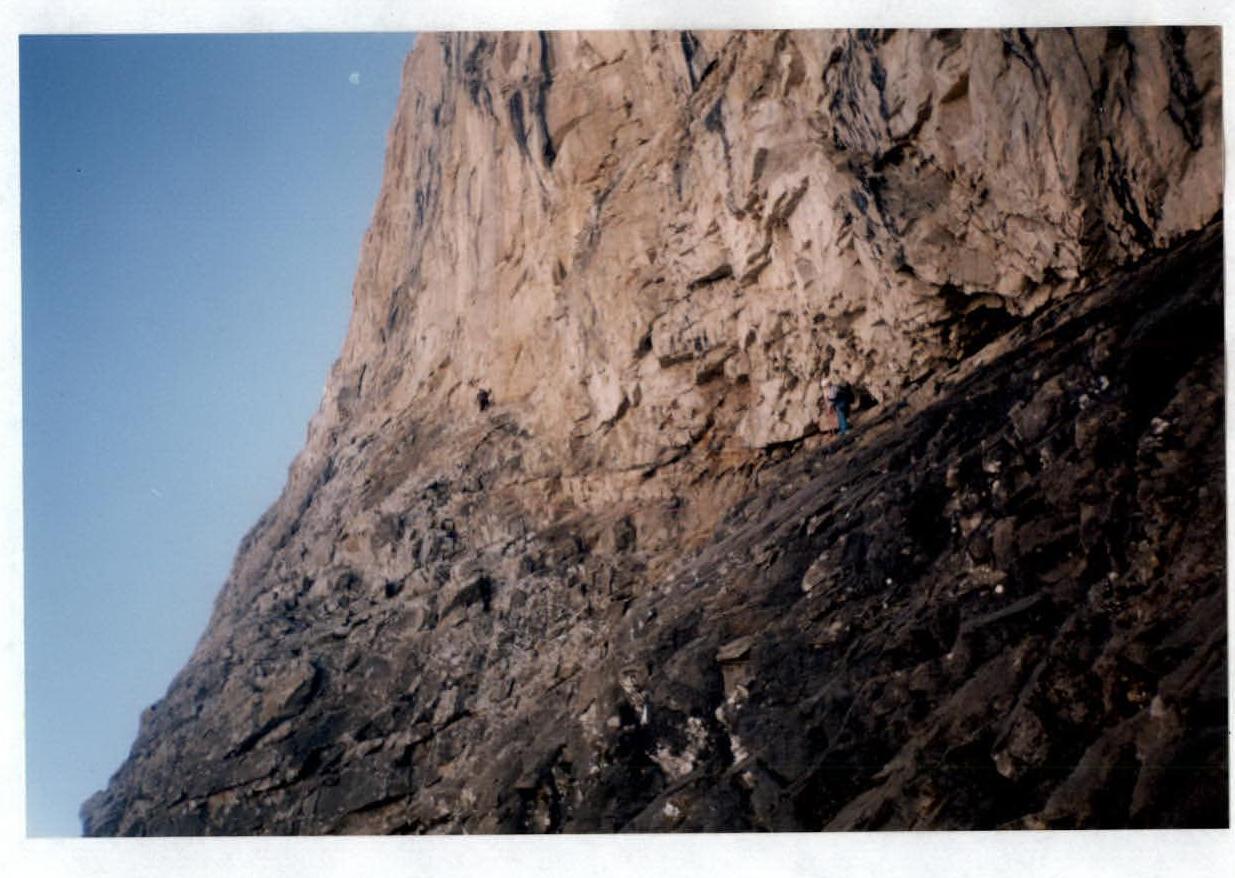
Photo №2. R2–R5 section (Large oblique ledge)
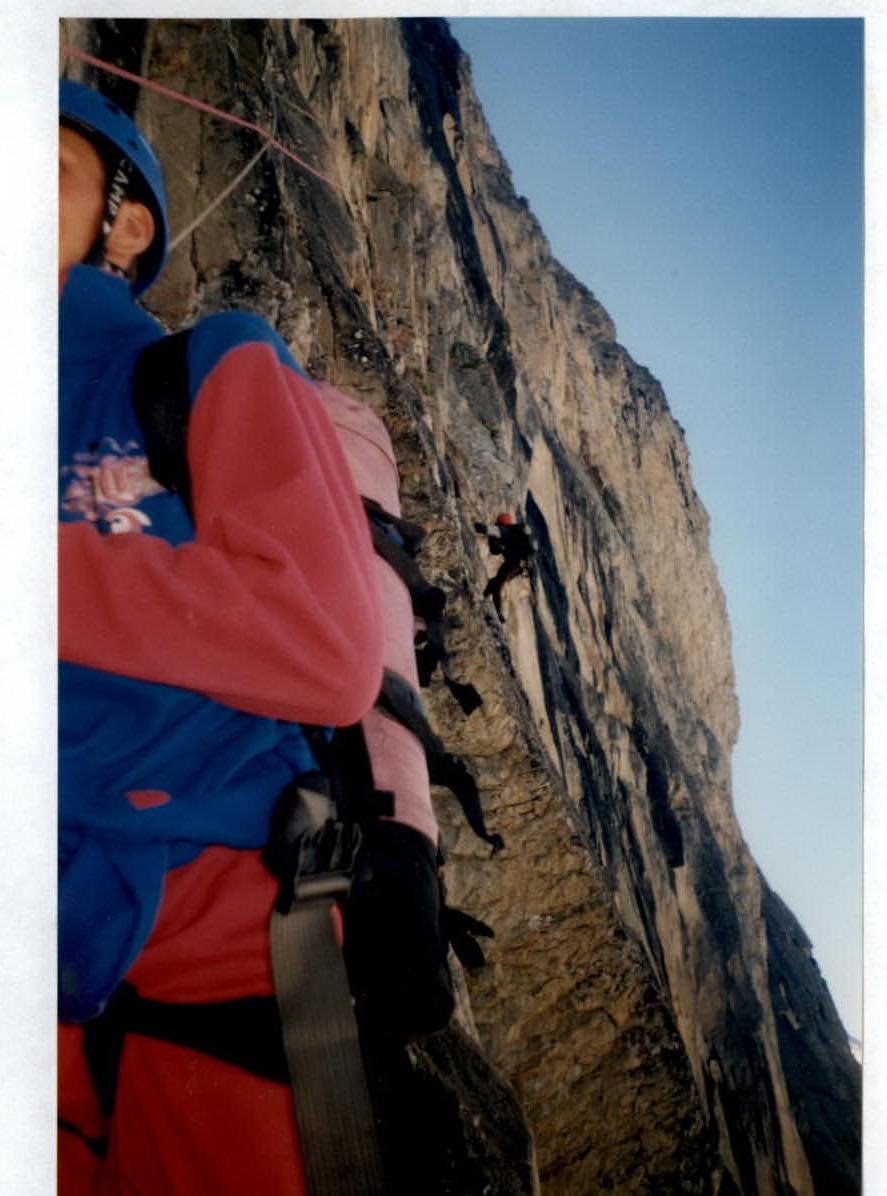
Photo №3. R5–R6 section (Traverse right along monolithic wall)
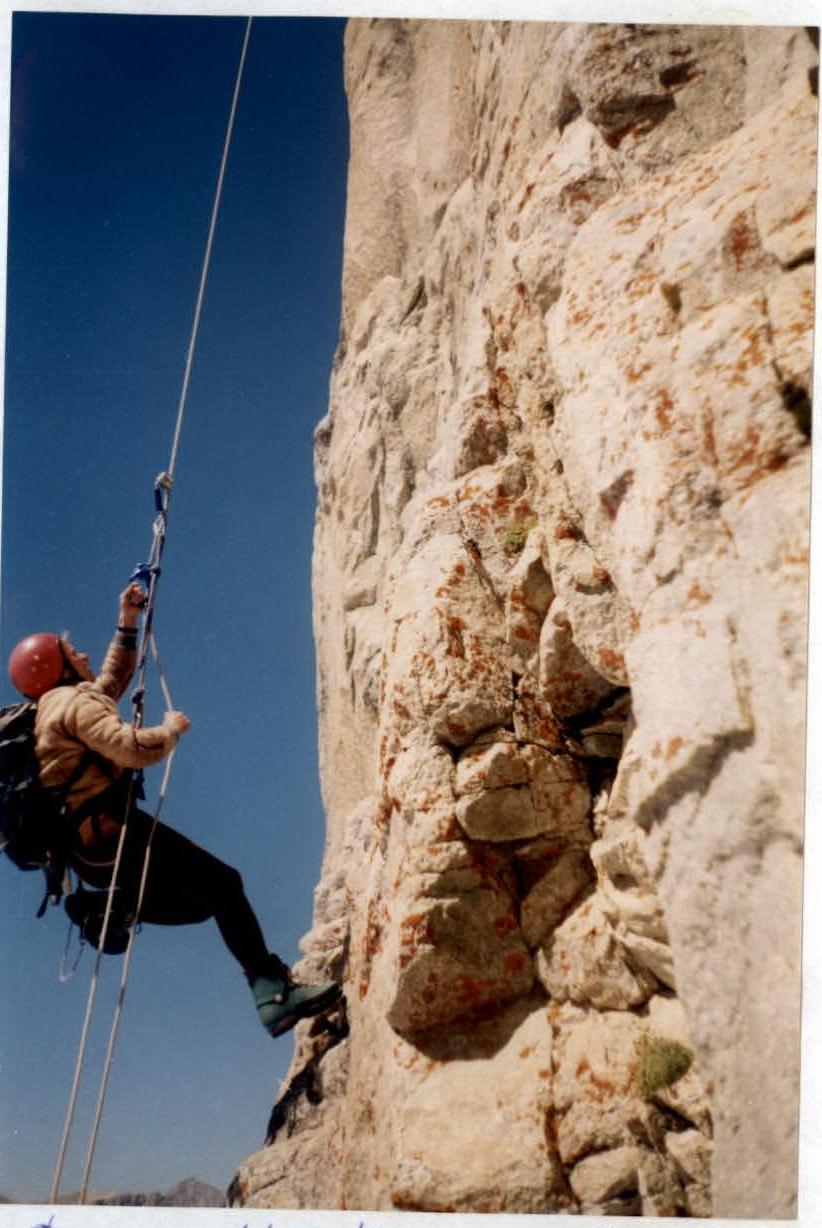
Photo №4. R7–R8 section (Series of steep monolithic walls)
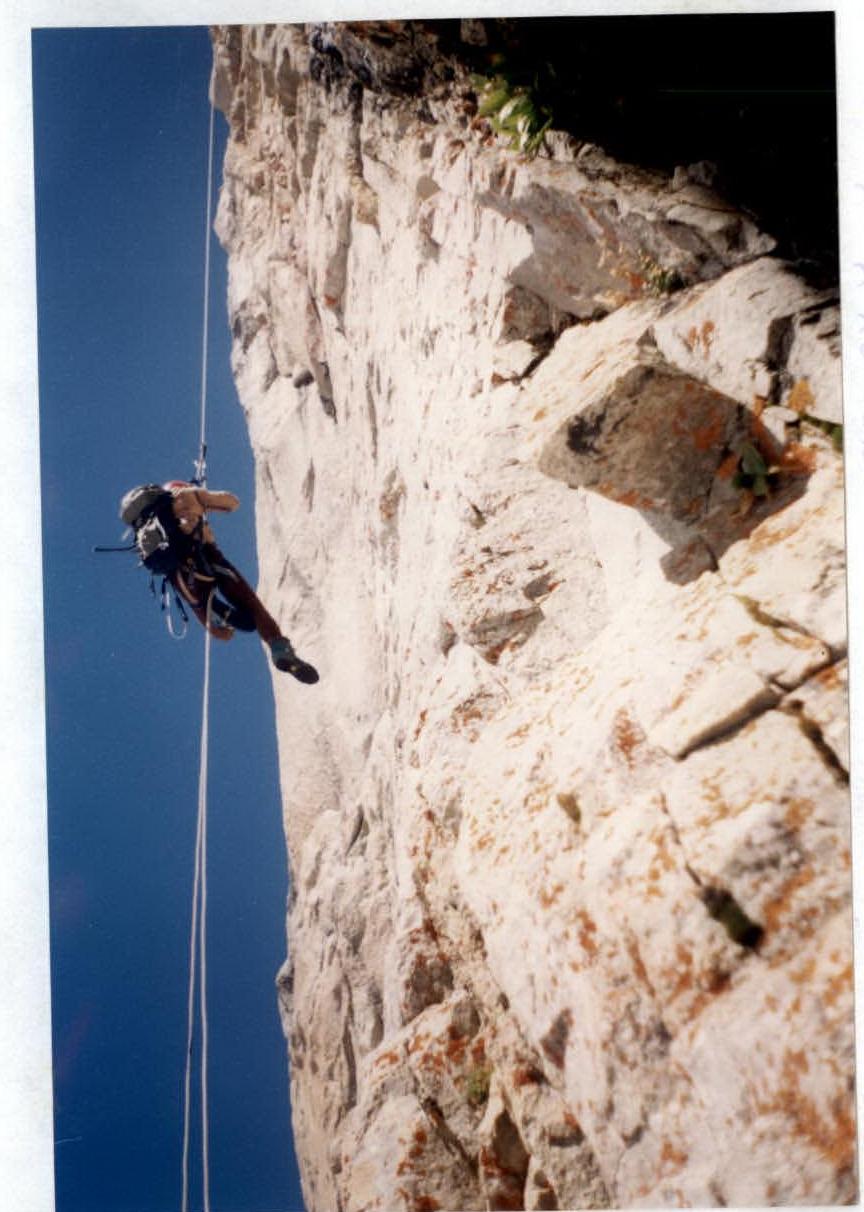
Photo №6. R10–R11 section (Overhanging inner corner)
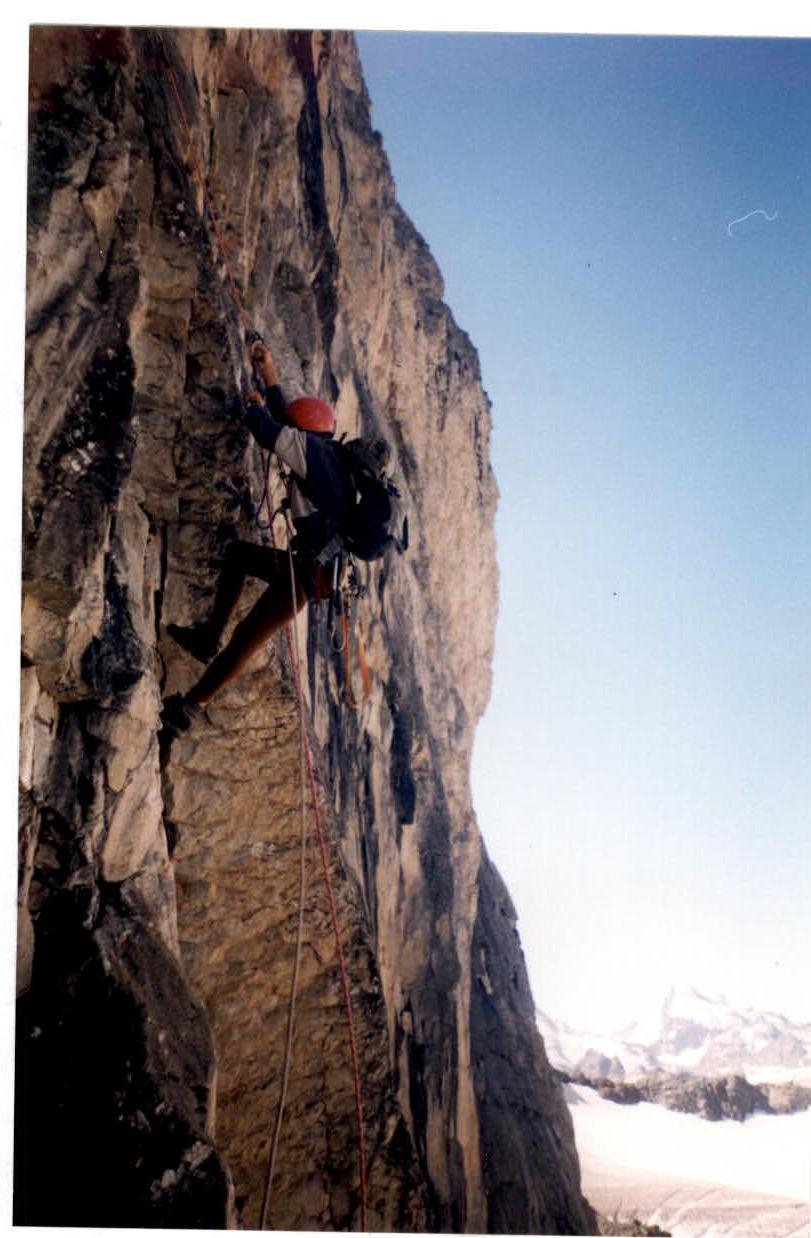
Photo №7. R17–R18 section (Wall with diverse relief)