Author: Yu. Vasilenko
Description of the "Brov'" route, 5A, Sokol mountain
The route is very beautiful and diverse in climbing. Stations on bolts. Nowadays, the route has been re-drilled by Misha Voloshinovskiy for climbing and is done mostly with free climbing, except for the "brov'" section.
To start, one needs to approach the wall from the road. The climbing is similar to 3rd category routes, and belaying needs to be organized. The start of the route is on a ledge under the "Brov'" cornice, to the right of a slab leaning against the wall. At this spot, two gaps lead under the cornice. One can move either through the right or the left gap.
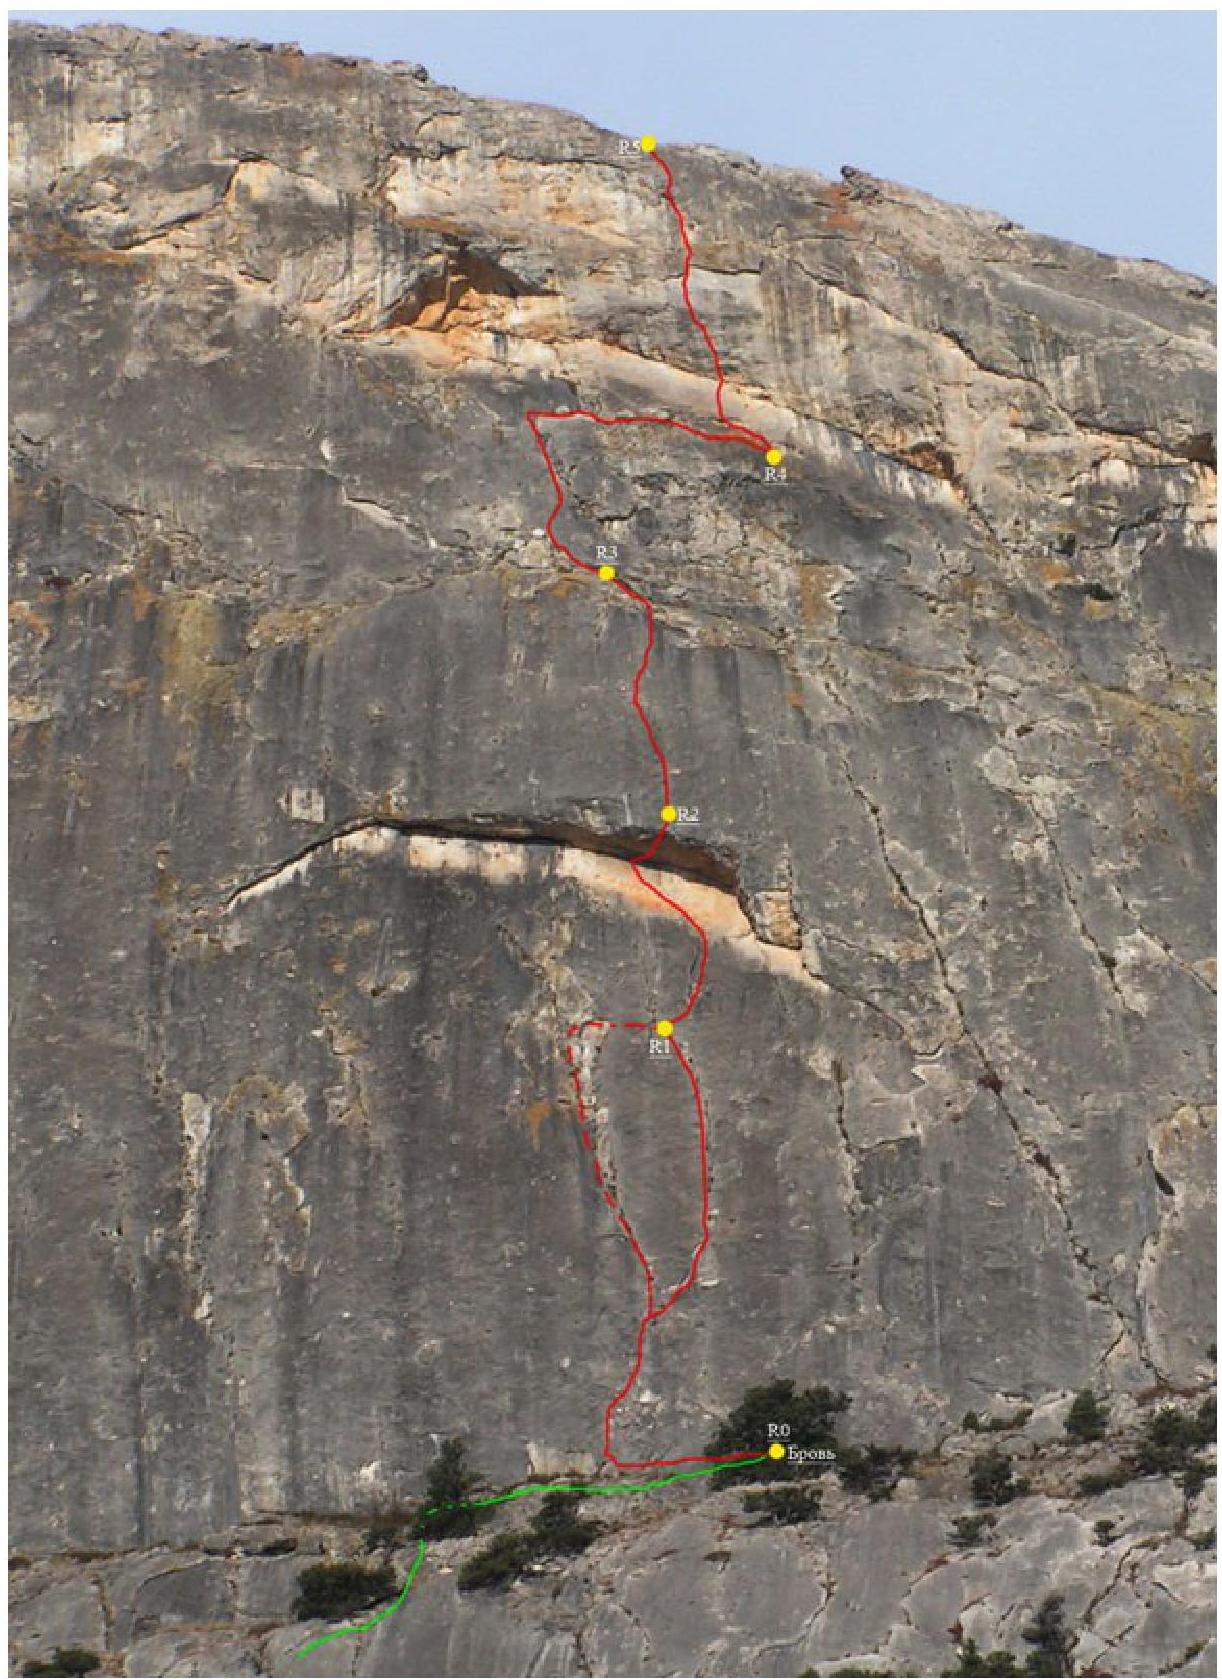
Sokol, Brov' route, 5A R0–R1: 45–50 m, 6b, belaying on bolts + own protection, station on a bolt and two pitons (the left variant of reaching the station requires a pendulum).
The start of the first rope is through a slab, which is the crux of the rope. The climbing is mixed, with free climbing interspersed with aid climbing, and constant "under-climbing".
1st variant.
- Climb 10 m up the slabs, then traverse right to the "right" gap, and up through it to the station.
2nd variant.
- Climb 10 m up the slabs, then up through the "left", partially destroyed, gap. Station on pitons.
- Then, pendulum to the "right" gap and up through it to the station on 3 bolts.
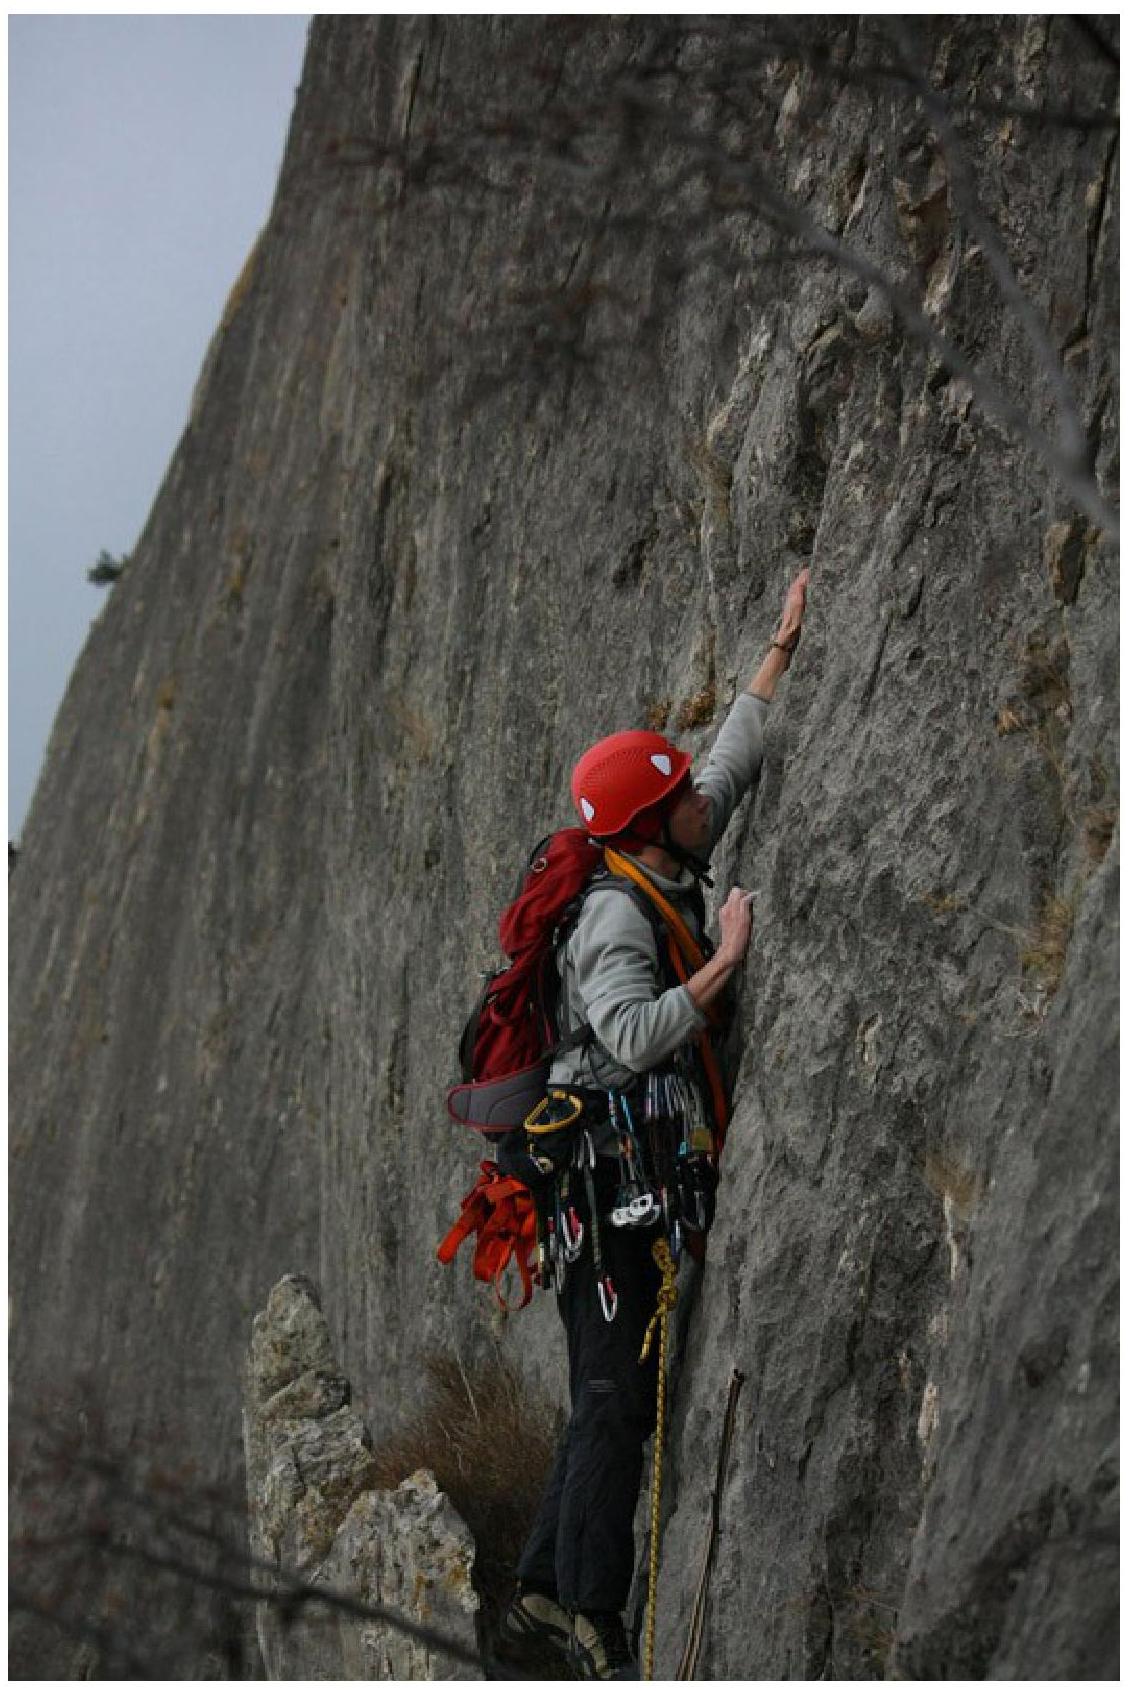
Sokol, "Brov'" route - start of the route. Photo by: Kulpin Anton.
R1–R2: 25 m, 5c
- Belaying on bolts + own protection
- The "Brov'" cornice is traversed with aid climbing on bolts
- Station on two bolts above the cornice
The "Brov'" cornice is traversed on bolts; it's probably impossible to do it with free climbing. There are old "Fantik" bolts everywhere, but climbing on new bolts is quite reliable. This section is more work for the second climber, and one can get stuck here for a long time.
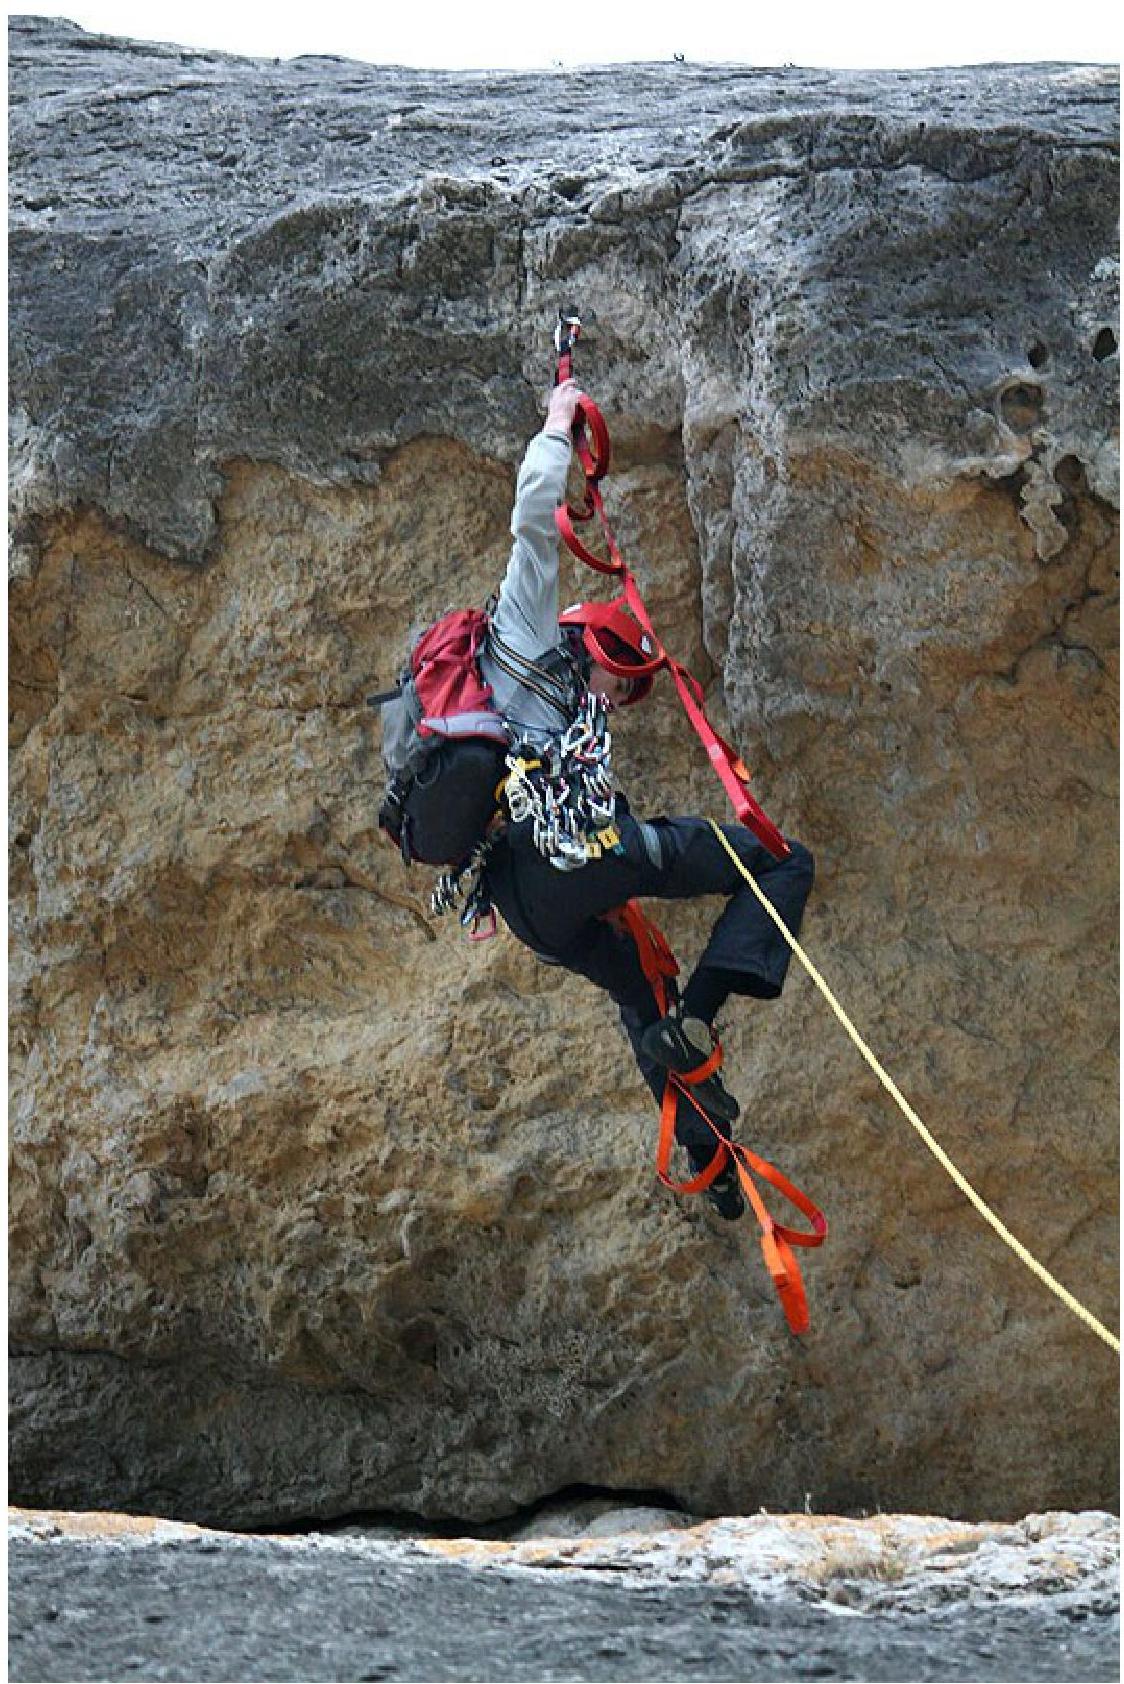
Sokol, "Brov'" route - traversing the "Brov'" cornice. Photo by: Kulpin Anton.
R2–R3: 25–30 m, 6a+, slab climbing on friction, belaying on bolts, large gaps between bolts in the lower part, station on two bolts on a comfortable ledge under an overhang.
R3–R4: 30 m, 5c+, climb a slab (belaying on bolts), then simple climbing up a gap to a ledge, followed by a traverse to the right, station in an internal corner on a ledge, on a bolt + own protection.
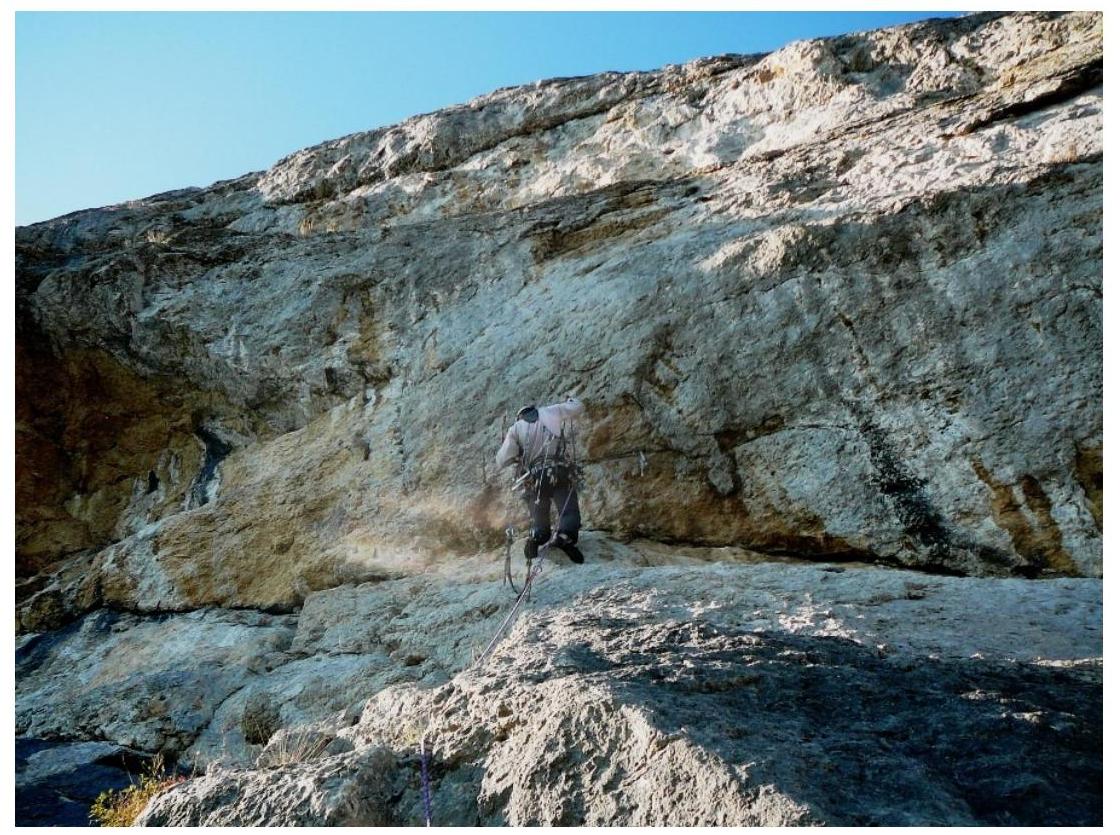
R4–R5: 40 m, 6B+ (or A1), belaying on bolts (some are "bolted"), be careful when passing the overhanging section, station on a plateau on two bolts. Through the overhanging section, two cascades, 4 m each.
- On the first overhanging section, there are "bolted" holds for climbing
- If you look closely, you can climb it with free climbing (C0, 2 m, 95; 6A, 8 m)
Description of the last rope (sascha-lange.livejour*nal.com): "And here's the last rope with the infamous bolt. I look at it and honestly don't understand how to climb it. I see one bolt and nothing else; the wall is overhanging. I climb to this bolt, and it's very scary to clip into it; it's one-third out of the wall, and the ear is rotten. What to do next is unclear; it's clear that you need to go up. I see old 'Fantik' bolts, which are placed every meter, but they're all knocked out. Climbing like this, calling it free climbing, is unpleasant; there's no possibility of belaying except for this bolt - no belaying at all. If you fall, you'll land right on the ledge, so this bolt is placed very poorly; I understand why there's so much written about it on the internet.
Tried to find something for a cam - nothing! Smooth wall. I really regretted not having a drill and skyhooks; I was climbing at 5A! In short, be very, very careful and climb at your own risk.
Further, at a decent distance, there was another rotten bolt, and then the climbing becomes easier. On this section with rotten bolts, you need to make bouldering moves on passive holds, approximately 6c, 6c+ - a small section, but very difficult.
Aid climbing is impossible; at least, I couldn't do it. Climbing is very scary and very dangerous. The route generally leaves a good impression, except for this spot.
The only psychologically unpleasant part for me was this "belly" on the last rope, which you need to climb out. The second time you do it, it becomes clearer. I tried to climb it several times from different sides; I can say that this spot is usually bypassed on the left - it's just unpleasant to traverse, but most people bypass it there. That's it.
- The 3rd bolt is normal and not rusty, inspiring trust
- Further, all remaining meters are climbed quickly
This section is bouldering; you need to make a series of difficult moves, and if you can't, you fall onto this bolt and reach the sloping ledge.
For a person climbing this route for the first time, it's very uncomfortable to feel themselves on a single bolt, making bouldering moves on holds that are not immediately visible, to a bolt that's also not immediately visible. If I had confidence in this bolt, I could fall and fall, but I didn't want to. I tried to hook a cam somewhere, but I didn't find anything.
Recommended equipment:
- 50 m rope
- set of cams and nuts
- 16–18 quickdraws
- 3 large and 2–4 small slings
- pitons are mandatory
- hammers
- 4 ladders
Overall impression: A classic route with a high level of climbing. Many sections are done on determination. Time to complete for an average team: 3.5–5 hours.
Material prepared by: ALP Project