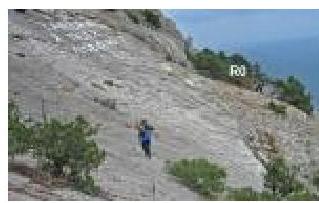
Sokol Mt., "Gammi Wall" route (1B)

General view Notes:
- The route is good because the sun is in full force only after noon, and it is also well protected from winds that sometimes blow off the routes along the main wall.
- Since the route in the middle part passes through a series of rain gullies, passing it in the rain is dangerous - water can carry stones.
- Helmets are mandatory on the route due to the presence of loose rubble in the upper part.
- If the length of the section is not explicitly stated, it is considered to be a rope length of 50–55 m.
- The choice of stations is relatively arbitrary due to the sufficient number of
trees.
The starting point of the route is a message to an unknown
Tatiana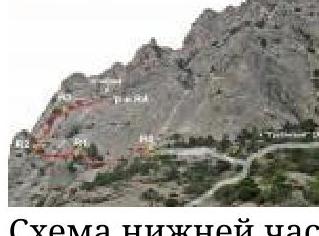
Scheme of the lower part of the route R0–R1 — easy, walking along the slope. Need 1–2 loops on tree-bushes in the middle of the rope. Station on the saddle or its slopes, on a pine tree
R1–R2 — I Traverse along shelves with trees, with a small descent at the beginning and a small gain in height at the end. Station on a tree. Nuts, mainly loops on trees and their roots.
R2–R3 — I+ Along the inner corner, station on a tree. Intermediate points - at will on trees. Station on the next pine tree.
R3–R4 — II Transition to the right-up through a large bush into a gully directly above the drain. Station - on a tree. Nuts, possibly medium friends under a chip during traverse. Insurance is mandatory.
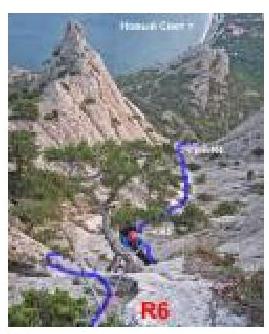
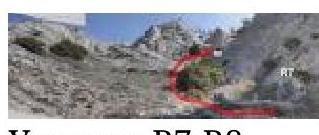
View of the R4–R6 section
R4–R5 — easy, 100–120 m
Transition on foot along the gully. There are places for tents and firewood. Water - only in rain :-)
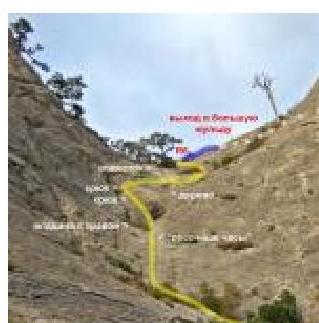
The key to the route (R5–R6) R5–R6 — III+ On friction and on small ledges, exit upwards along the drain to the "pit" with grass. Here underfoot there are "hourglasses" for which it is worth getting insurance, because there are not many places for intermediate points on this rope.
Above the "pit" begins a deep crack upwards - to the left with two pitons in the upper part, the second hook is slightly higher than comfortable. Further:
- Traverse to the right to a tree.
- From the tree - to the right - up - to the left, bypassing the drain, because the relief is not rich.
Station - on a lying tree. Equipment: small and medium nuts, loops, possibly a couple of pitons if there is no faith in "stationary" ones. A hammer is desirable.
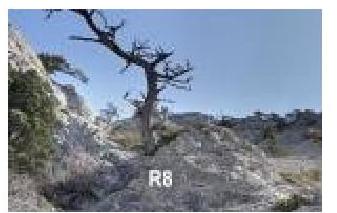
R7–R8, R6–R9 — easy — II−, 150–200 m
A walk along the ridge, veering to the right, through a series of muldas and gentle sections, passed on friction - the choice of path is quite arbitrary.
Station R9 - on the last tree on the ridge before the destroyed vertical wall about 5–7 m high, leading to the summit plateau, on the left - a failure bowl.
Insurance on trees, because in general and on the whole ridge:
- either smoothed,
- or destroyed (rubble).
View from the R8 station on the further path R9–R10 — easy — II — You don't need to climb the destroyed wall, but you need to walk along it towards the drain above the bowl on the left, and climb up through the gully 2–3 m. With points it's tight, but you can try to arrange 1–2. (Option: Bypass the wall to the right). Station on the plateau on a tree at 5–10 meters from the upper edge of the wall.
R10 — summit — easy, up to 200 m
A walking tour on the summit plateau
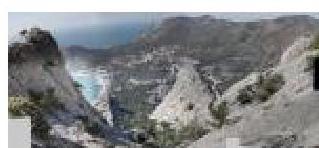
View from the route on Novy Svet and Karaul-Oba massif
Descent: along trails towards Novy Svet or Sudak. You can also take a walk through the summit of the ridge, passing north (Perchem Mt.).
The description is compiled based on the results of the passage of the связок:
- Andrey Nikanov — Roman Goncharuk — Natika Kudlay (September 2008).
- Natalia Smilyanets — Alexander Lysak (April 2009).


