Report
On the ascent of the Takhtarvumchorr ridge via the center of the Belts Wall. Estimated category of difficulty: 5B.
For classification. (First ascent: Andreev A.B., 2004.)
Khibiny mountain range, Takhtarvumchorr ridge, Classification table section: 8.6.
Team coaches: Kurdiy A.A., Pochivalov S.S. Leader: Druzhkin A.S.
Murmansk, 2021
I. Ascent Passport
1. General Information
| 1.1 | Leader's full name, sports rank | Druzhkin Andrey Sergeevich, 1st sports rank |
|---|---|---|
| 1.2 | Team members' full names, sports rank | Struin Vasily Sergeevich, 1st sports rank |
| 1.3 | Coaches' full names | Kurdiy Alla Andreevna, CMS |
| Pochivalov Sergey Sergeevich, CMS | ||
| 1.4 | Organization | Club of Alpinists and Rock Climbers |
| of Murmansk "Irbis" |
2. Characteristics of the Ascent Object
| 2.1 | Region | Kola Peninsula, Khibiny mountain range |
|---|---|---|
| 2.2 | Valley | Takhtarvumchorr ridge |
| 2.3 | Classification table section number | 8.6 |
| 2.4 | Peak name and height | Takhtarvumchorr ridge, 1143 m |
| 2.5 | Peak geographical coordinates (latitude/longitude), GPS coordinates | Latitude: 67°68′34.189″ Longitude: 33°52′85.568″ |
3. Route Characteristics
| 3.1 | Route name | Via the center of the Belts Wall |
|---|---|---|
| 3.2 | Estimated category of difficulty | Winter: 5B Summer: 5B |
| 3.3 | Route освоенности | The route is not освоен. The team made the third ascent. |
| 3.4 | Route terrain character | Winter: combined Summer: rock |
| 3.5 | Route elevation gain (altimeter or GPS data) | 350 m |
| 3.6 | Route length (in meters) | 400 m |
| 3.7 | Technical elements of the route (total length of sections with varying category of difficulty and terrain type) | 5th category — 120 m, 6th category — 160 m |
| 3.8 | Average route steepness | 88.5° |
| 3.9 | Average steepness of the main part | 83° |
| 3.10 | Descent from the summit | 1. Via the northern spur of Takhtarvumchorr ridge (no mountaineering equipment required) 2. Through Geografov Pass (no mountaineering equipment required for options 1 and 2) 3. Through Akvalang Pass. 4. Via the ascent route. (Mountaineering equipment required for options 3 and 4) |
| 3.11 | Additional route characteristics | Compared to similar routes in the Khibiny Mountains, this route is the most challenging. Compared to a similar route by Murin E. (5A category) in the Belts cirque, the team's route is more complex and offers fewer opportunities for free climbing on rock sections, except for the third belt. The route is significantly more challenging and technically demanding than the "Lestnica" and "Stena otkola" routes. In winter, the route may be complicated by ice covering the microrelief and a large snow cornice on the plateau (from December to May). In summer, precipitation from overhanging cornices can occur even in clear weather. There are 2 control cairns on the route, including a summit one. |
4. Team Tactical Actions
| 4.1 | Time in motion (team's walking hours, in days) | 19 hours, 2 days |
|---|---|---|
| 4.2 | Route preparation time | No preparation |
| 4.3 | Departure for the ascent from camps near Lake Vudyavr | 8:00, August 21, 2019 |
| 4.4 | Start of the route | 10:00, August 21, 2019 |
| 4.5 | Reach the summit | 13:30, August 22, 2019 |
| 4.6 | Complete descent from the summit | 17:00, August 22, 2019 |
5. Team Technical Actions
| 5.1 | Pitons left on the route | 1 removable |
|---|---|---|
| 5.2 | Pitons used on the route: | |
| — stationary bolt pitons | 1 | |
| — removable bolt pitons | 1 | |
| — for ITO | More than 80 points | |
| 5.3 | Protection points used: | |
| — rock pitons, including anchors, "fifis" | About 30 | |
| — chocks | About 20 | |
| — camalots | More than 40 |
6. Weather Conditions
| 6.1 | Temperature, °C | 8–10 °C |
|---|---|---|
| 6.2 | Wind speed, m/s | 2–3 m/s |
| 6.3 | Precipitation | None |
| 6.4 | Visibility, m | Good |
7. Report Responsible
| 7.1 | Full name, e-mail | Druzhkin A.S., dalar08@mail.ru |
|---|
II. Ascent Area Description

Fig. 1. Area map. Scale 1:100,000. The first approach option is shown in red (part of the path may be passable by a high-clearance vehicle). The descent route via Geografov Pass is shown in blue. The descent option via Akvalang Pass is shown in yellow.
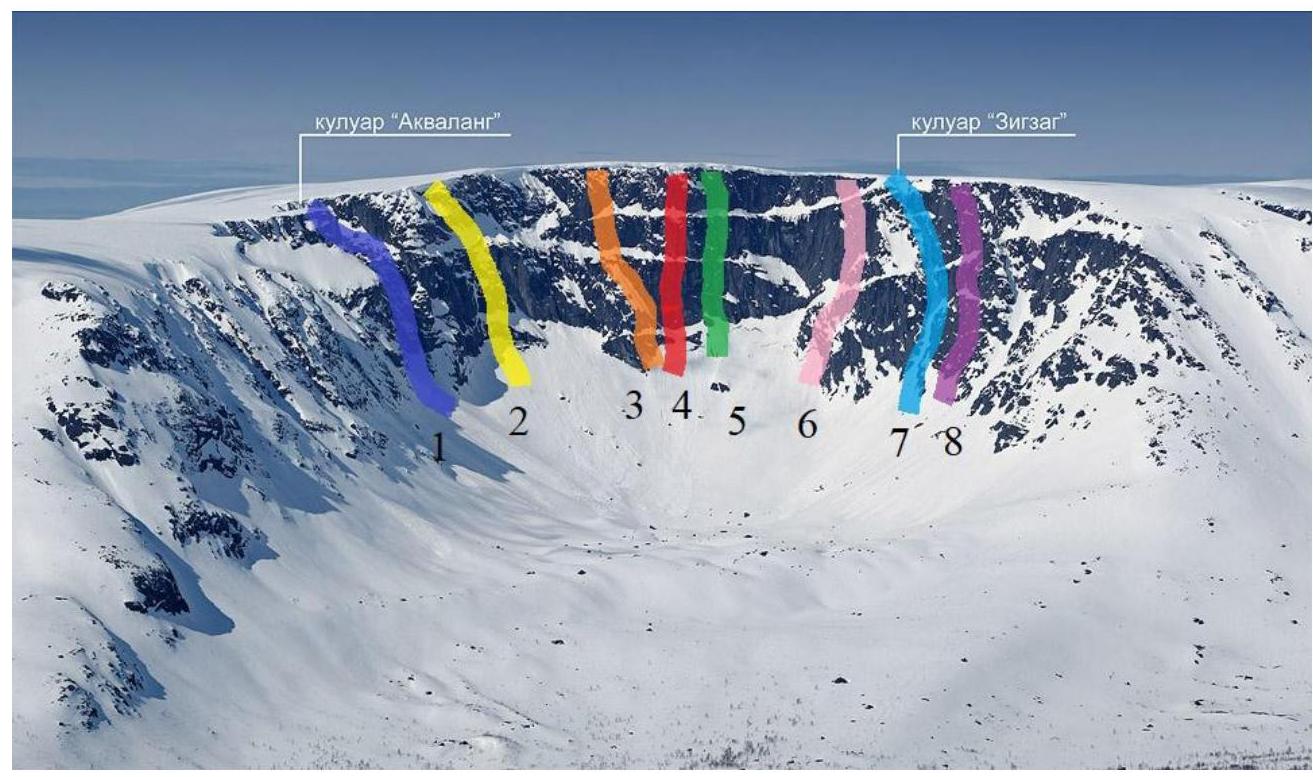
Fig. 2. Area panorama with existing route lines (winter survey).
- "Golfstream", 4B, A. Yurkin.
- "Burovoy", 4A (2012), Koksharov I. (exclusively ice route, not always icy. Not submitted for classification)
- Via the left part of the central Belts Wall, Andreev A., 4B (No information on second and subsequent ascents)
- "Via the center of the Belts Wall", 5A, Andreev A.
- "Via the internal corners of the Belts Wall", 5A, Murin E.
- Via the northeastern buttress of the eastern wall of the central cirque, 2B (No information on second and subsequent ascents).
- "Zigzag" couloir, 2A.
- "Zubastik", 3A, Pochivalov S.
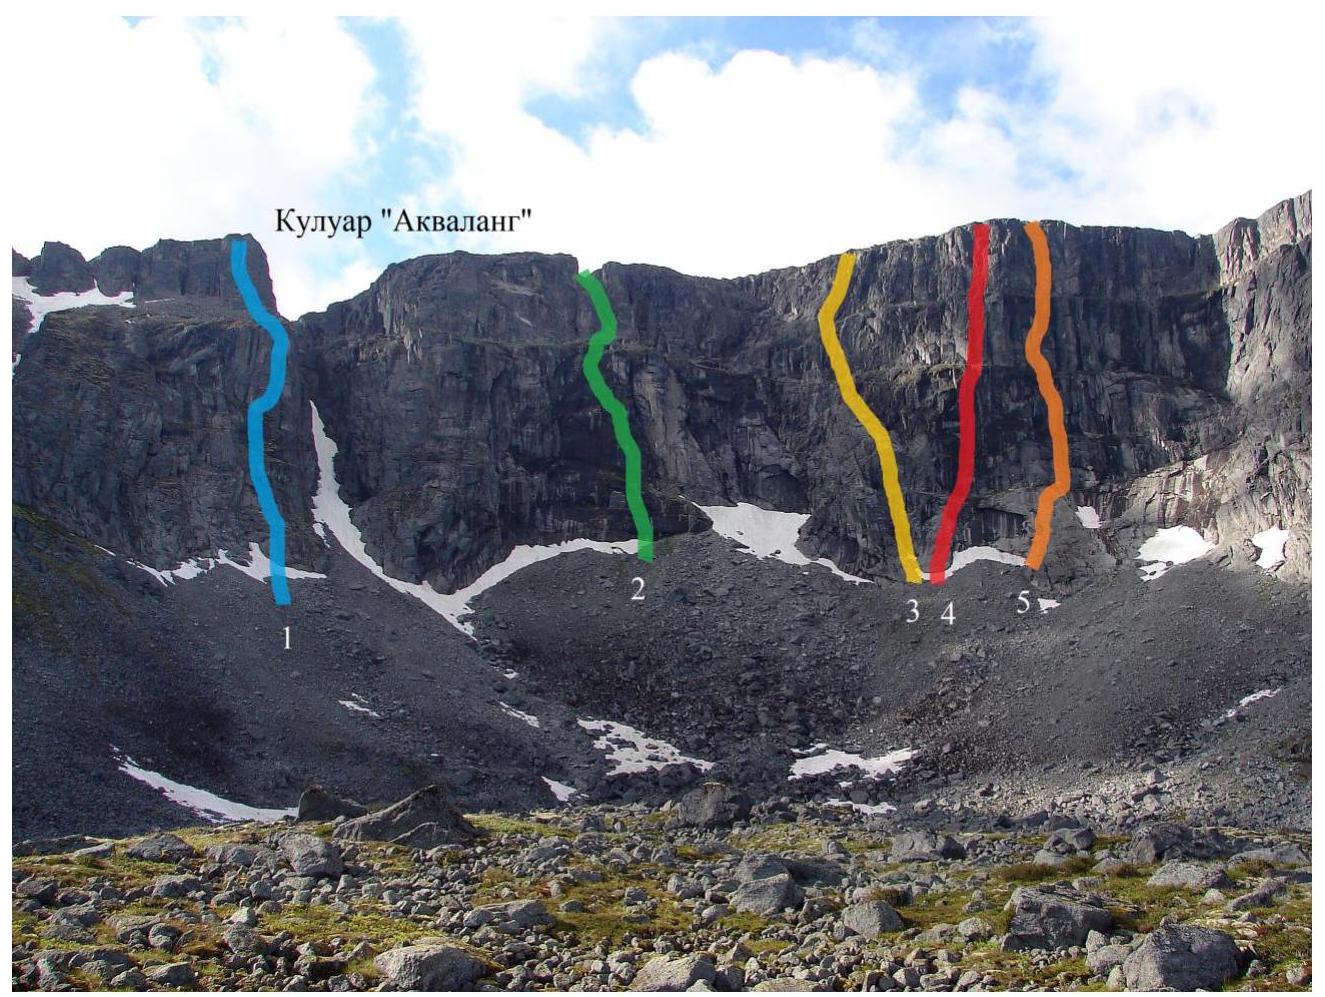
Fig. 2. Area panorama with existing route lines (summer survey, different angle).
- "Golfstream", 8. B, A. Yurkin.
- "Burovoy", 4A (2012), Koksharov I. (exclusively ice route, not always icy. Not submitted for classification)
- Via the left part of the central Belts Wall, Andreev A., 4B (No information on second and subsequent ascents)
- "Via the center of the Belts Wall", 5A, Andreev A.
- "Via the internal corners of the Belts Wall", 5A, Murin E.

Fig. 3. Ascent area panorama with route line (summer survey, August 21, 2019).

Fig. 4. Belts Wall in winter.
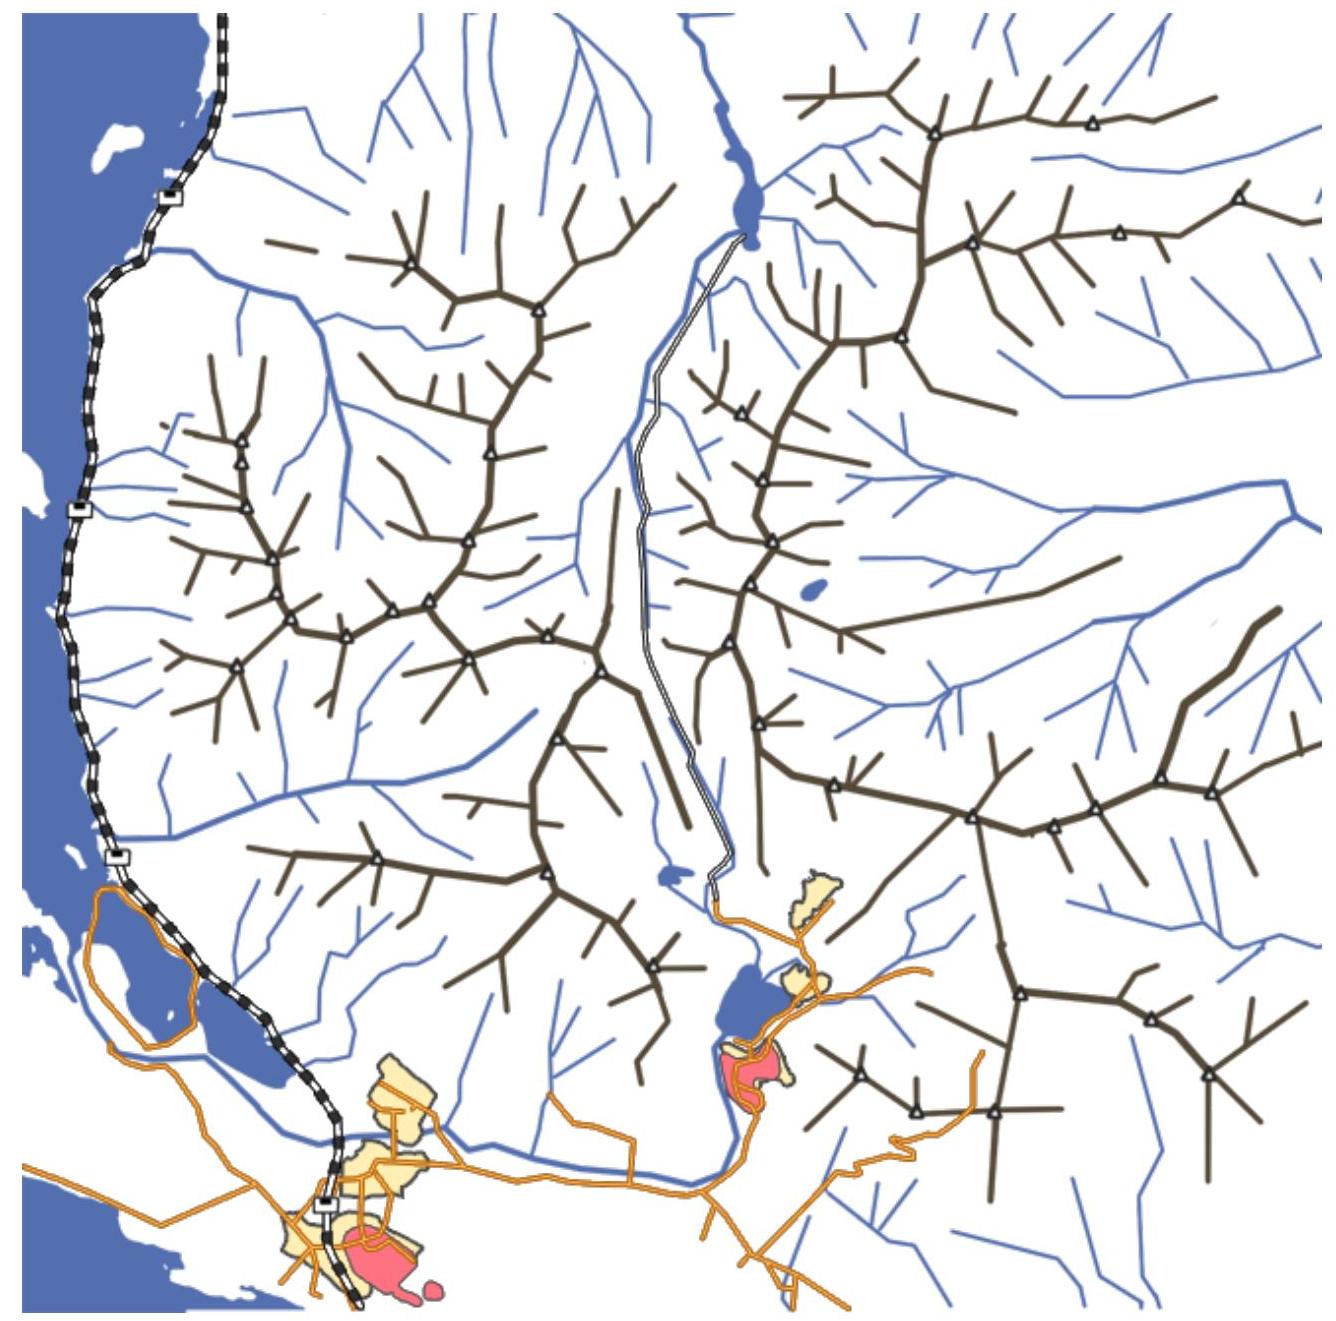
Fig. 5. Orgraphical scheme of the Khibiny Mountains.
III. Route Description
1. Route Profile
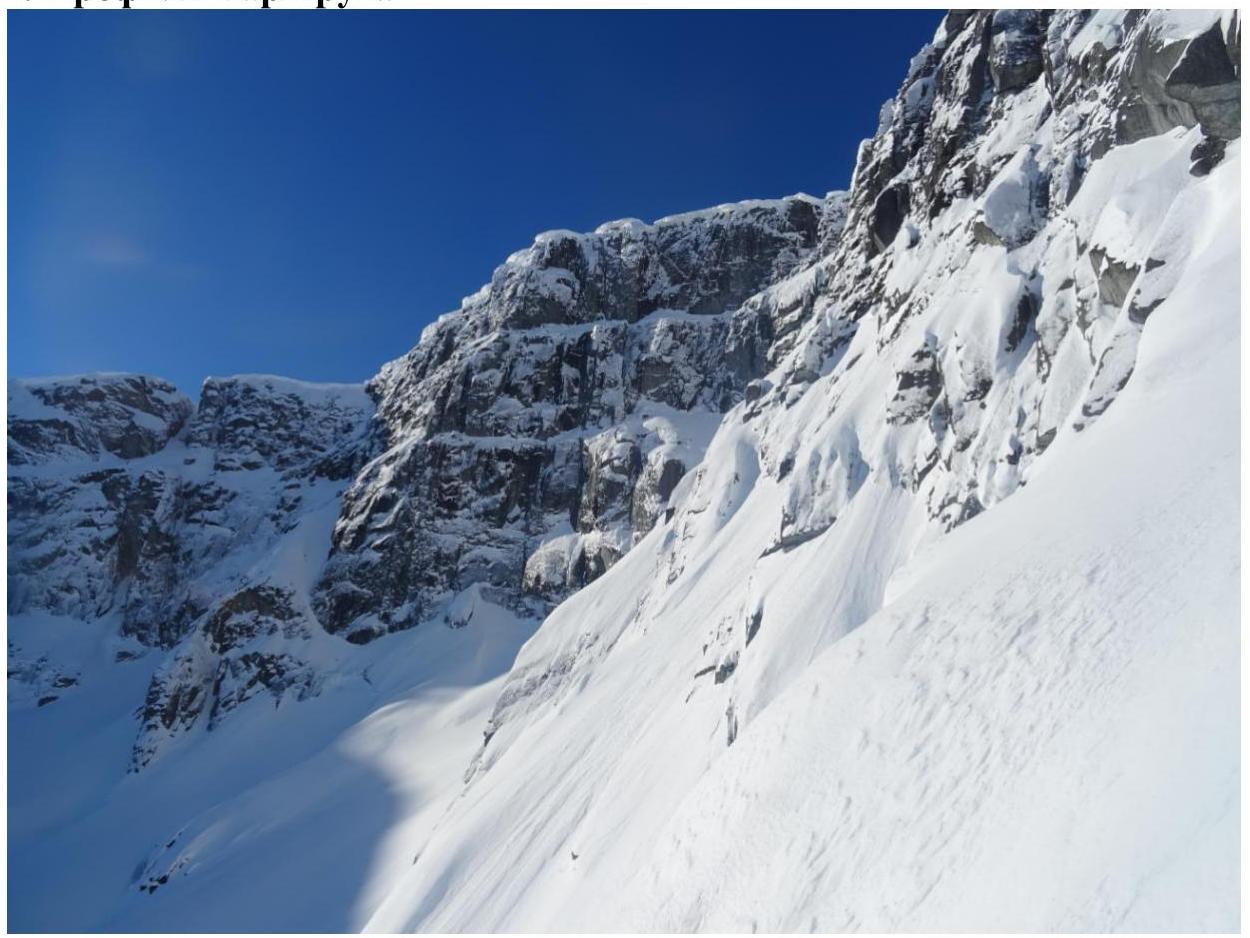
Fig. 6. Route profile and line. Photo taken in February 2018.
2. Technical Route Photography
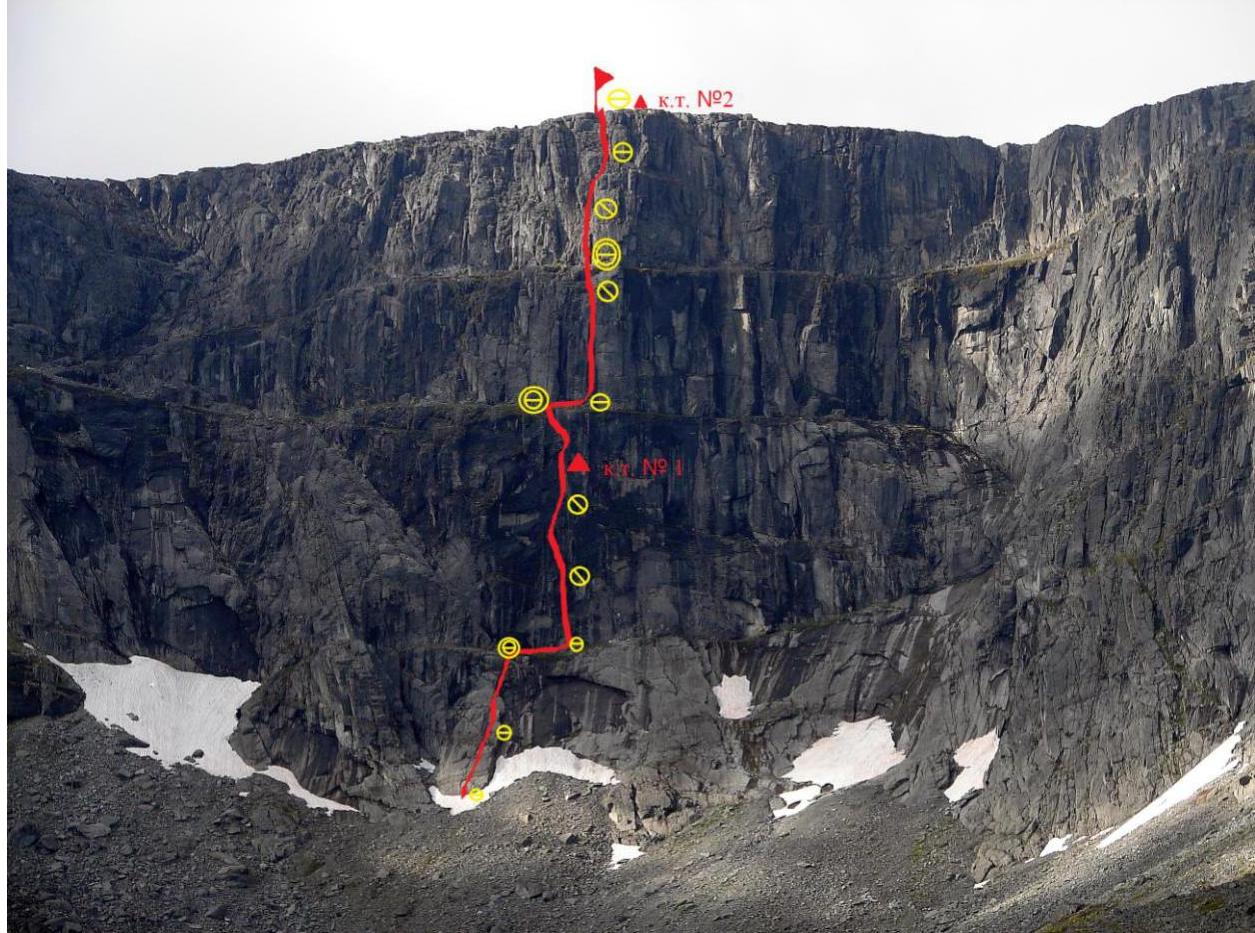
Fig. 7. Technical route photo.

Fig. 8. Drawn route profile.
3. Route Diagram in UIAA Symbols
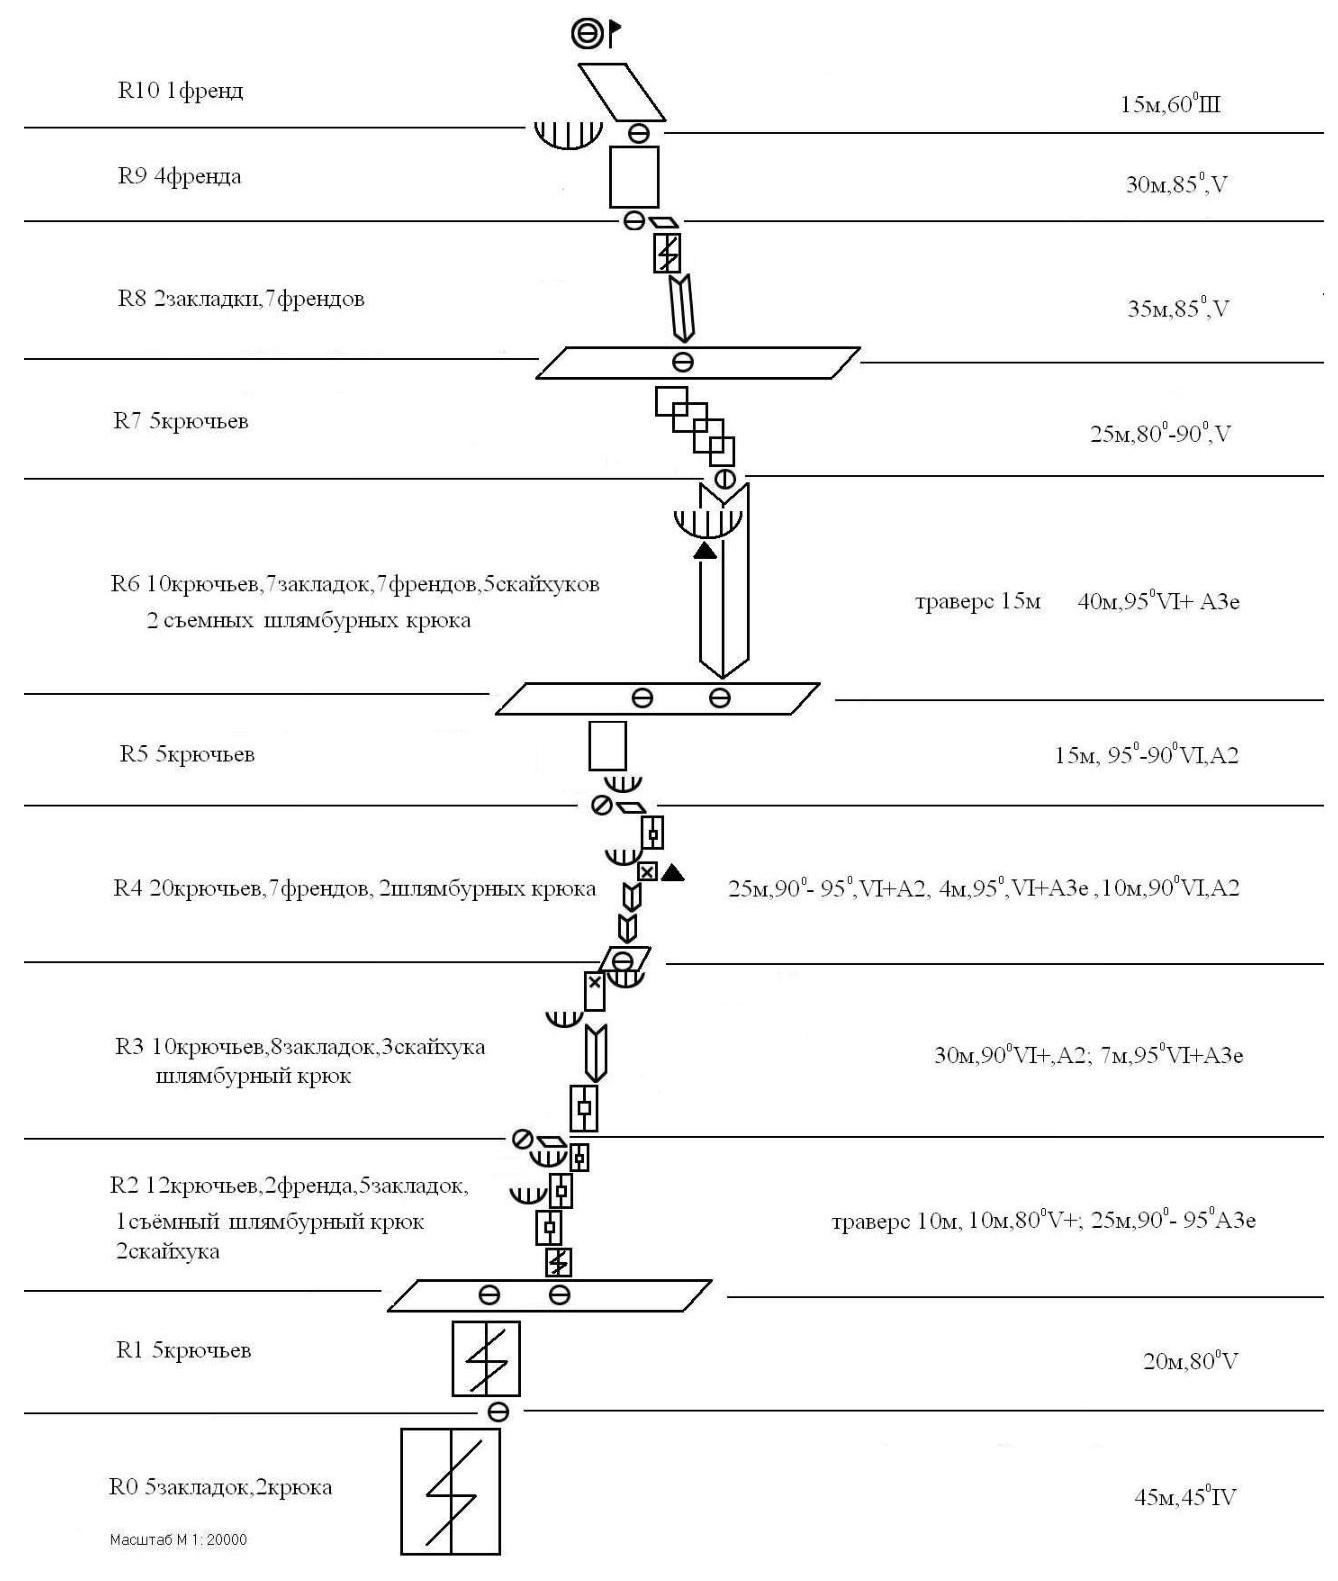
Scale 1:20000
Route sections according to the UIAA scheme: R10: 1 friend; 15 m, 60°, 3rd category of difficulty R9: 4 friends; 30 m, 85°, 5th category of difficulty R8: 2 chocks, 7 friends; 35 m, 85°, 5th category of difficulty R7: 5 pitons; 25 m, 80–90°, 5th category of difficulty R6: 10 pitons, 7 chocks, 7 friends, 5 skyhooks, 2 removable bolt pitons; traverse 15 m, 40 m, 95°, 6th category of difficulty, A3e. R5: 5 pitons; 15 m, 95–90°, 6th category of difficulty, A2. R4: 20 pitons, 7 friends, 2 bolt pitons; 25 m, 90–95°, 6th category of difficulty, A2; 4 m, 95°, 6th category of difficulty, A3e; 10 m, 90°, 6th category of difficulty, A2. R3: 10 pitons, 8 chocks, 3 skyhooks, 1 bolt piton; 30 m, 90°, 6th category of difficulty, A2; 7 m, 95°, 6th category of difficulty, A3e. R2: 12 pitons, 2 friends, 5 chocks, 1 removable bolt piton, 2 skyhooks; traverse 10 m, 10 m, 80°, 5th category of difficulty; 25 m, 90–95°, A3e. R1: 5 pitons; 20 m, 80°, 5th category of difficulty. R0: 5 chocks, 2 pitons; 45 m, 45°, 4th category of difficulty.
4. Route Description by Sections
The provided UIAA scheme is taken from Andreev A.B.'s description in 2003. It accurately describes the route line. The lengths of the sections correspond to the description. However, due to abundant precipitation from the existing three cornices, some sections were intentionally extended by 10 to 15 meters, which did not affect the logic and beauty of the route line. The description is made considering the group's movement and technical photos.
The route begins on a snowfield (in summer, the snow is hard and compacted, with ice in some places).
R0–R1: Up the slab, left of the wet cornice, 45 m, 45°, 4th category of difficulty. R1–R2: Up the wall with a crack to the first "belt". 20 m, 80°, 5th category of difficulty. Station. R2–R3: Traverse right 30 meters. R3–R4: A crack (10 m, 80°, 5), followed by a series of walls with "deaf" cracks. 30 m, 90–95°, 6th category of difficulty, A3e. Skyhooks. (A slab with a "deaf" crack about 10 m long with no possibility for protection). Bypass the cornice on the right via an overhanging wall 10 m, 95° (anchors, "fifis"). Uncomfortable station on a microledge. R4–R5: Via internal corners under a large, sharp cornice. 30 m, 90°, 6th category of difficulty, A2, then via an overhanging wall onto the cornice. Stationary bolt. 7 m, 95°, 6th category of difficulty, A2e. Skyhooks. Up the slab 10 m, 80°, with an internal corner on the right as an orientation. Station on a small ledge ("sleeps"). R5–R6: Via internal corners up under a large cornice 25 m, 90–95°, 6th category of difficulty, A2. Under the cornice, an overhanging wall 4 m, 95°, 6th category of difficulty, A3e. Stationary bolt, control cairn #1. Bypass the cornice on the right and exit onto a wall to an inclined ledge. 10 m, 90°, 6th category of difficulty, A2. Exit to a flattening 10 m, 75–80°. Then up to the left via an overhanging wall 5 m, 90–95°, 6th category of difficulty, A2, to reach the second "belt". Good station location. (From station R5 to the second "belt", 60 meters of rope were "stretched". This section is better divided into 2 pitches of 30–35 meters, to the cornice and after it). R6–R7: Traverse right 15 m. 2nd category of difficulty. To a huge internal corner. Above, under the cornice, a control cairn #2 is visible (the cairn was missing). R7–R8: Up the internal corner 40 m, 95°, 6th category of difficulty, A2. After flattening, up the wall 15 m, 5th category of difficulty. Station. R9–R10: Up a series of walls to the third "belt". 15 m, 80–90°, 5th category of difficulty. Good station location on a ledge. R10–R11: Up the internal corner and wall. 35 m, 85°, 5th category of difficulty. R11–R12: Up the wall with a series of cracks 30 m, 85°, 5th category of difficulty, A1 — 5 m. R12–R13: Via destroyed rocks to the summit. 15 m, 60°, 3rd category of difficulty.
5. Route Recommendations and Safety Assessment
The route represents a logical, well-readable line tied to internal corners on the wall. The route angle is about 85–90°, with poor relief and constantly wet rocks greatly limiting free climbing. The ITO level is A2–A3, requiring the use of a full arsenal of modern mountaineering equipment, including relief skyhooks and "fifis".
Orientation on the route is not difficult, tied to natural relief and fully corresponding to the route description.
Organizing protection on the route is sometimes challenging due to the relief featuring "deaf" cracks without microrelief. All protection stations on the route are located in safe areas.
The first belt, 4 ropes long, presents the greatest difficulty. The rocks are wet, with "deaf" cracks, moss in crevices, etc.
During the ascent, the weather was cloudy, with rain over two days, causing constant "waterfall" from the cornices along the entire first belt. This circumstance affected the group's movement (increased section lengths).
Stationary bolt pitons were encountered only at R5–R6 under the cornice. Some areas had holes for skyhooks (possibly removable bolt pitons).
At the time of passage, the team made the third ascent of the route. The second ascent was made in winter 2005 by Dashkevich S. and Borich M. http://www.alpklubspb.ru/ass/a136.htm↗.
For a winter ascent, a pair of tools, a snow brush, and crampons for all participants are recommended. Leader readiness to work on "poor" relief is essential.
In polar day conditions (summer), the route can be climbed by a duo in alpine style. There is no water on the route.
Descent from the summit without using mountaineering equipment.
Emergency exit from the route: via the ascent path.
IV. Technical Photos from the Route
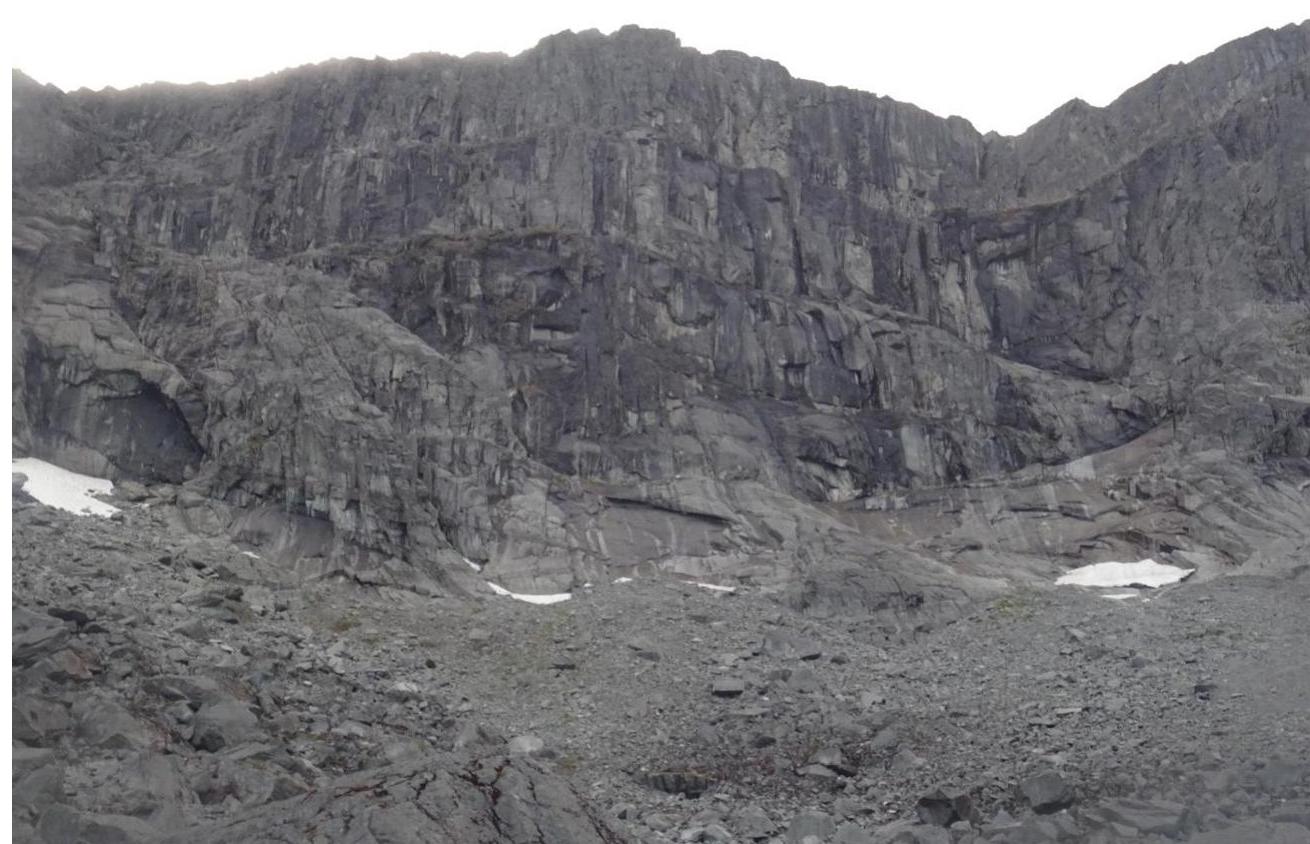
Photo 1. General view of the wall.
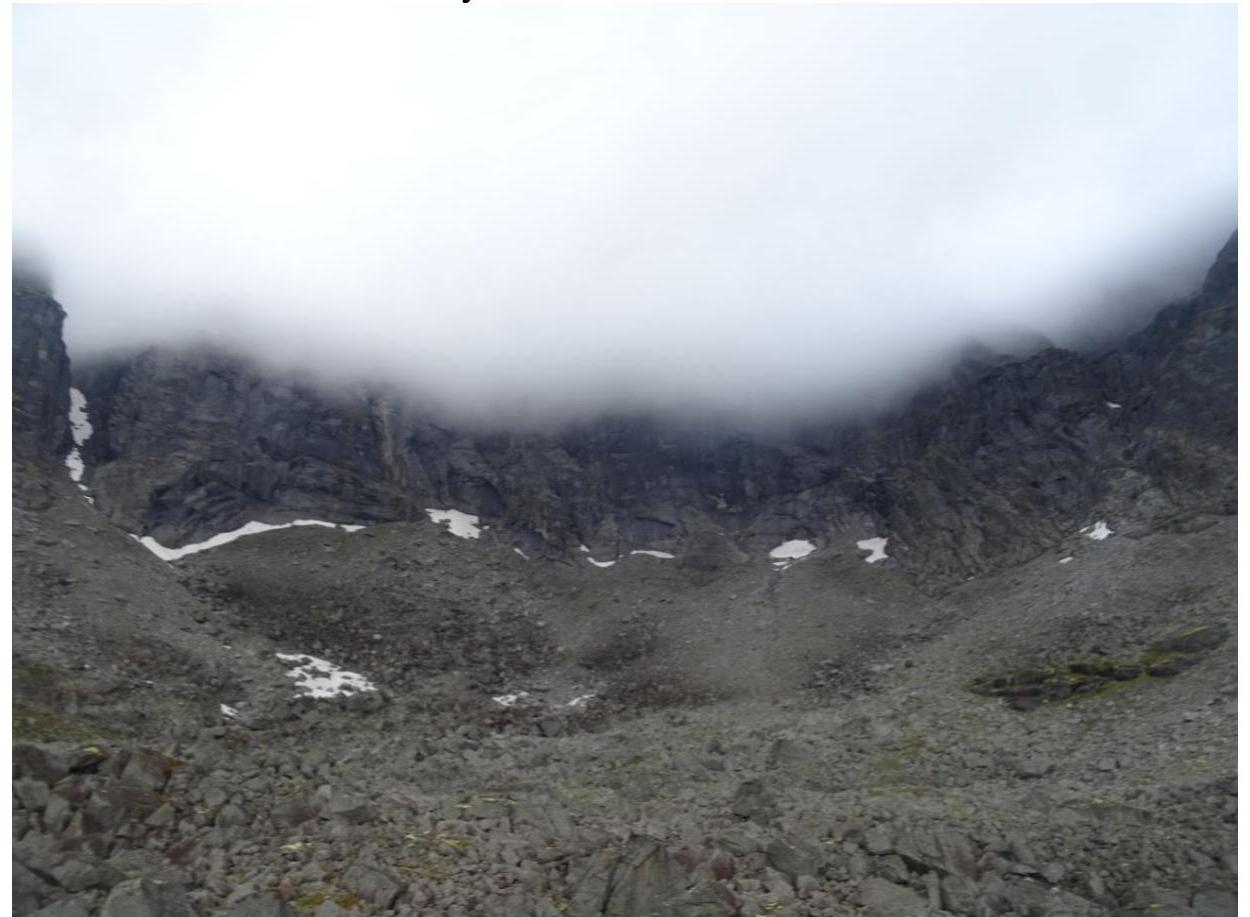
Photo 2. Low cloud cover is a common occurrence in the Khibiny Mountains.
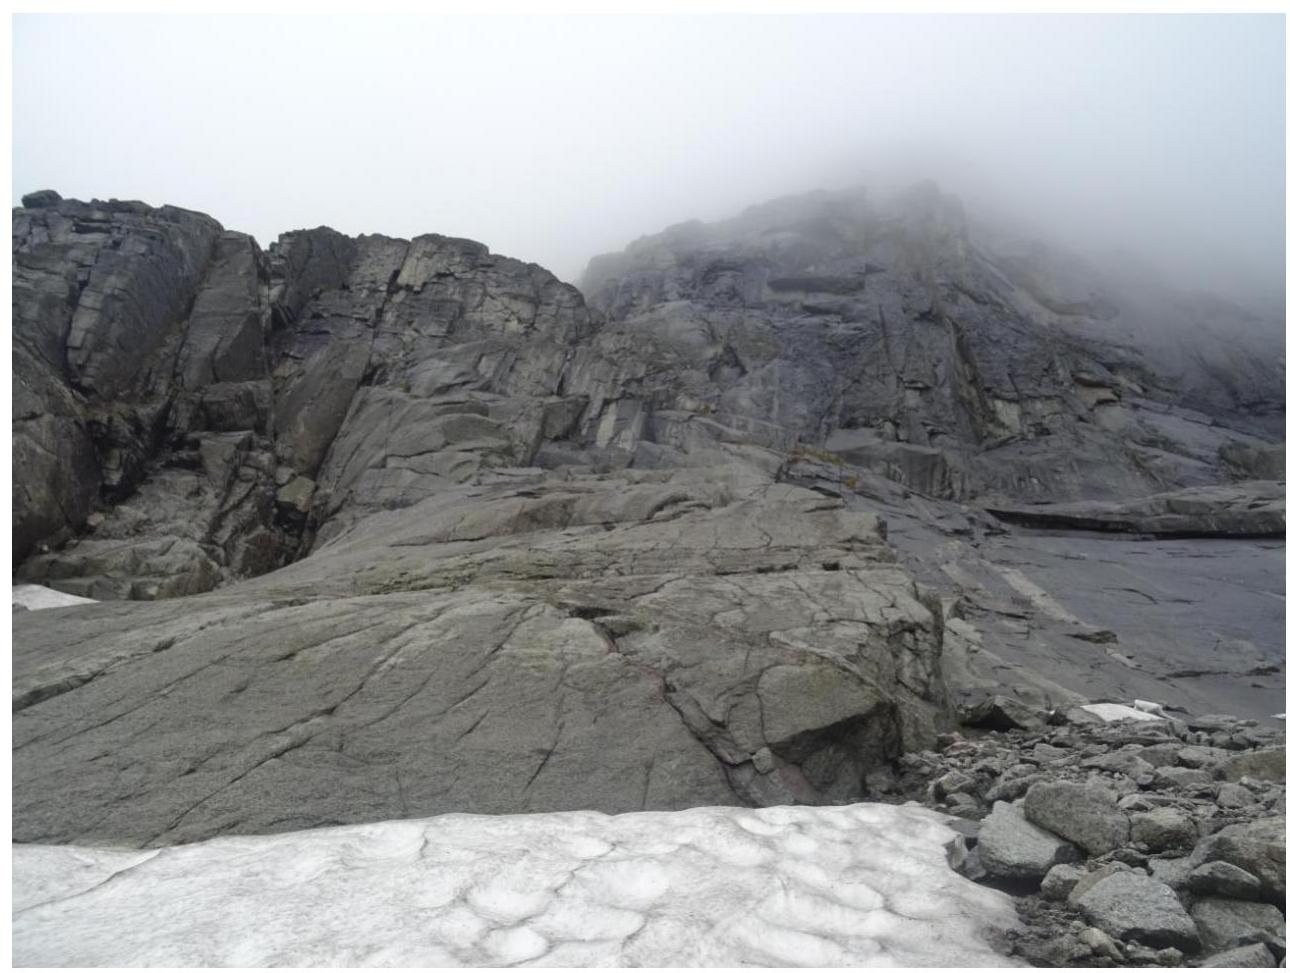
Photo 3. General view of R0–R2.
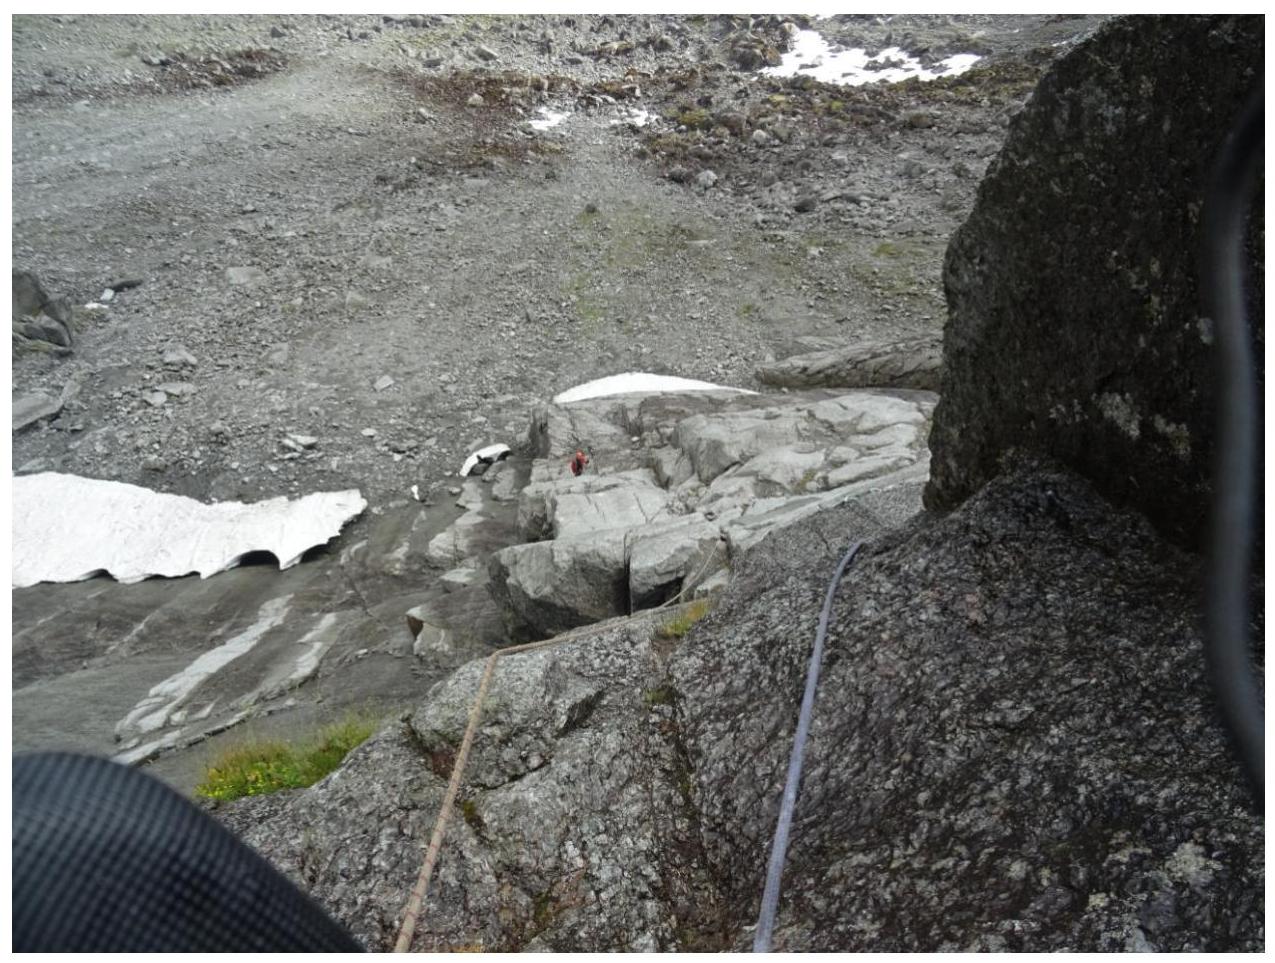
Photo 4. View from R2 before exiting to the 1st belt.
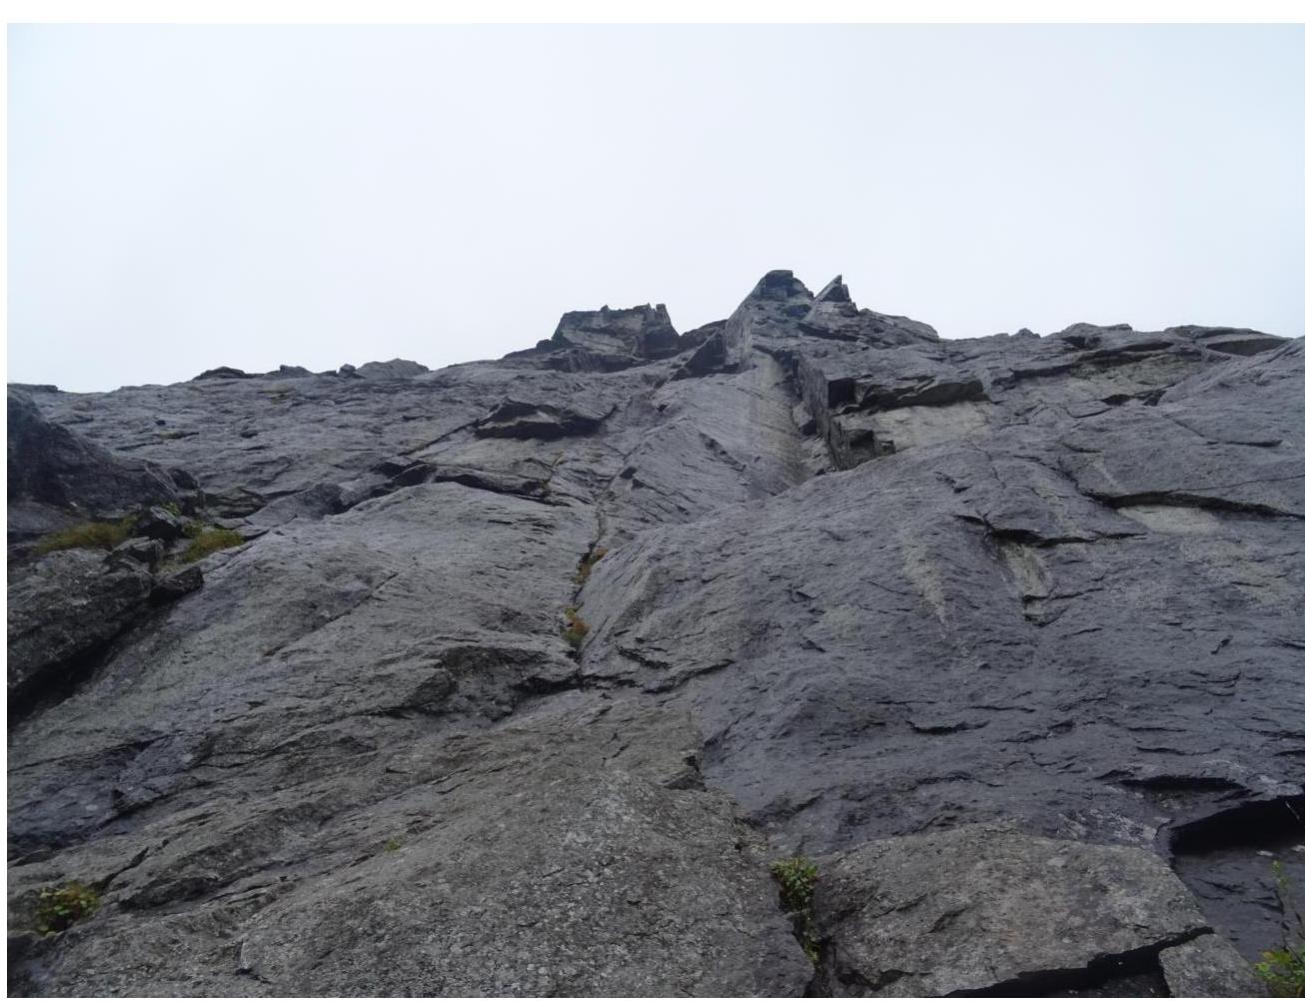
Photo 5. General view of the 1st belt, sections R3–R5.
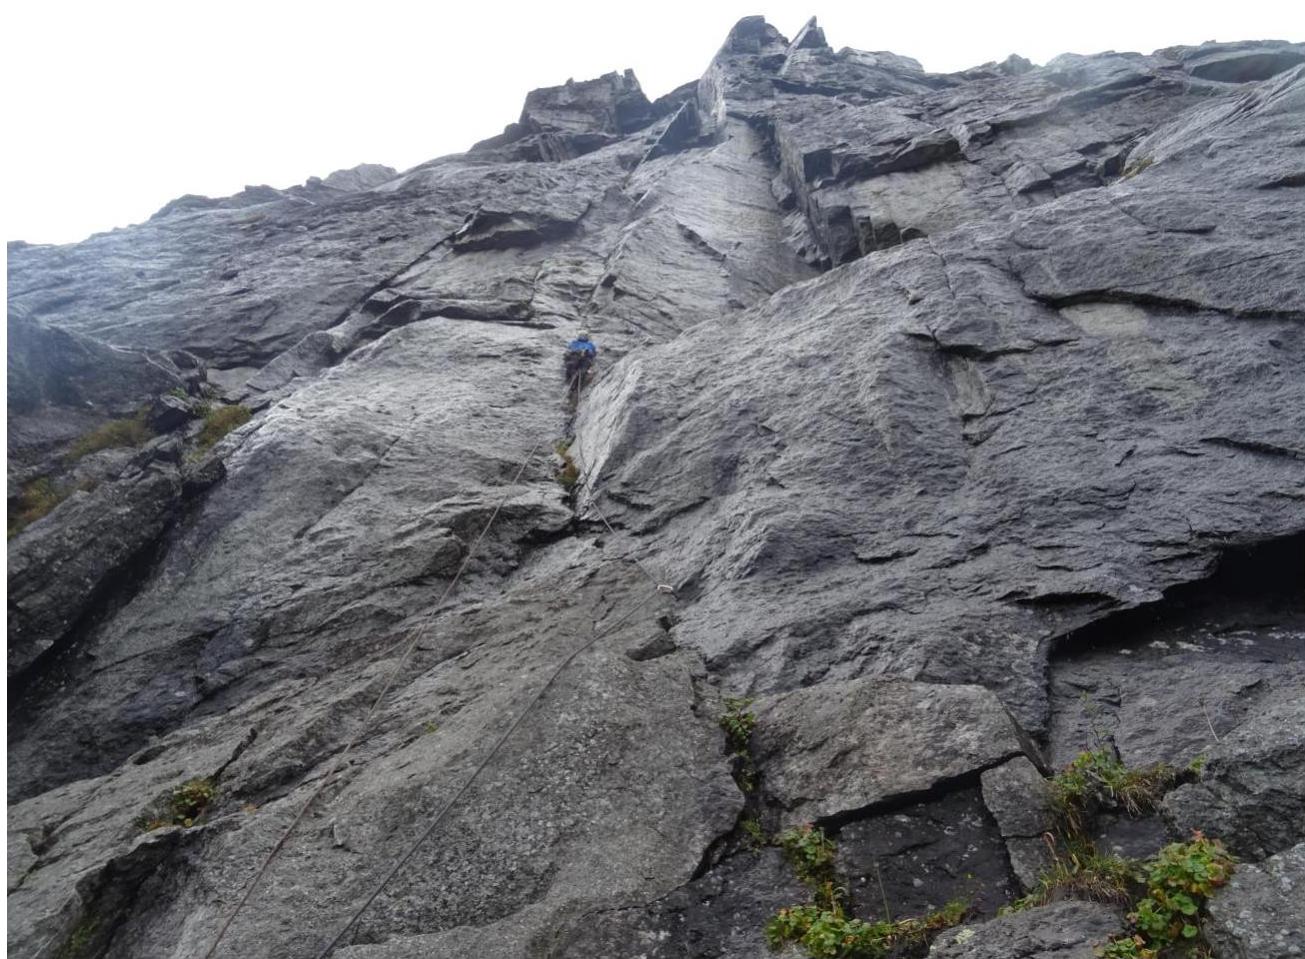
Photo 6. Section R3–R4.

Photo 7. Section R4–R5. Exit to the 1st cornice.
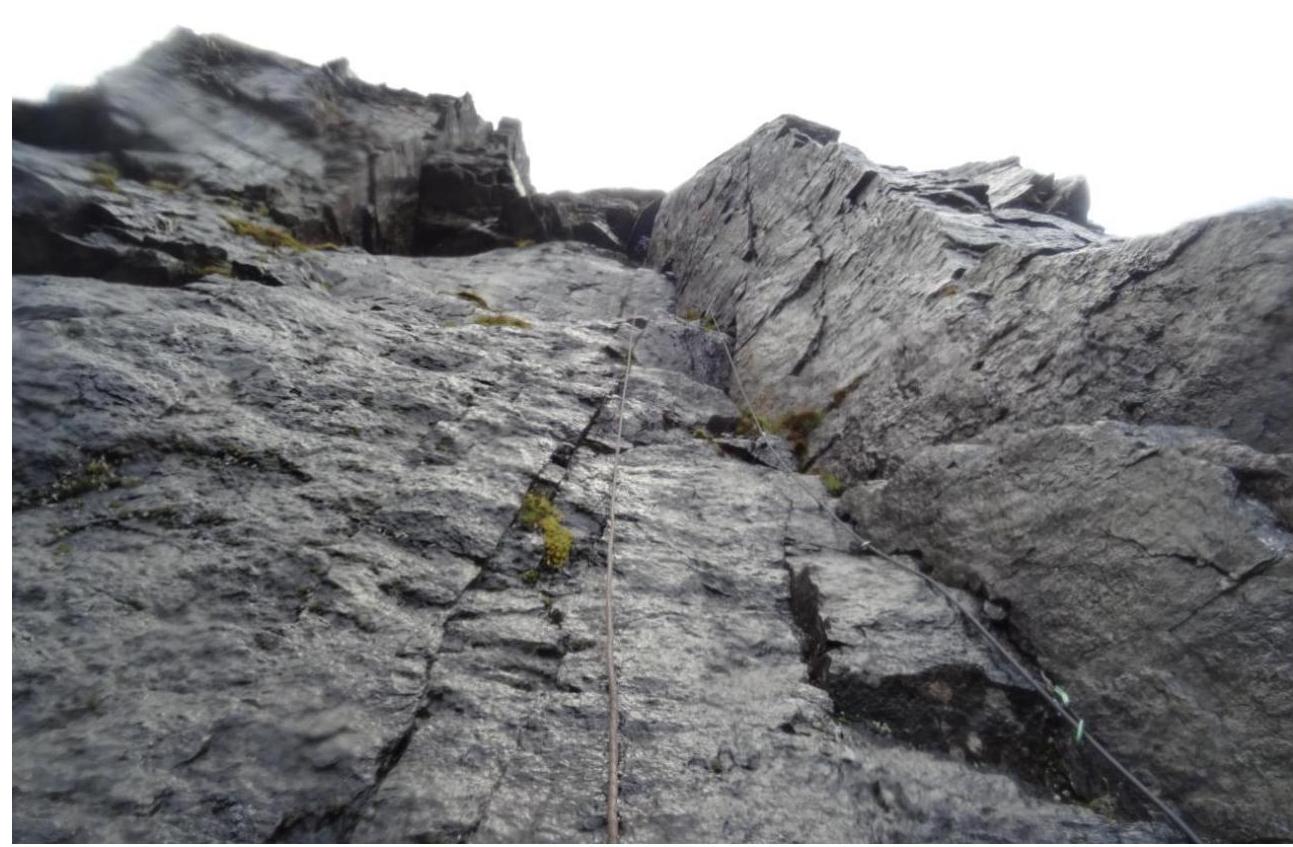
Photo 8. Section R5–R6. Work under the 3rd cornice. (Control cairn #1).
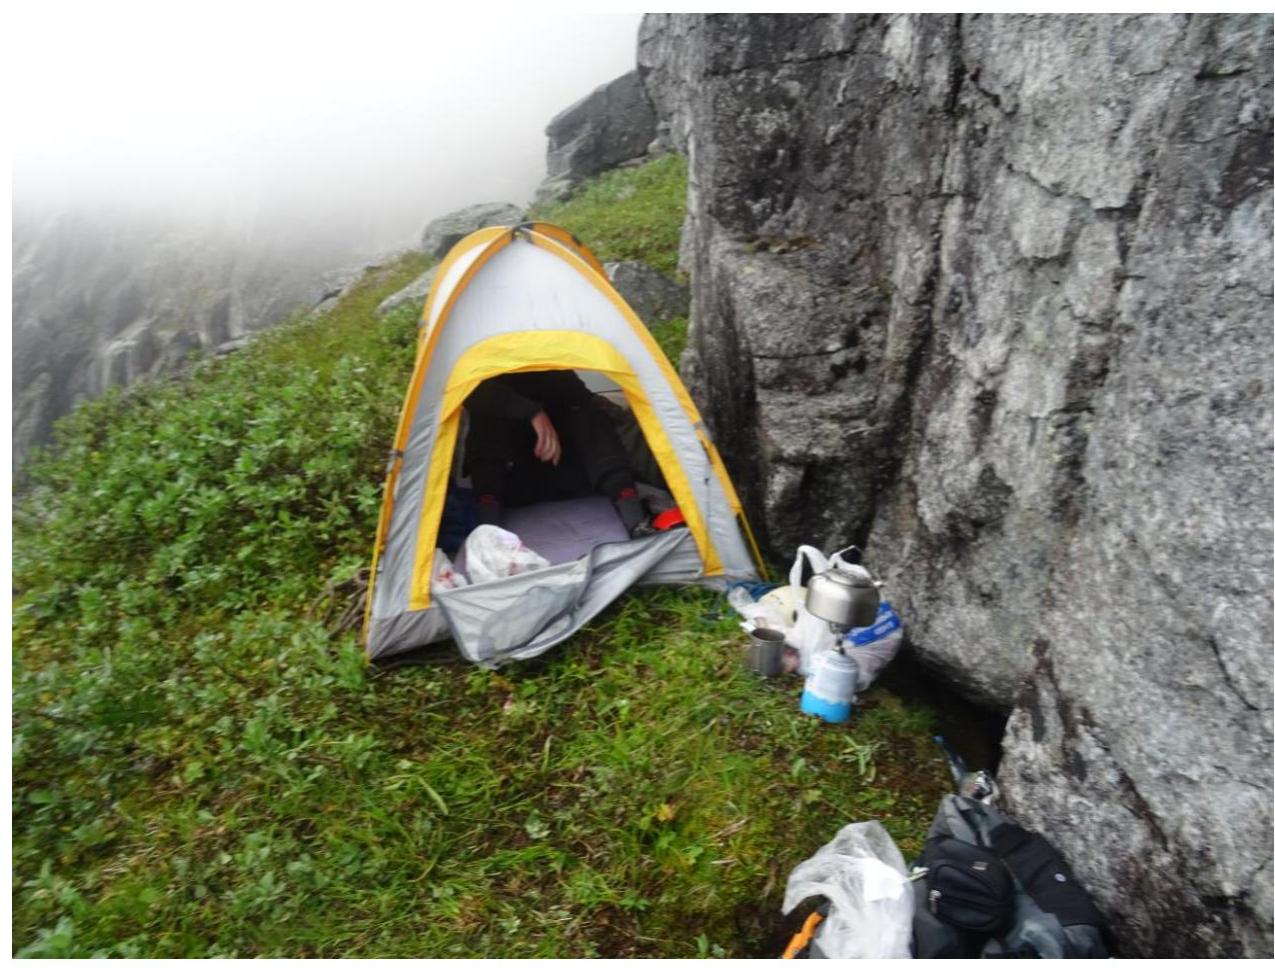
Photo 9. Overnight on the 2nd belt (R6).
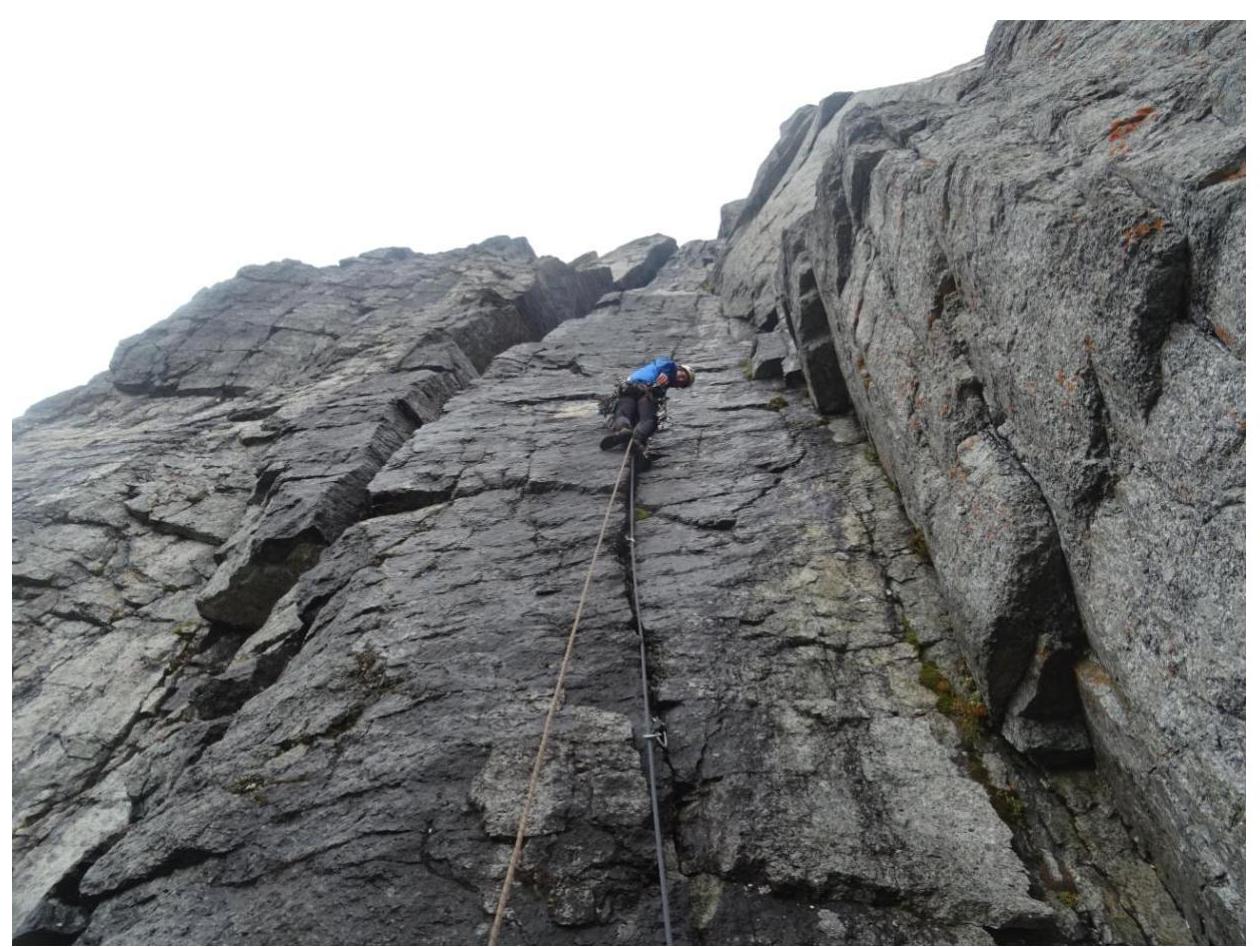
Photo 8. Section R7–R8.
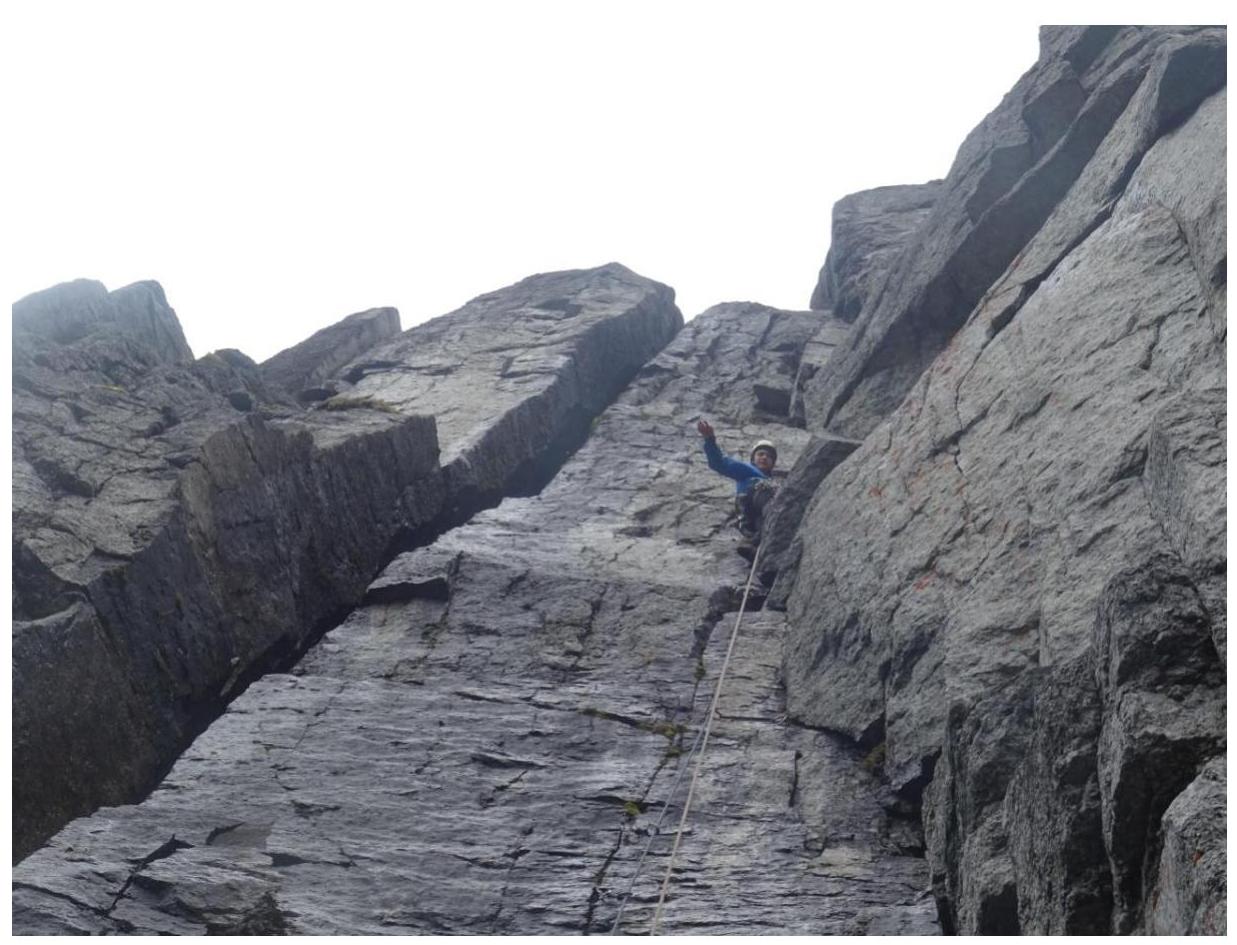
Photo 9. Section R7–R8.
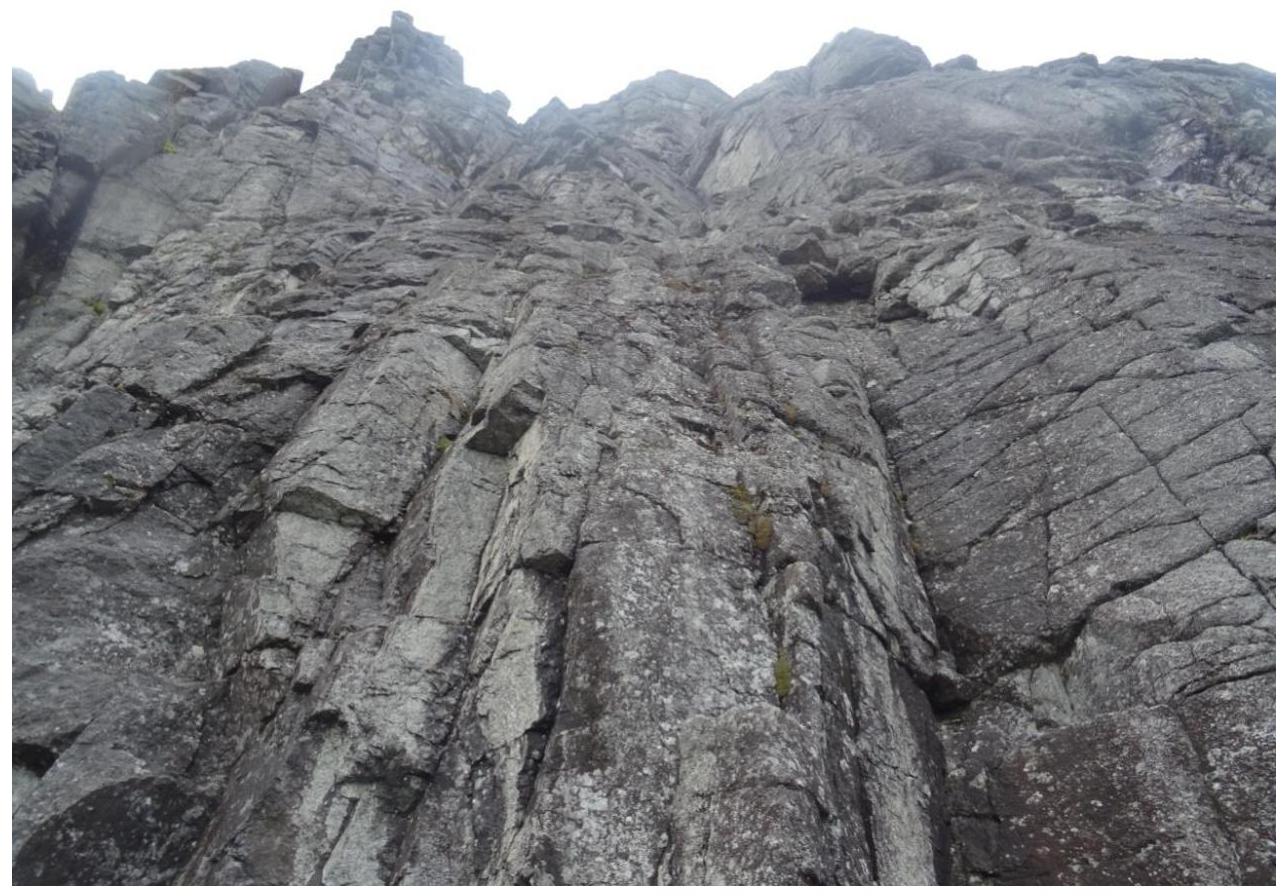
Photo 10. General view of the 3rd belt, sections R9–R11.
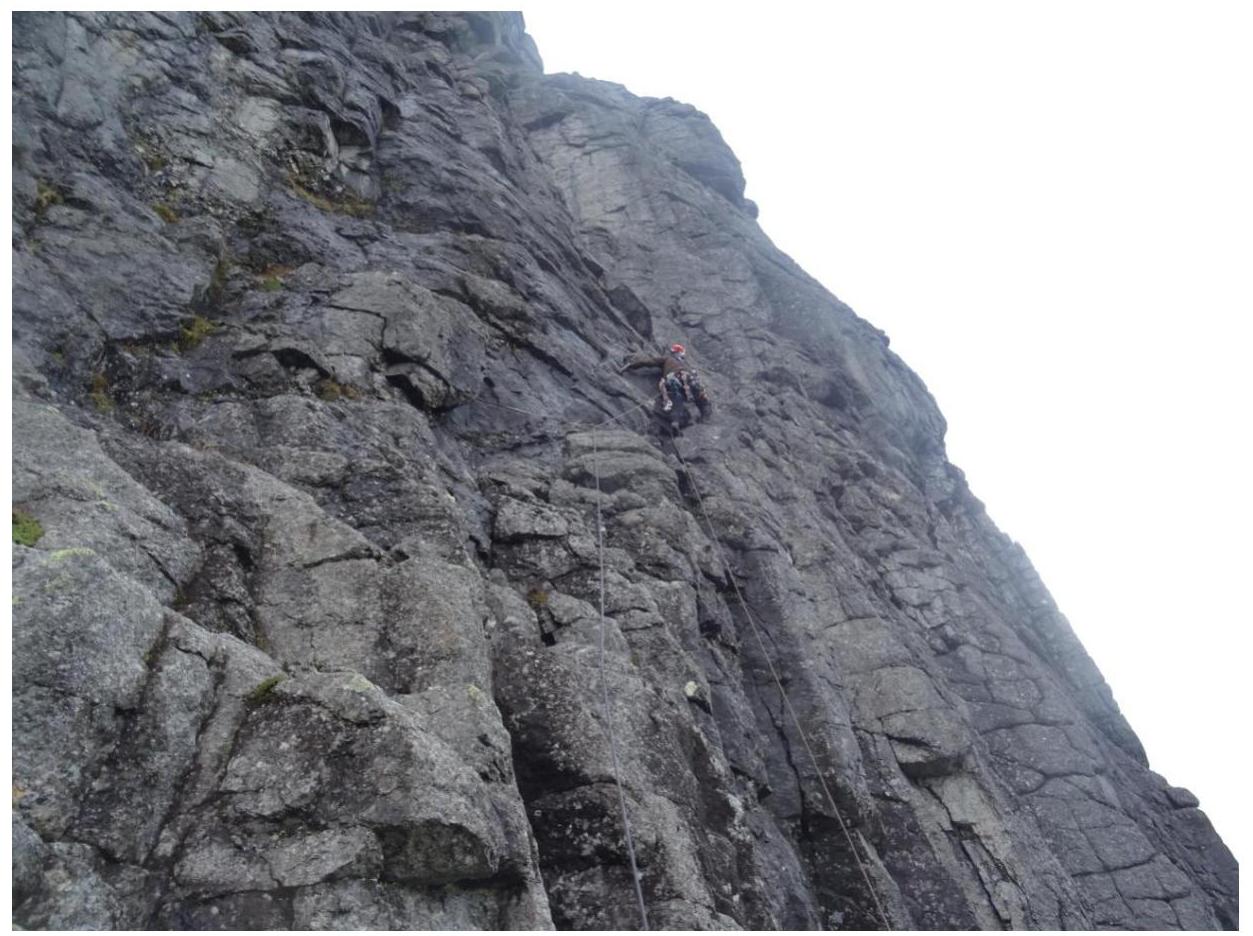
Photo 11. Section R9–R10.
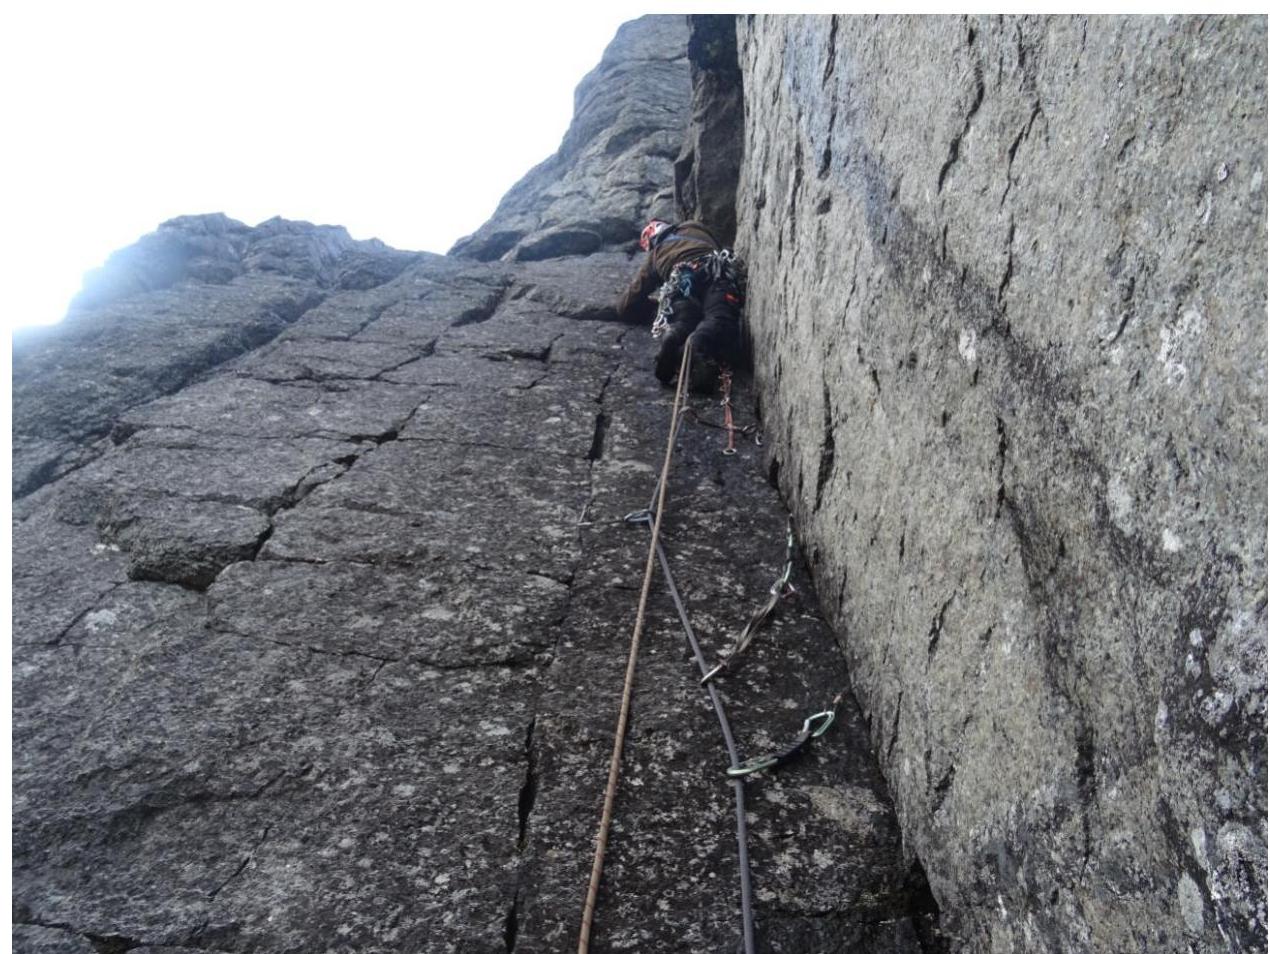
Photo 12. Sections R11–R12.
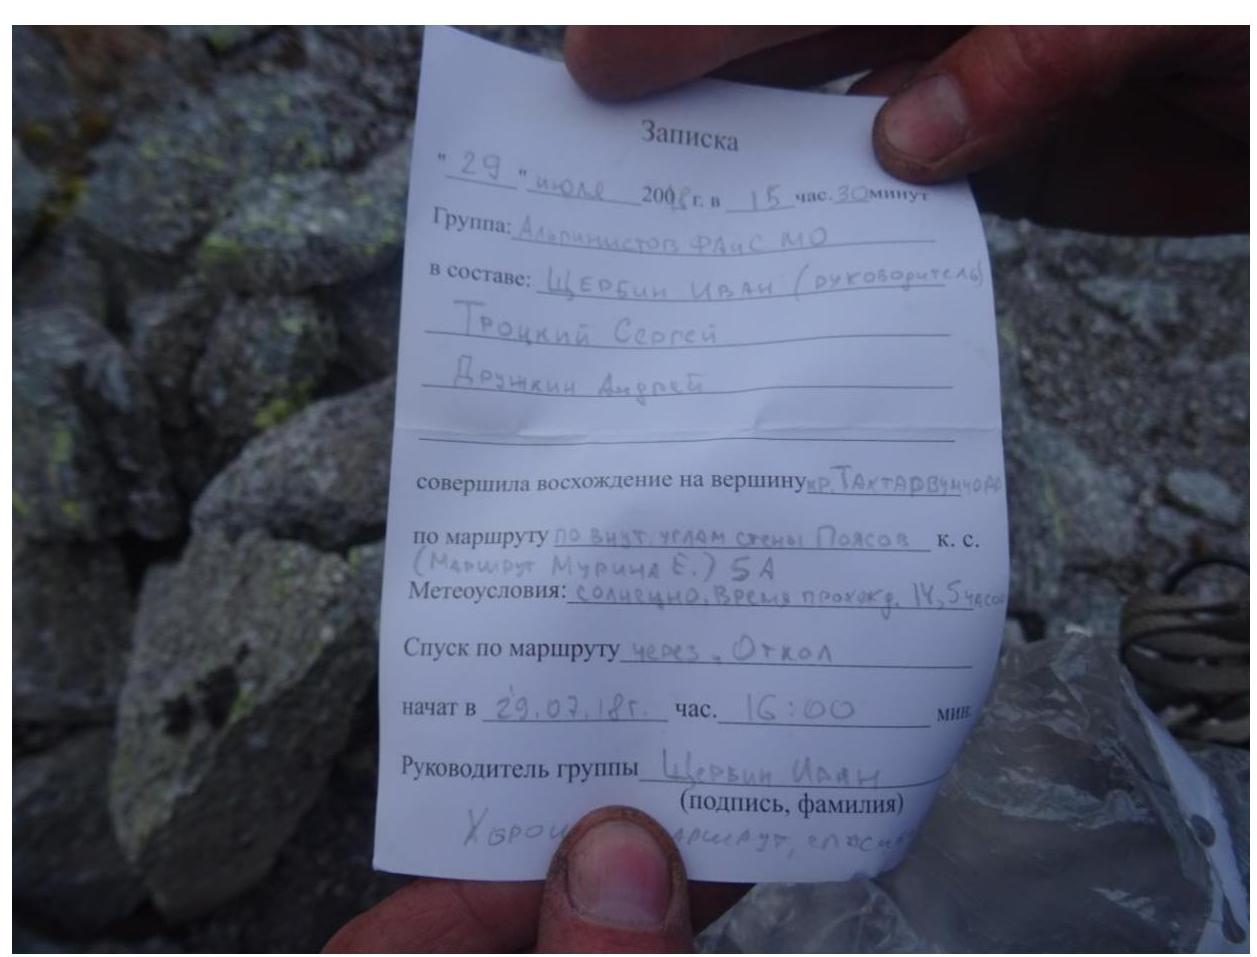
Photo 13. Note from the summit cairn.
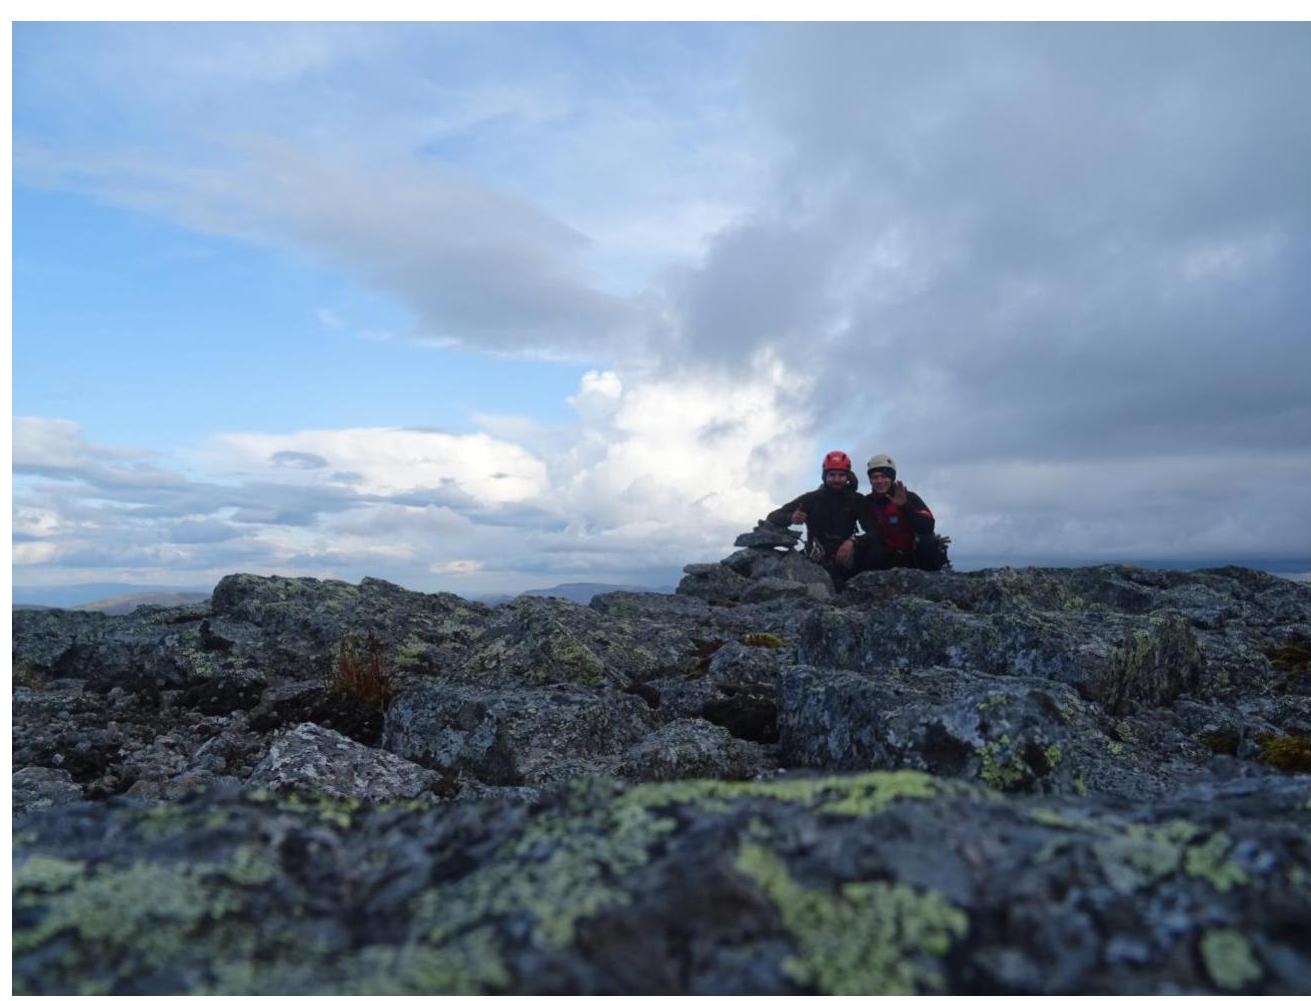
Photo 14. Team photo at the summit. (Left — Struin V.S., right — Druzhkin A.S.).


