Report
On the ascent of the Right part of the Left bastion of the Eastern wall of Vudyavrchorr (B) (1068 m), "Kopilka" route. Estimated category of complexity – 4A.
For classification. (First ascent: Ageev N., 1995)
Khibiny mountain range. Takhtarvumchorr ridge, Ganesina cirque. Classification table section number: 8.6.1.
Team coach: Timoshenko T.I. Leader: Kananykhin I.V.
St. Petersburg, 2019
I. Ascent Passport
1. General Information
| Leader's full name, sports rank | Kananykhin Igor Vladimirovich, Candidate for Master of Sports | |
|---|---|---|
| 1.1 | Participants' full names, sports ranks | Bykov Alexey Pavlovich, 1st sports rank, Churkin Ivan Sergeevich, 1st sports rank |
| 1.2 | Coach's full name | |
| 1.3 | Organization | |
| 1.4 |
2. Ascent Object Characteristics
| Area | Kola Peninsula, Khibiny mountain range | |
|---|---|---|
| 2.1 | Valley | Takhtarvumchorr ridge |
| 2.2 | Classification table section number | 8.6.1 |
| 2.3 | Name and height of the peak | Vudyavrchorr (B), 1068 m, "Kopilka" route |
| 2.4 | Geographic coordinates of the peak (latitude/longitude), GPS coordinates | - |
| 2.5 |
3. Route Characteristics
| Route name | Right part of the Left bastion of the Eastern wall | |
|---|---|---|
| 3.1 | Proposed category of complexity | Winter: 4А–4Б, Summer: 4А |
| 3.2 | Route освоенности | The route is well освоен, with signs of previous groups throughout |
| 3.3 | Route terrain character | Winter: combined, Summer: rock |
| 3.4 | Route height difference (altimeter or GPS data) | 350 m |
| 3.5 | Route length (in meters) | 450 m |
| 3.6 | Technical elements of the route (total length of sections with different category of complexity, indicating terrain character: ice-snow, rock) | 2 cat. sl. rocks = 100 m. 3 cat. sl. rocks = 200 m. 4 cat. sl. rocks = 100 m. 5 cat. sl. rocks = 50 m. |
| 3.7 | Average slope of the route, ° | about 65° |
| 3.8 | Average slope of the main part of the route, ° | about 70° |
| 3.9 | Descent from the peak | along the western slope to the Geografov pass, then through the pass to Maly Vudyavr lake |
| 3.10 | Additional route characteristics | The route is well known, popular. By complexity and character corresponds to |
| 3.11 | neighboring route 4А "Chestnaya devushka". In winter, the snow drift over the plateau can be a problem — requires viewing the route from the side of the Northern wall of the cirque. 2 control tours + 1 summit tour are left on the route. |
4. Team Tactical Actions
| Movement time (team hours, in hours and days) | 7 hours, 1 day | |
|---|---|---|
| 4.1 | Route preparation time | No preparation |
| 4.2 | Departure for ascent from overnight stay by the lake | 10:00, 27.07.2019 |
| 4.3 | Start of ascent on the route | 11:00, 27.07.2019 |
| 4.4 | Reach the peak | 18:00, 27.07.2019 |
| 4.5 | Finished descent from the route | 19:30, 27.07.2019 |
| 4.6 |
5. Team Technical Actions
| Pitons left on the route | Not left | |
|---|---|---|
| 5.1 | Pitons used on the route: | |
| 5.2 | — stationary pitons | Not used |
| — removable pitons | Not used | |
| — for ITO | Not used | |
| Protection points used: | ||
| 5.3 | — rock pitons | About 15 |
| — chocks | About 10 | |
| — camalots | About 30 |
6. Weather Conditions
| Temperature, °C | 10–15 °C | |
|---|---|---|
| 6.1 | Wind speed, m/s | - |
| 6.2 | Precipitation | Light short-term rain |
| 6.3 | Visibility, m | Excellent |
| 6.4 |
7. Report Responsible
| Full name, e-mail | Kananykhin I.V. i.v.kananykhin@gmail.com | |
|---|---|---|
| 7.1 |
II. Ascent Area Description
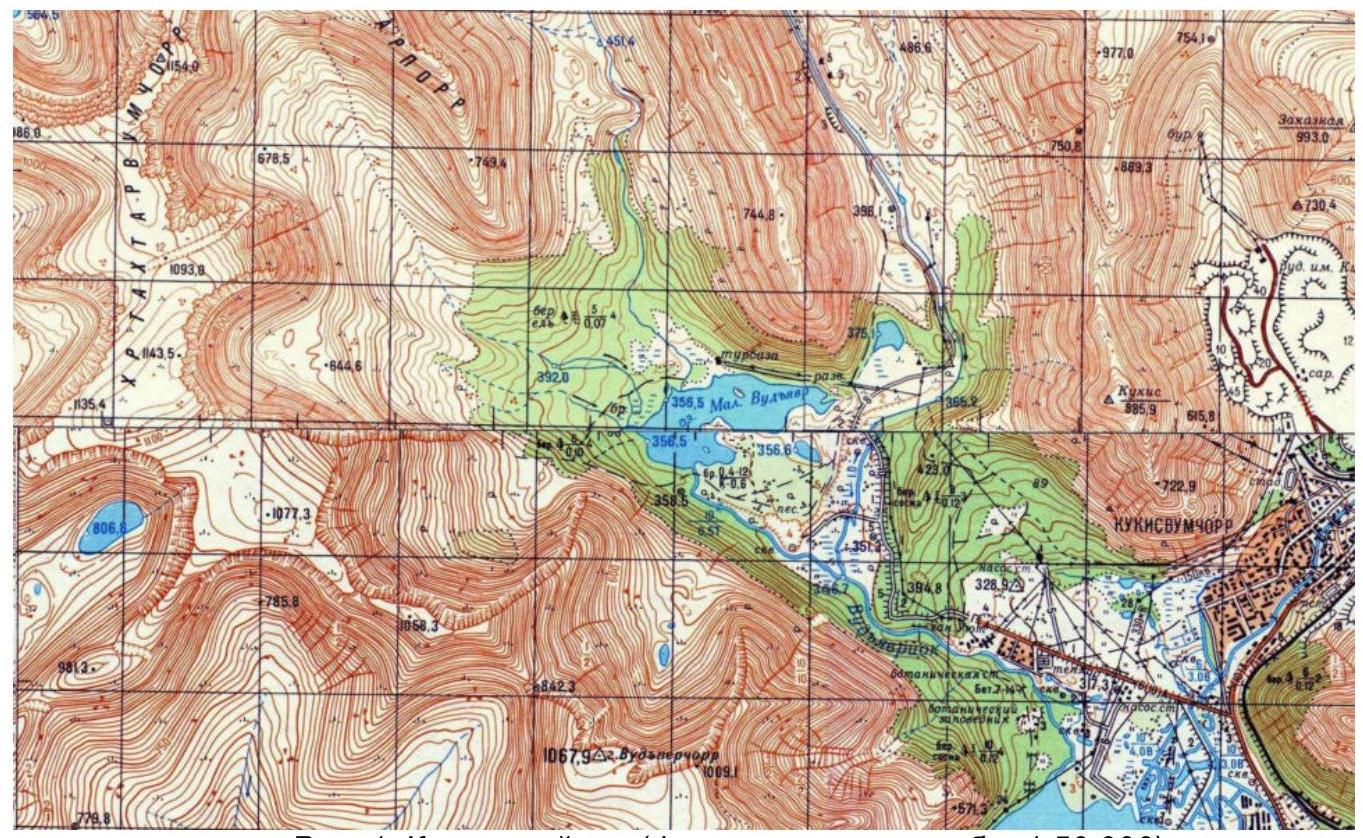
Fig. 1. Area map (fragment, scale – 1:50 000)

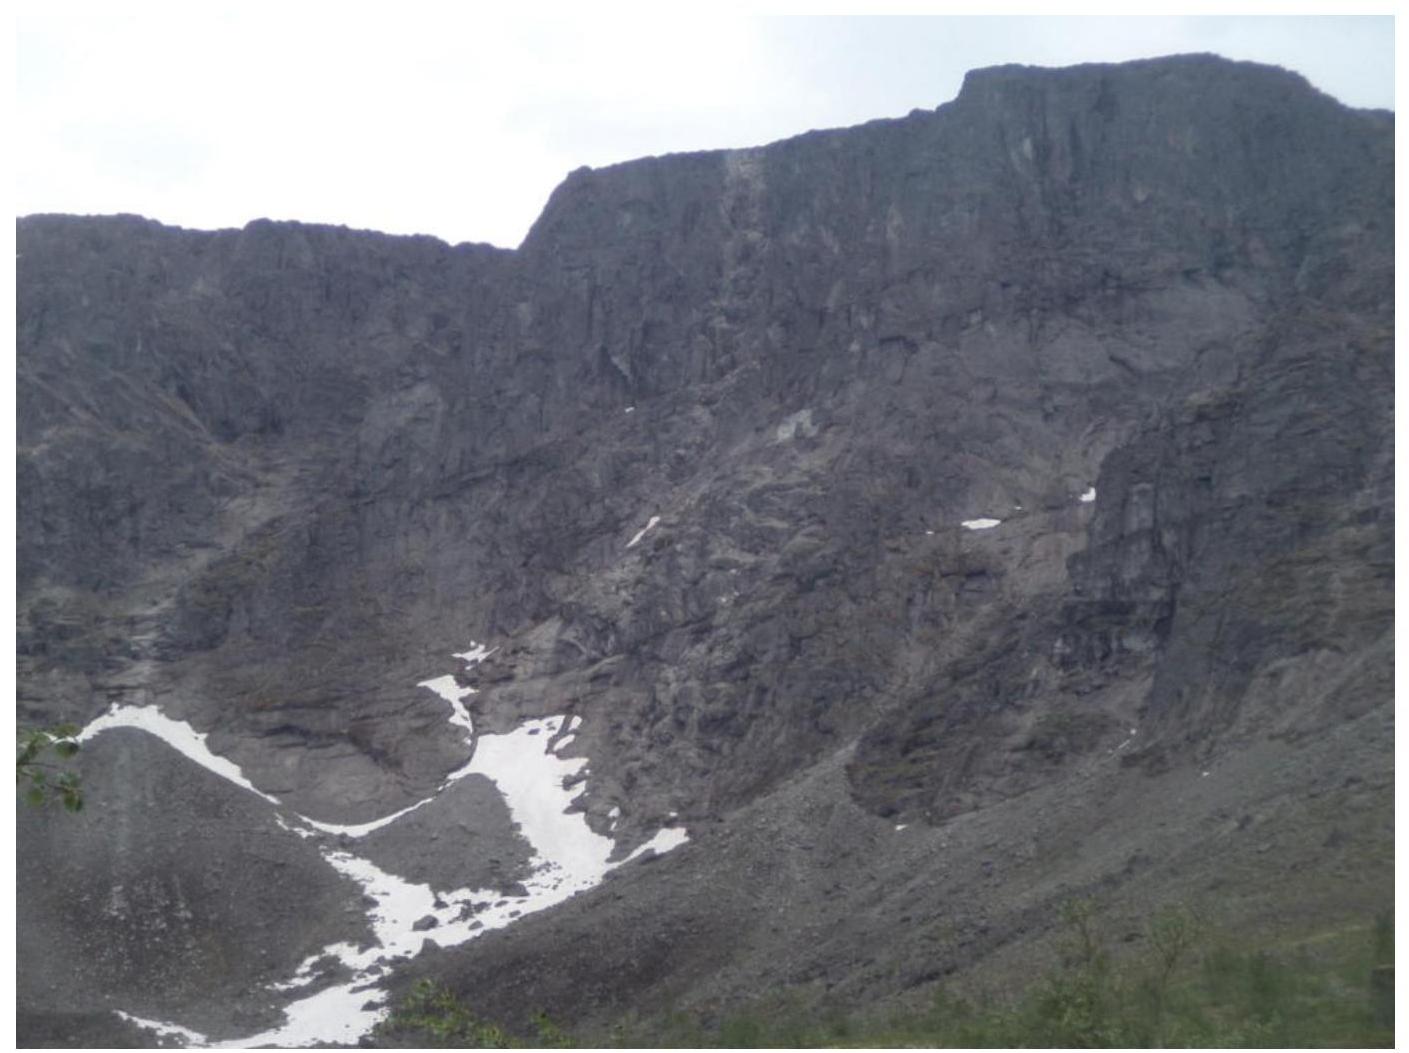
Fig. 2. Area panorama (Time and location: 9:00, June 9, 2013, Ganesina cirque)
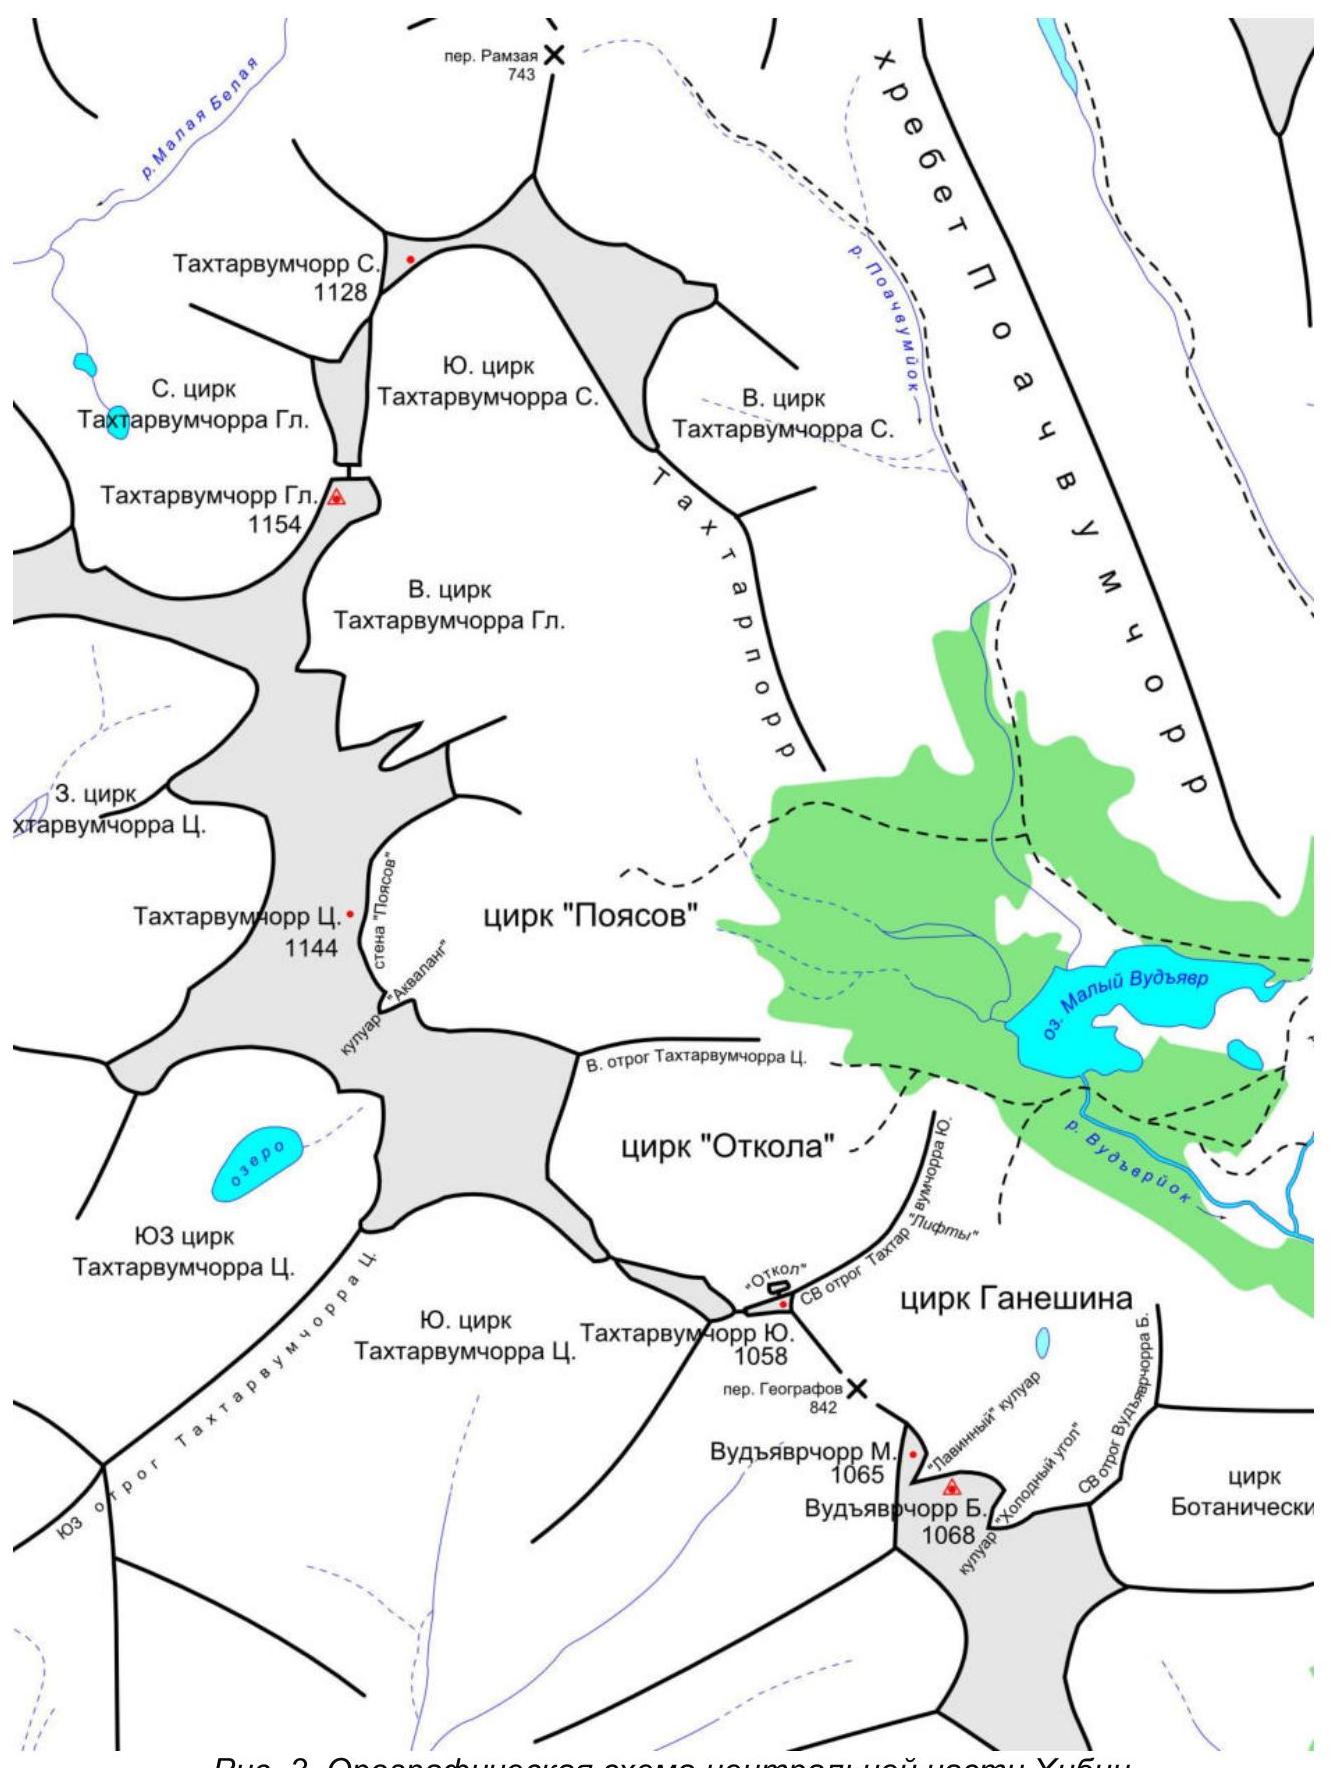
Fig. 3. Orgraphical scheme of the central part of Khibiny
III. Route Description
1. Route Profile
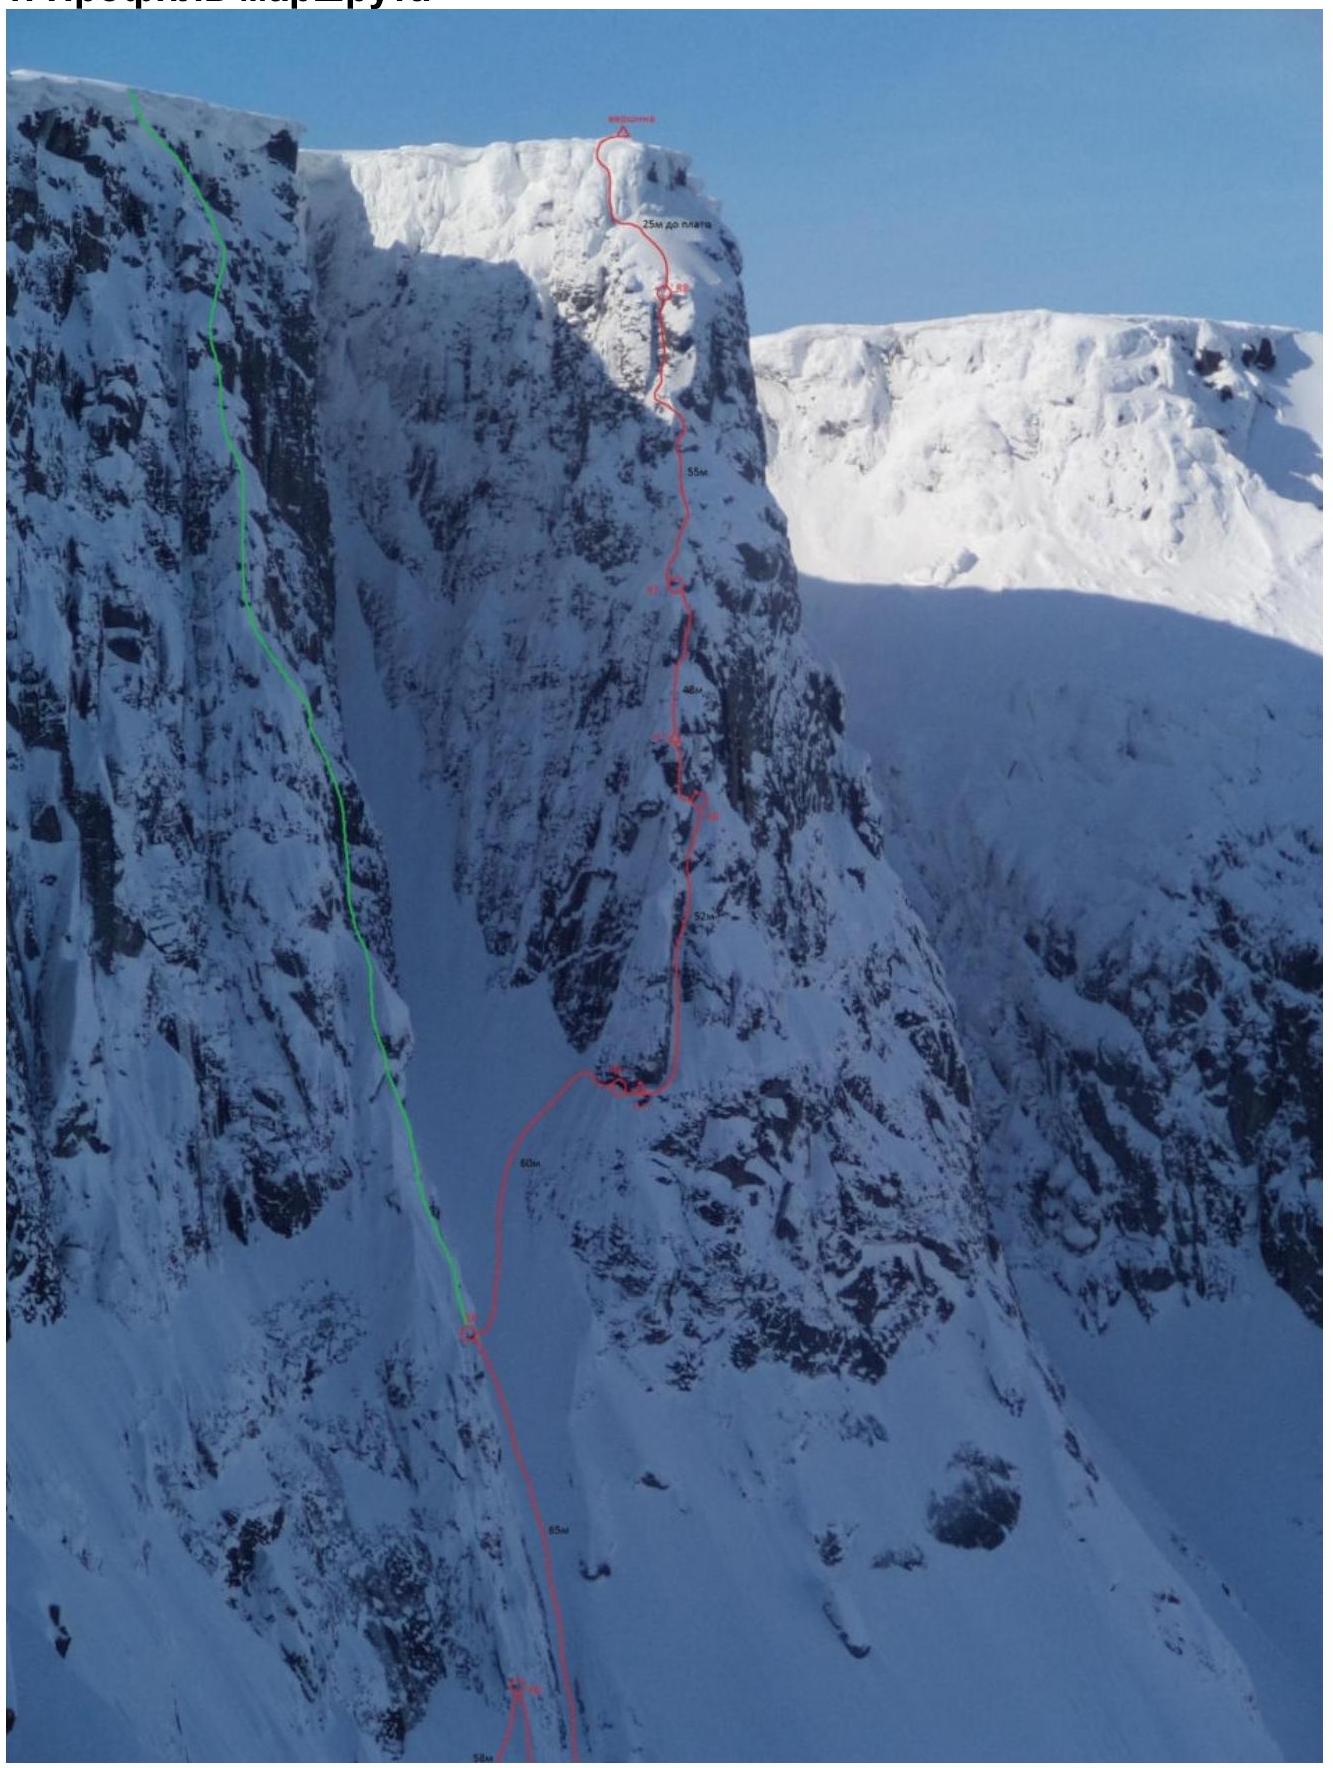
Fig. 4. Ascent route profile shown by a green line. Photo taken in April 2016 from the plateau above the Northern wall of Ganesina cirque.
2. Technical Route Photo
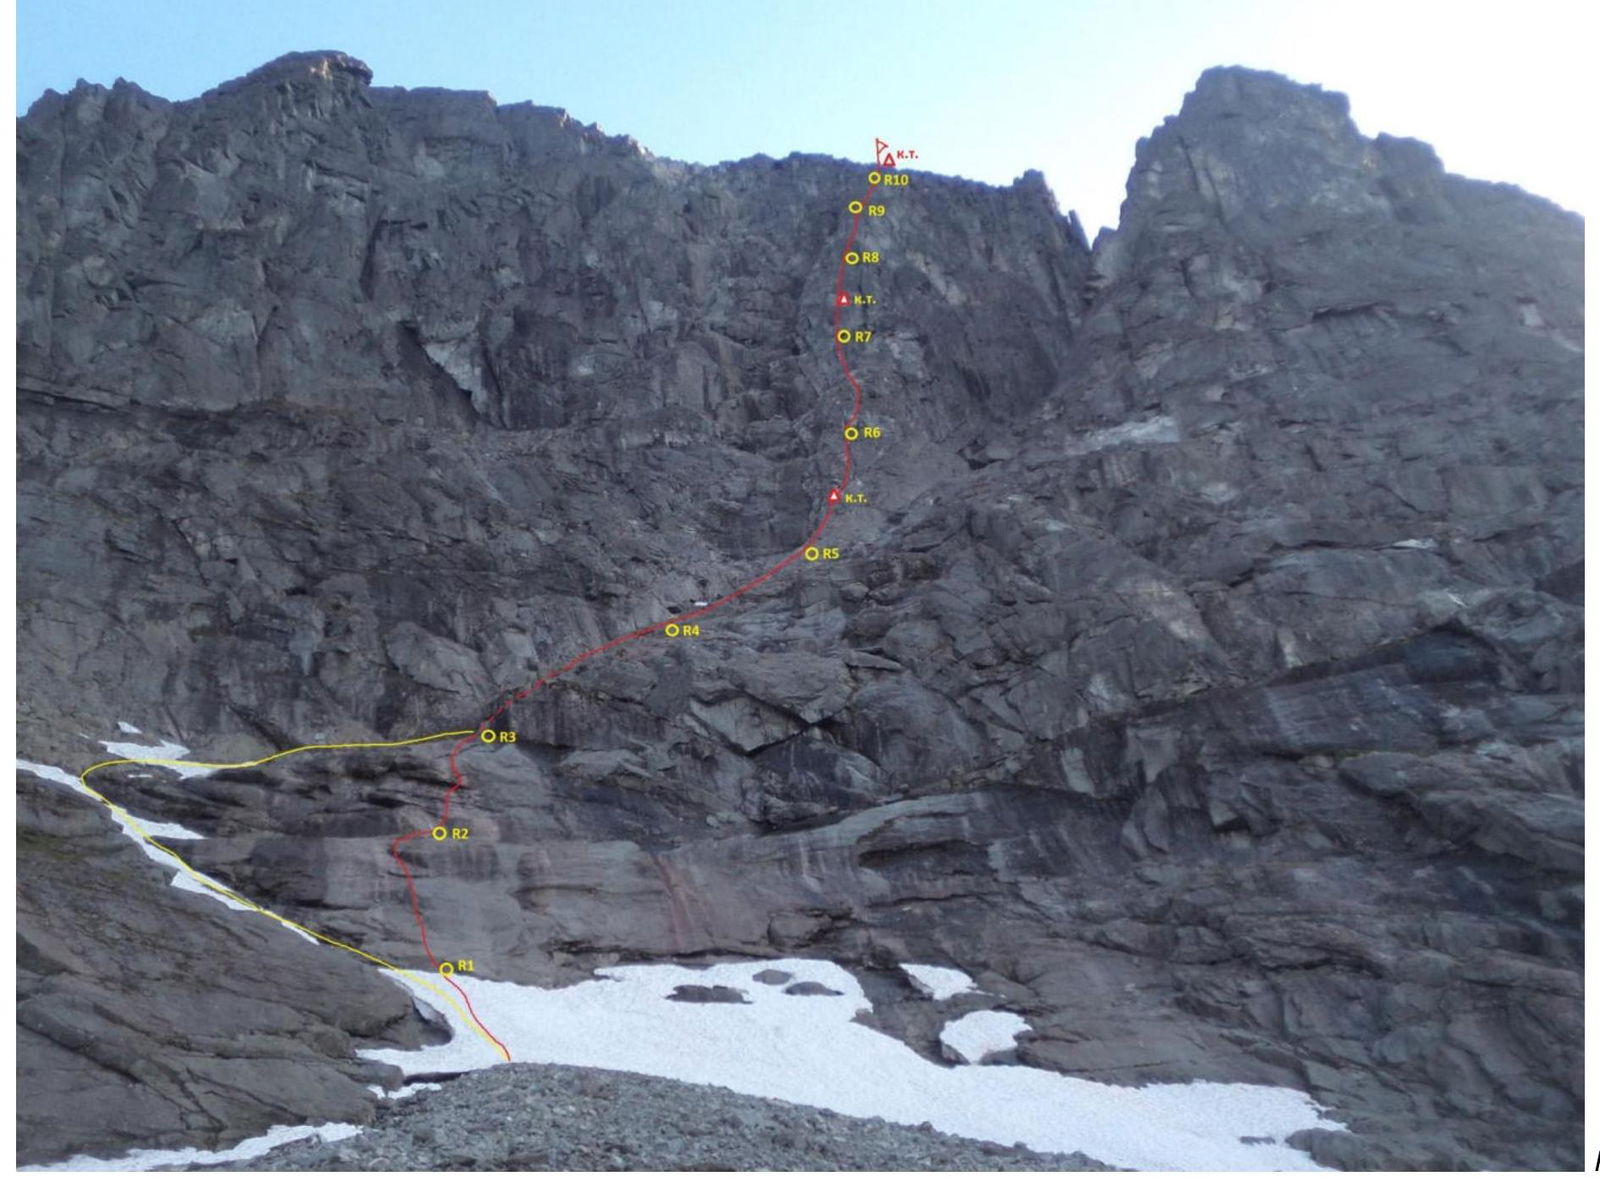
Fig. 5.
3. Route Scheme in UIAA Symbols
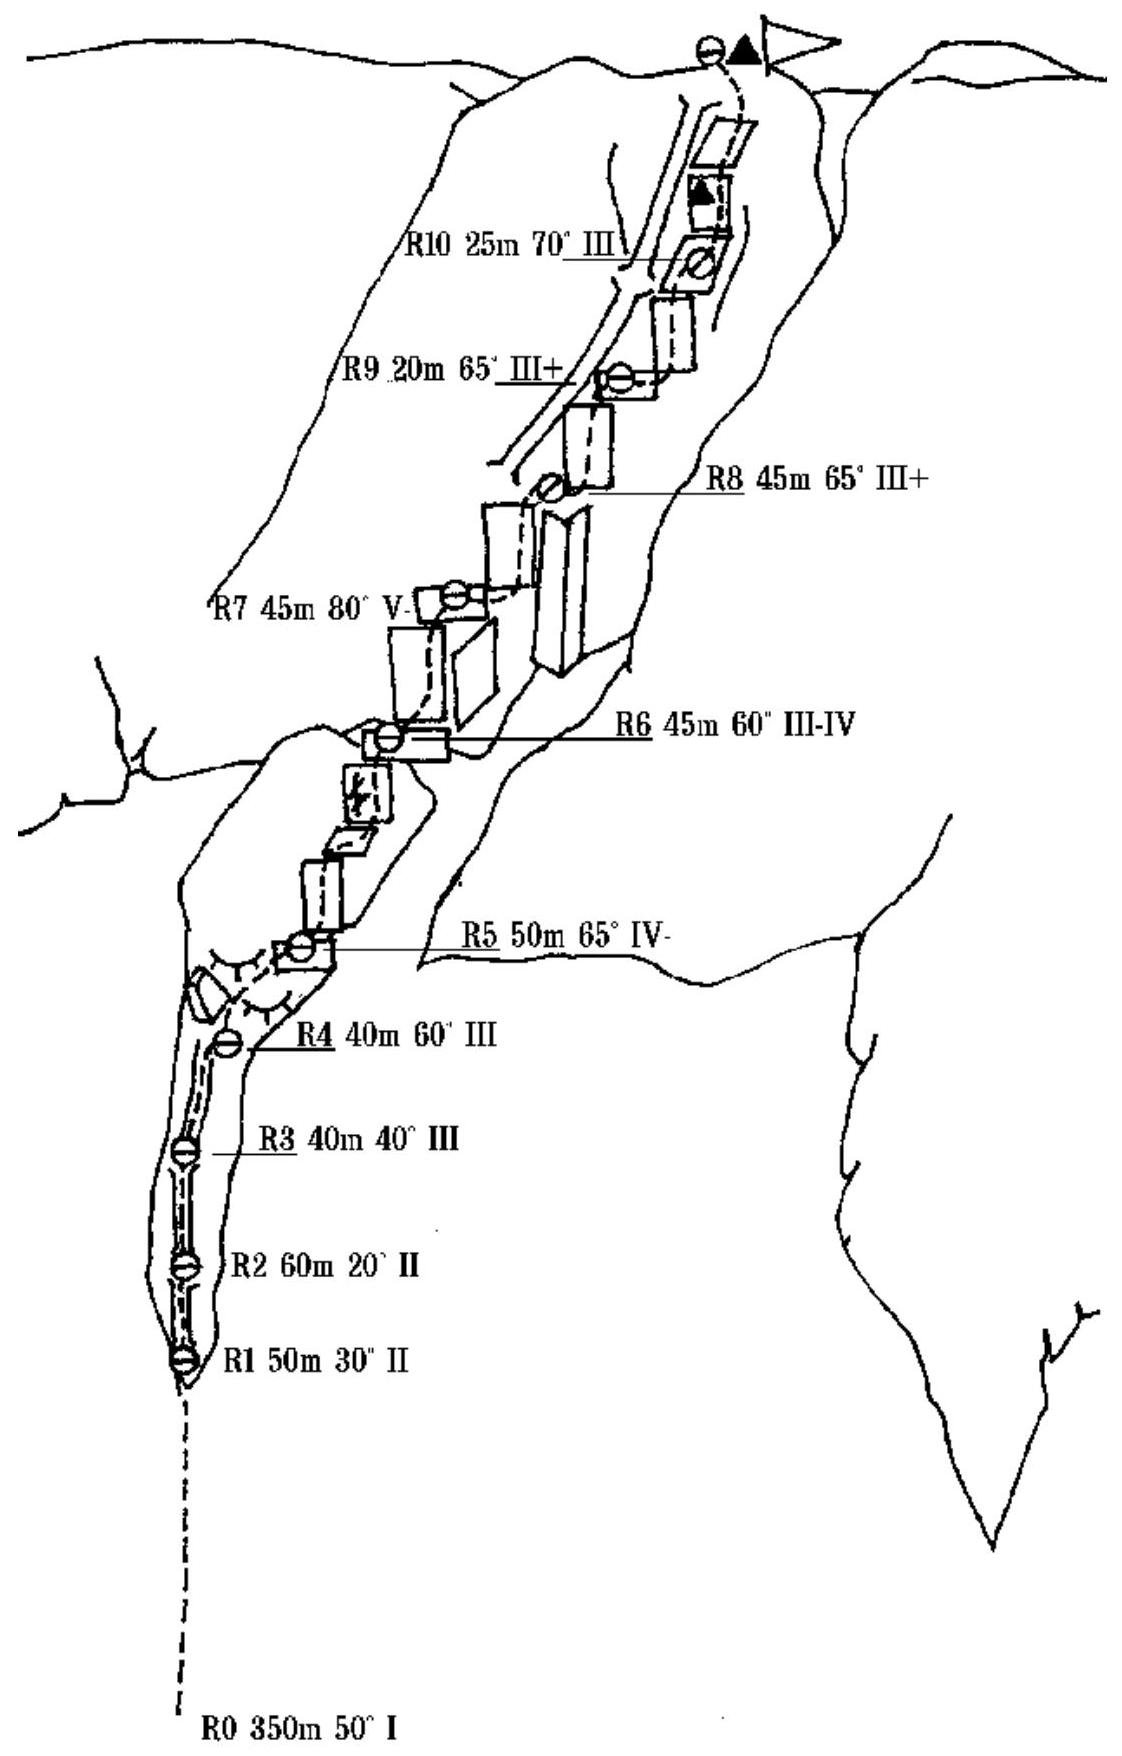
4. Route Description by Sections
The given UIAA scheme is taken from N.V. Ageev's description of 1995. It accurately describes the route line. The lengths of our ascent sections differ slightly — within measurement error.
The classic start of the route lies on a snowpatch (yellow line on Fig. 5). This is a simple and logical path. In summer, the snow is hard, compacted, and sometimes forms ice.
Due to the group's lack of ice climbing equipment, it was decided to ascend directly upwards from the rancluft, through the "barani lby" (red line R1–R3 on Fig. 5), to save time.
R0–R1 (150 m I/II, 50–60°)
- Approach to the route via rock scree, then along a snowpatch to the rancluft.
- Station in a horizontal crevice on the wall.
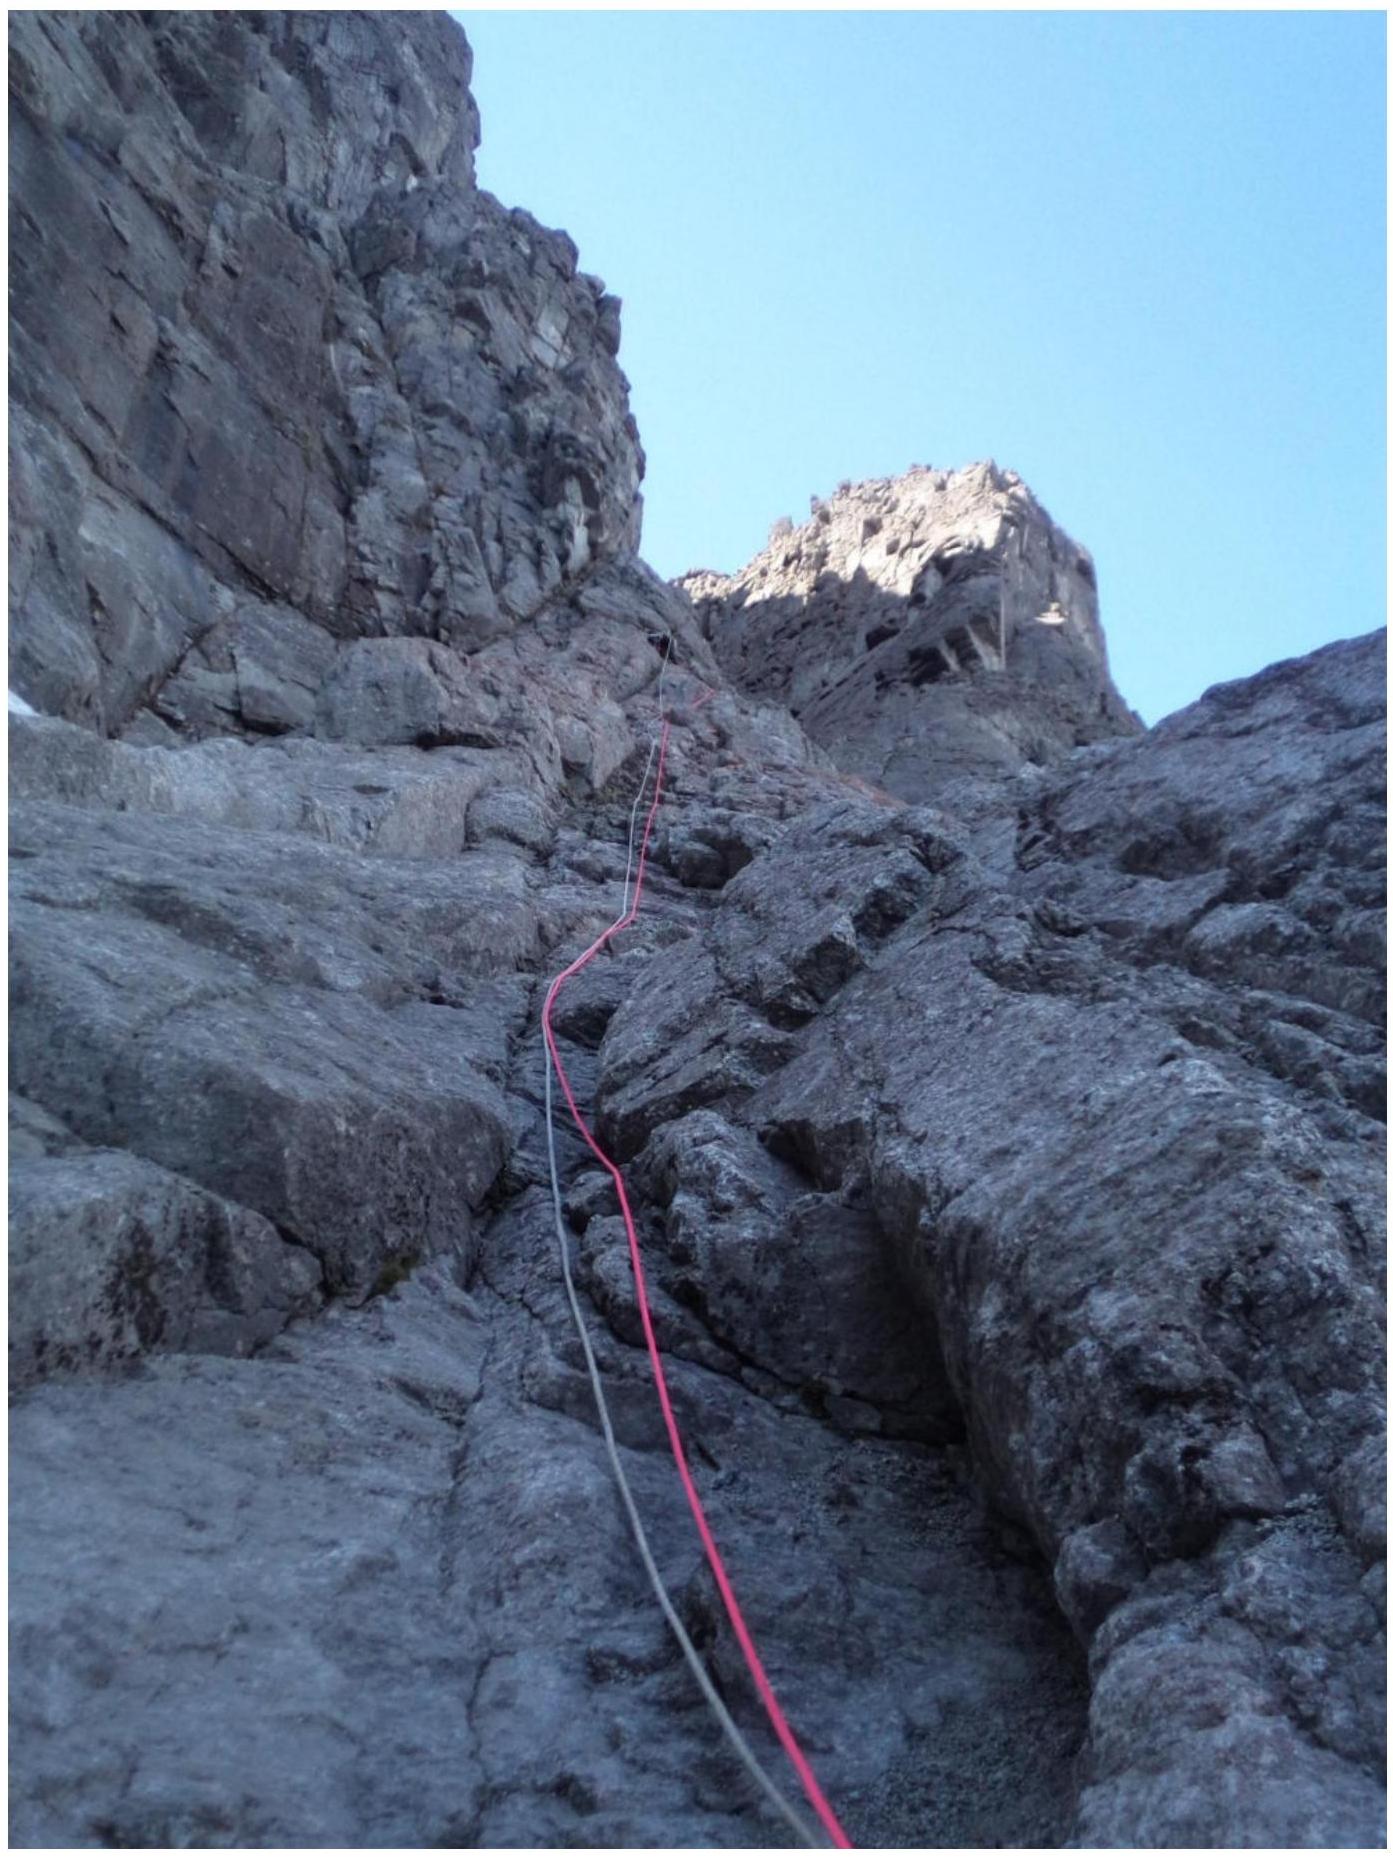
R1–R2 (48 m IV/V, 70°) On "barani lby", mostly on friction. The relief is poor, with few places for protection. Station slightly above a large ledge at the base of a gentle internal corner.
R2–R3 (50 m IV/V, 65–70°)
Along smooth, sloping rocks, bypassing cornices to the right. At the start of the section, there are problems with organizing reliable protection. Not recommended to climb on wet or icy rocks.
- Move left to a large crevice.
- Along it upwards to the entrance to the chimney.
Station on the right wall at the entrance: the place for the station is chosen because the chimney is exposed to falling rocks from the leader.
R3–R4 (10 m III/IV, 75°; 40 m III, 60°)
Up the right wall of the chimney, bypassing the blocking stone to the right. Further, holding the ridge towards the bastion. Station on the ridge. There are no characteristic ledges, so it's not very comfortable.
R4–R5 (50 m III/IV, 65–70°)
Up the ridge towards the bastion. Station is not very comfortable.
R5–R6 (8 m IV, 65–70°; 35 m IV/V, 80°) 8 meters to the base of the bastion. Control Tour №1. Then, along the right part of the bastion vertically upwards along monolithic blocky rocks. Comfortable station on a ledge under the wall.
R6–R7 (5 m V, 90°; 20 m IV, 70°; 8 m V, 90°)
From the station through the wall upwards along the right crevice. To the right, there's a "local" hook. Further, the counterfort flattens out and leads to a large ledge crossing the entire left part of the Eastern wall. Station behind the next wall above the large ledge. On the large ledge, a good overnight stay is possible.
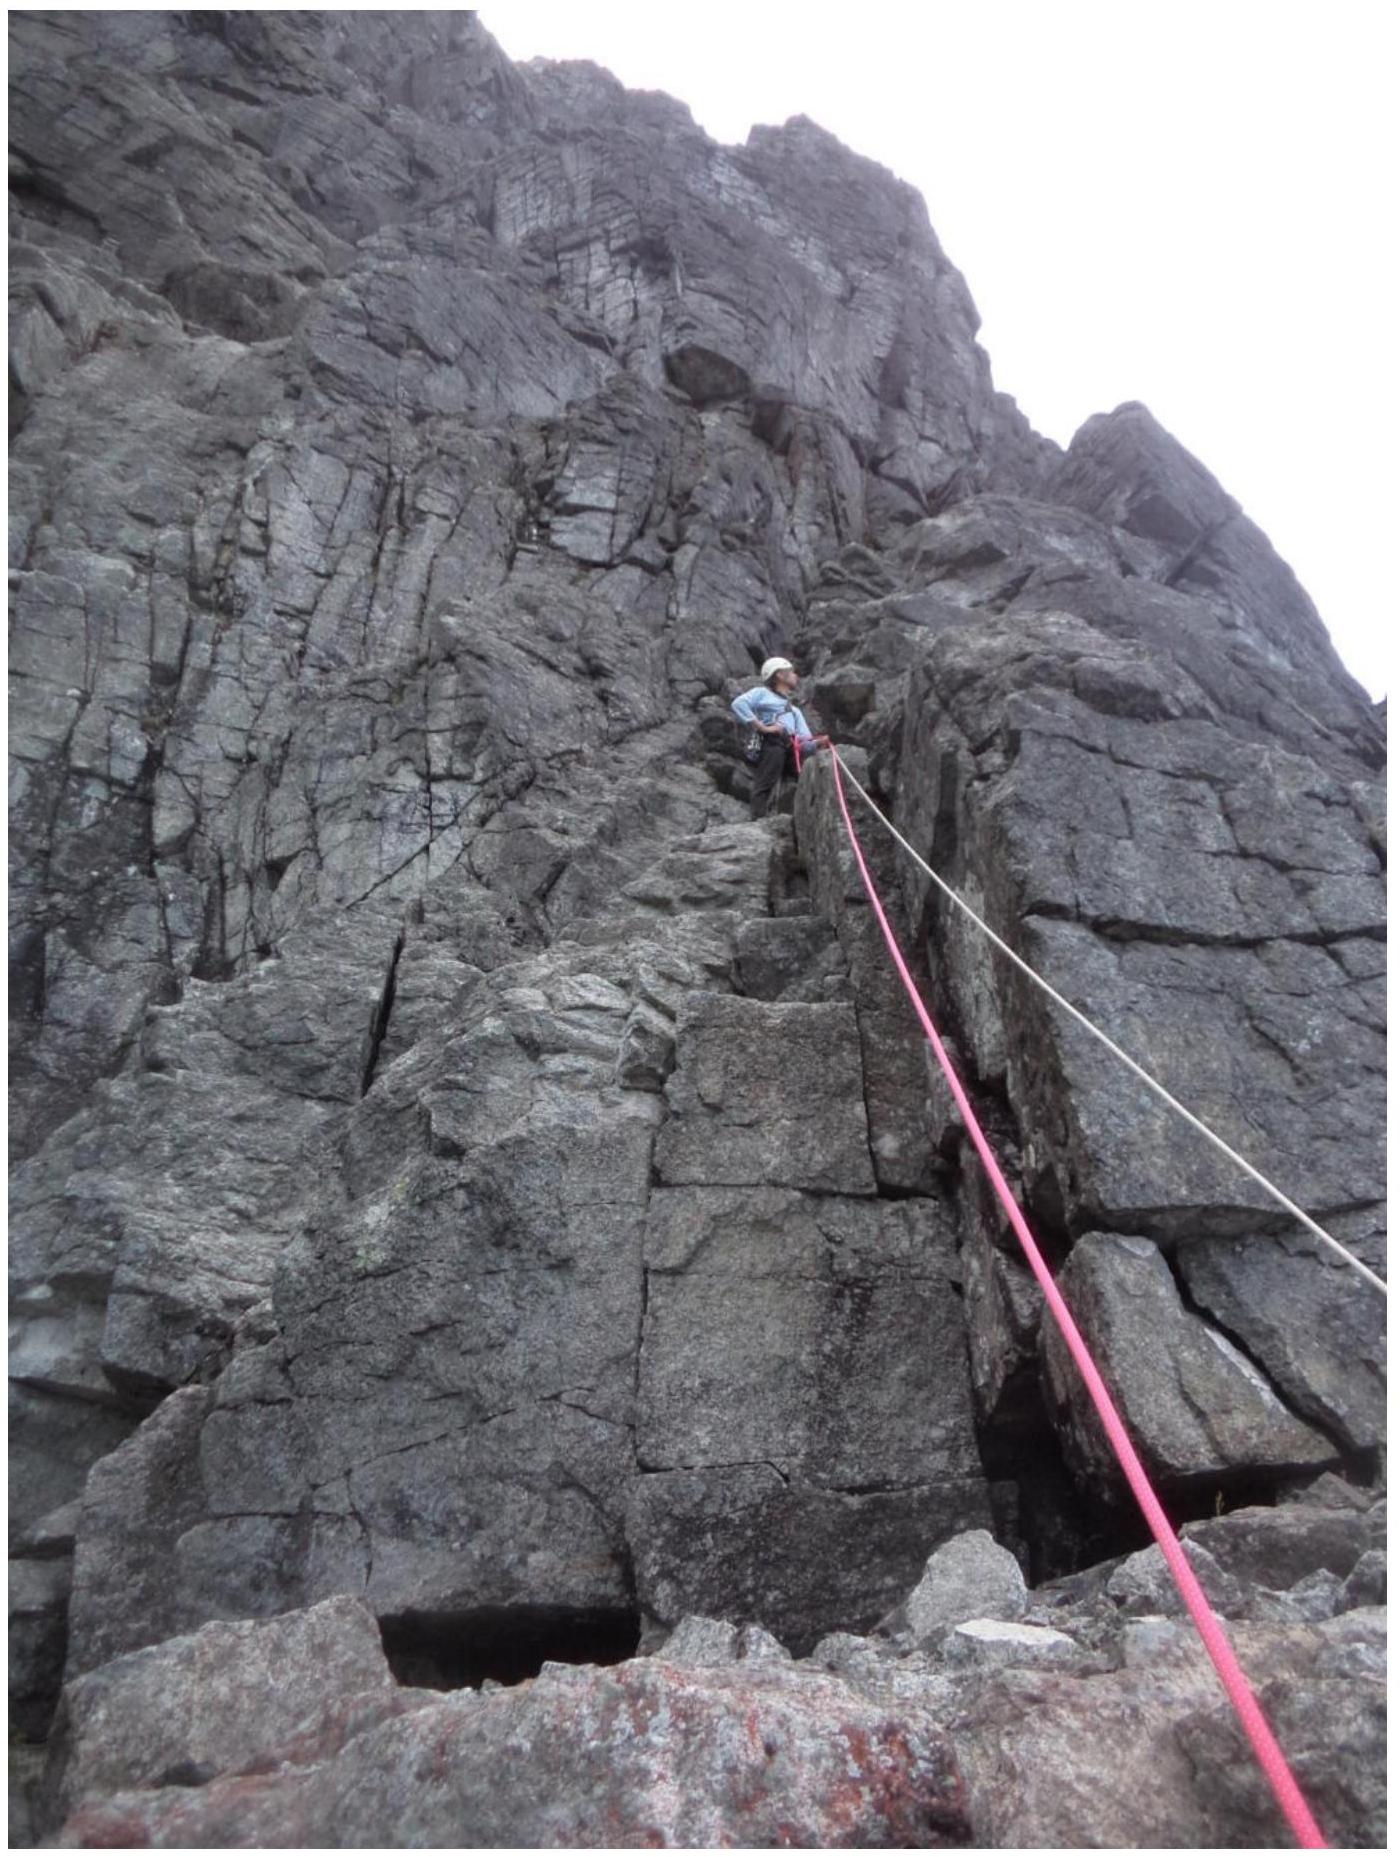
R7–R8 (15 m IV, 80°; 8 m V+, 90°; 8 m III, 60°)
Cross the crevice and move upwards towards Control Tour №2. It is left under a cornice as an orientation landmark and should be clearly visible from the large ledge and from the station.
From the control tour, left upwards through a vertical wall of blocky rocks to a good ledge. Station.
R8–R9 (5 m V+, 90°; 15 m III/IV, 60–70°; 15 m IV, 75°) Through the vertical wall upwards, overcome a section of large-block rocks, and along the left part of the vertical wall, exit to a gentle section. Station.
R9–R10 (15 m III/IV, 70°; 10 m II; 10 m IV/V, 85°) From the station, move vertically upwards, holding the counterfort line. Do not cross the left crevice-gully or enter it. From a large flat ledge along a vertical wall upwards. Station on a rock.
R10–R11 (25 m II, 45°) — along simple rocks, exit to the plateau to the summit tour.
5. Route Recommendations and Safety Assessment
The route is a logical, well-known, and popular line. The counterfort is quite narrow, well-read, and does not cause difficulties in orientation, either in winter or summer. The lower part of the route coincides with the neighboring route "Chestnaya devushka". And overall, the route is very similar to it, although the counterfort is not as pronounced and, therefore, not as scenic. The counterfort itself (above the first tour) is formed mainly by monolithic blocky rocks: there's practically no "live" rock, and opportunities for organizing protection are numerous and varied.
In summer, the route is safe. It can be recommended as a first 4A. In conditions of the polar day (end of June – beginning of August), one can work on the route around the clock. With a good technical level of participants, the route is easily passed with free climbing. For movement on the snowpatch, the leader is recommended to have:
- crampons
- ice axe
In winter, the lower part of the route can be dangerous if the snow cover is unstable. Also, attention should be paid to the snow drift over the plateau: its size can be estimated from Fig. 4.
For summer, the necessary equipment is necessary:
- a set of chocks
- a set of friends
- a set of anchors
- extension slings
For winter, it is additionally recommended:
- a couple of tools and a brush for the leader
- crampons for all
All protection stations on the route are located in safe places, most on comfortable ledges. In the upper part, some sections of the route were specially shortened because many bends are formed, hindering the first climber's work.
Emergency descent from the route — rappelling down the ascent path. In winter, it's better towards the right couloir.
IV. Technical Route Photos
Different angle.
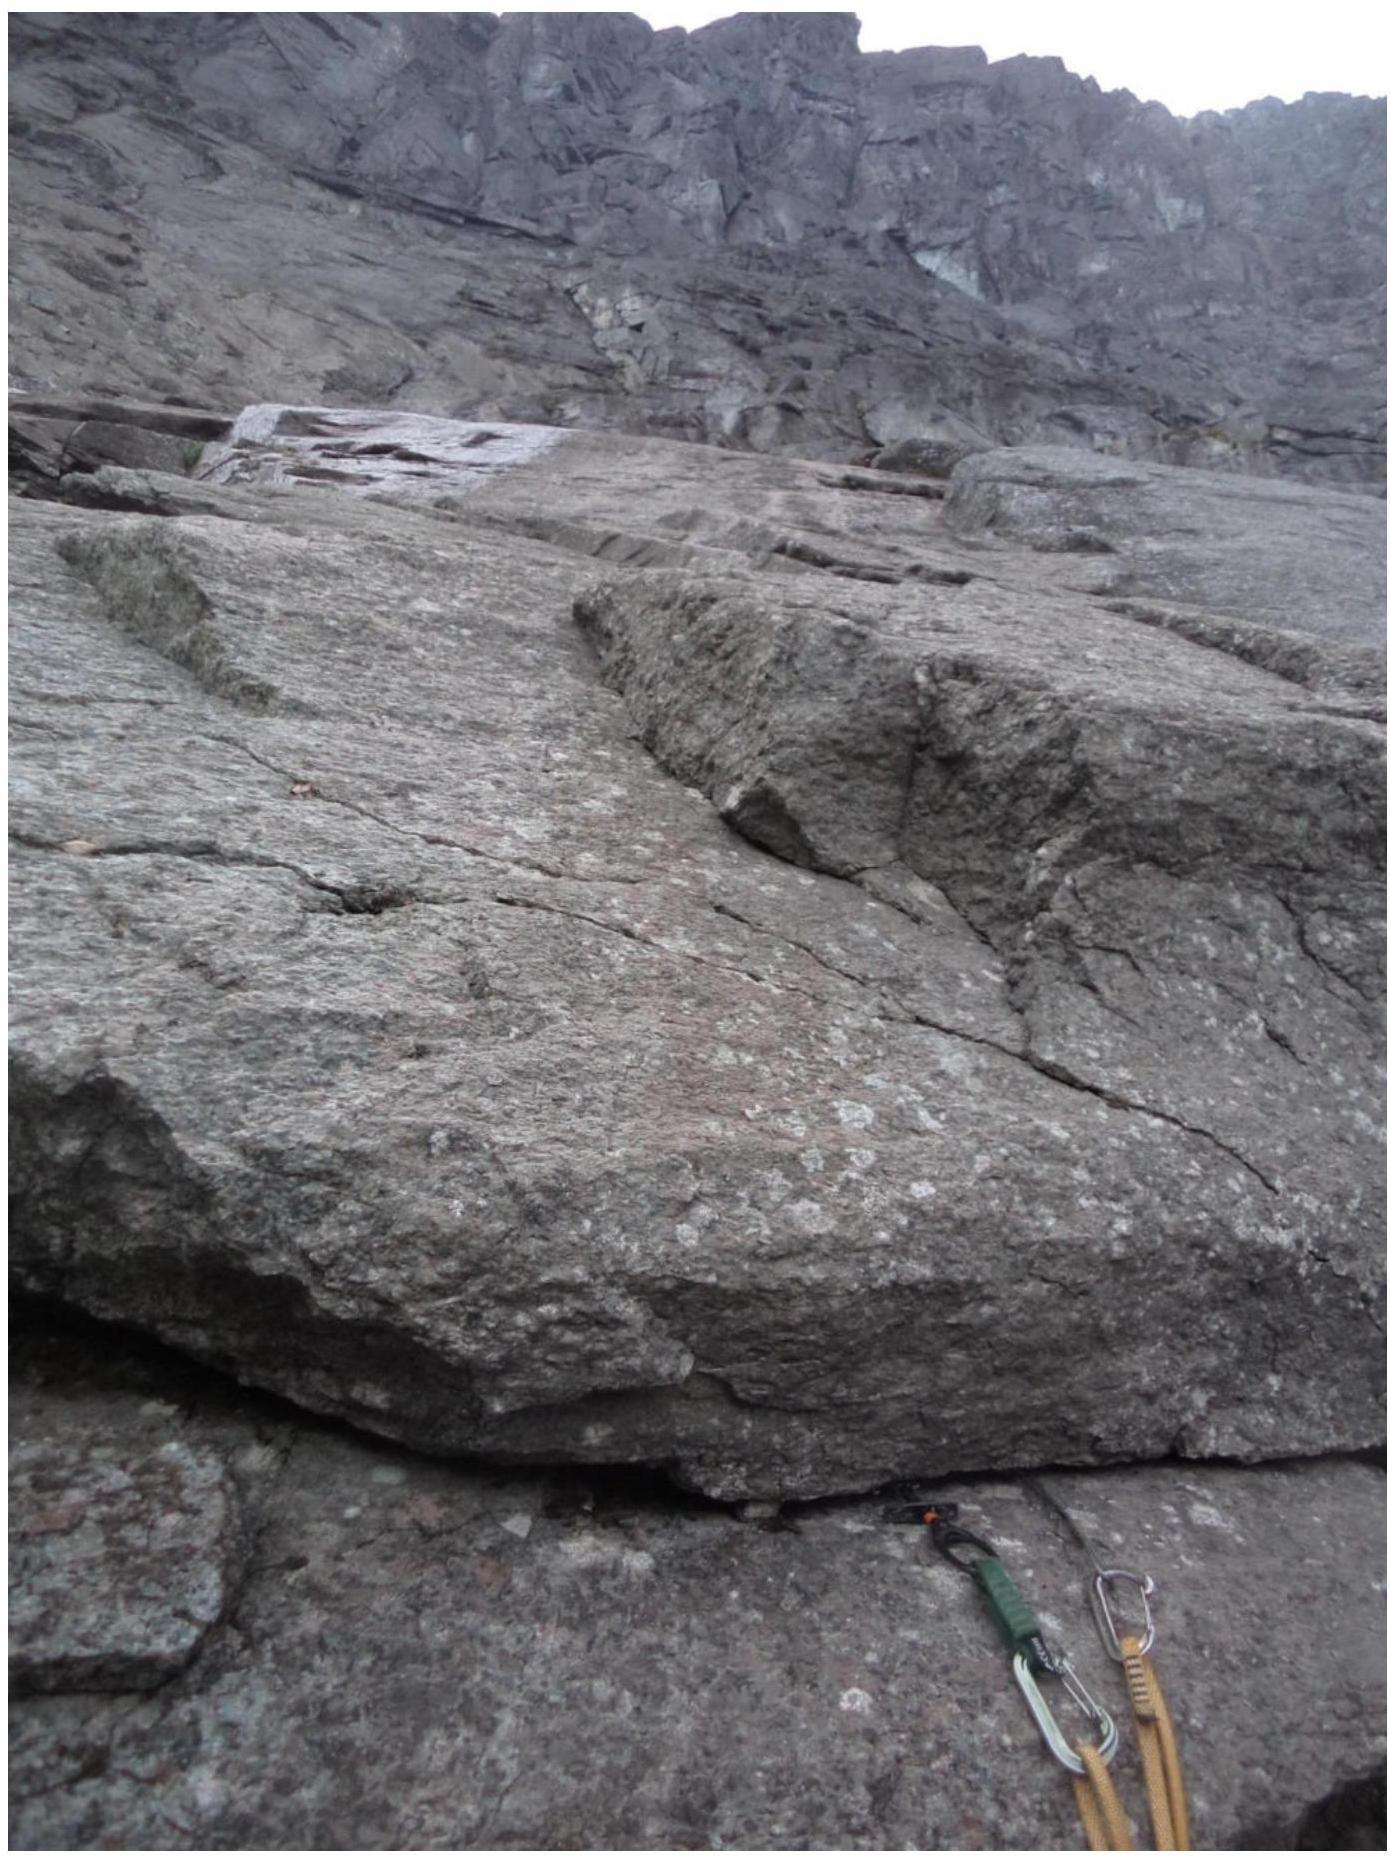
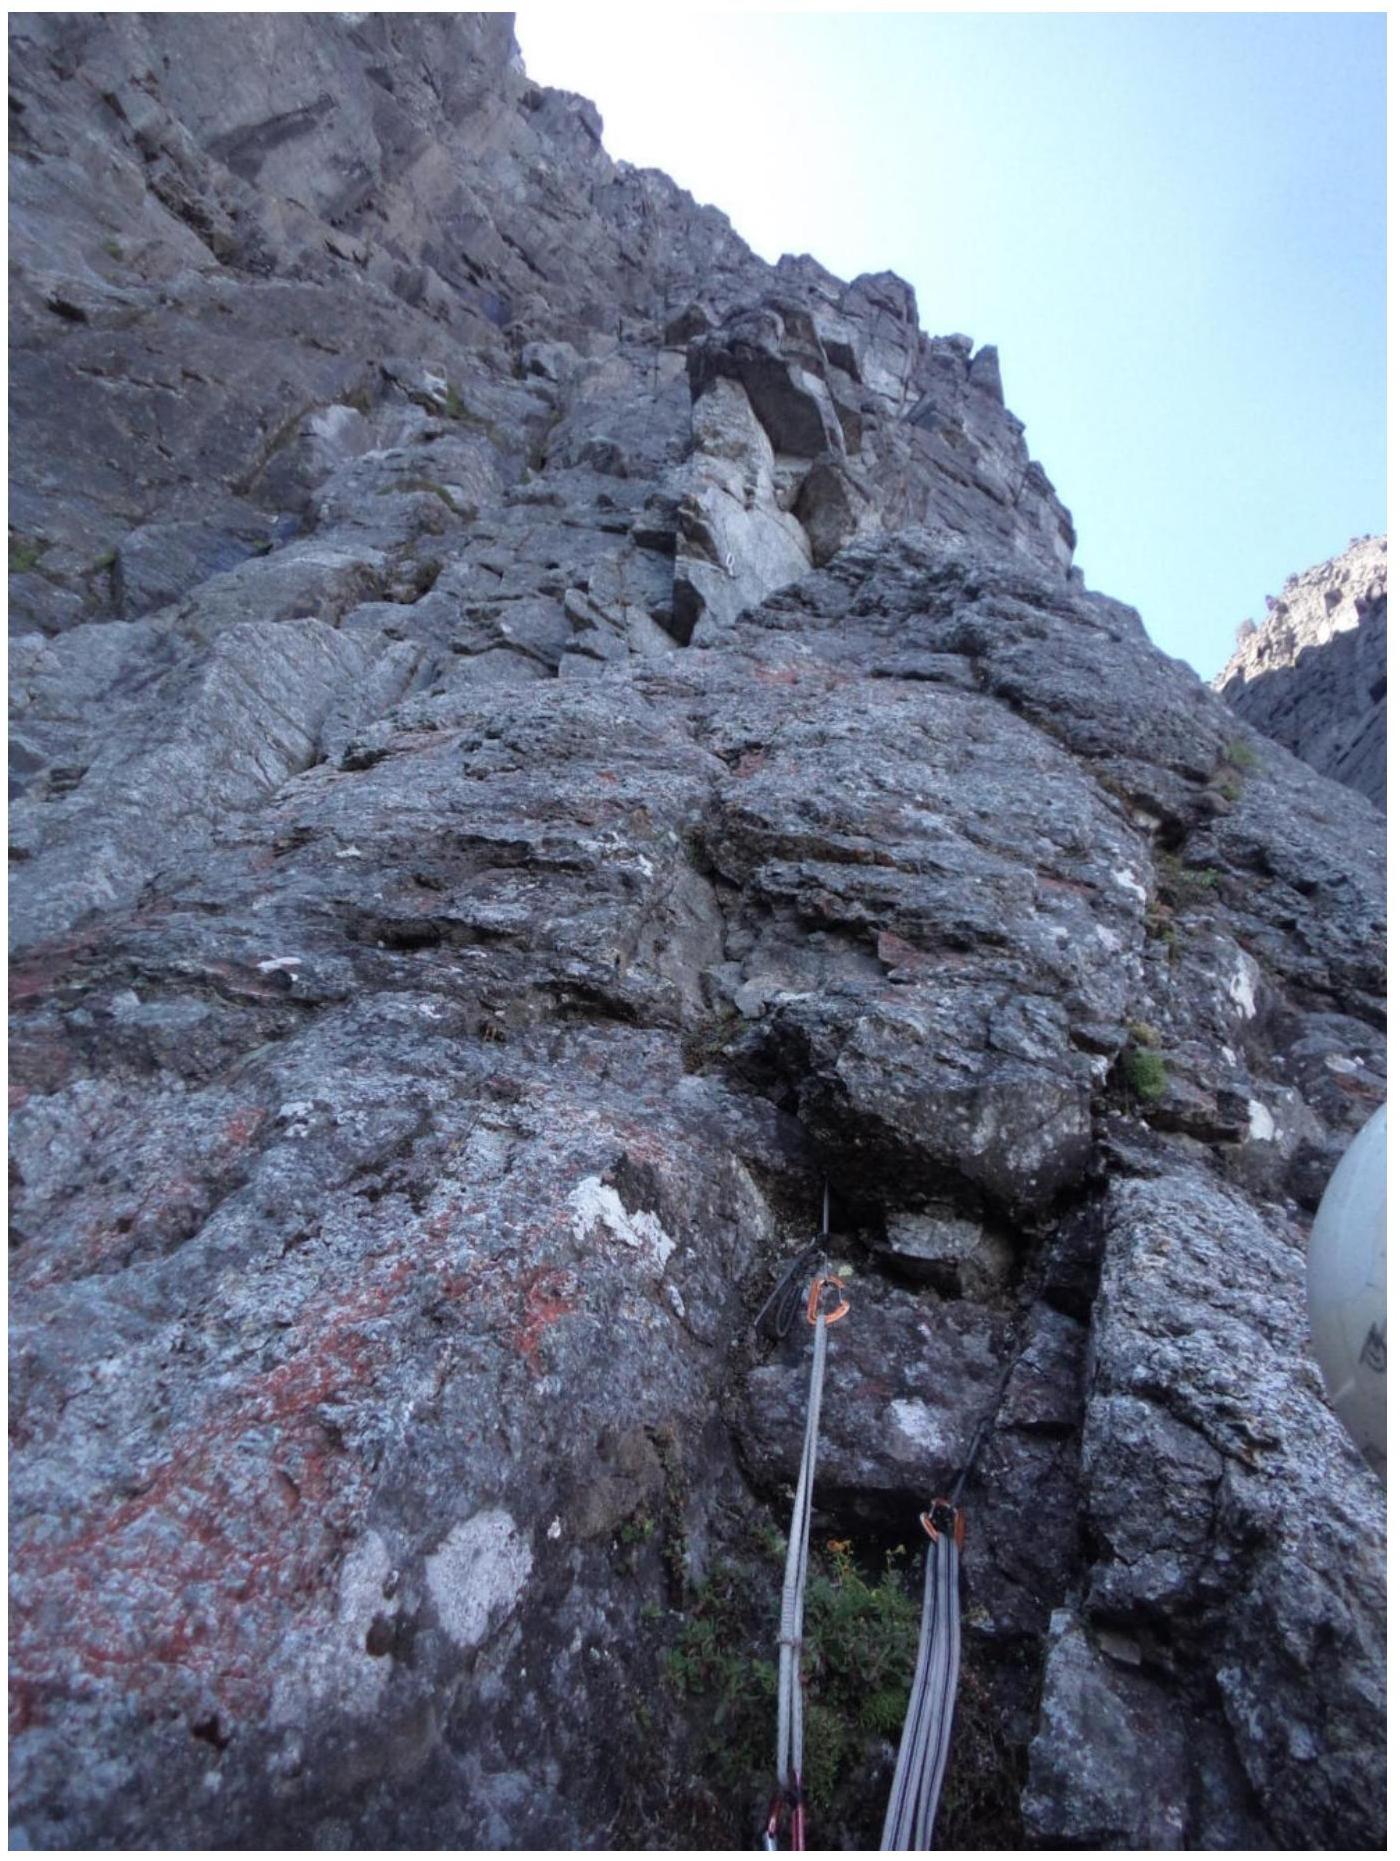
R1. View from the rancluft.
Section R1–R2.
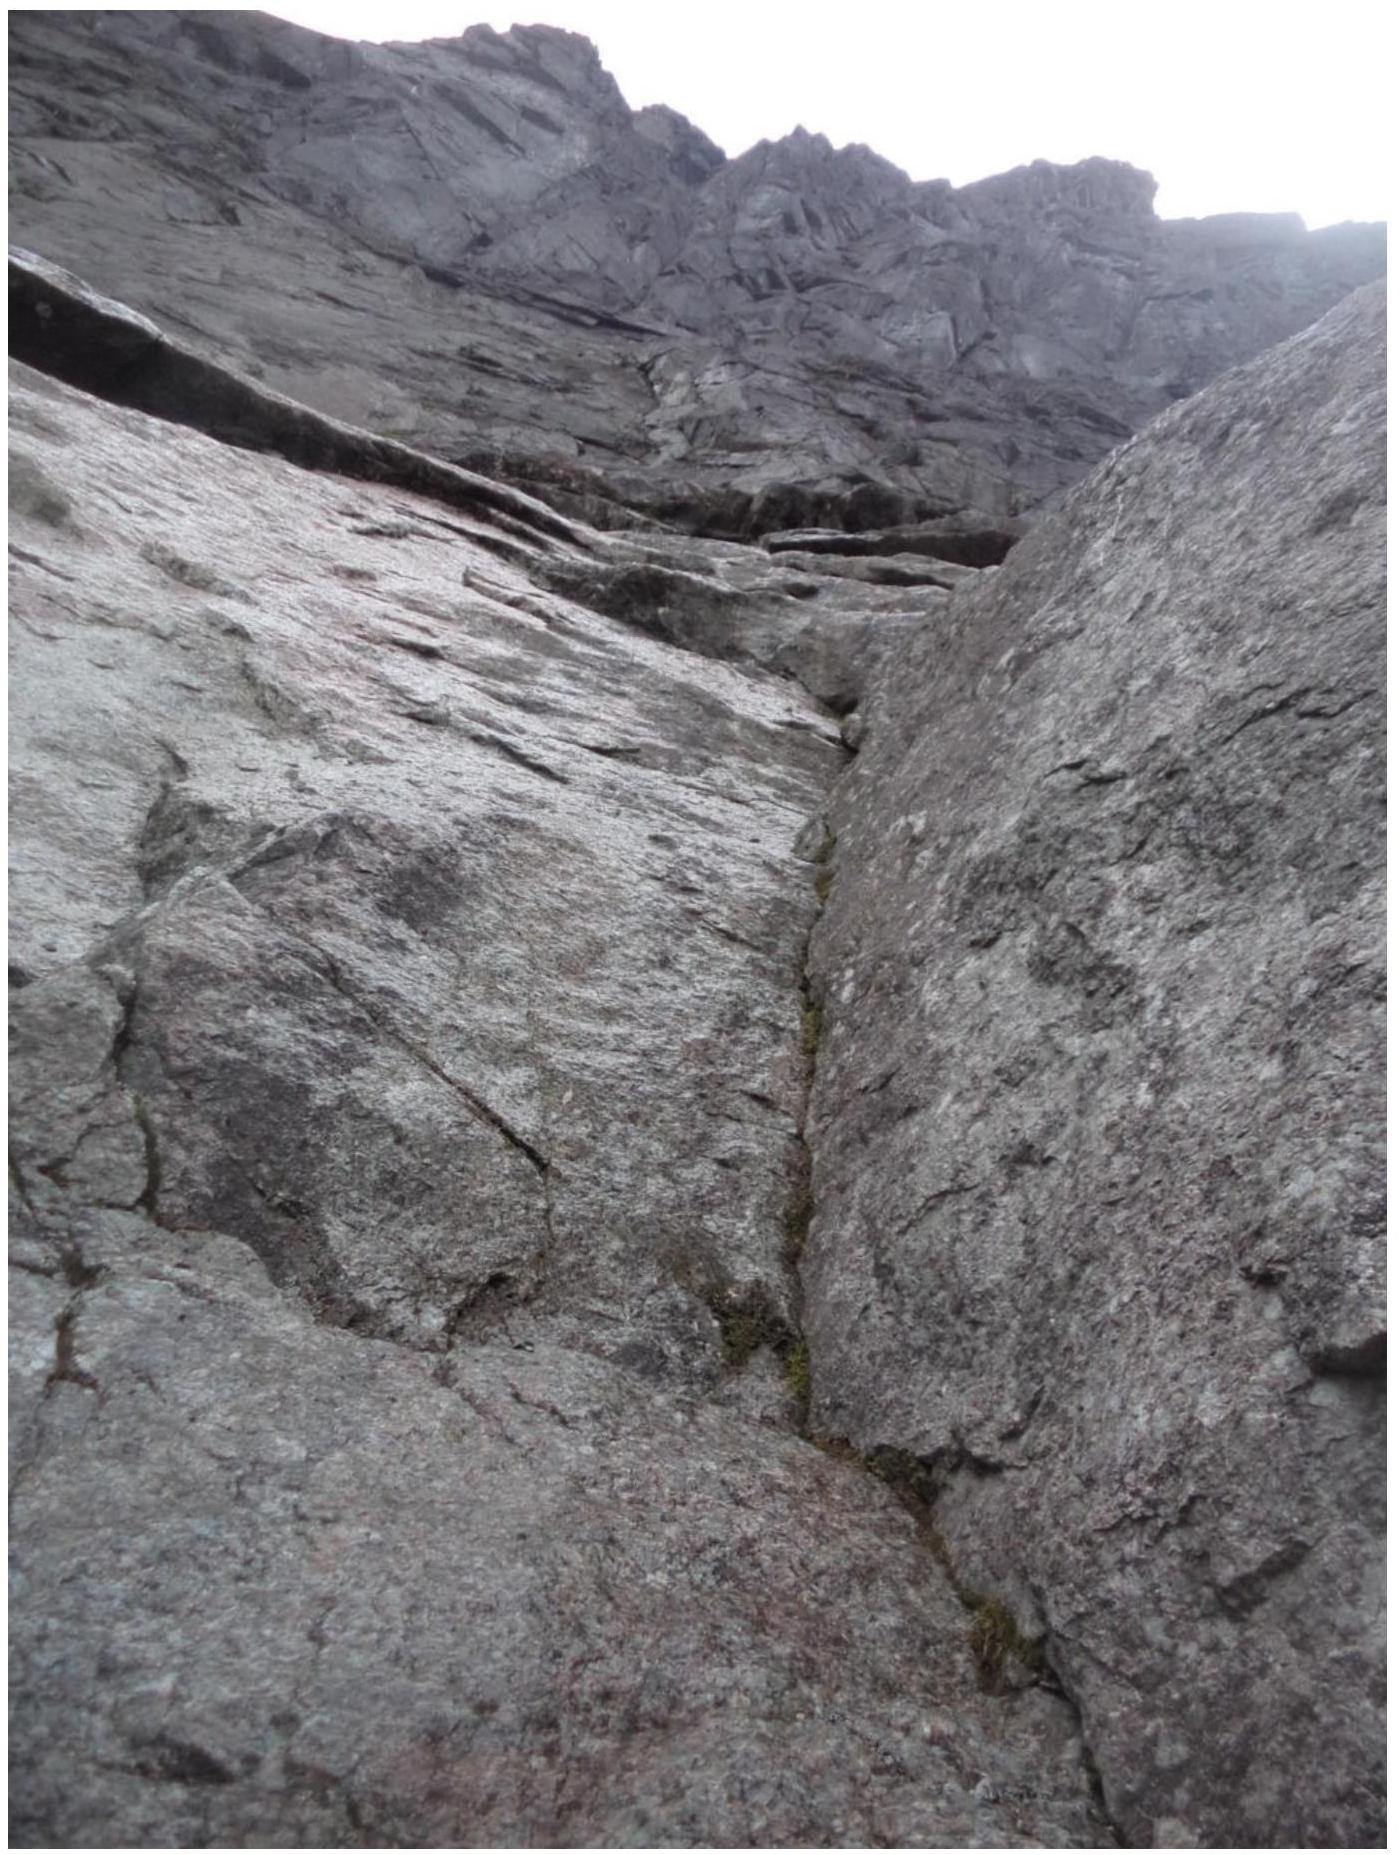
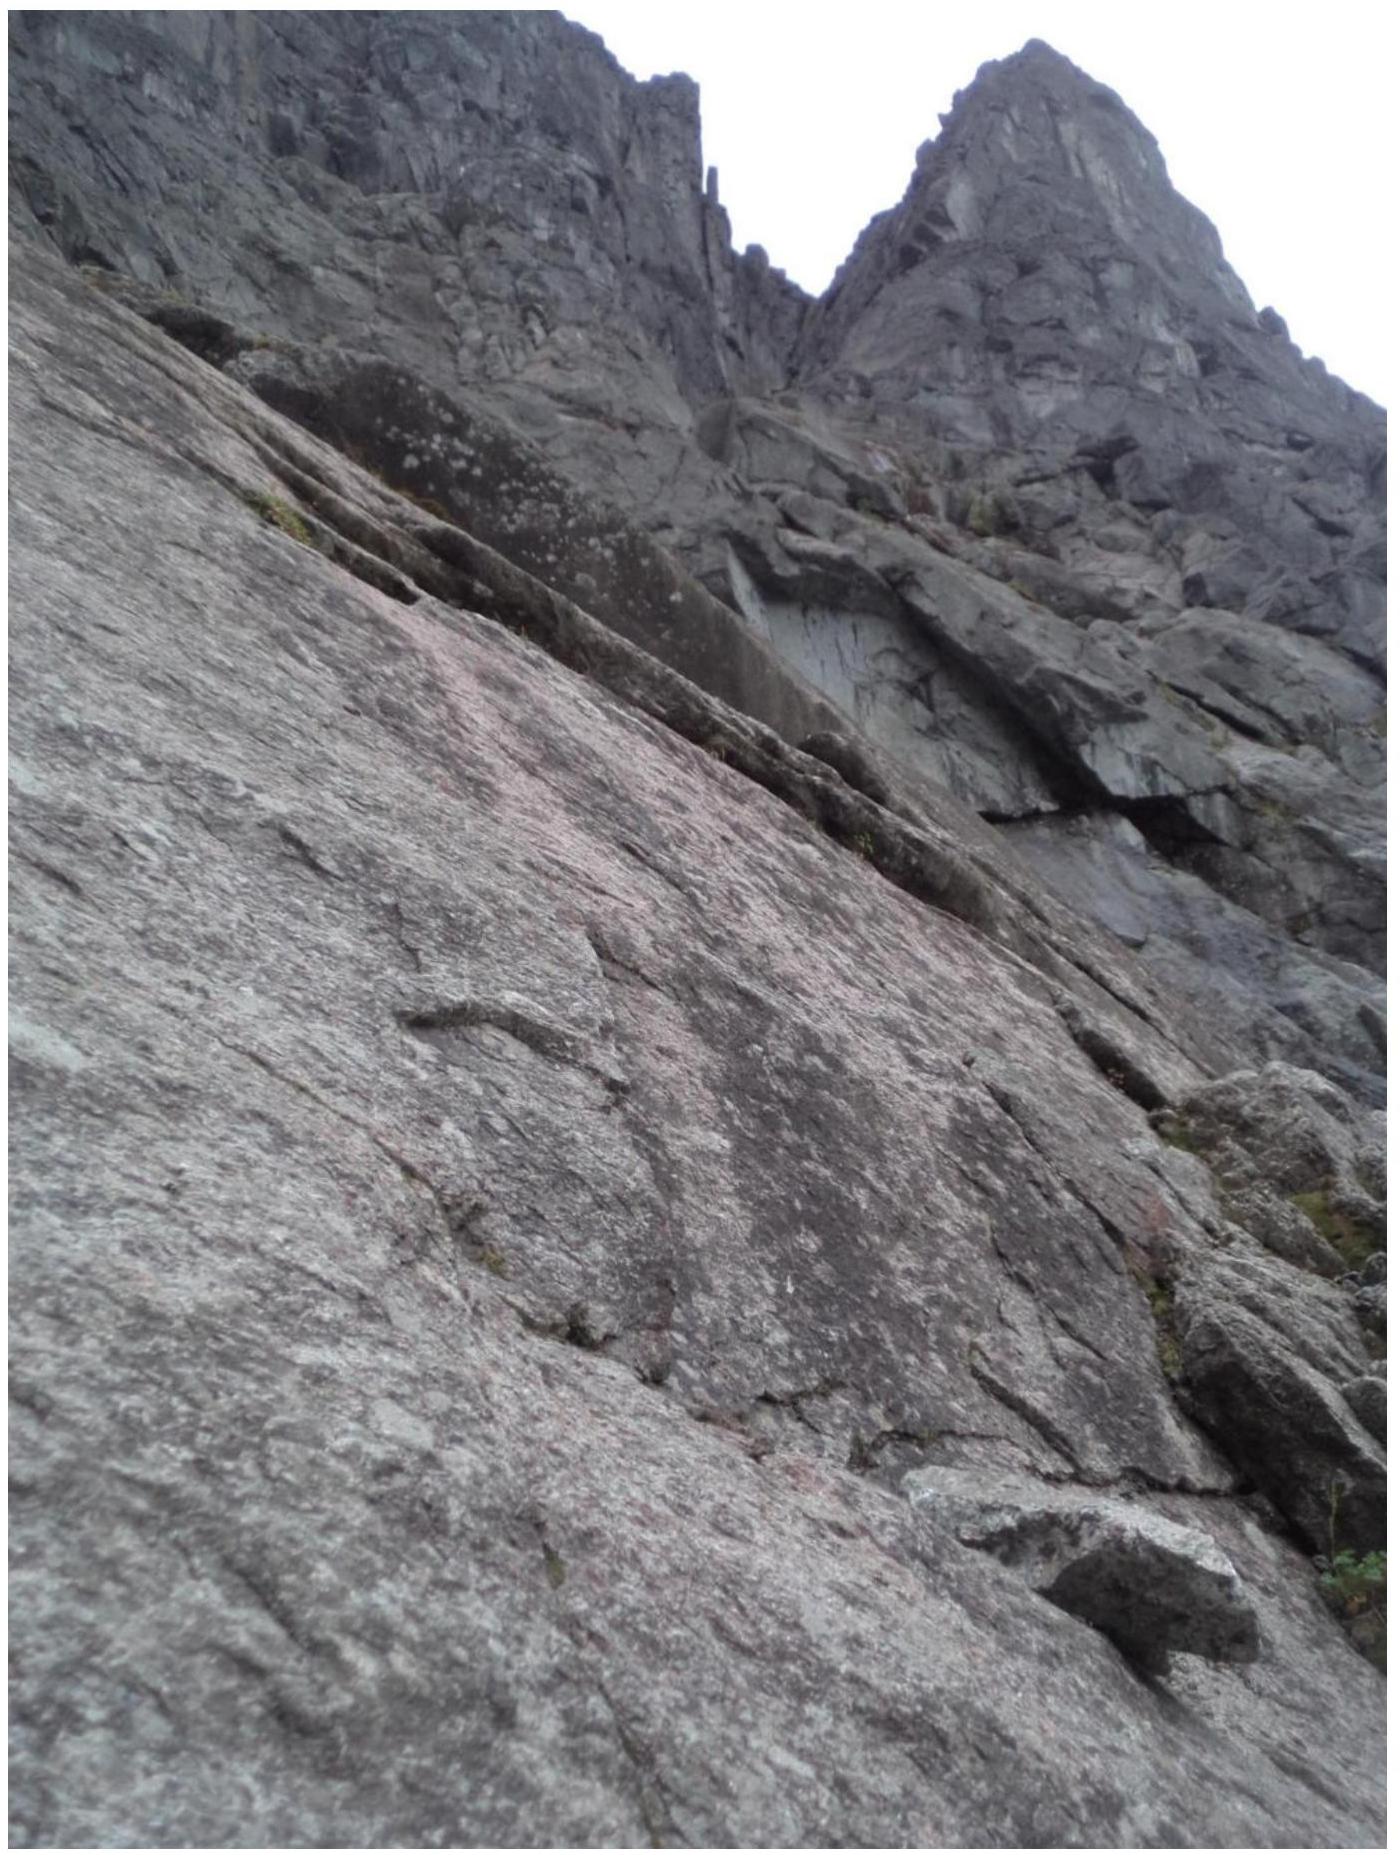
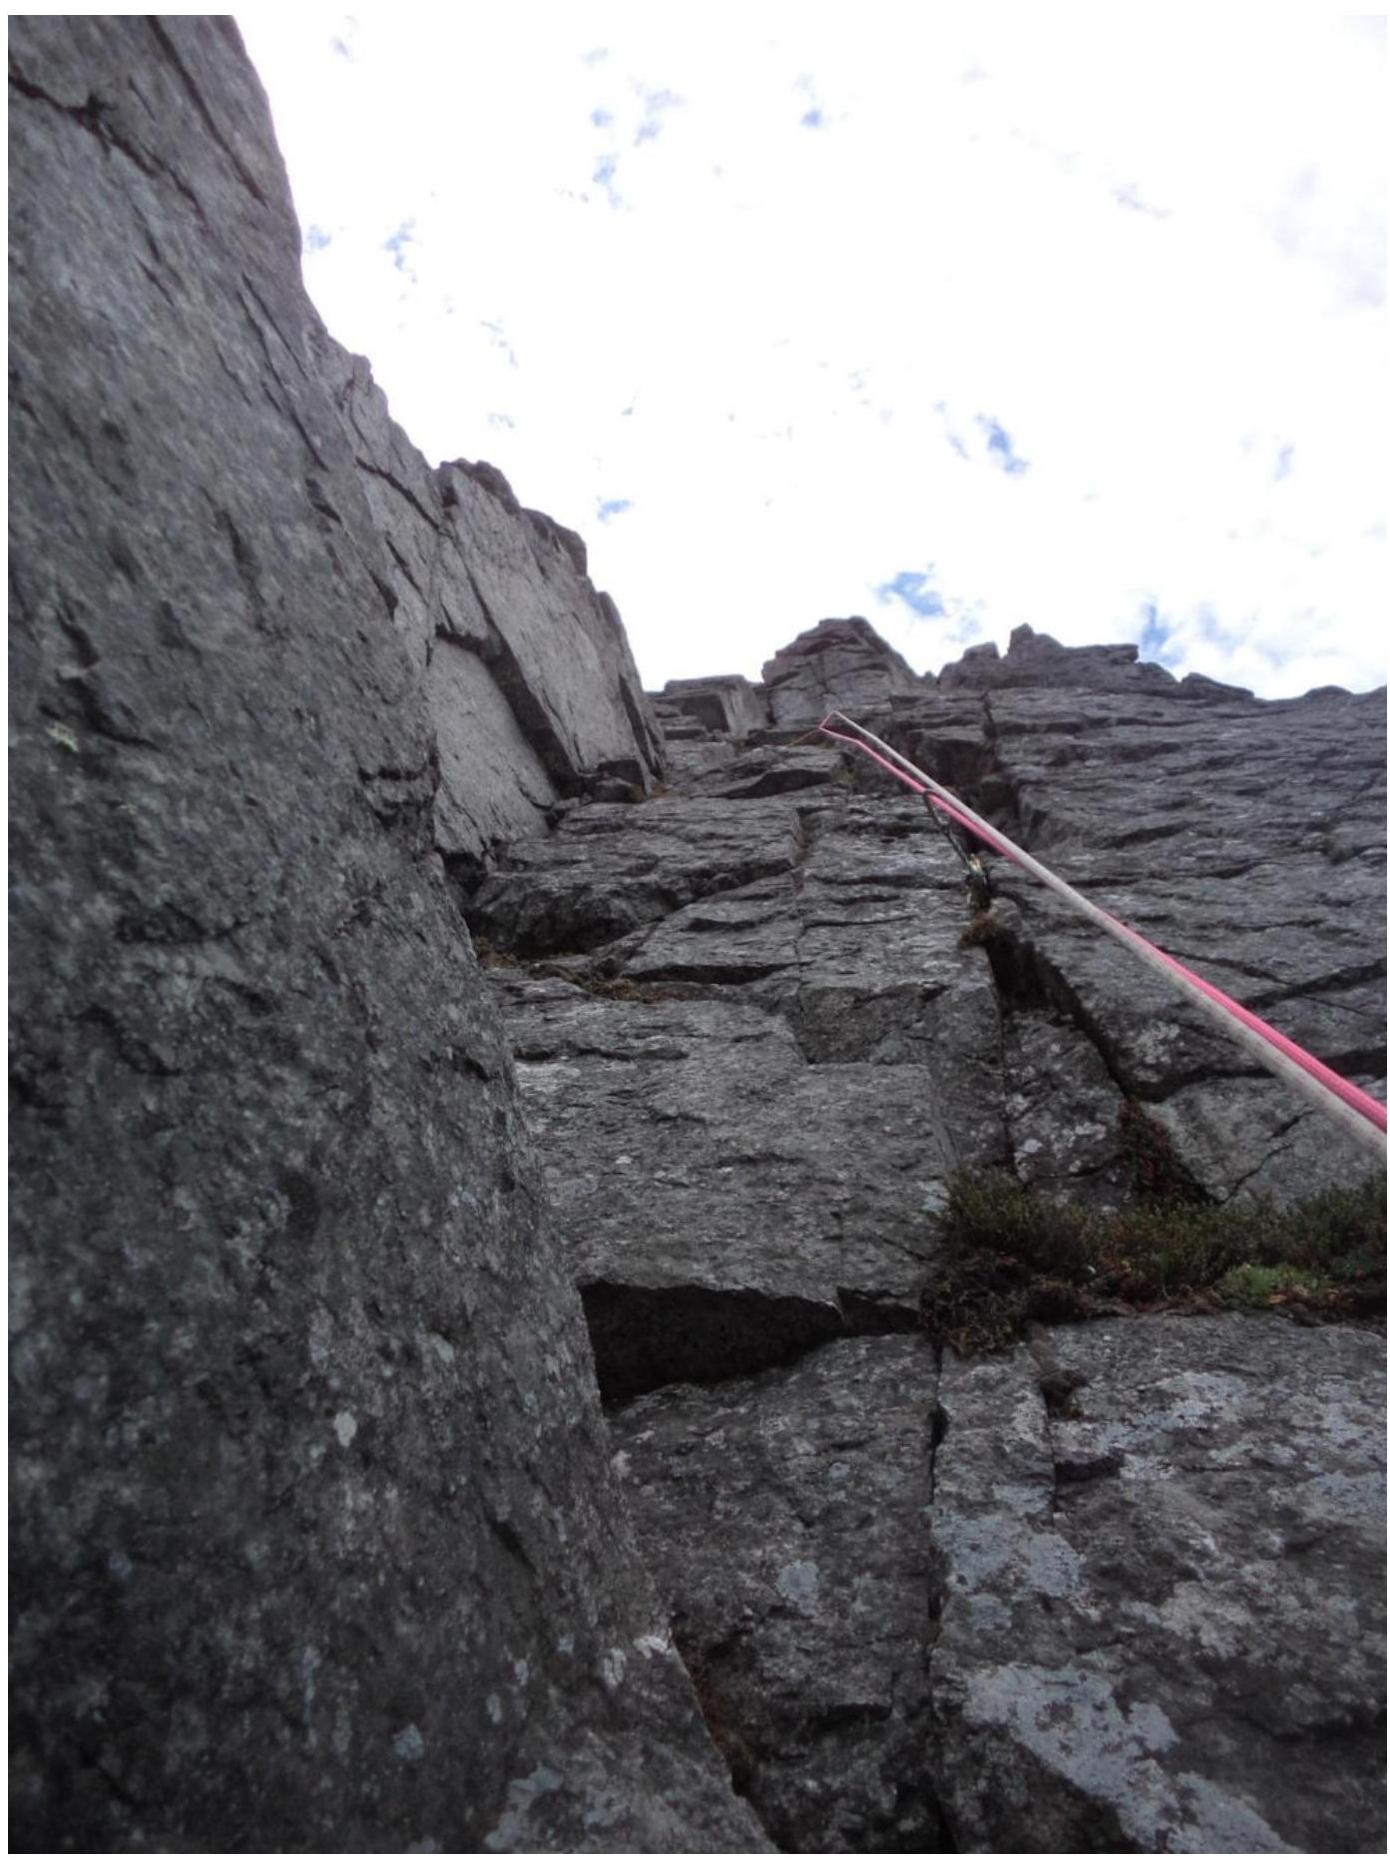
View from R2 on section R2–R3.
R2–R3, upper part. Station R3 is to the left of the black streak at the entrance to the chimney.
View from station R3 on the start of section R3–R4.
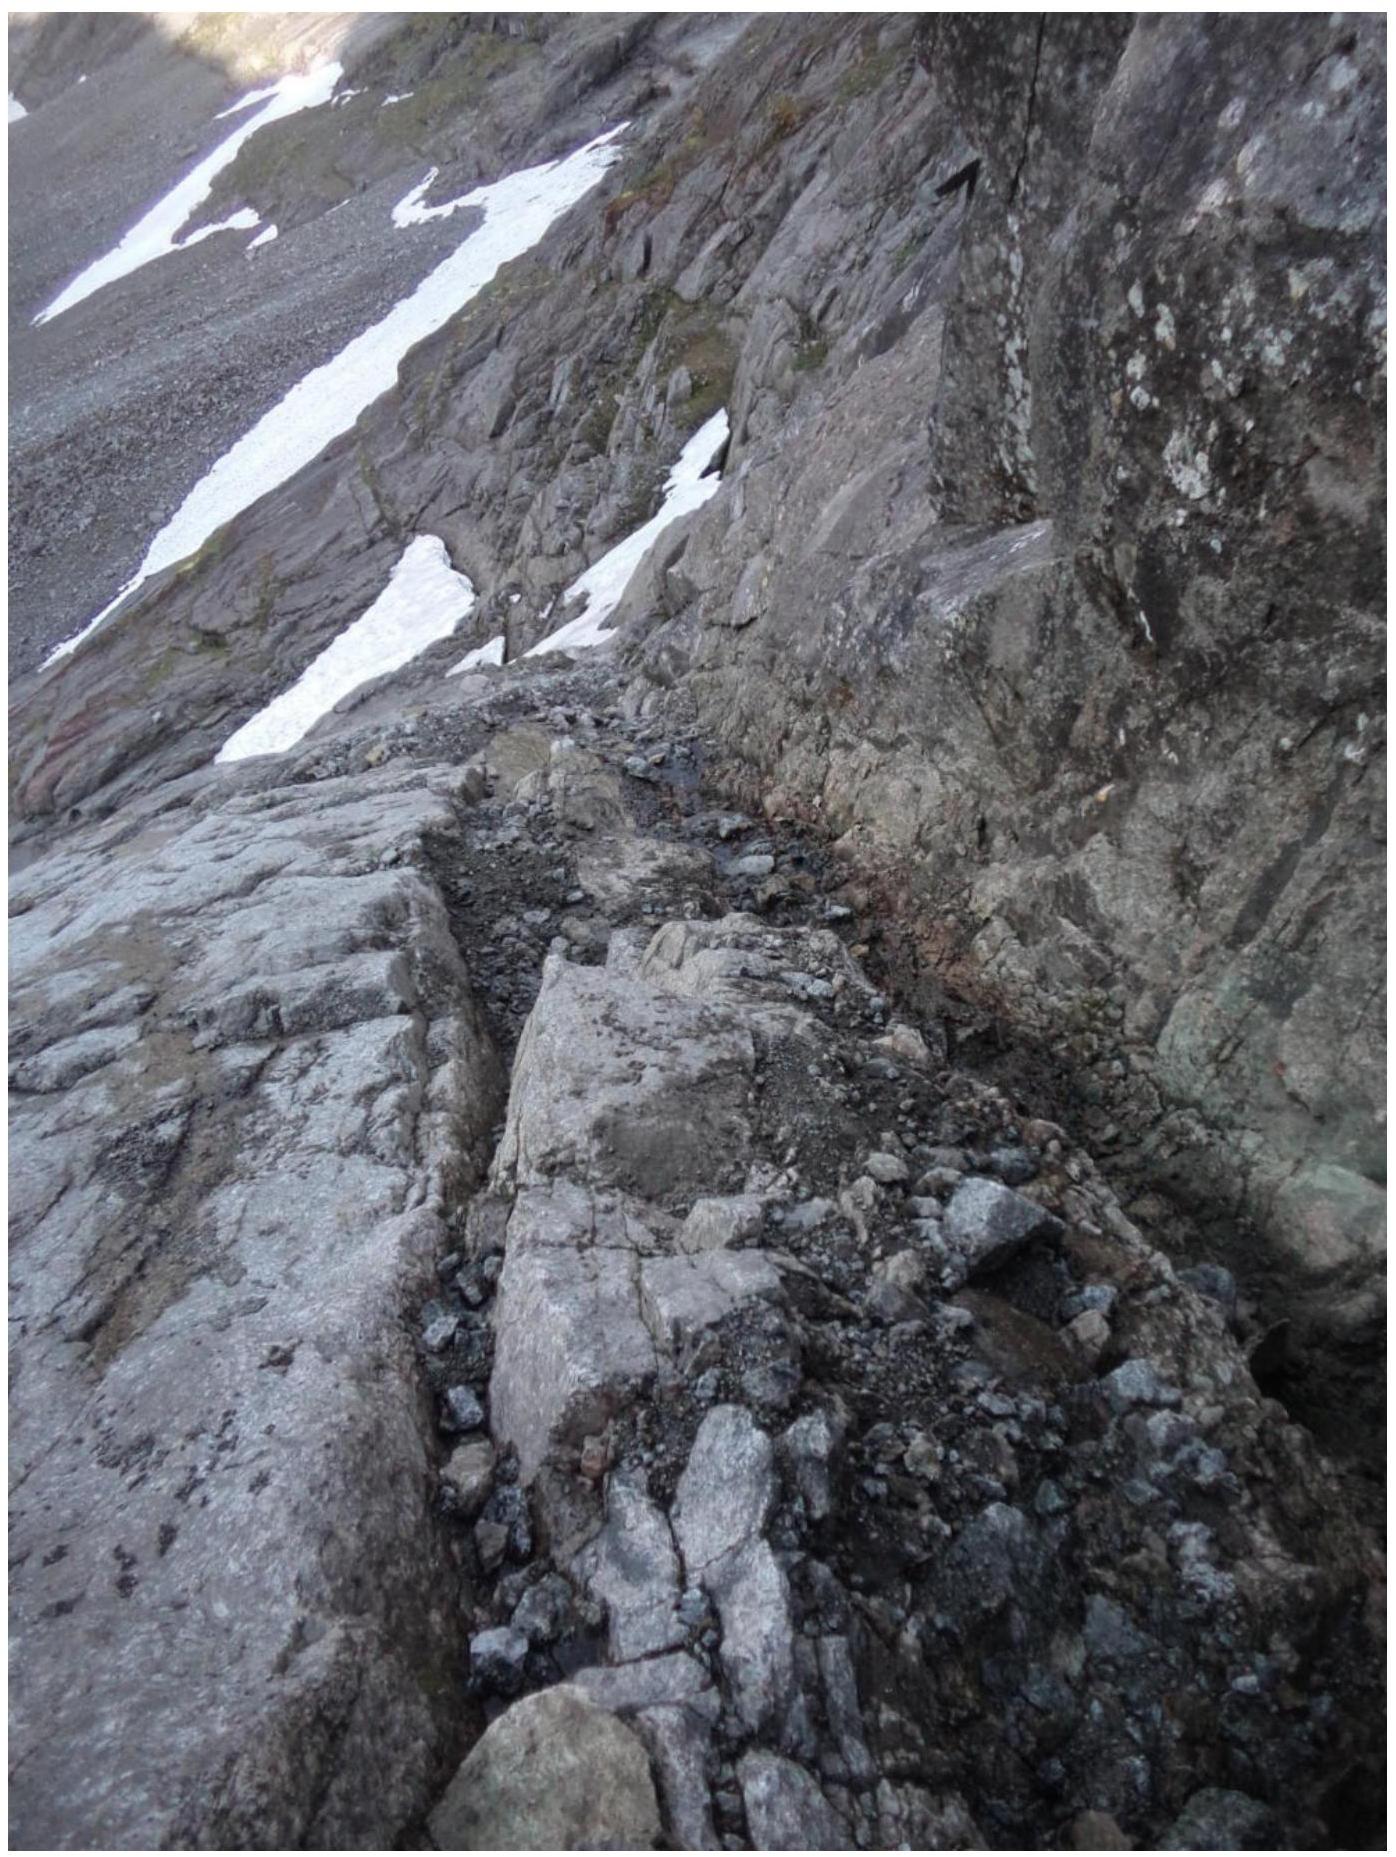
View down from station R3 on the "classic" variant of the route start (marked with a yellow line on the technical photo).

View on section R3–R4 above the chimney.
R4–R5.
R5, view on R6. On the light wall, a white loop is visible — on it, we secured Control Tour №1.
Section R5–R6 above the control tour.
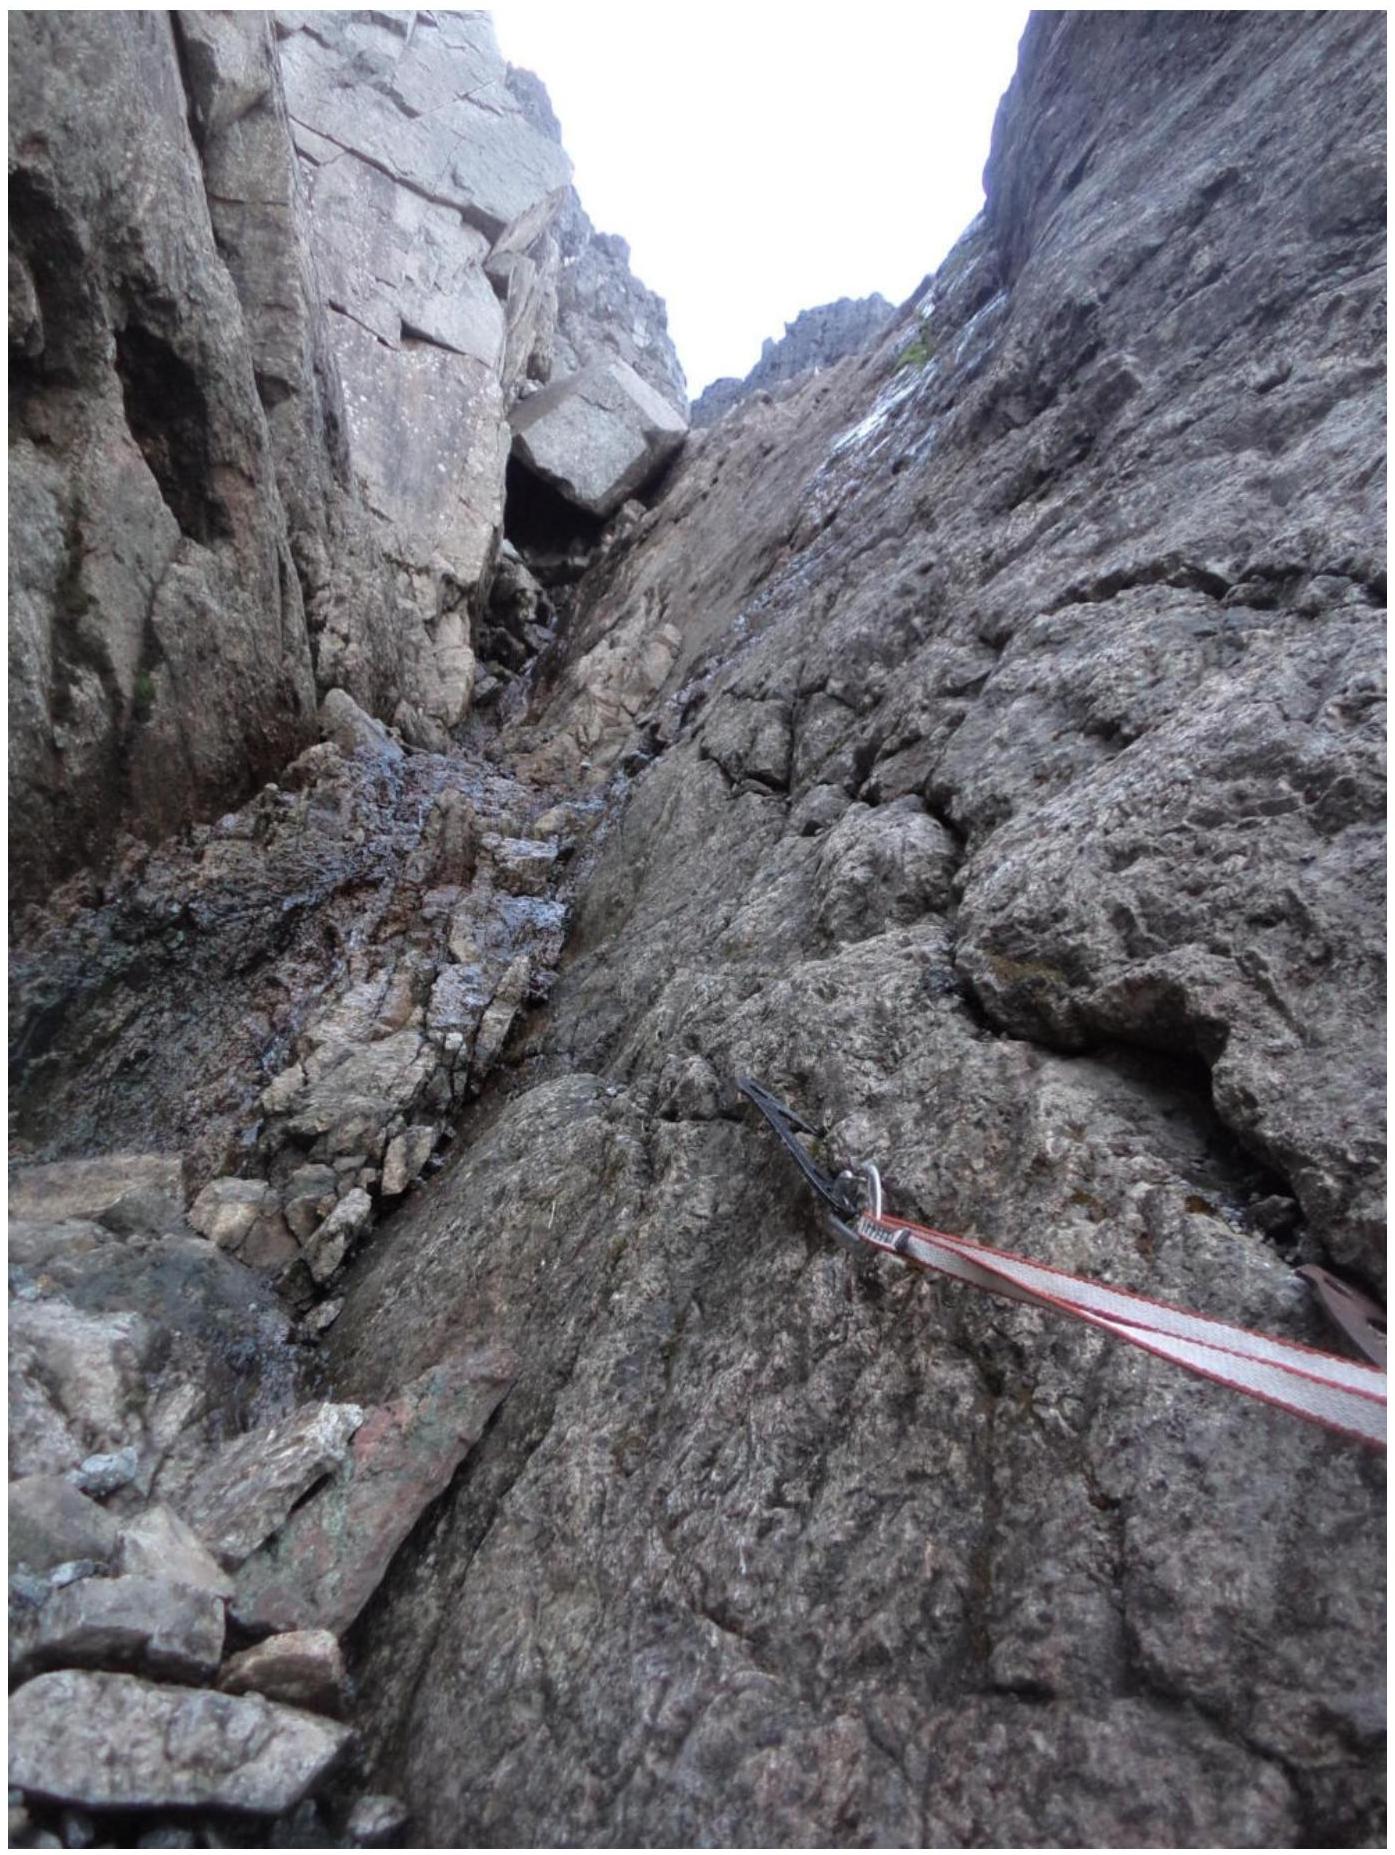
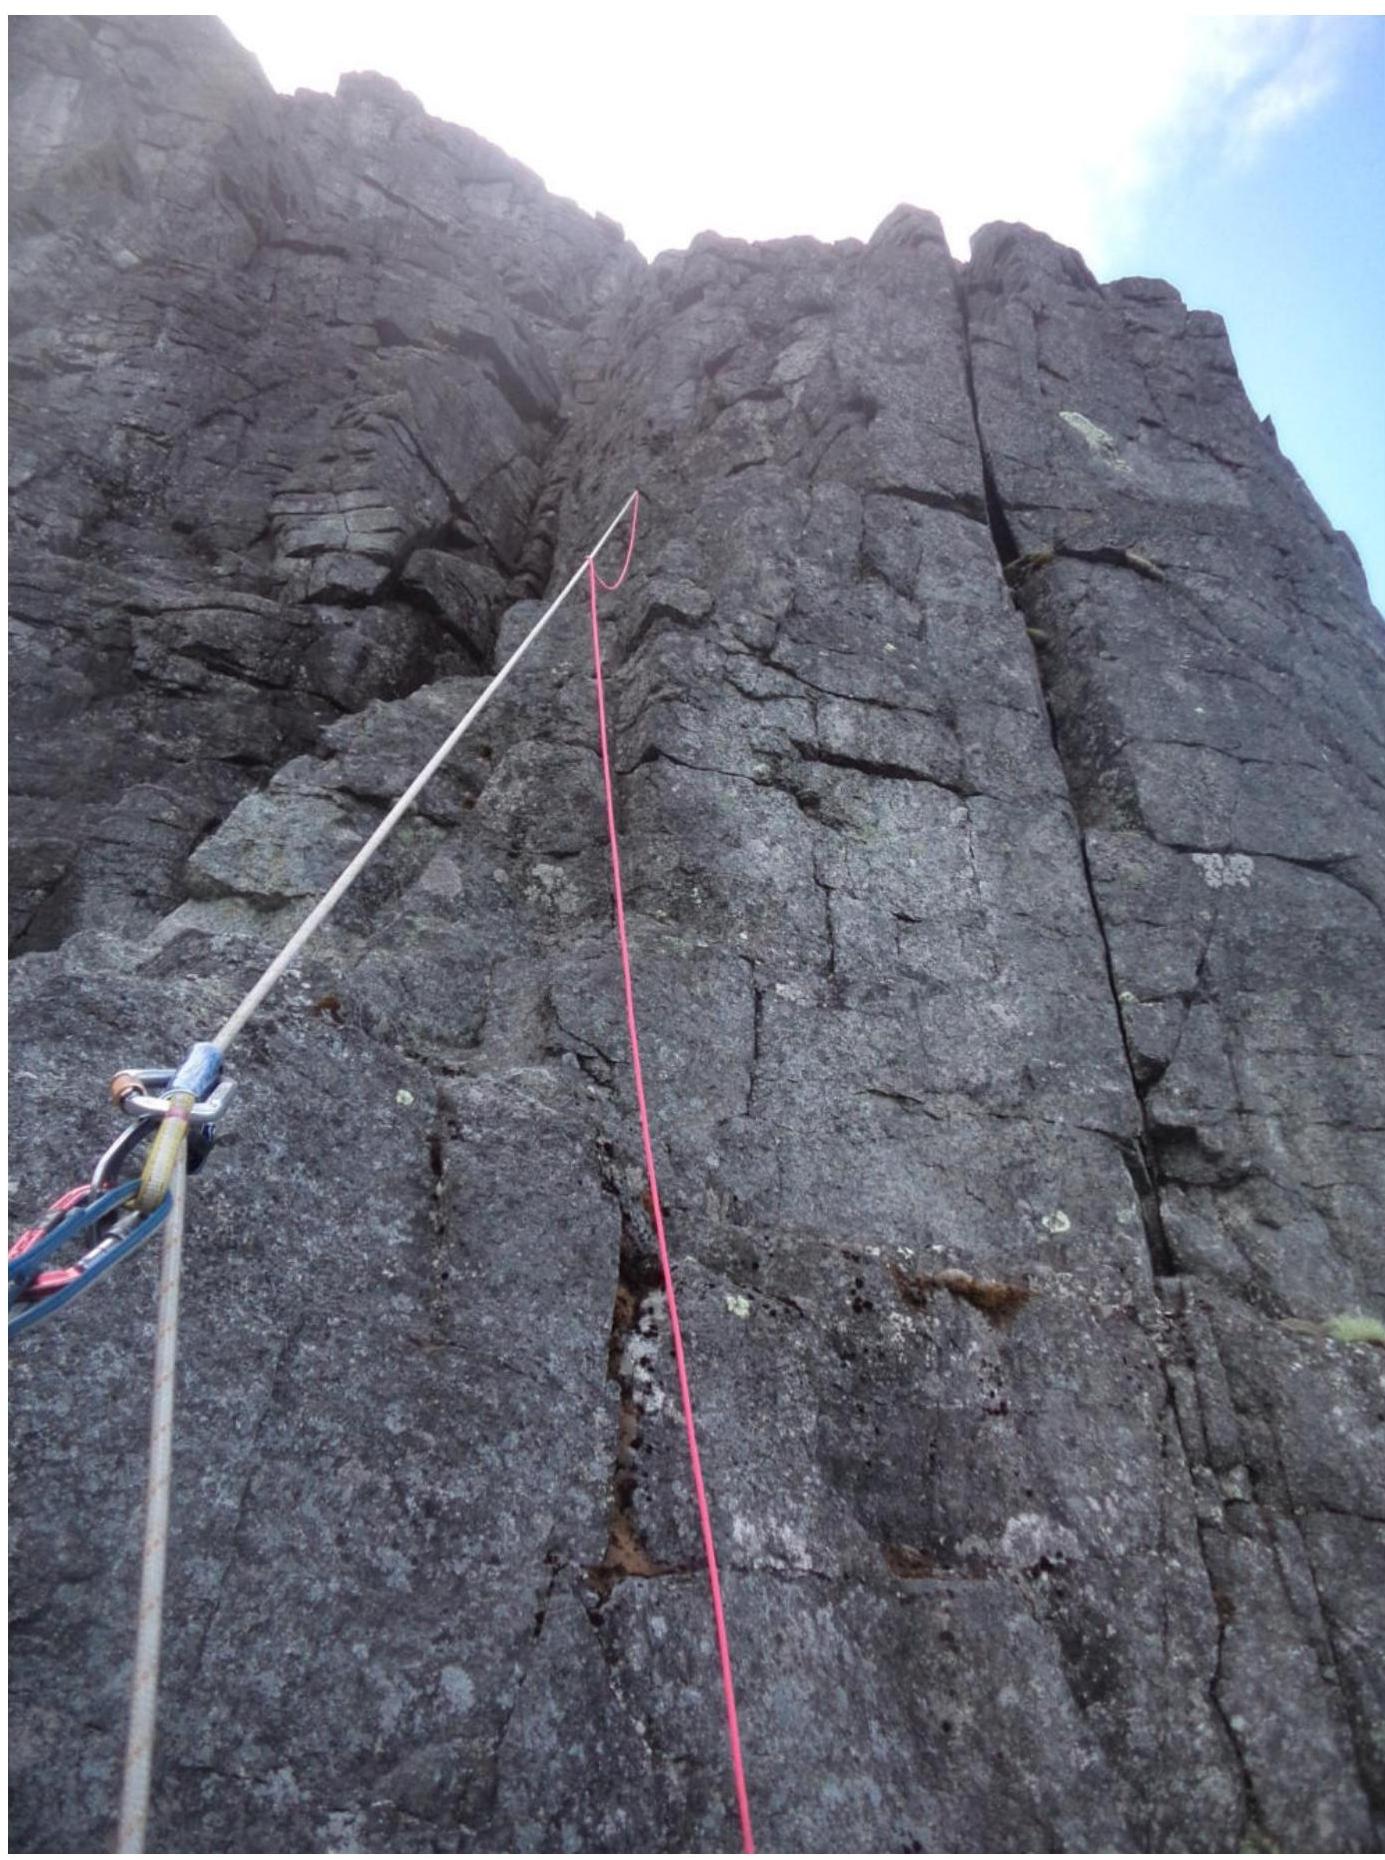
Station R6 on a ledge. From it, along the right crevice vertically upwards. To the right of the crevice, there's a "local" hook.

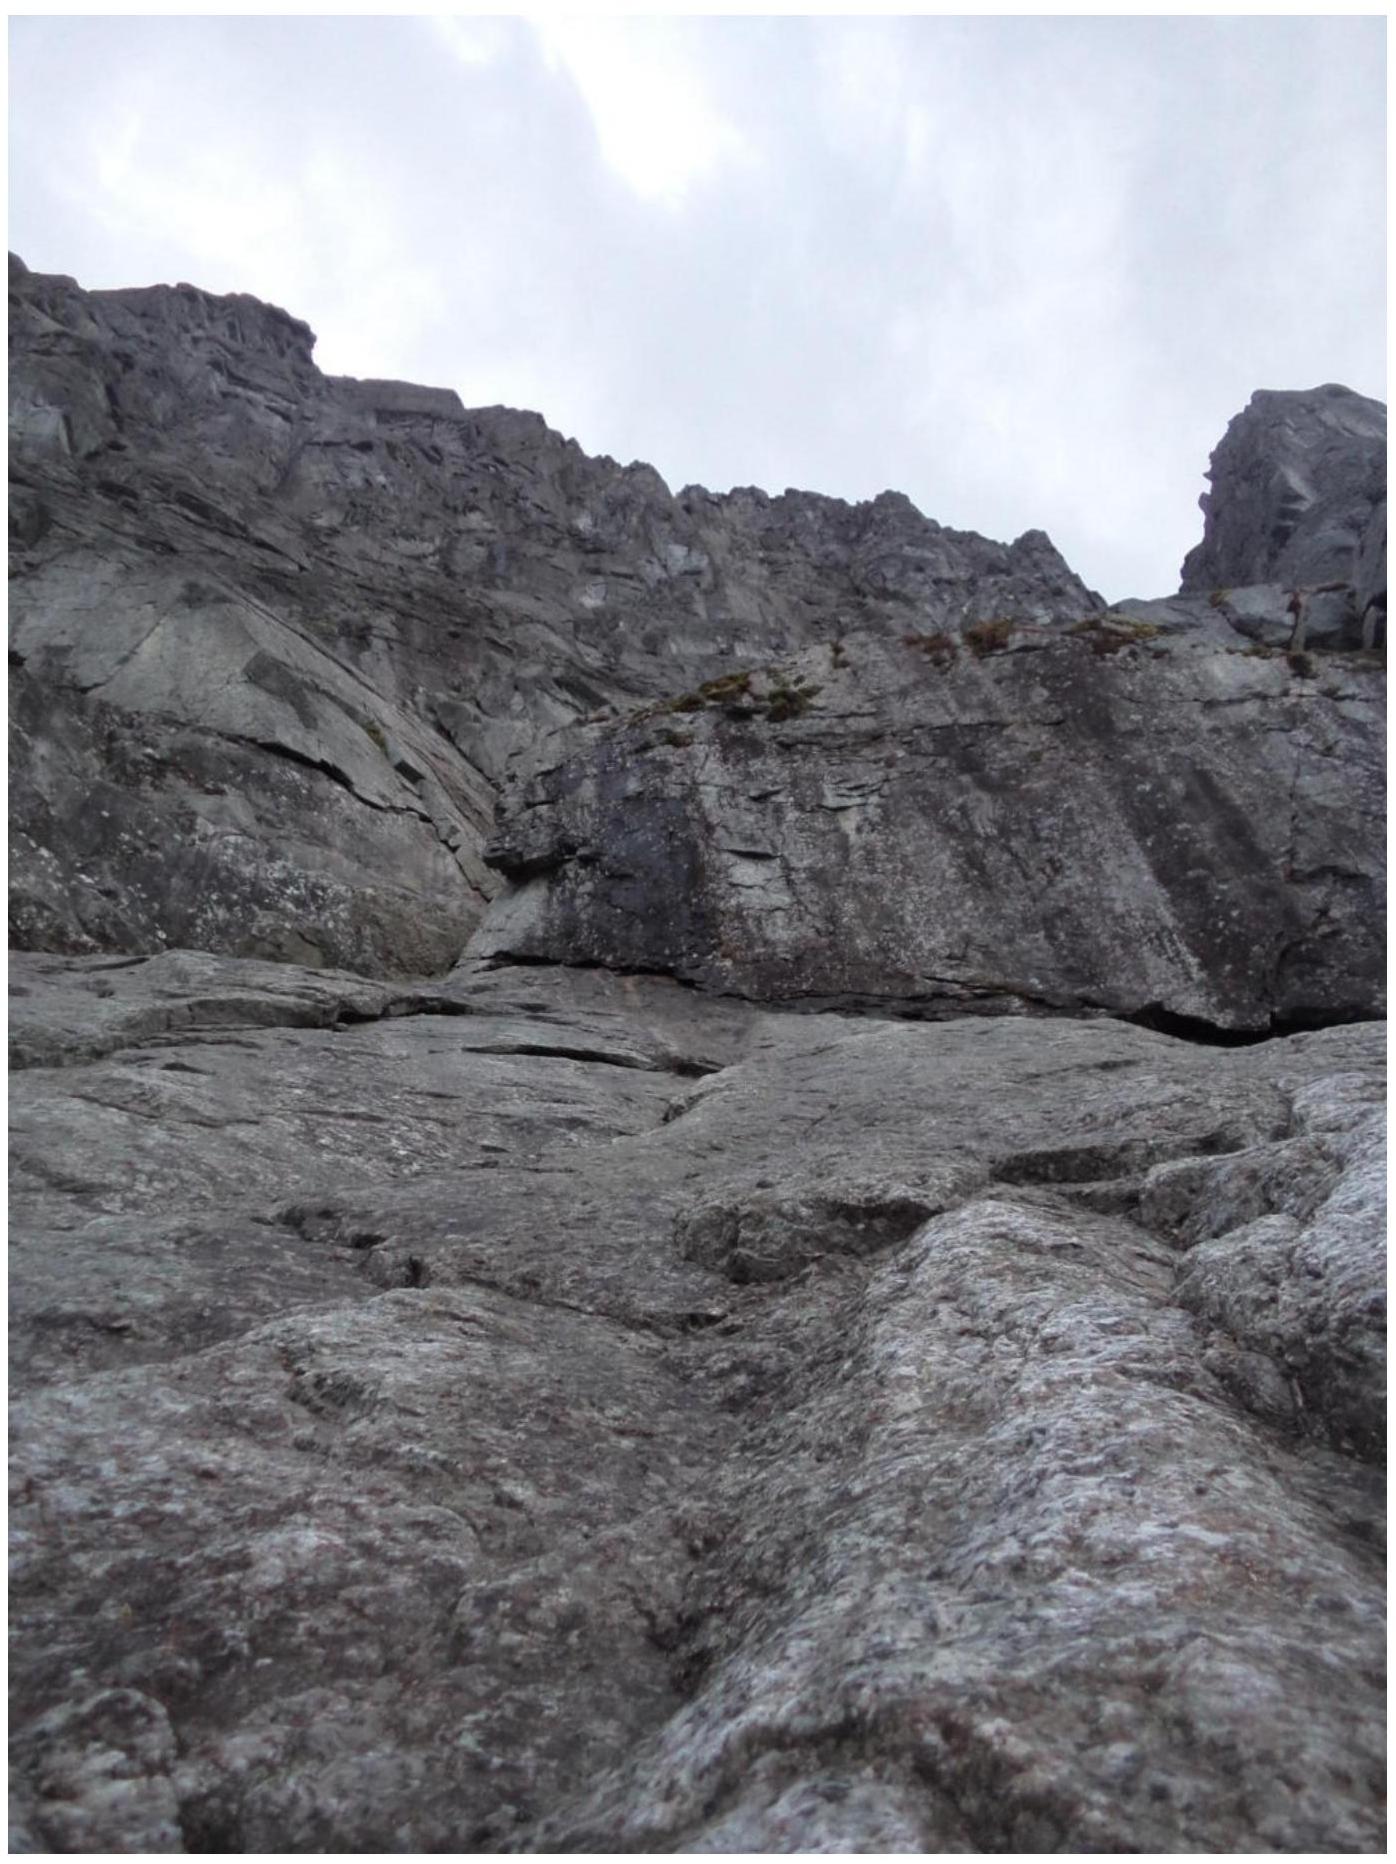
Start of section R6–R7. View from the station.
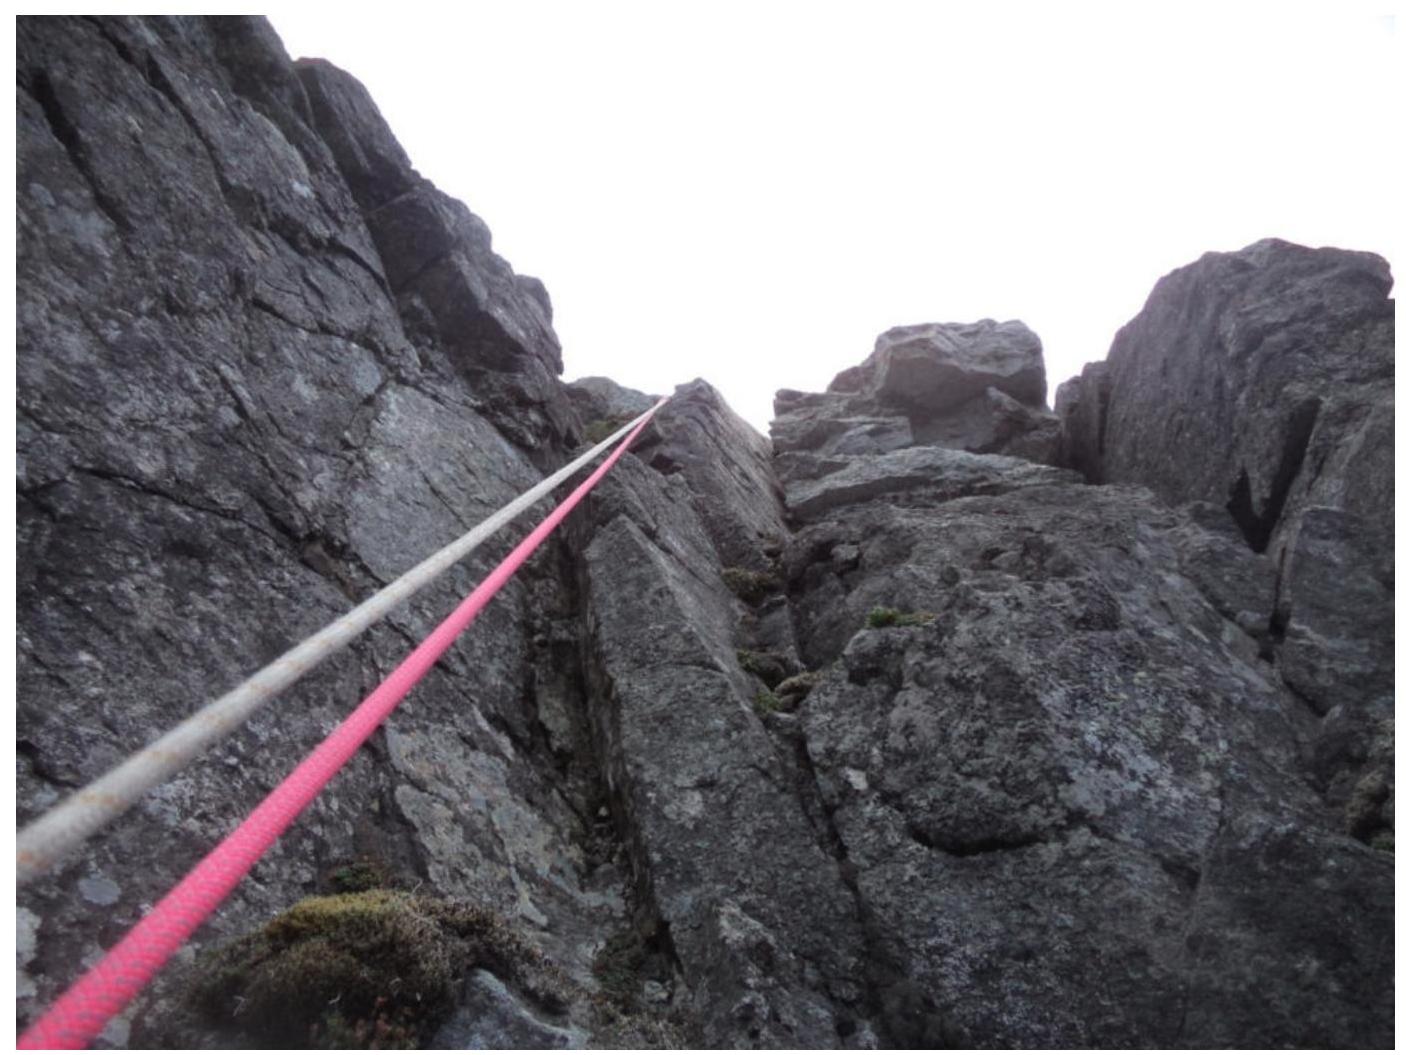
R6–R7. Rocks lead to a large ledge crossing the entire right part of the Bolshoy Vudyavr massif.
Station R7 in a comfortable place above the ledge. Nearby, a tour is stacked from rocks (empty).
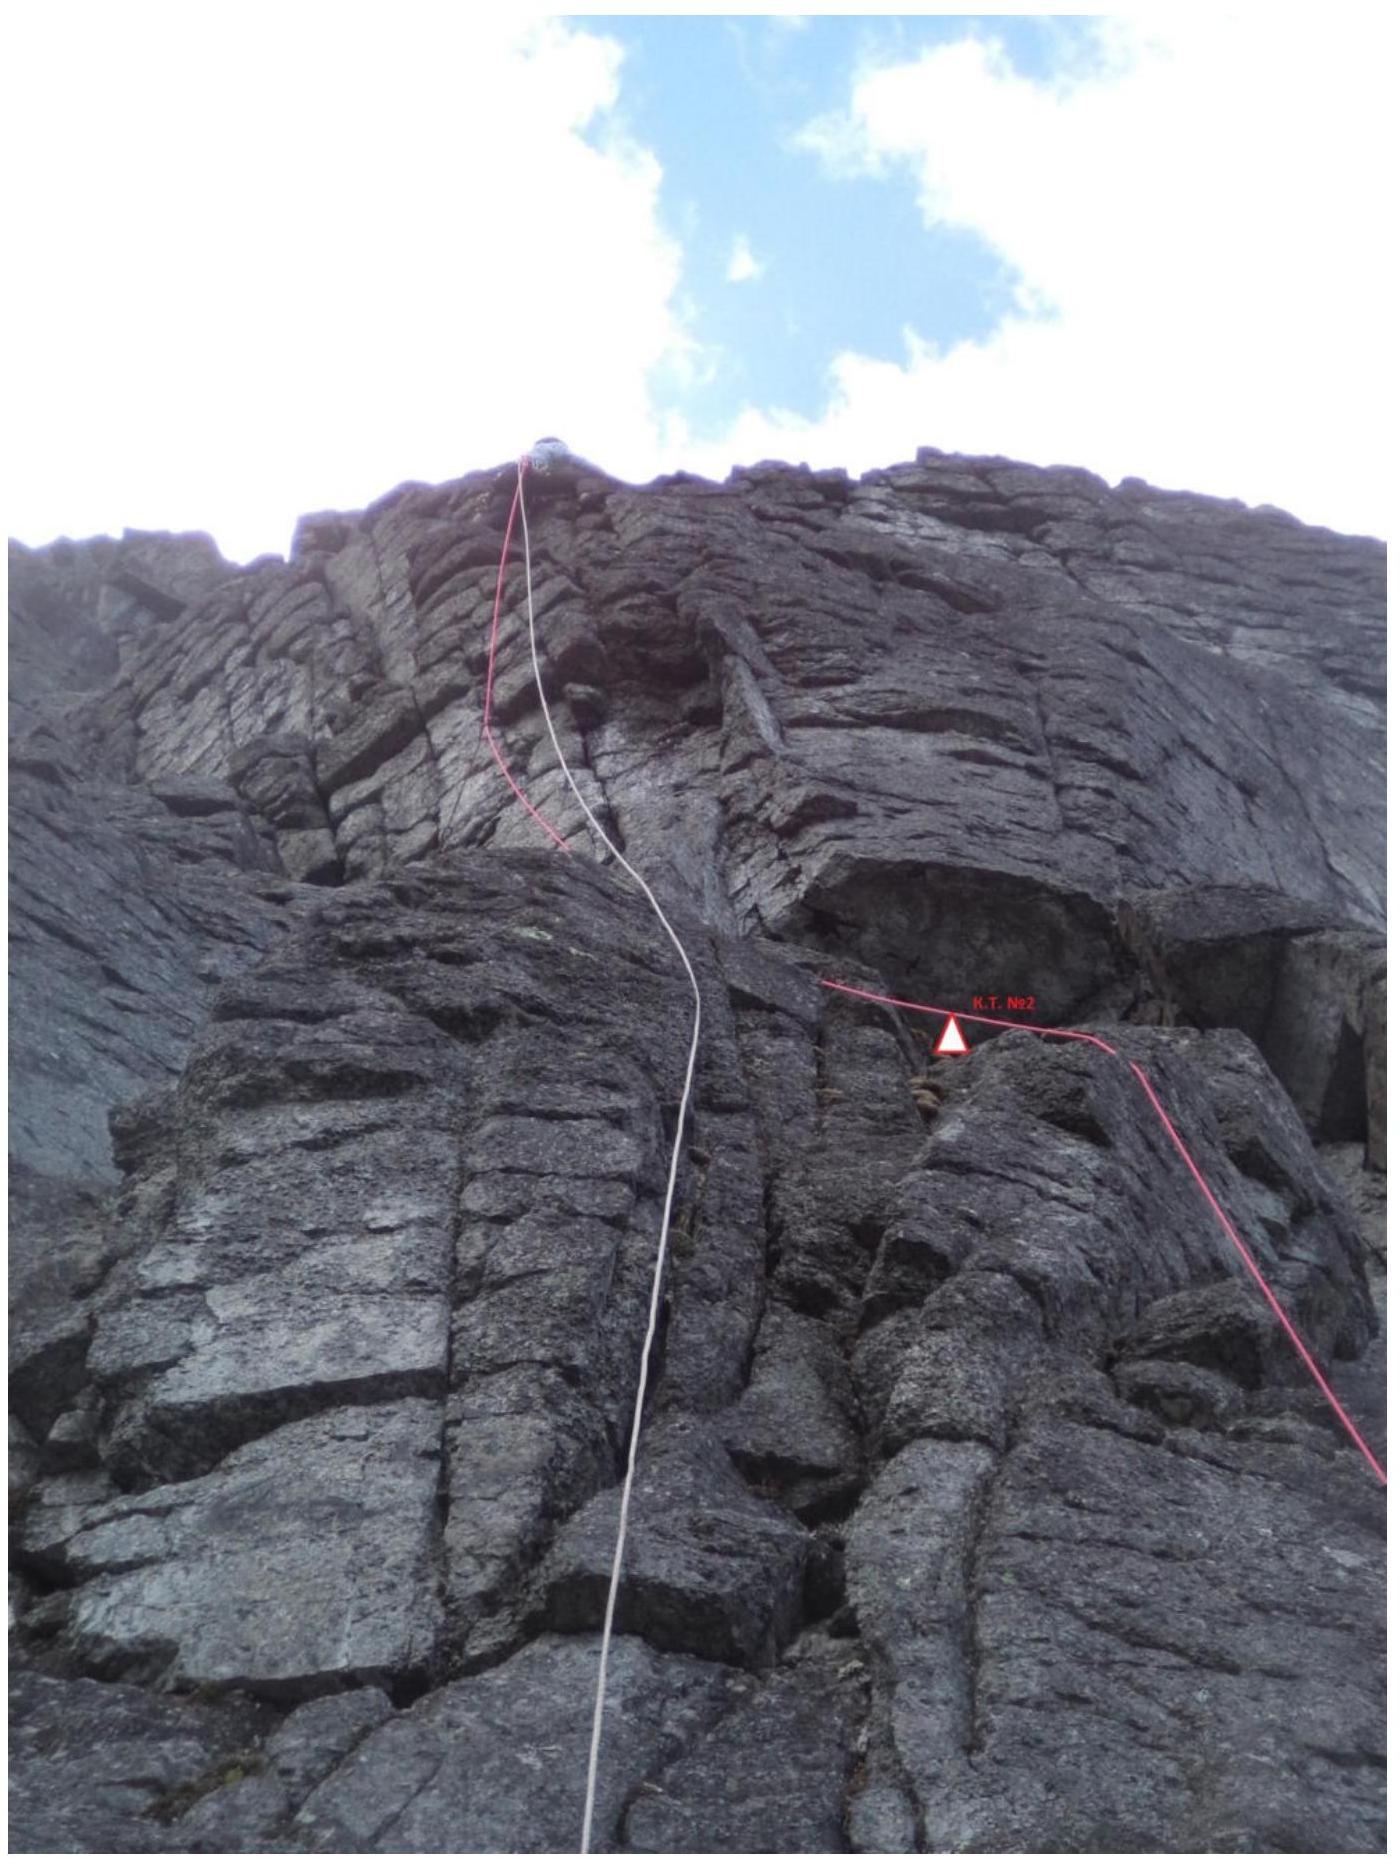
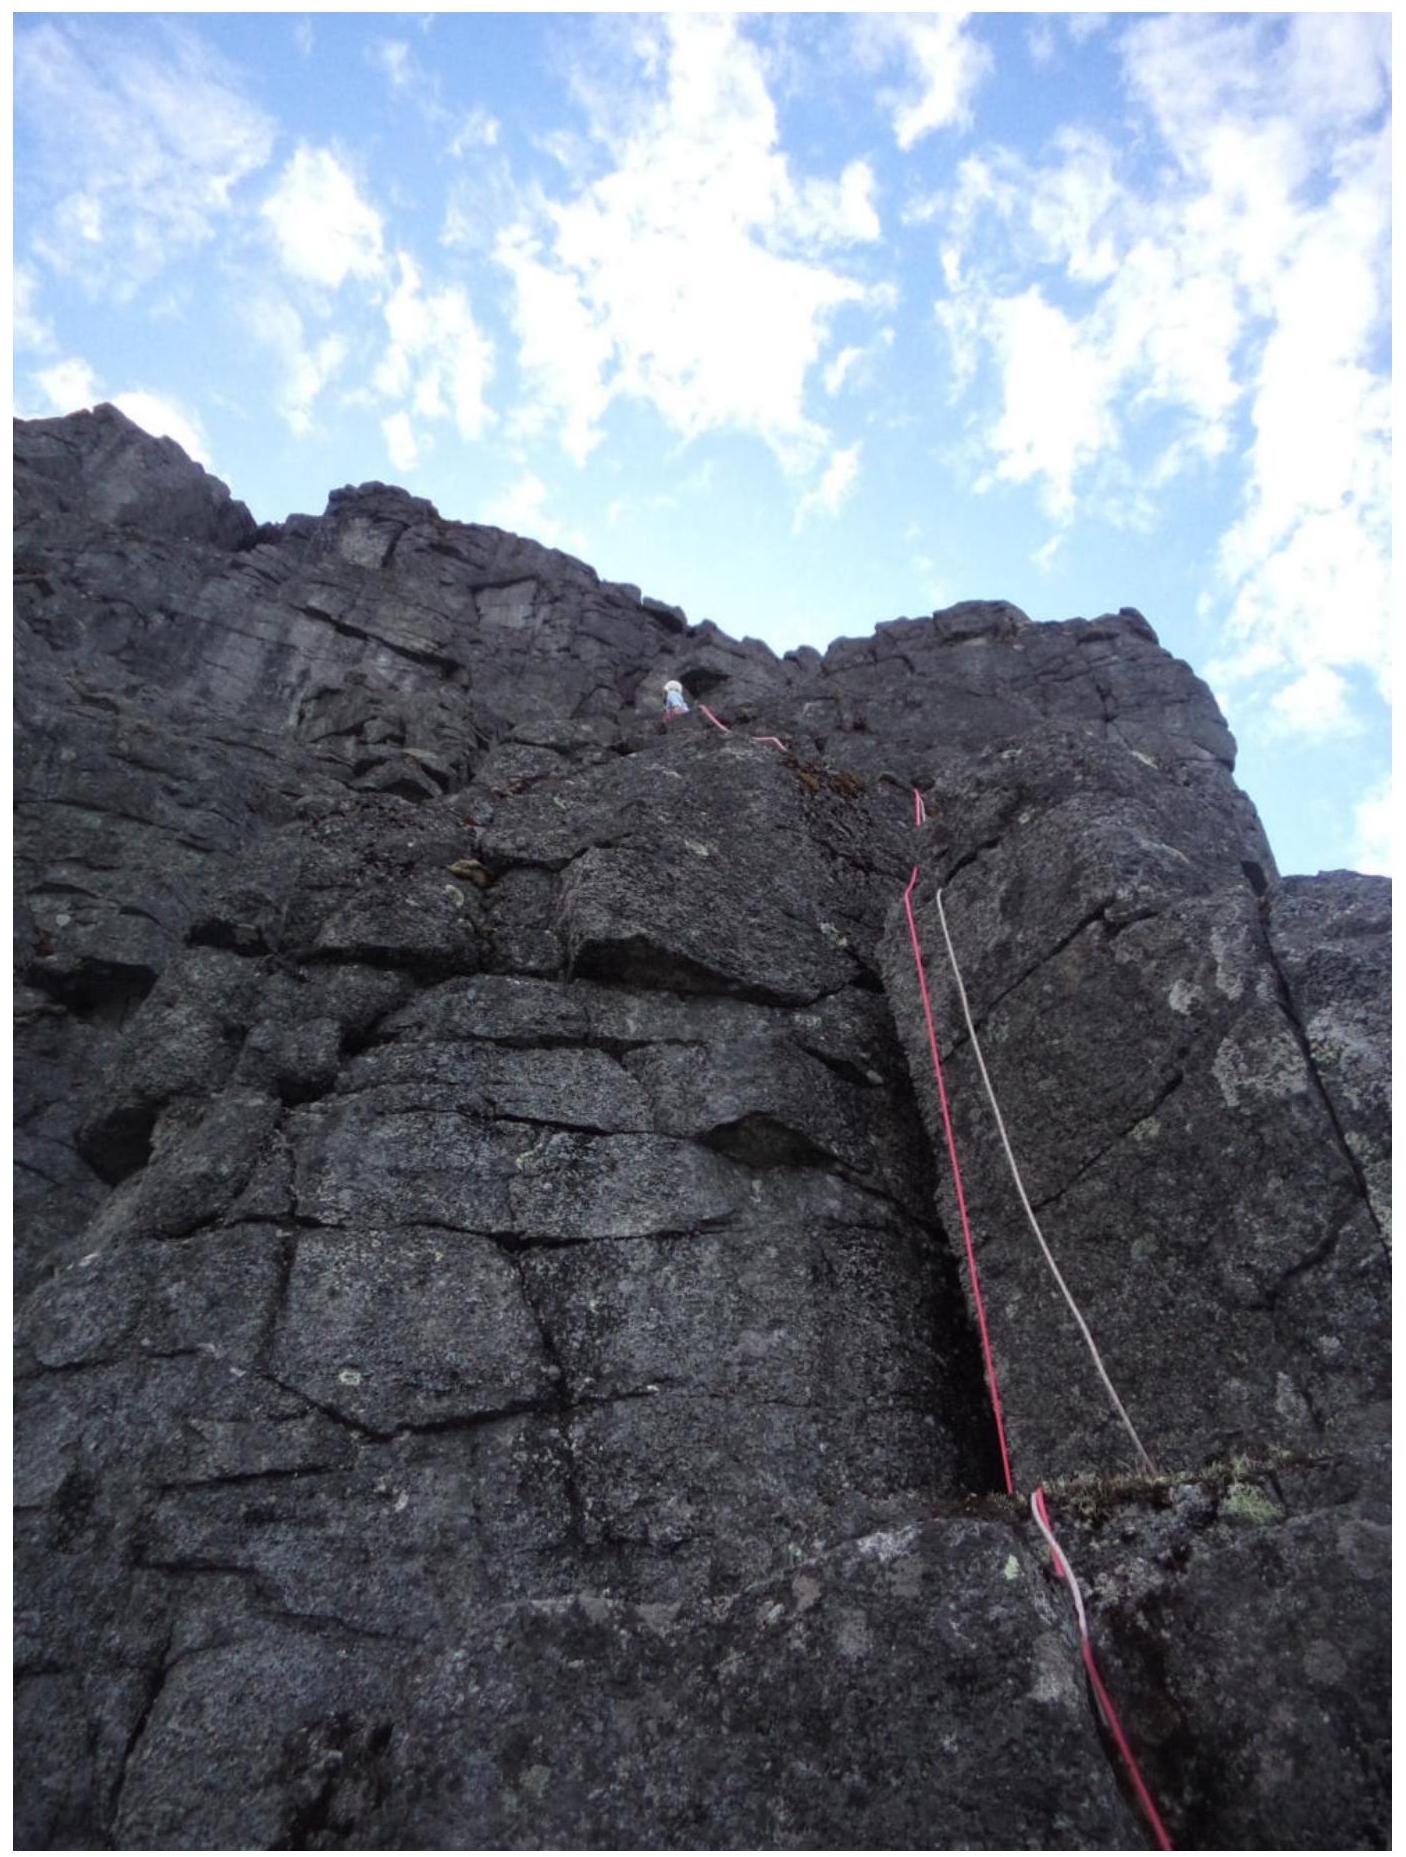
Leader's work on section R7–R8. Under the cornice on a hook, Control Tour №2. It should be clearly visible from the Large ledge and from station R7.
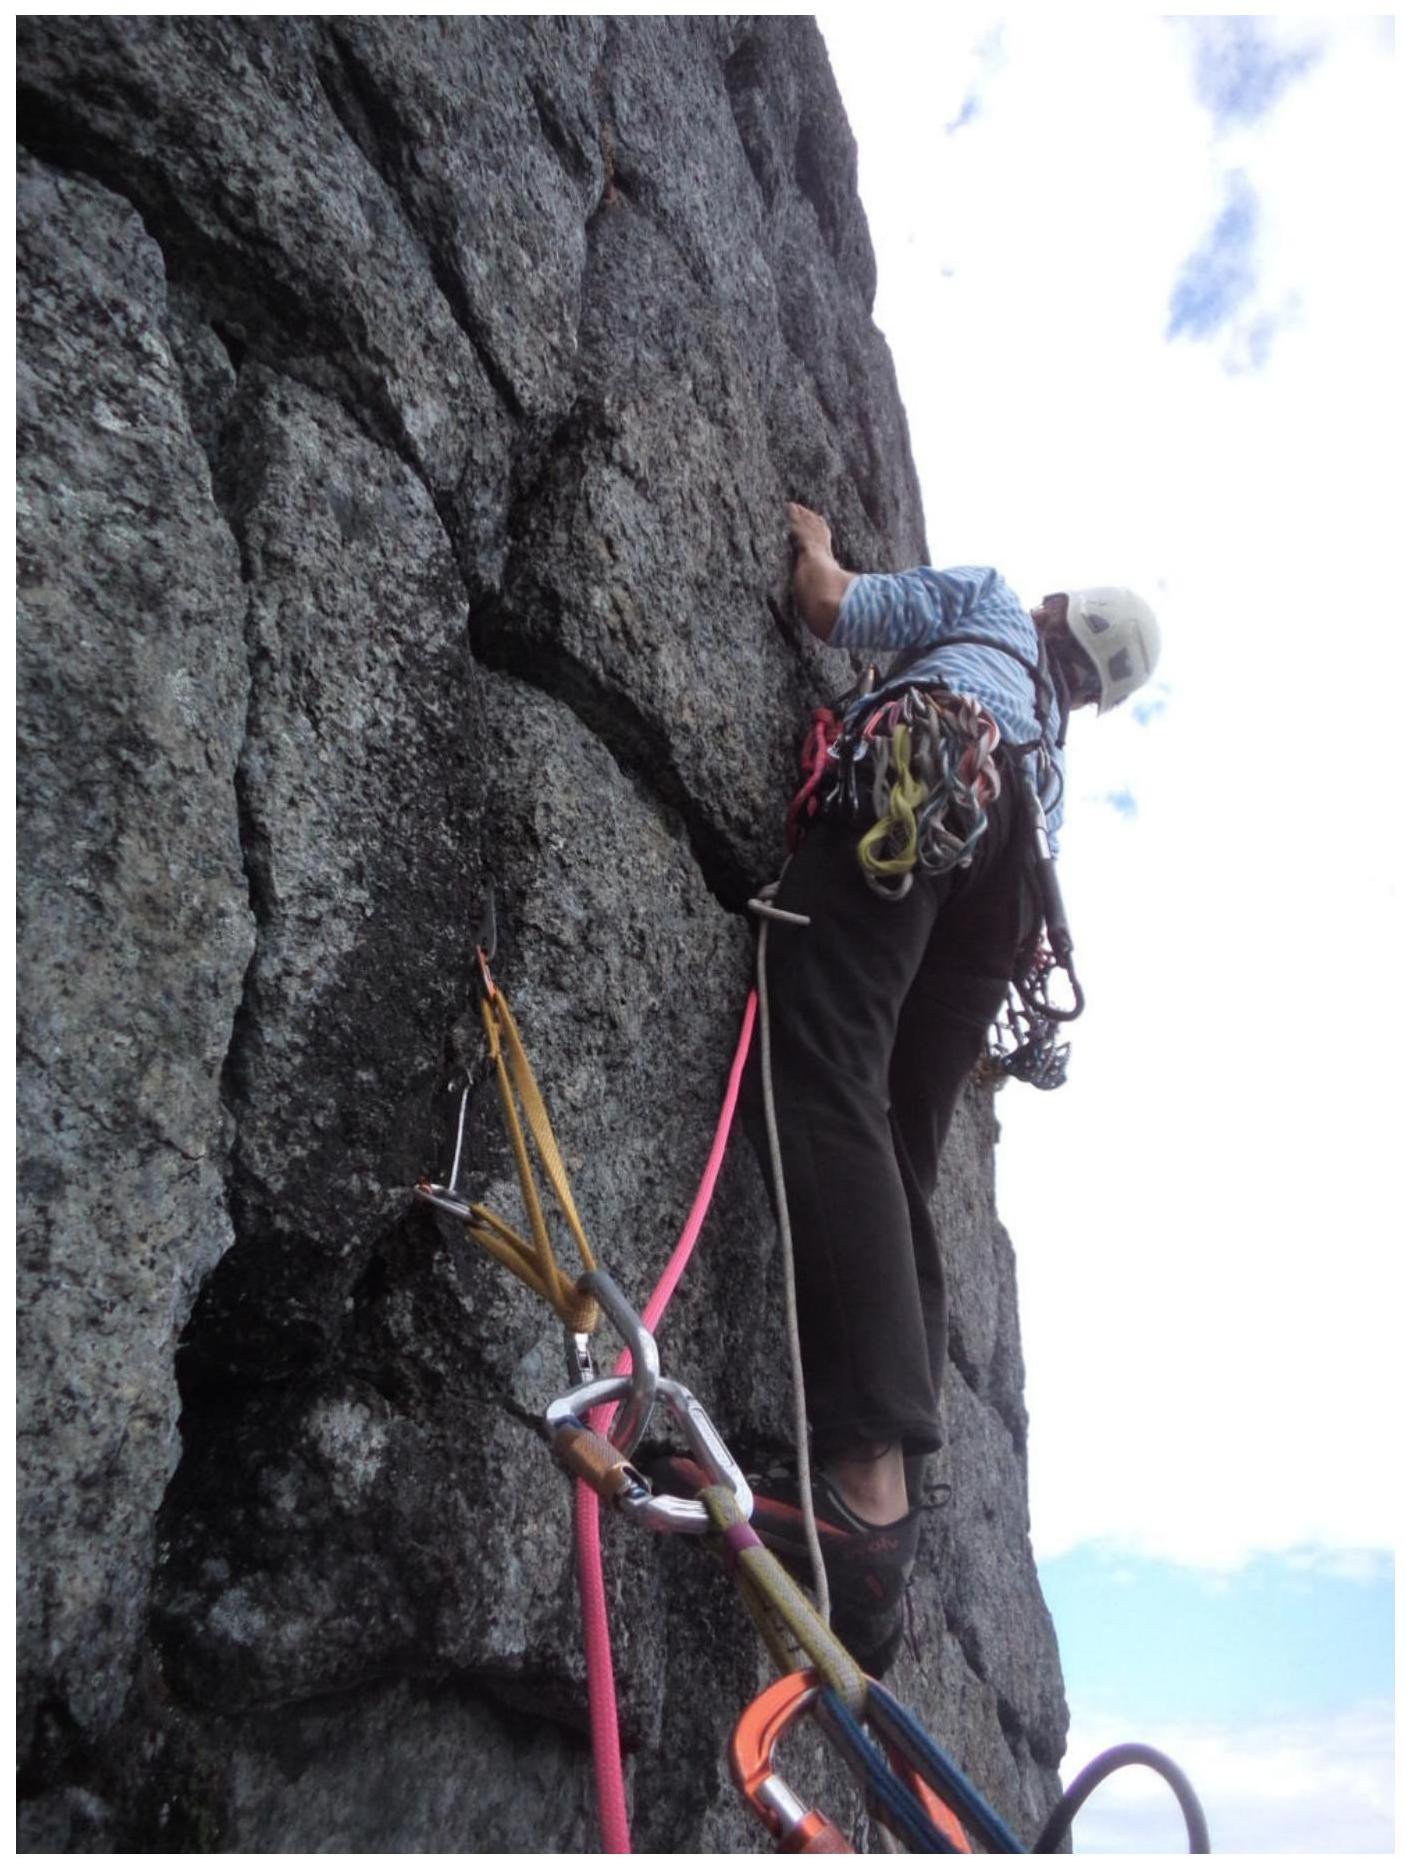
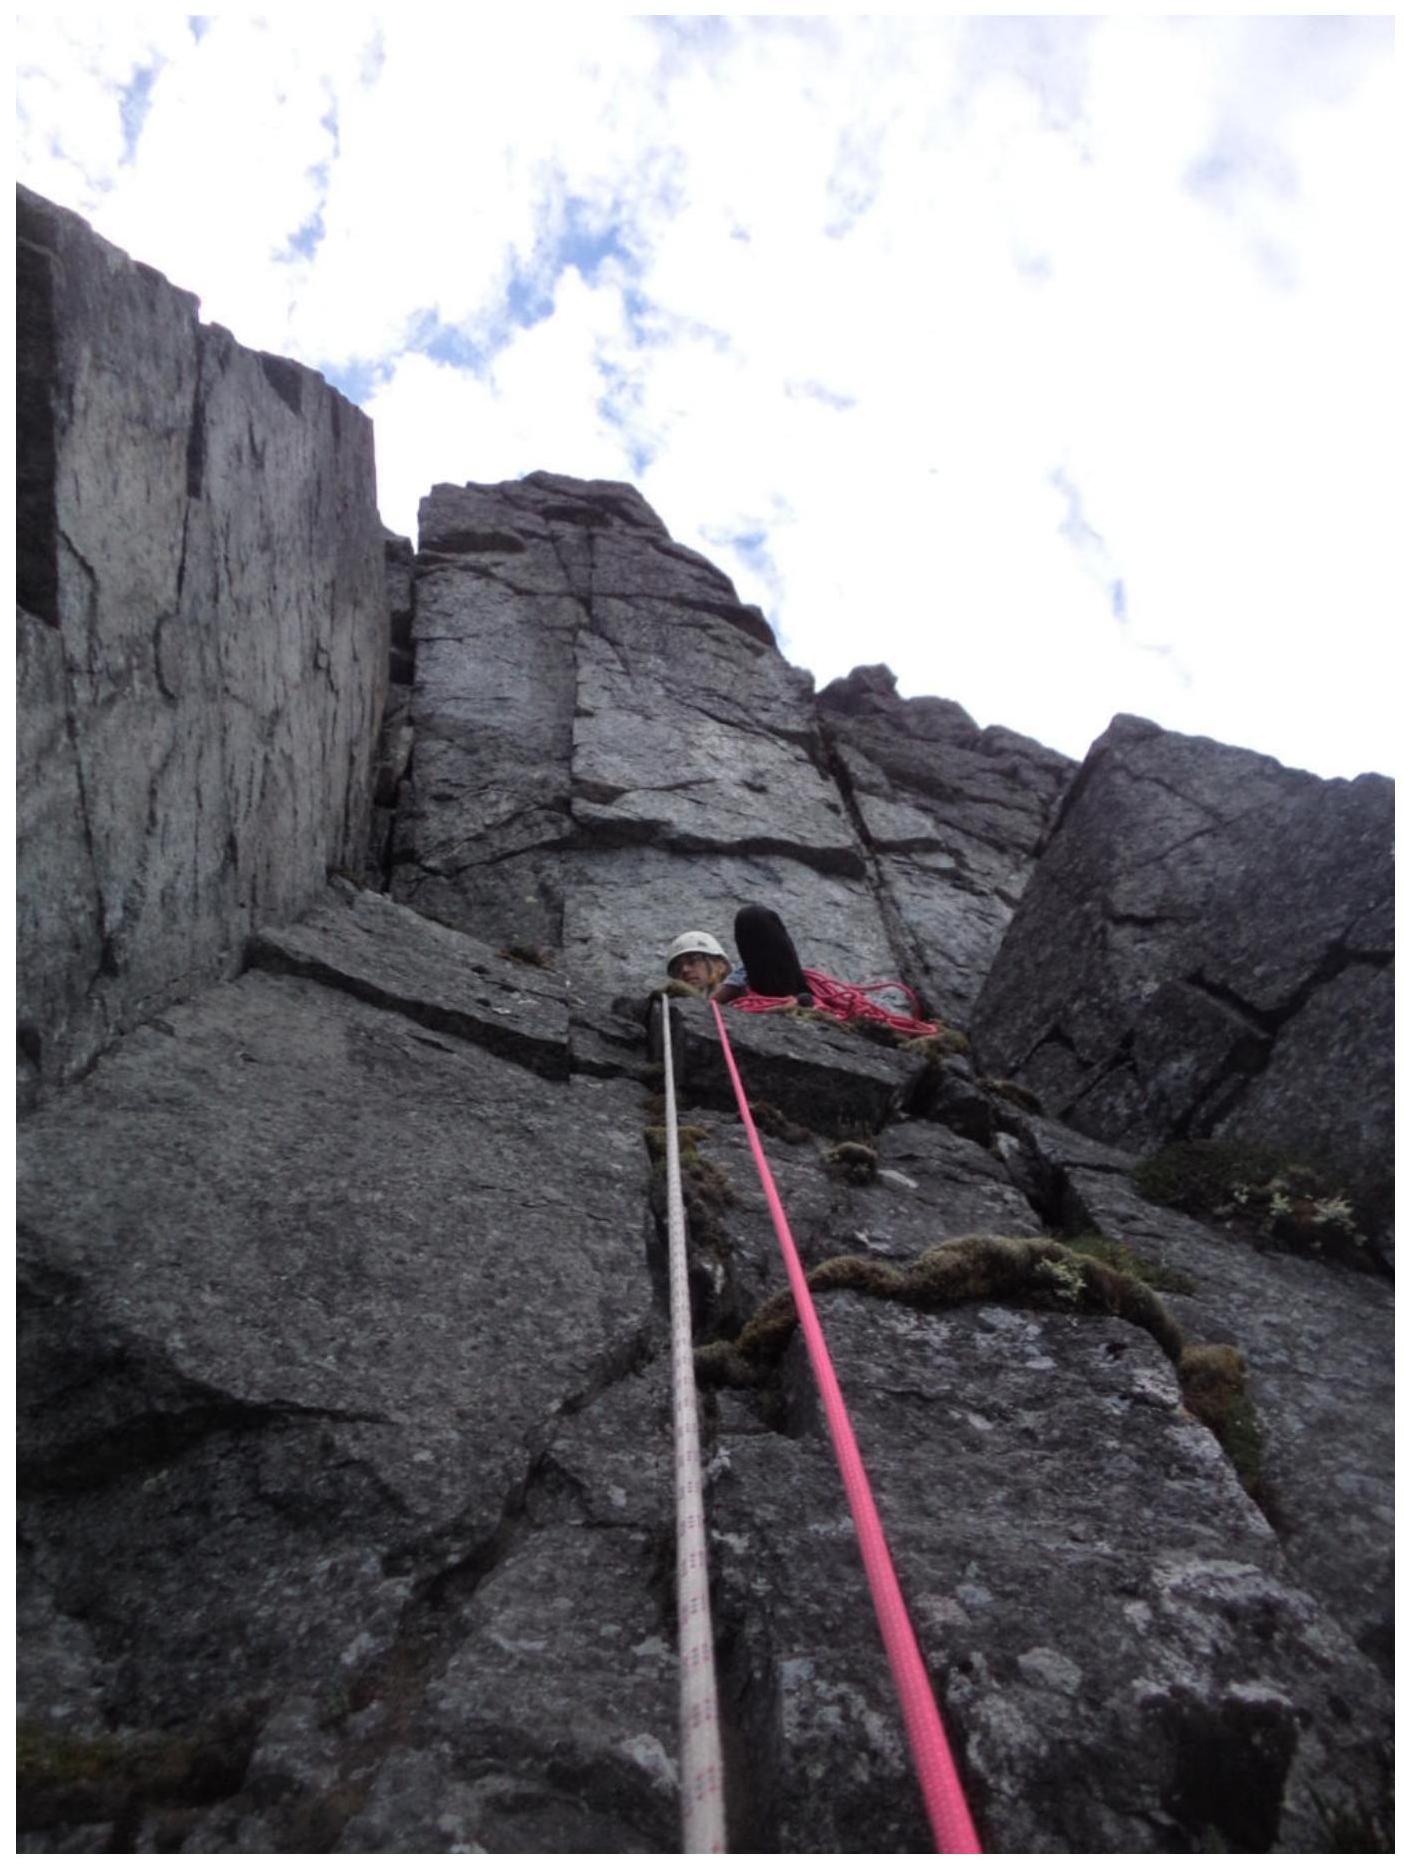
Difficult vertical wall at the start of section R8–R9.
R8–R9. Through walls and ledges vertically upwards, holding the center of the bastion.
R9–R10. View from station R9.
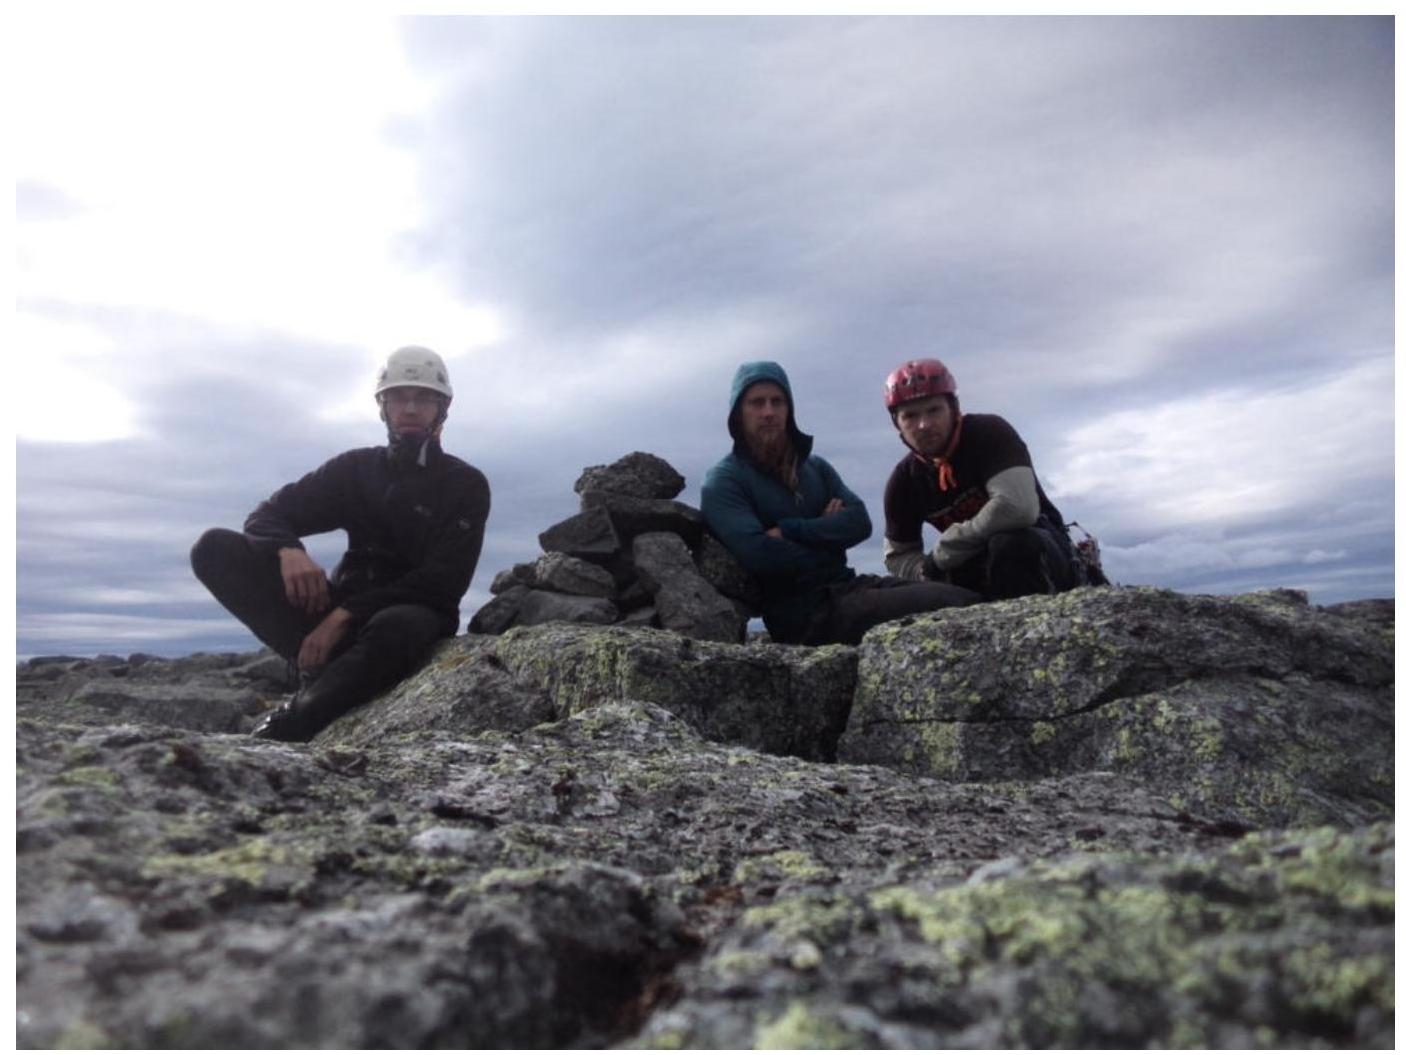
Team at the summit tour.


