
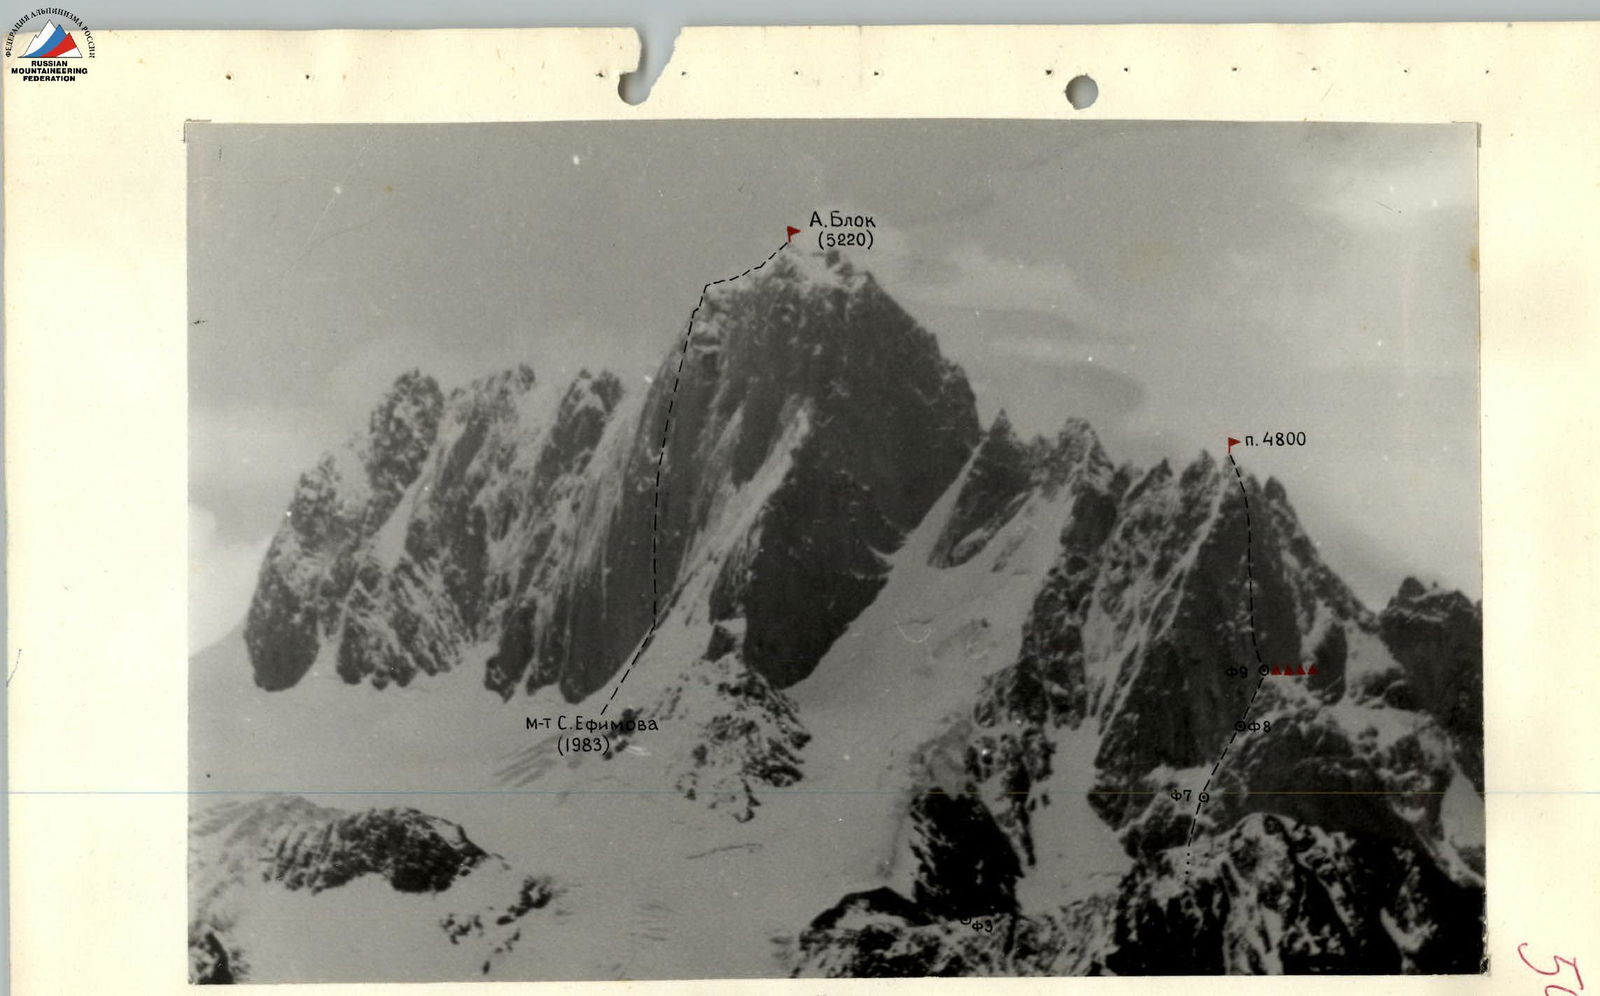
PHOTO PANORAMA OF THE AREA. Taken on July 5, 1983 (II ch.); lens "Jupiter-37A", focus 135 mm; distance about 7 km, shooting point F4, height 4200 m.
Tactical Actions of the Team
July 18 Snow-ice couloir. No spontaneous rockfalls were observed, and there were no traces of stones under the couloir. Nevertheless, the group started the route in the dark to overcome the lower part of the couloir on firm snow and leave the couloir before the sun illuminated the northern slope of the mountain. Bashkirov and Khankevich worked ahead. The other participants moved along the rope, using the "chest-leg" method on many sections. They reached the shoulder by 15:00 - an excellent place for camping.
July 19 Wall processing. To increase the pace of passage, two teams worked on the wall:
- In the first half of the day - Plotkin-Mikhaylov
- In the second half of the day - Bashkirov-Raboчих
The descending team straightened the rope, removing unnecessary pitons, and then rested properly on the shoulder in a tent.
July 20 Continuation of processing. The organization of work remained the same:
- First team - Khankevich-Mikhaylov
- Second team - Bashkirov-Plotkin
They reached a ledge where a campsite could be organized if necessary. The group took 10 ropes on the route so that they wouldn't have to transfer the bivouac and could continue processing the wall from the shoulder.
July 21, 1953 Passage of the key section (2nd wall with shells). The Bashkirov-Mikhaylov team worked ahead. The Khankevich-Raboчих team helped with belaying and straightened the hung ropes.
July 22 The group in full strength goes on the wall. Raboчих worked first. Summit. Descent to the shoulder. Elimination of ropes.
July 23 Descent to the glacier along the ascent route. To speed up the work, a system of removable ice screws was used, and the descent on the rope was 80 m.
WARNING! Pitons on the route (except for the 2nd and 5th on the R11-R12 section) were hammered halfway - only for passage. They cannot be used for belaying!
Route Description by Sections
R0–R1
- Overcome the bergschrund along a snow wall (about 2.5 m)
- Then up 100 m along the firn slope to the couloir under the ice wall (frozen waterfall)
R1–R2
- Ascend the left part of the wall and exit into the ice couloir
R2–R4
- Up the couloir 150 m to the main wall of the summit
- Along the wall to the right and up 290 m along the ice slope with rock islands - exit to the snow shoulder
- Good bivouac
R5–R6
- Ascend directly up through a well-defined crack to the right of a large cornice
- Free climbing
R6–R7
- Up the crack to the right of the cornice directly up (A.I.D. 70 m, piton - only for A.I.D.!) - exit to an internal corner with flowstone
R7–R8
- Up the internal corner to a snow ridge-ledge
R8–R9
- From the ridge up, slightly left along the wall with shells
- Ascend to the second snow ledge
- Possible overnight stays
R10–R11
- From the ledge along a crack in the right part of a vaguely defined buttress - ascend to a small ledge
- Along the ledge, exit into an internal corner with a small ice wall
- Up the internal corner - exit to a good ledge-ridge under the second wall with shells
R11–R12
- From the ledge 5 m down and to the right under a crack
- Up the crack to the left 8 m
- Then traverse to the right 5 m (1st piton)
- Then up and to the right under a crack to the left of a clearly defined crack (do not go left!)
- Up the crack to a crevice, up the crevice
- 2nd and 5th pitons - for belaying, the rest - A.I.D.!
R13–R15
- Up the crevice to a ledge
- Then up an internal corner and a system of ledges - exit to the summit
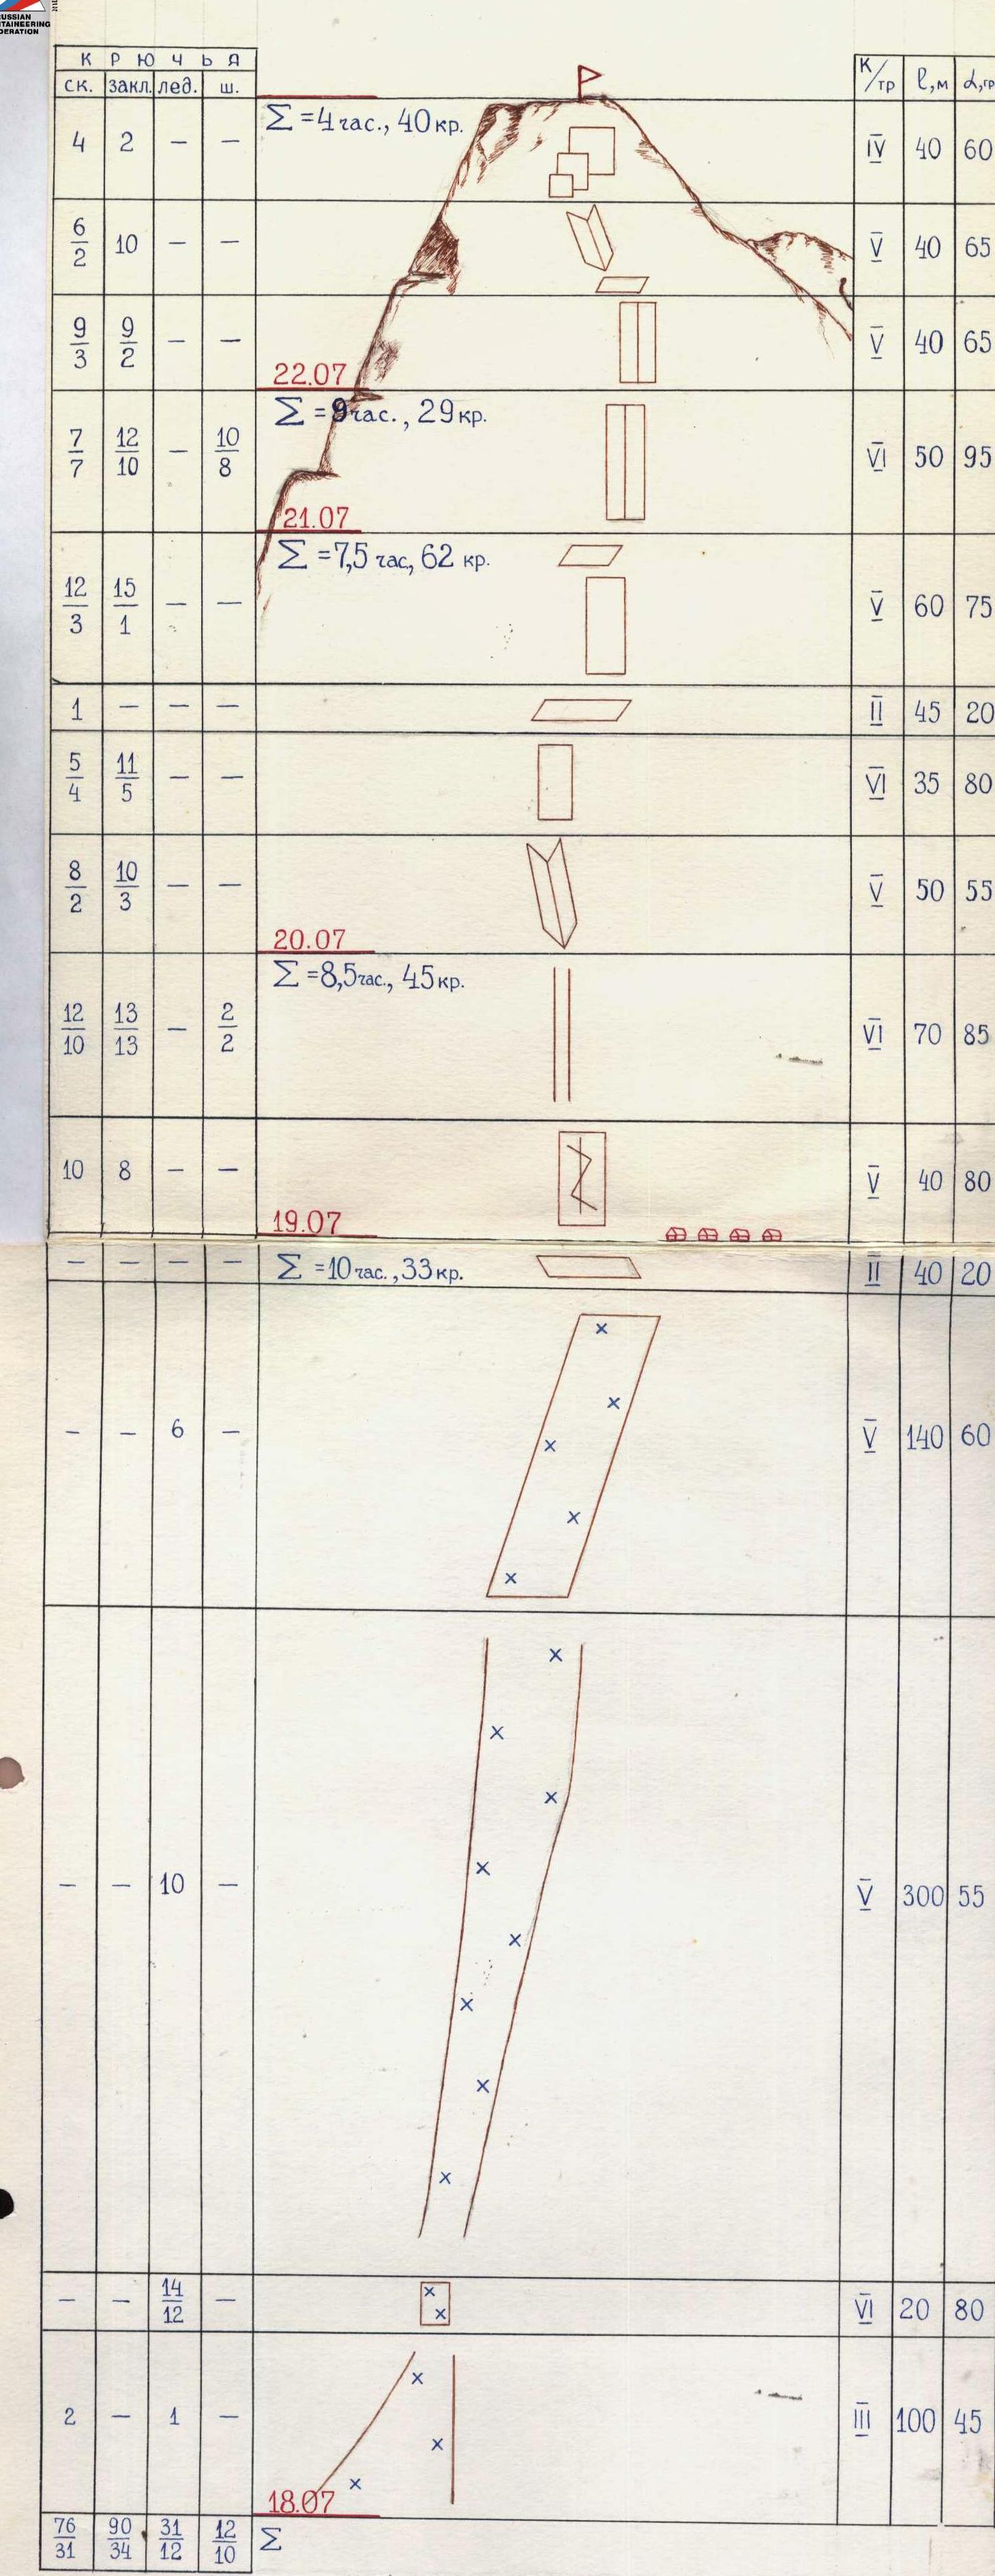
Route scheme in UIAA symbols
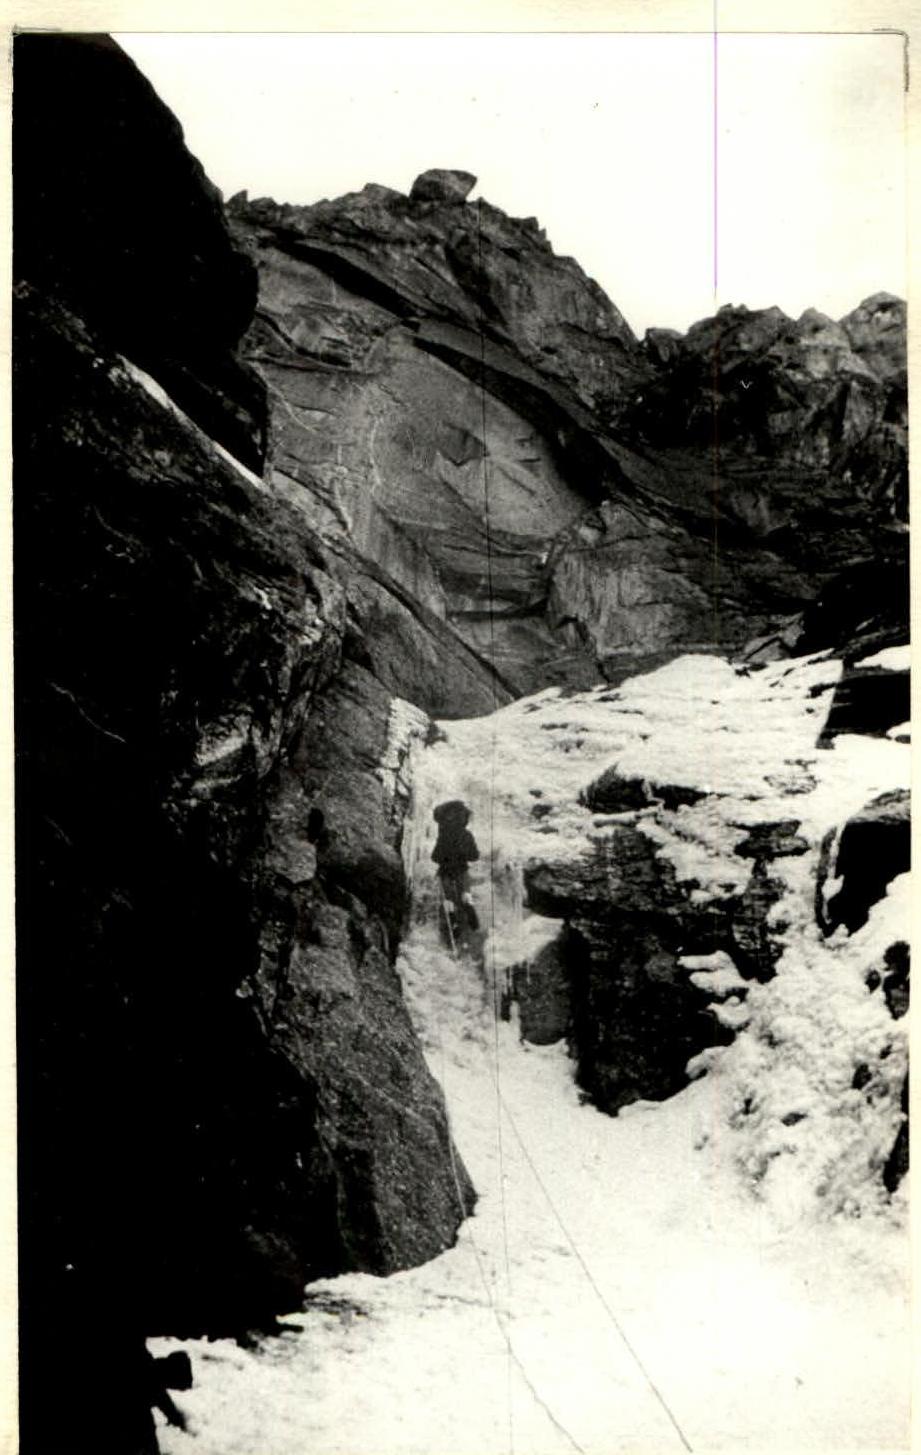
Section R1-R2
Frozen waterfall. Shooting point F6. Lens "Helios-44M".

Section R2-R3
Shooting point F7. Lens "Helios-44M".
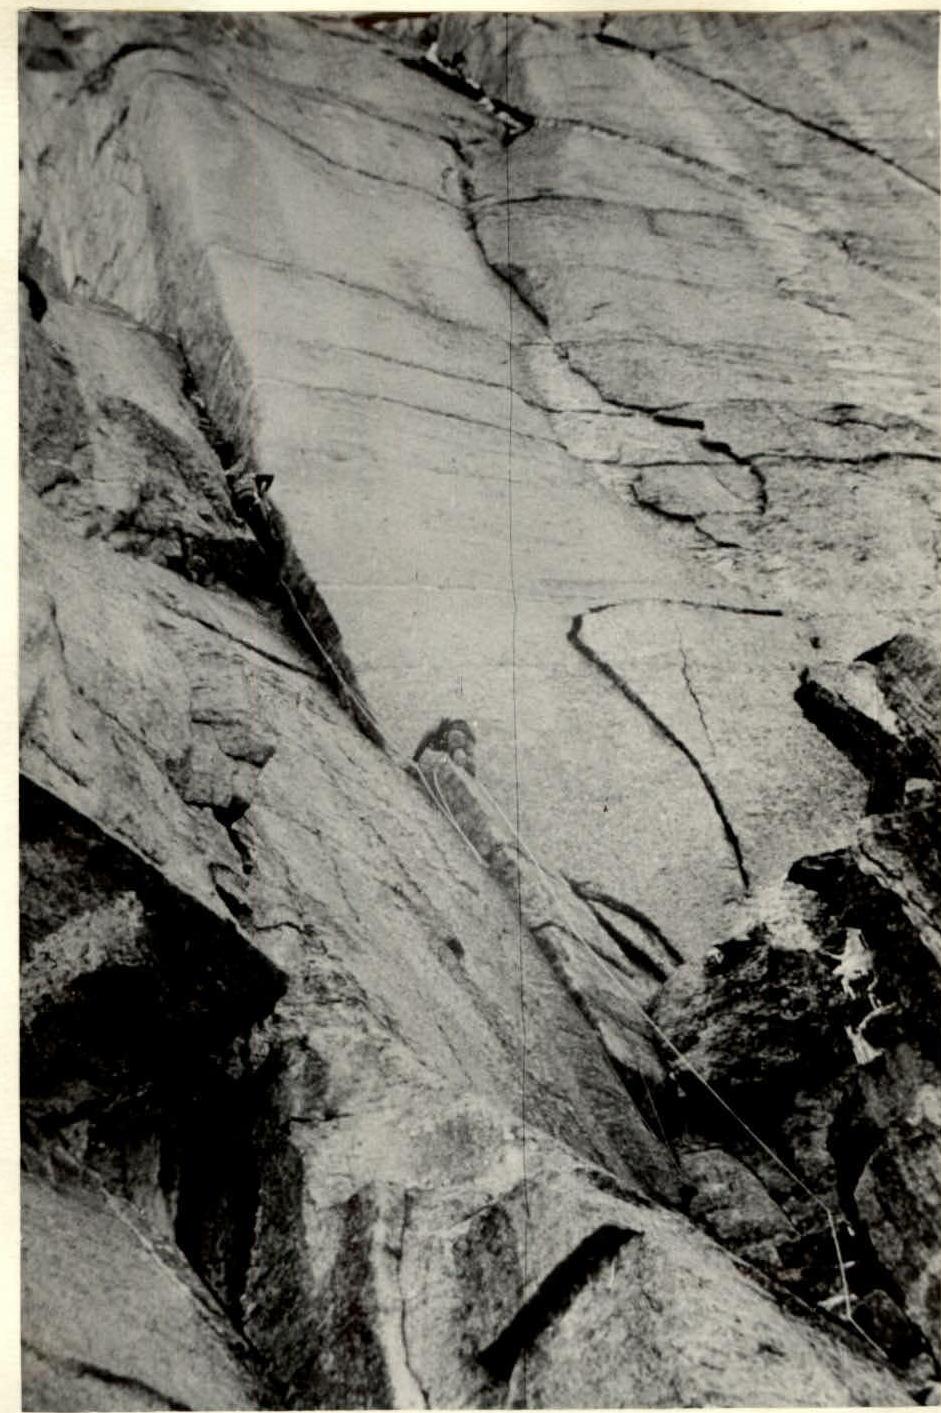
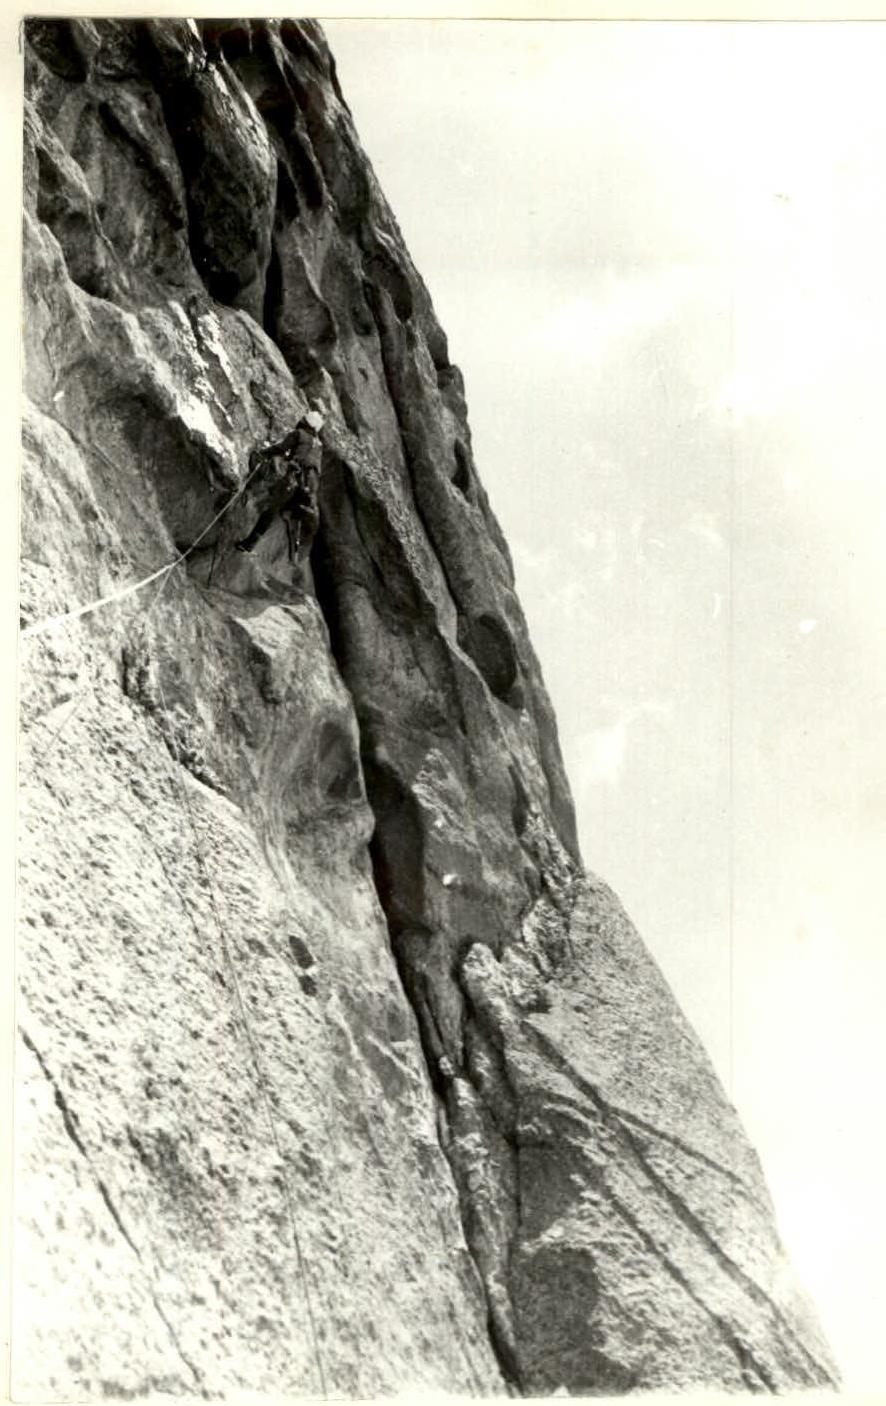
Section R6-R7
Passage of the crack using A.I.D. Shooting point F9. Lens "Jupiter-37A".
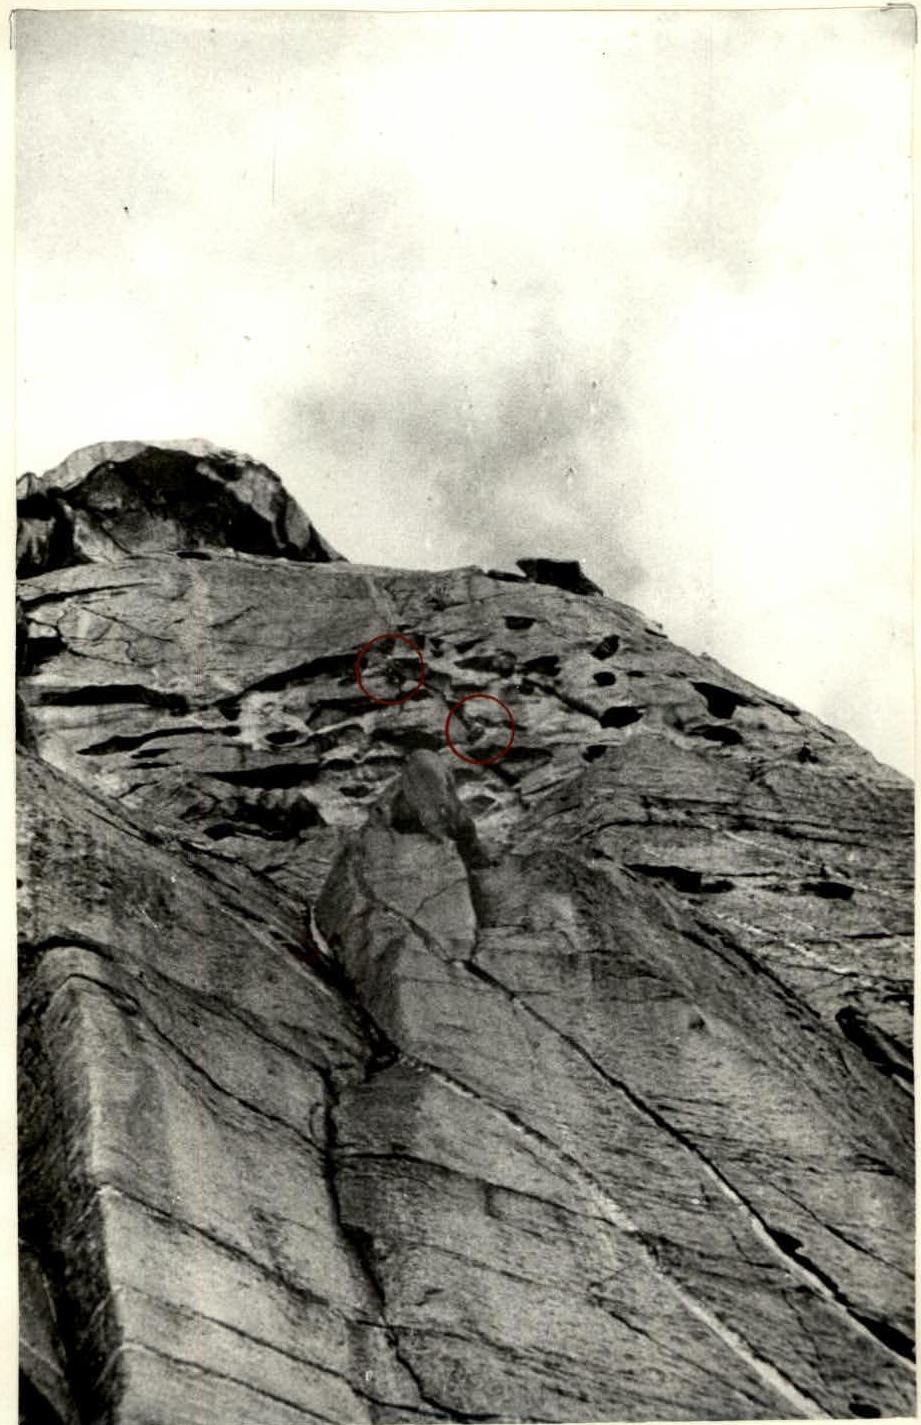
Section R11-R12
Passage of the second wall with shells. Shooting point F9. Lens "Jupiter-37A". Person on the route
Section R11-R12. Entrance to the crevice. Shooting point F11. Lens "Industar-50".