Report
On the first ascent to the peak Korona, 5th Tower, 4860 m, via the right part of the southwest wall, presumably 6A category of difficulty, by the team of "SCA Zelenograd" (Moscow) and "ROO FASO" (Ekaterinburg) from August 26 to August 28, 2013.
Ascent Passport
- Class — Technical.
- Tian-Shan, Kyrgyz Range, Ak-Sai valley.
- Peak Korona, 5th Tower, 4860 m, via the right part of the SW wall.
- Proposed category of difficulty — 6A. First ascent.
- Route type — Rock climbing.
- Route characteristics:
| — Height difference of the route | — 725 m |
|---|---|
| — Route length | — 950 m |
| — Length of the wall section | — 410 m |
| — Length of sections with 5–6 category | — 450 m |
| — Average steepness of the route | –67° |
| — Average steepness of the wall section | –86° |
- Number of pitons used:
| — Rock pitons | — 77 | incl. aid climbing — | 25 |
|---|---|---|---|
| — Chocks | — 8 | incl. aid climbing — | 3 |
| — Friends | — 77 | incl. aid climbing — | 4 |
| — Stationary bolt pitons | — 6 | incl. aid climbing — | 0 |
| — Total | — 168 | incl. aid climbing — | 32 |
| — Pitons left on the route | 8 |
- Total climbing hours – 33.5 (up to the summit); descent 4.5 hours; total – 3 days.
Day 1 – 13 hours. Day 2 – 9 hours. Day 3 – 11.5 hours (up to the summit) + 4.5 hours descent from the summit to the "Koronskaya" hut.
- Start of the route – August 26, 2013, at 7:00 AM
Summit reached – August 28, 2013, at 6:30 PM. Return to base camp – August 28, 2013, at 11:00 PM
- Overnight stops:
1st — lying on a platform on the wall. 2nd — lying on a platform on the wall.
- Team members (in pairs):
Markevich Konstantin Georgievich — Candidate Master of Sports ("SCA Zelenograd", Moscow)
Syshchikov Anatoly Gennadievich — Candidate Master of Sports ("ROO FASO", Ekaterinburg)
Korona 5th Tower. General view. The team's route is shown in red. (Route lines are drawn according to the information from the FAR database)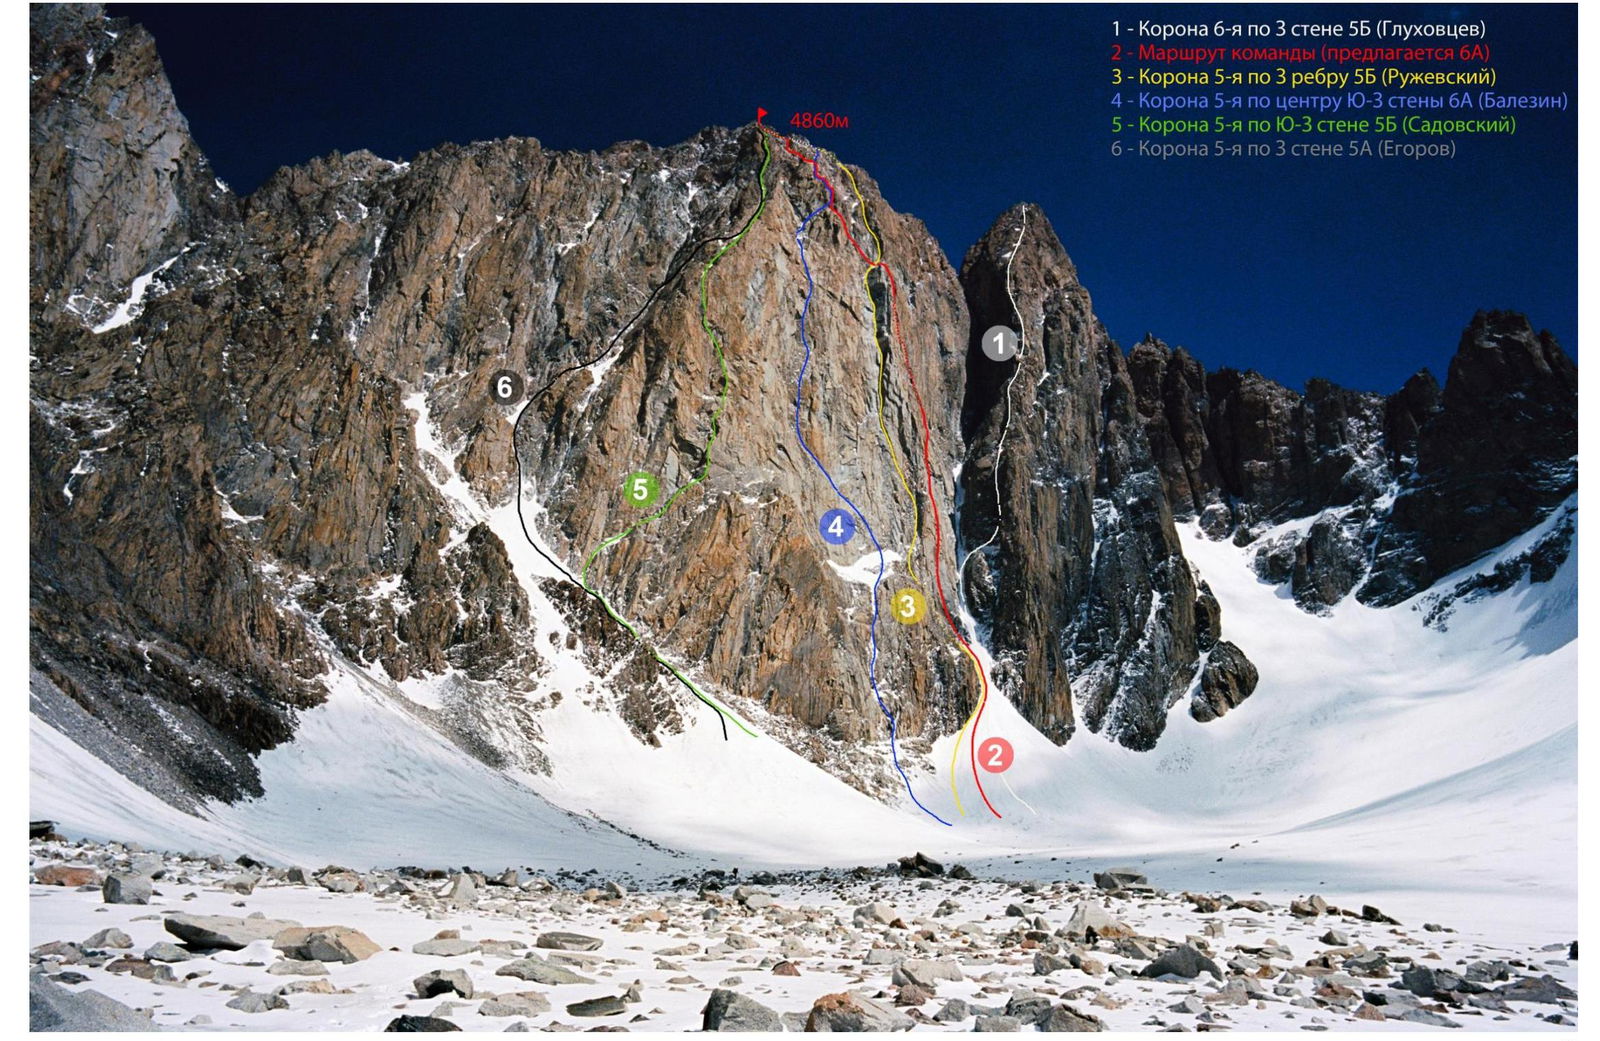
Tactical Actions of the Team
The route was suggested by Sergey Dashkevich, who attempted it in November 2012 but couldn't complete it due to bad weather.
According to the tactical plan:
- the route was climbed without prior processing, with a platform;
- 3–4 days were allocated for climbing the wall;
- food and gas were stocked for 7 days, in case of potential bad weather;
- the team took 5 liters of water for the wall.
As a result, in good weather conditions (the first two days were warm and sunny, and only on the third day did strong wind and snow start), the route was completed in 3 days.
The team's movement tactic was as follows: The lead climber goes on a single rope and pulls the second rope (static), makes a belay station. One rope serves as a handrail, and the other is used to pull up the platform and simultaneously provides backup for the second climber. The lead climber pulls up the platform through a self-locking belay device.
The second climber:
- follows on the handrail,
- removes intermediate protection,
- controls the platform,
- pulls up the bag using a 2:1 pulley system assembled on the end of the handrail rope.
(The bag is equipped with a block — a clamp. The second climber moves a few meters, then pulls up the bag by the end of the handrail rope.)
The lead climber worked in rock shoes, without a backpack. Most of the wall was climbed with free climbing, and on particularly difficult based sections (up to F6C), aid climbing was partially used. The lead did not change during the day.
The team had all necessary gear for climbing terrain of any difficulty. Anchor pitons and small and medium-sized friends were used most frequently.
All stations were set up on a minimum of 4 points, and for setting up the platform, bolt pitons were hammered. There were no falls during the ascent.
The team had hot meals twice a day. On the route, the team worked autonomously, without a rescue team, and maintained radio contact with an observer every 3 hours from 9:00 AM.
By adopting a different tactical plan, it is possible to climb the route without a platform.
Sitting overnight stops can be organized on stations:
- R4
- R7
- R9
After exiting the wall on R11, a lying overnight stop can be organized.
There is no water on the wall section of the route in good weather. The team climbed the route after several days of bad weather in the area, and some snow was found on ledges (on R4, R7, and R8).
In the team's assessment, this route, in terms of technical difficulties and length, corresponds to similar routes of 6A category in the area. Compared to the Balazin route on the 5th Tower of Korona, 6A category:
- This route has more sections of difficult climbing and aid climbing
- The difficulty of these sections is higher
- The route length is the same
(Both team members had previously climbed the Balazin route).
Route Description by Sections
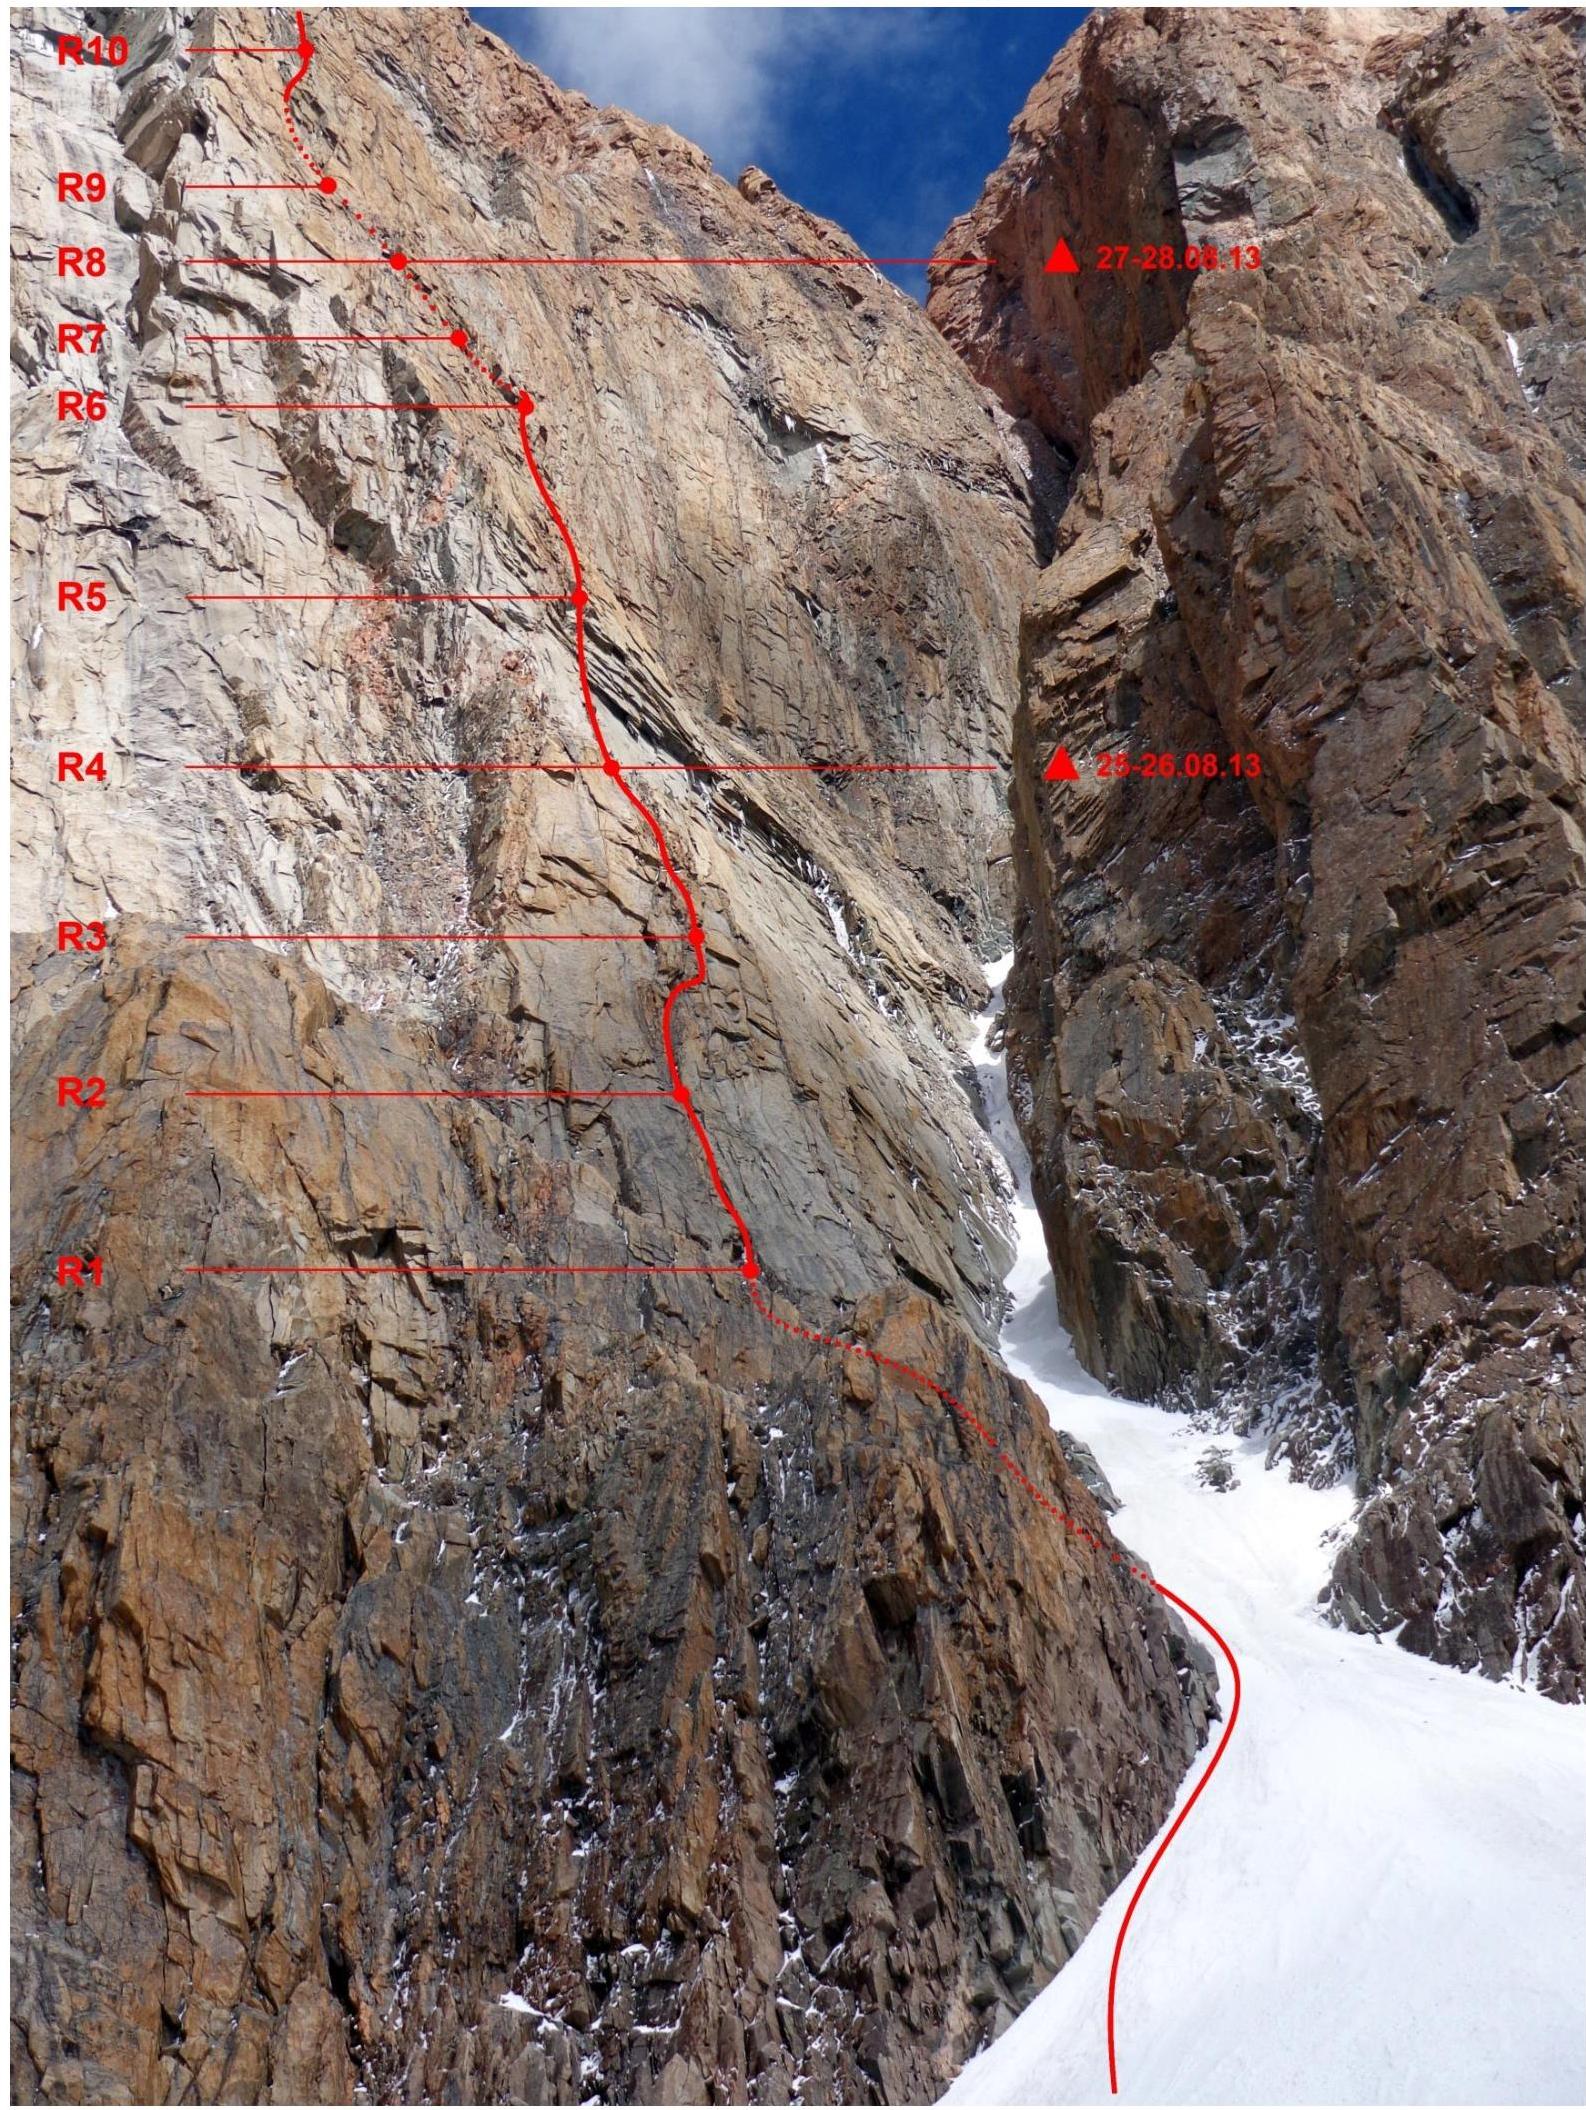
R0–R1. A snow couloir about 150 m, 40°–50°, is climbed on individual protection, followed by about 7 m of simple destroyed rocks. At the base of the chimney is station R1. A bolt is hammered on station R1. (150 m; III) Station R1 is on a bolt.
R1–R2. From station R1 up the chimney, midway a "plug" — a cornice. Station R2 is on a ledge, semi-hanging. (50 m; 85°–90°; V–VI; friends — 5 pcs, pitons — 8 pcs, chocks — 1 pc.) Station R2 is on 2 anchors and 3 small friends.
R2–R3. First 20 m up the chimney to a cornice, after passing the cornice to the right, bypassing a slab on the wall with a system of vertical cracks, another 10 m up. Station R3 is hanging. To set up a reliable belay, many anchor pitons are needed. (35 m; 90°–100°; VI, A1, A2; friends — 2 pcs, anchor pitons — 15 pcs, horizontal micro-piton — 1 pc.) Photo №1 Station R3 is on 2 pitons and 3 friends.
R3–R4. Up the wall about 10 m 90° V+–VI, then the wall becomes slightly easier but is heavily destroyed with many "live" stones — 35 m 80°. Station R4 is on a ledge. There is snow. A sitting overnight stop is possible. (45 m; 80°–90°; VI–V; friends — 4 pcs, pitons — 6 pcs.) Photo №2 Station R4 is on 2 pitons and 2 friends. On R4, the first overnight stop. A few meters above the station, a bolt is hammered for setting up a platform and is linked to the R5 belay.
R4–R5. Up steep, heavily destroyed large-block rocks to the left of a mirror under a cornice. 20 m 90° VI, A2, F6B. The cornice consists of large destroyed blocks and is climbed straight on. 15 m 100°–110° VI+, A2, F6C. A very difficult and tense section, many blocks are "live." It is necessary to climb this section and set up a belay very carefully and accurately. Station R5 after the cornice is hanging (35 m; 90°–110°; VI+, A2+, F6C; friends — 6 pcs, pitons — 9 pcs, chocks — 1 pc.) Photo №3, 4, 6 Station R5 is on 3 pitons and 3 friends.
R5–R6. Up the wall. After the cornice, the wall becomes monolithic, making it difficult to set up a reliable belay. Midway, a bolt is hammered. (50 m; 90°; VI; friends — 6 pcs, pitons — 3 pcs, chocks — 3 pcs, bolt — 1 pc.) Photo №7 Station R6 is on a ledge.
R6–R7. A horizontal traverse along the wall to the right to an internal angle, about 8 m, then left up the internal angle. Station is on a ledge. There is snow. A sitting overnight stop is possible. (30 m; 90°; V–VI; friends — 4 pcs, chocks — 1 pc.) Photo №8 Station R7 is on 3 friends and 1 chock.
R7–R8. Up the internal angle, with ice and icicles encountered. After exiting the internal angle, simple rocks lead to a diagonal ledge. Station is on a ledge. There is snow. (40 m; 90°–80°; V–IV; friends — 2 pcs, pitons — 1 pc.) Station R8 is on 2 friends, 1 anchor, and 1 chock. On R8, the second overnight stop. A bolt is hammered for setting up a platform and is linked to the station.
R8–R9. Up an ice-filled internal angle. In the evening, water flows there, and by morning, an ice crust forms on the rocks. 15 m 90° V+. Then up a large-block internal angle to a ledge 25 m 90°–80°, V. Before reaching the ledge, it becomes slightly easier. Station is on a ledge. A sitting overnight stop is possible. (40 m; 90°–80°; V; friends — 6 pcs, pitons — 5 pcs.) Photo №9 Station R9 is on a ledge.
R9–R10. Up the internal angle to a small ledge 15 m 90° VI. On this section (15 m), "old" iron is encountered (4 pitons and 2 bolts). Possibly, this is a variation of the Ruzhevsky route; the Ruzhevsky route goes from the left side of the buttress, along an internal angle, much further to the left. The route line is taken from the FAR database. From the ledge to the right along steep destroyed rocks to the next ledge, along it to the right, to the base of a destroyed internal angle. 15 m 90°–80° VI–V. Up the internal angle. 20 m 90°–80°, V. Station is in the angle, to the right of an ice flow, under a cornice — hanging. (50 m; 90°–80°; VI–V; friends — 3 pcs, pitons — 9 pcs, bolt — 2 pcs.) Photo №10 Station R10 is on 2 pitons and 3 friends.
R10–R11. Up the angle 10 m 80° V. Then along simple rocks to a large ledge 20 m 60°, IV–III. Station is on a ledge. There is a lot of snow on the ledge, and a lying overnight stop is possible. (30 m; 80°–60°; V–III; friends — 3 pcs.) Station R11 is on 3 pitons.
R11–R12. Left along a diagonal ledge 30 m II. Station is on a ledge under an internal angle. (30 m; 20°, II; friends — 1 pc, pitons — 1 pc.) Station R12 is on a ledge.
R12–R13. Up the internal angle, then to the right along destroyed rocks to a snow ledge. On the ledge, the route merges with the "Balezin" route, control point. (35 m; 80°–45°; V–III; friends — 2 pcs.) Photo №11 Station R13 is on a ledge.
R13–R14. Up a wall. The wall is climbed from left to right. 8 m 80°, V. Then up a wide destroyed chimney. 30–35 m 45°–80°, IV–V. Station is after exiting the chimney on a ledge. (40 m; 80°–45°–80°, V; friends — 4 pcs, pitons — 2 pcs.) Station R14 is on a ledge.
R14–R15. Up rocks of medium difficulty 20 m 70°, IV, then traverse left to a chimney filled with ice. 10 m 50° III. Up the chimney through a "plug" — a cornice to a ledge 5 m 90° V. Then to the right up snow-covered walls — ledges. 15 m 45°–70° III. Station is on a ledge. (50 m; 45°–90°; V–III; friends — 3 pcs, pitons — 1 pc.) Station R15 is on 1 piton and 3 friends.
R15–R16. Up simple rocks to a ledge, along the ledge left to a couloir. (50 m; 45°; II–III; friends — 4 pcs.) Station R16 is on 1 piton, 1 friend, 1 chock.
R16–R17. Up the couloir to the ridge (50 m; 45°; II). Movement with simultaneous protection.
R17–R18. Along the ridge to the left to the summit, about 30 m; II. Movement with simultaneous protection.
Along the ridge to the 3rd Tower of Korona. Descent from the 3rd Tower to the Koronsky glacier — 4 rappels of 50 m each.
Ascent Schedule
August 24, 2013 — Gathering of team members in Bishkek, ascent to "Ratsek", ascent to "Koronskaya" hut by 5:30 PM.
August 25 — Carrying gear under the wall, visual inspection of the wall, determining the route line, approximate overnight stops, and key sections.
August 26 — Departure from "Koronskiye" at 5:00 AM, approach to the route, start of climbing at 7:00 AM. From 7:00 AM to 8:00 PM, climbing sections R0–R4, processing section R4–R5, setting up a bivouac. Overnight stop on R4. Markevich K.G. leads.
August 27 — Departure from R4 at 10:00 AM. From 10:00 AM to 7:00 PM, climbing the processed cornice (R4–R5), and then R5–R8, setting up a bivouac. Overnight stop on R8. Syshchikov A.G. leads.
August 28 — Departure from R8 at 7:00 AM. Climbing sections R8–R18, completing the main wall section by 2:30 PM, reaching the summit at 6:30 PM. Markevich K.G. leads. Descent to "Koronskaya" hut by 11:00 PM.
August 29 — Descent from "Koronskaya" hut to "Ratsek" and then down to the alpine camp by 3:00 PM, departure to Bishkek.
Thus, the total time for the ascent from Bishkek to Bishkek was 5.5 days. The time for climbing the route itself was 3 days.
Main wall section of the route
| № | Pitons driven* | Diagram of the route in UIAA symbols | Length, m | Steepness | Category of difficulty | Photo № | |||
|---|---|---|---|---|---|---|---|---|---|
| Rock | Friend | Chock | Bolt | ||||||
| R17–R18 | - | - | - | - | 30 | - | II | ||
| R16–R17 | - | - | - | - | 50 | 45° | II | ||
| R15–R16 | - | 4 | - | - | 50 | 45° | II–III | ||
| R14–R15 | 2 | 6 | - | - | 50 | 45°–90° | V–III | ||
| R13–R14 | 1,1 | 4 | - | - | 30 | 45°–80° | IV–V | ||
| 8 | 80° | V | №11 | ||||||
| R12–R13 | - | 2 | - | - | 35 | 80°–45° | V–III | ||
| R11–R12 | 1 | 1 | - | - | 30 | 20° | II | ||
| R10–R11 | 3 | 3 | - | - | 20 | 60° | IV | ||
| 10 | 80° | V | |||||||
| R9–R10 | 7,4 | 6 | - | 2 | 50 | 90°–80° | VI–V | №10 | |
| 3 | |||||||||
| R8–R9 | 5 | 6 | - | - | 25 | 90°–80° | V | №9 | |
| 15 | 90° | V+ | |||||||
| R7–R8 | 2 | 4 | 1 | 1 | 40 | 90°–80° | V–IV | ||
| R6–R7 | - | 7 | 2 | - | 30 | 90° | V+ VI | №8 | |
| R5–R6 | 3 | 6 | 3 | 1 | 50 | 90° | VI | №7 | |
| 3 | 1 | 2 | |||||||
| R4–R5 | 12 | 9 | 1 | - | 15 | 110° | VI+ A2+ F6C | №3,4, 6 | |
| 3 | 2 | 1 | 20 | 90° | VI A2+ F6B | ||||
| R3–R4 | 8 | 6 | - | 1 | 35 | 80° | V | №2,5 | |
| 10 | 90° | VI | |||||||
| R2–R3 | 19 | 5 | - | - | 35 | 90°–100° | VI A1, A2 | №1 | |
| 13 | 1 | ||||||||
| R1–R2 | 10 | 8 | 1 | - | 50 | 85°–90° | V–VI | ||
| 3 | |||||||||
| R0–R1 | - | - | - | 1 | 160 | 40°–50° | III |
Route profile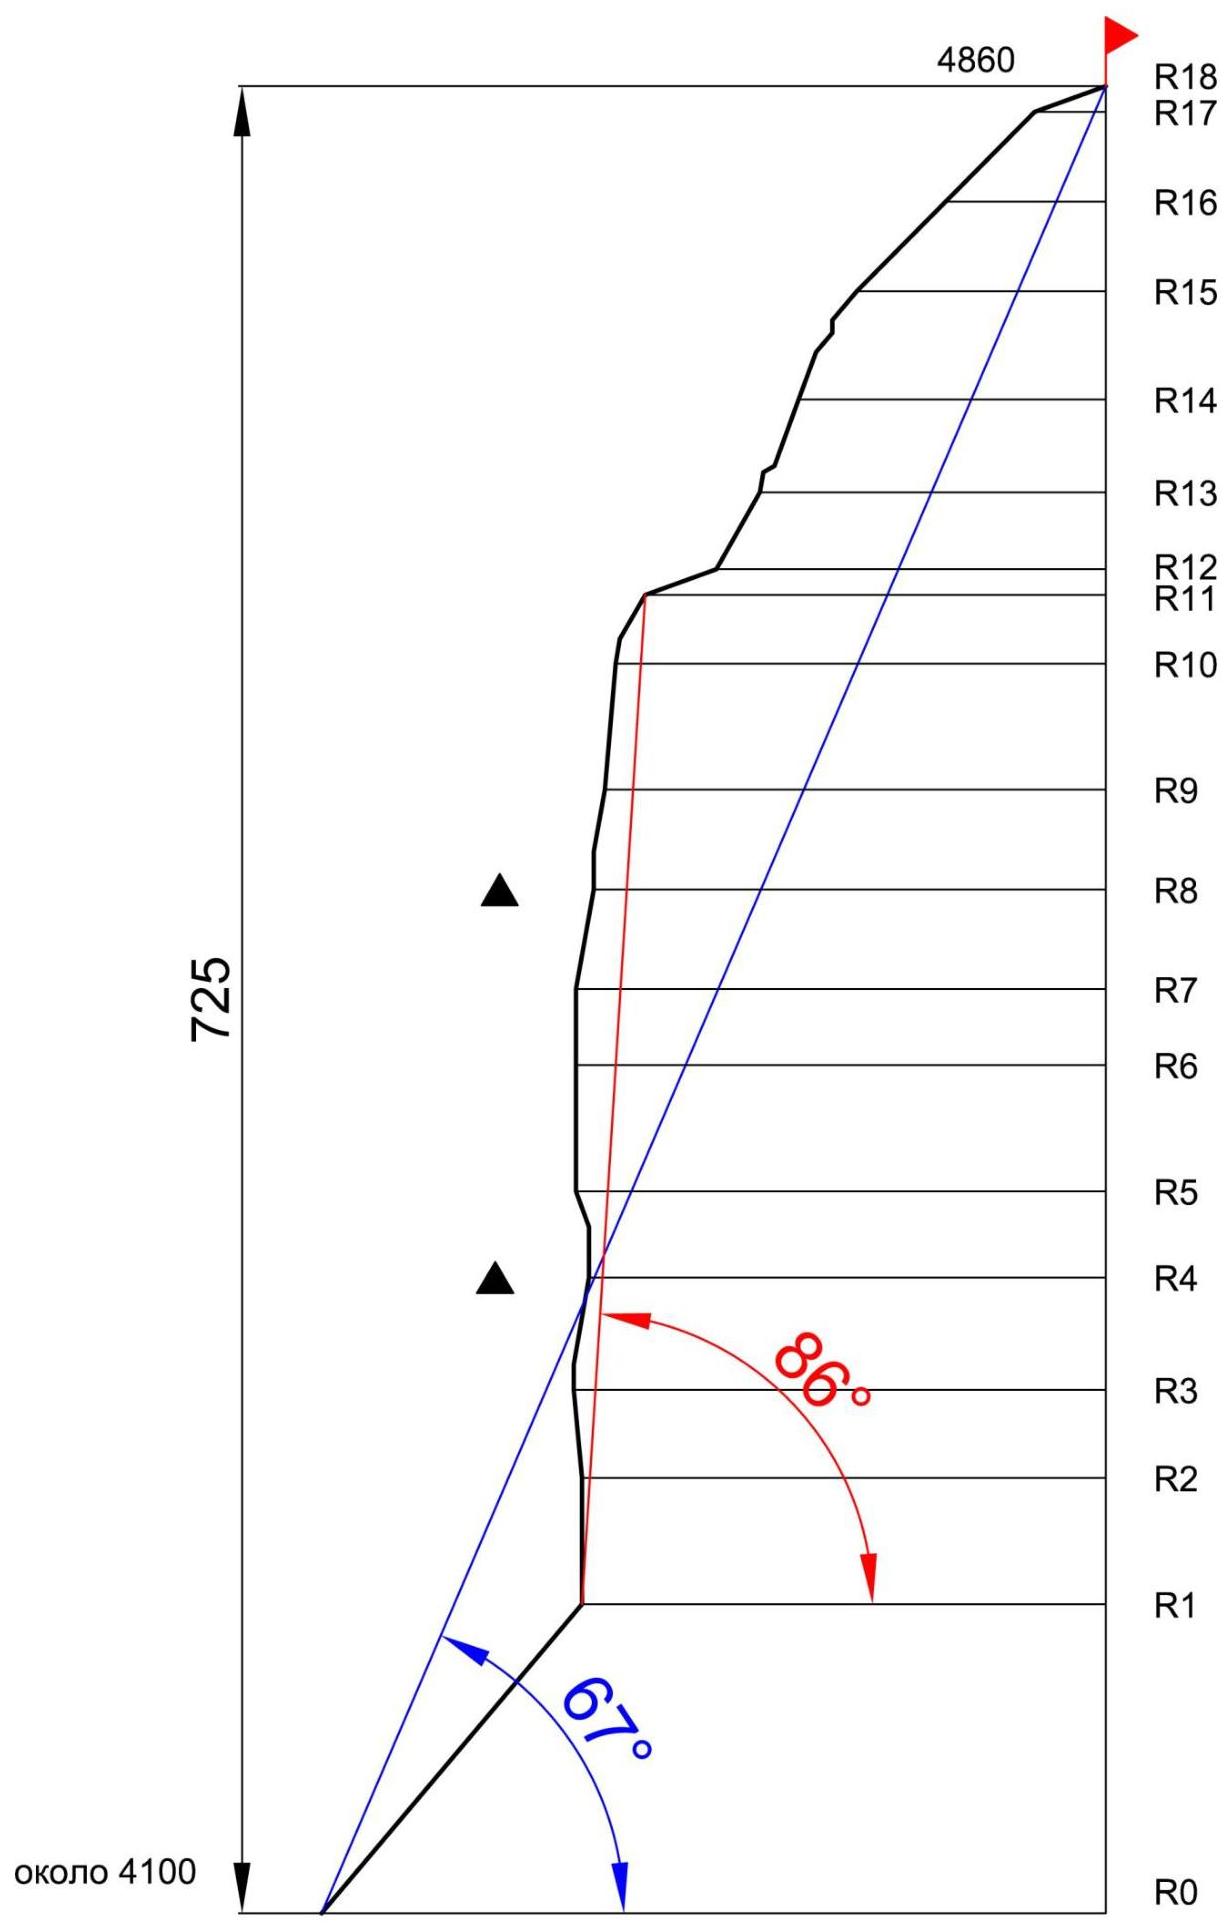
Equipment List
| № | Equipment | Quantity |
|---|---|---|
| 1 | Dynamic rope 10.1 mm 50 m | 1 pc. |
| 2 | Static rope 10 mm 50 m | 1 pc. |
| 3 | Quickdraws with carabiners 30, 40, 60 cm | 17 pcs. |
| 4 | Carabiners | 15 pcs. |
| 5 | Station slings | 4 pcs. |
| 6 | Friends Black Diamond C3 № 1, C4 №0,3, 0,4, 0,5, 0,75, 1, 1, 2, 2, 3 | 10 pcs. |
| 7 | Friends Fixe Aliens (small) | 5 pcs. |
| 8 | Chocks (stoppers) | set |
| 9 | Extraction tool | 1 pc. |
| 10 | Rock hammers | 2 pcs. |
| 11 | Anchor pitons | 17 pcs. |
| 12 | "Korob" pitons (titanium) | 2 pcs. |
| 13 | "Shveller" pitons (titanium) | 5 pcs. |
| 14 | Horizontal pitons | 2 pcs. |
| 15 | Horizontal micro-pitons (Black Diamond) | 2 pcs. |
| 16 | Bolt kit | set |
| 17 | Hole skyhooks | 2 pcs. |
| 18 | Relief skyhooks | 2 pcs. |
| 19 | Ice screws | 1 pc. |
| 20 | Crampons | 1 pair |
| 21 | Hook-on crampons | 2 pairs |
| 22 | Rungs for hook-on crampons | 1 set |
| 23 | Climbing shoes | 1 pc. |
| 24 | Harness + 2 self-belay | 2 sets |
| 25 | Helmets | 2 pcs. |
| 26 | Rock shoes | 2 pairs |
| 27 | Belay device ATC | 2 pcs. |
| 28 | Ascenders | 3 pcs. |
| 29 | Rope ascender | 1 pc. |
| 30 | Ascender pedal | 2 pcs. |
| 31 | Block-clamp Petzl Micro Traxion | 1 pc. |
| 32 | Headlamps | 2 pcs. |
| 33 | Bag 70 l. | 1 pc. |
| 34 | Platform Metolius with tent | 1 pc. |
| 35 | Sleeping bag | 2 pcs. |
| 36 | Sleeping pad | 2 pcs. |
| 37 | Stove JetBoil | 1 pc. |
| 38 | Gas cartridges 240 g. | 3 pcs. |
| 39 | Water flasks | 5 l. |
| 40 | First aid kit | set |
| 41 | Radio station | 1 pc. |
| 42 | Clothing | 2 sets |
| 43 | Camera | 2 pcs. |
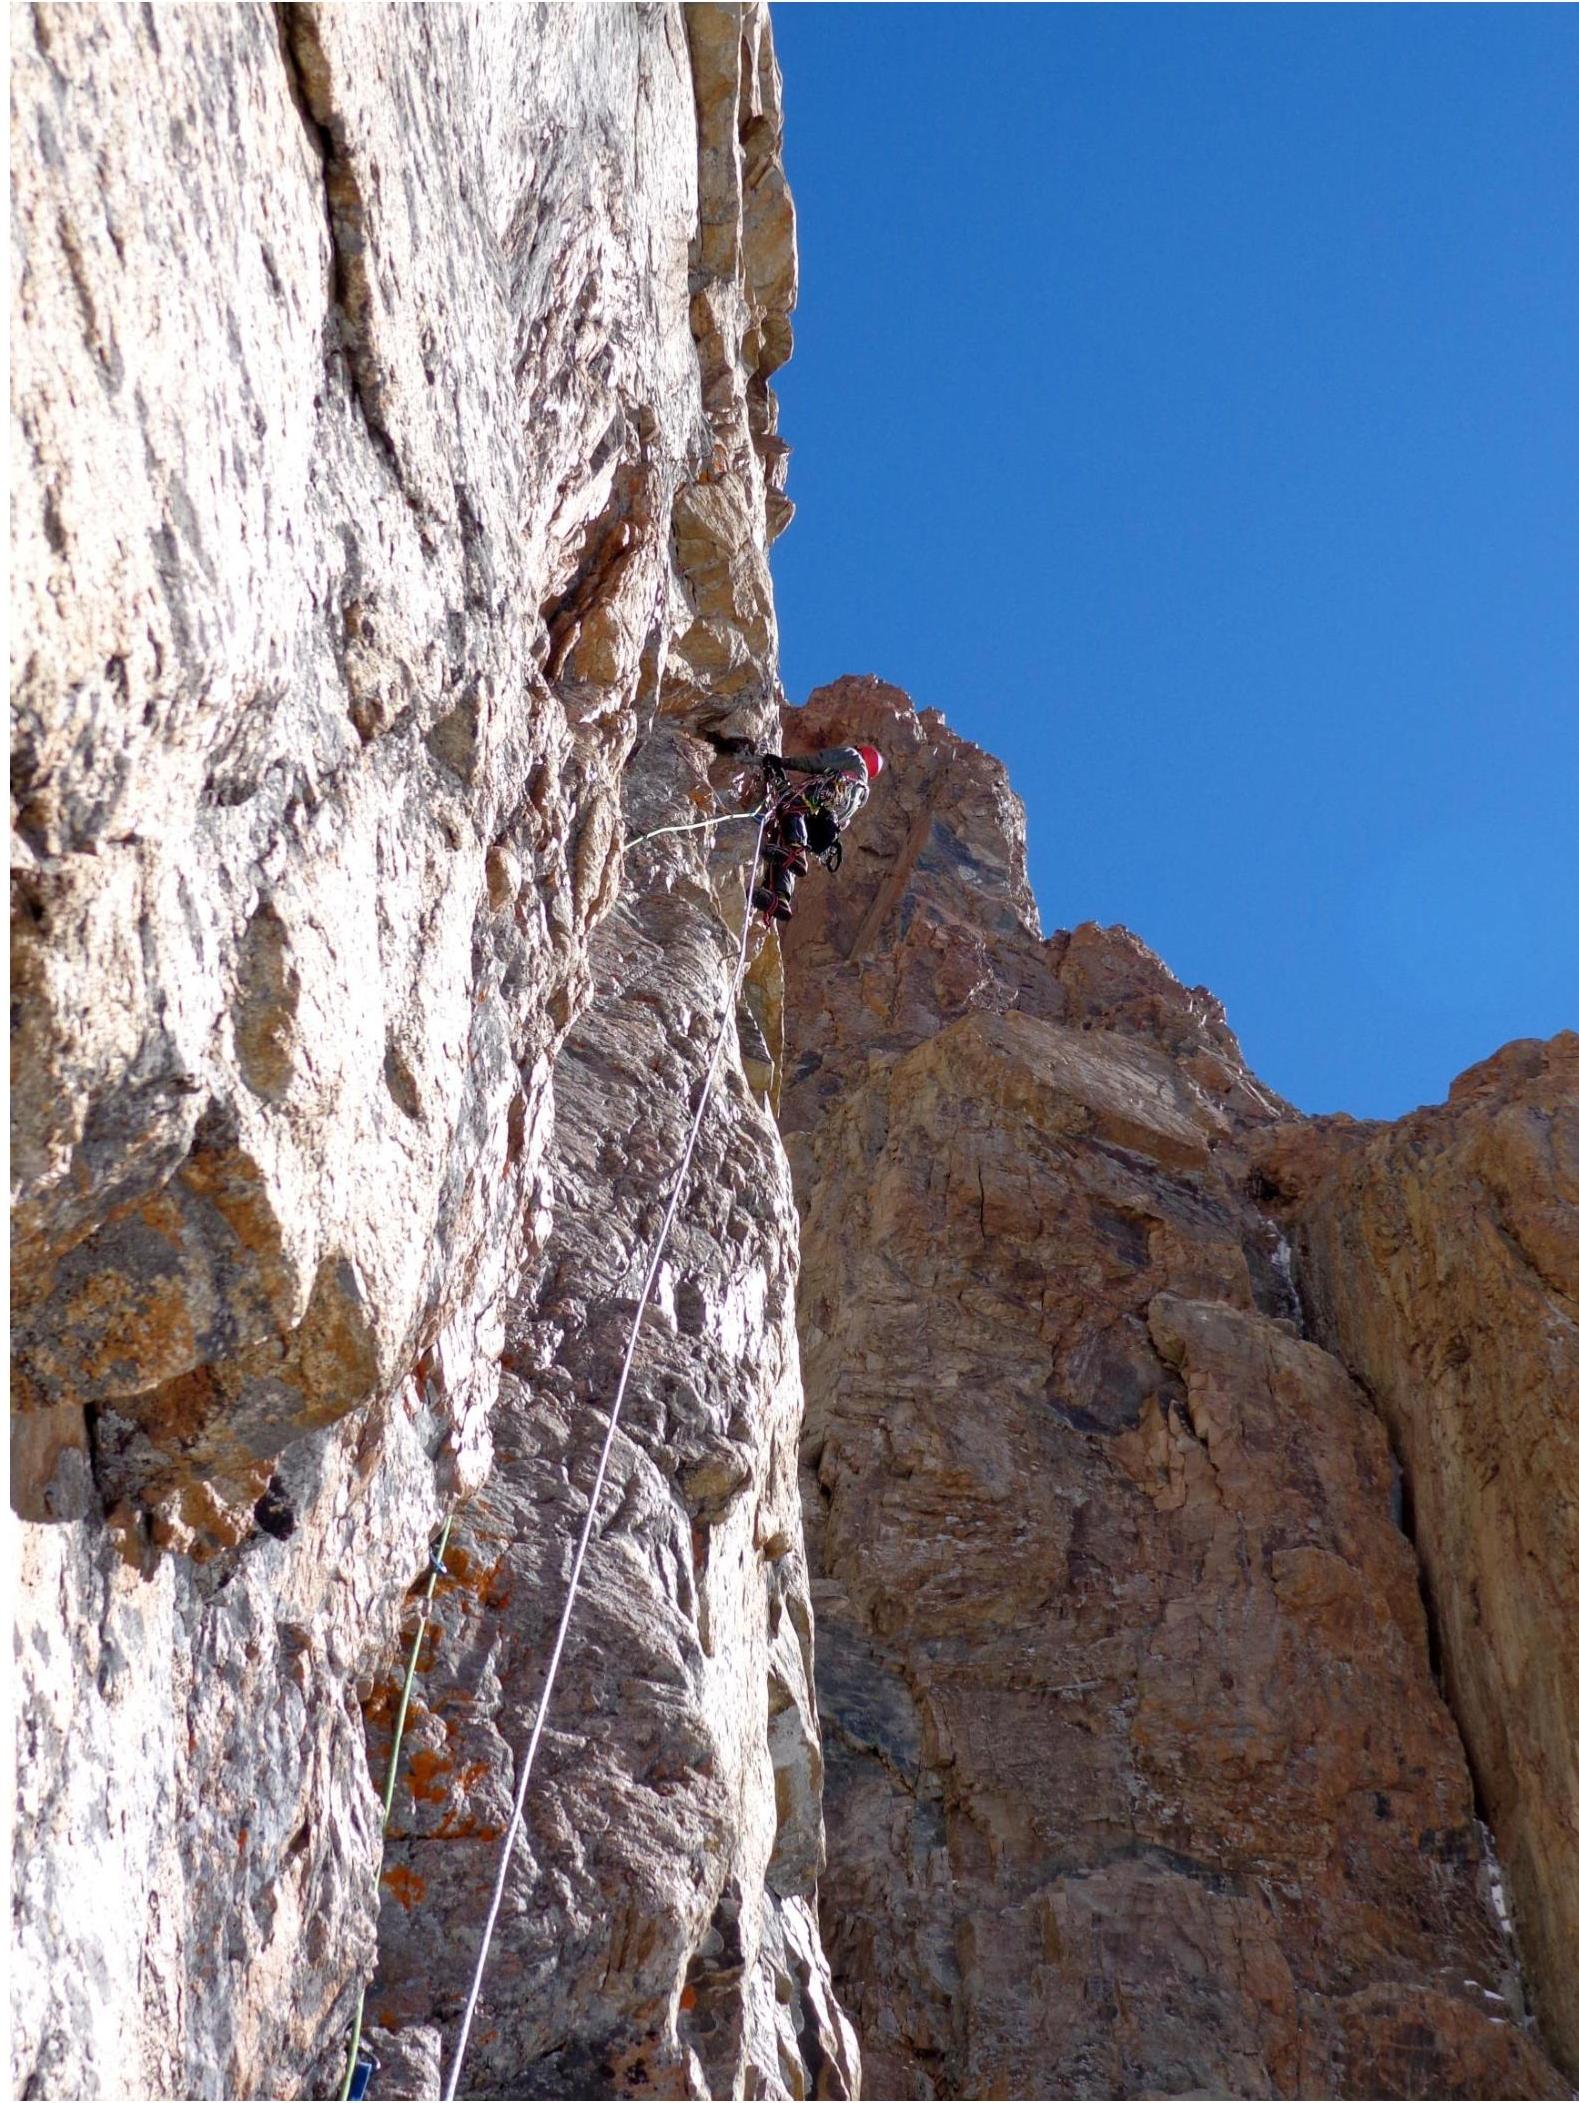
Photo №1. Passing the cornice on section R2–R3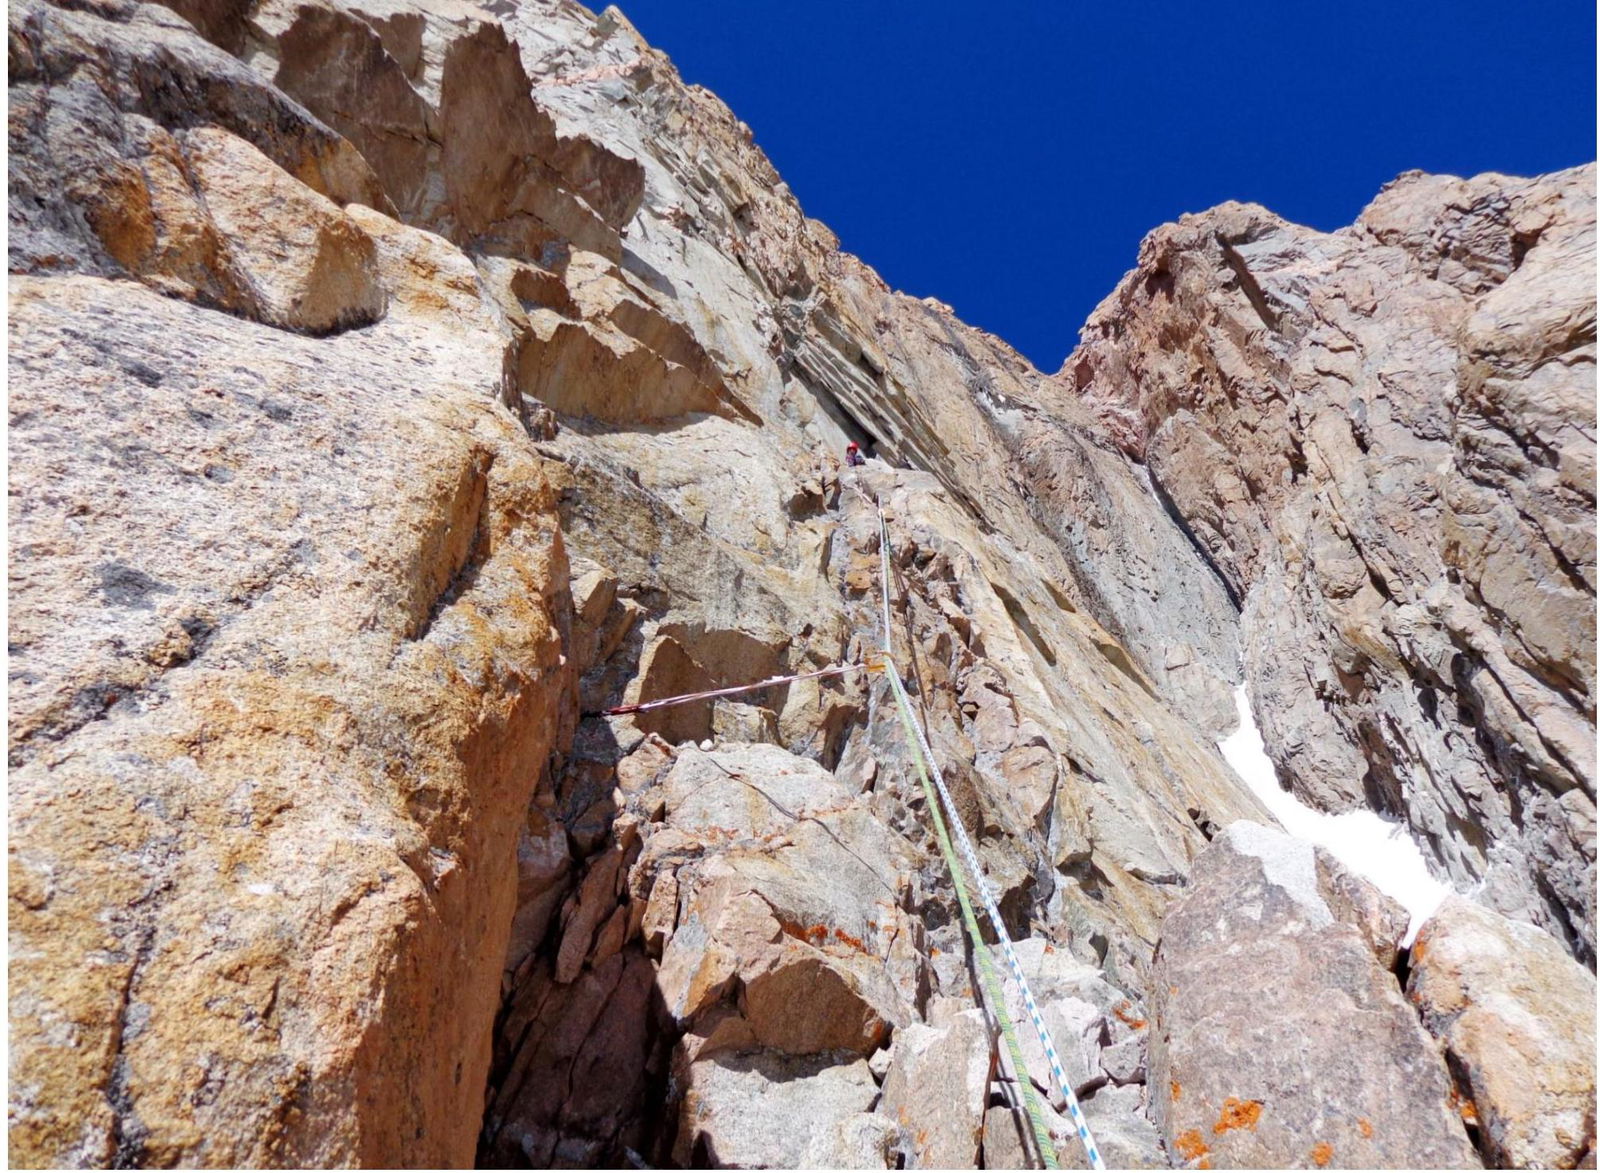
Photo №2. On section R3–R4
Photo №3. Passing section R4–R5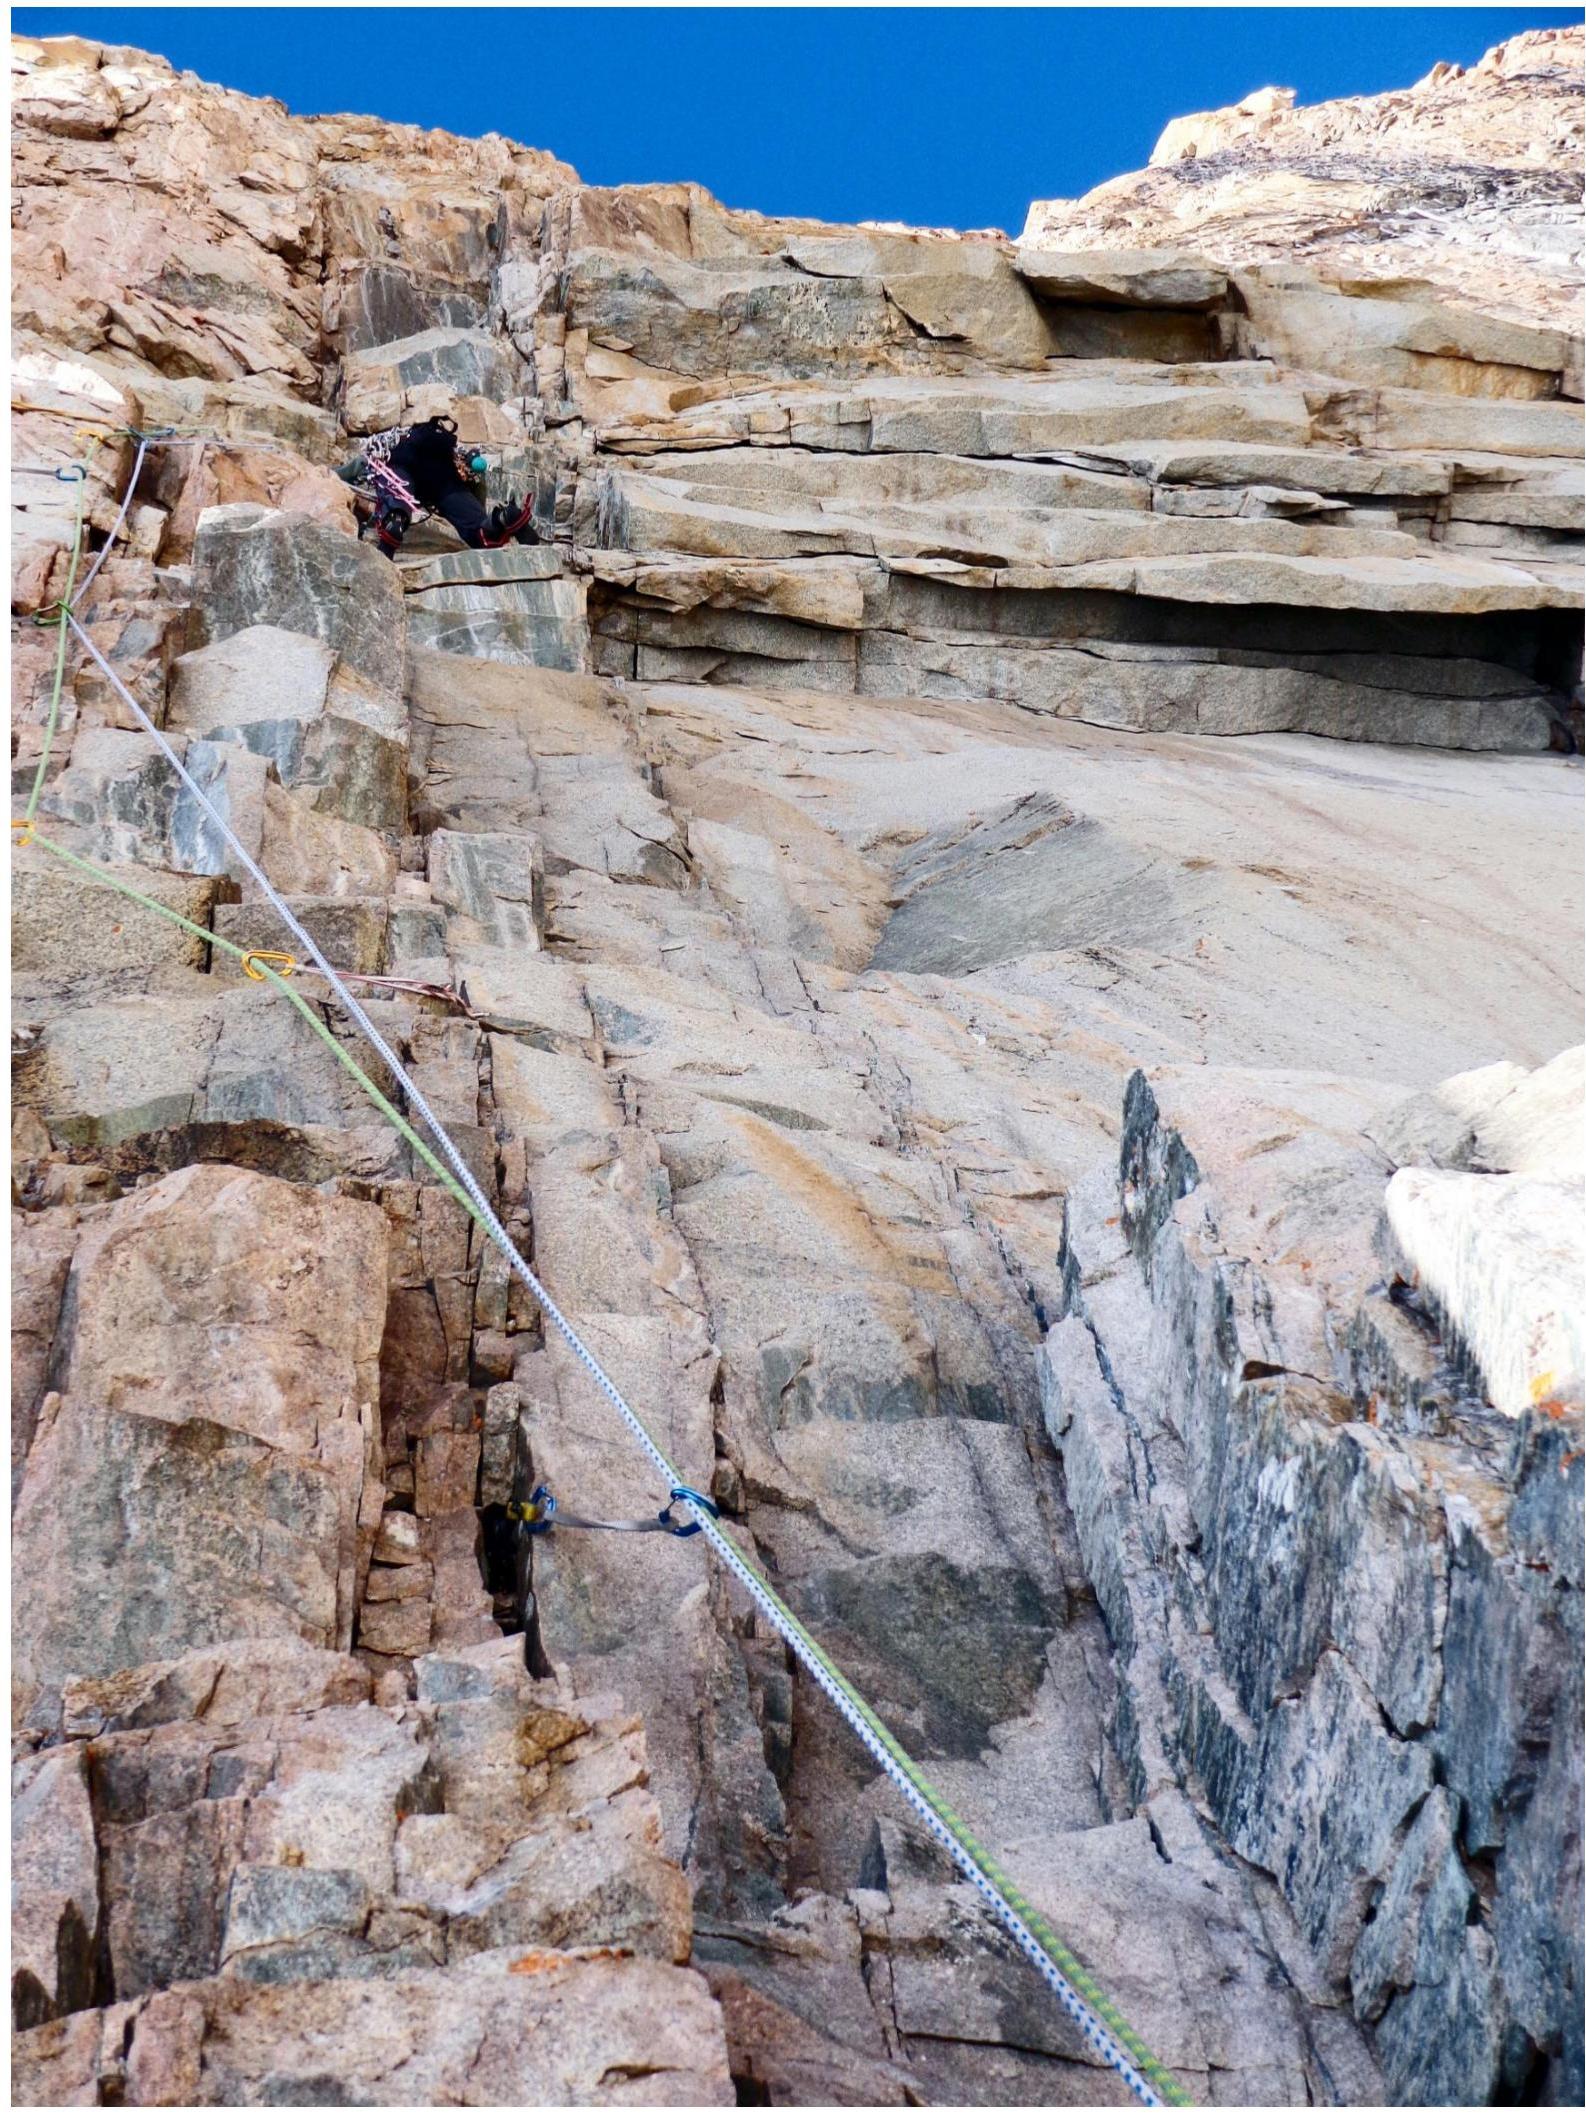
Photo №4. Passing section R4–R5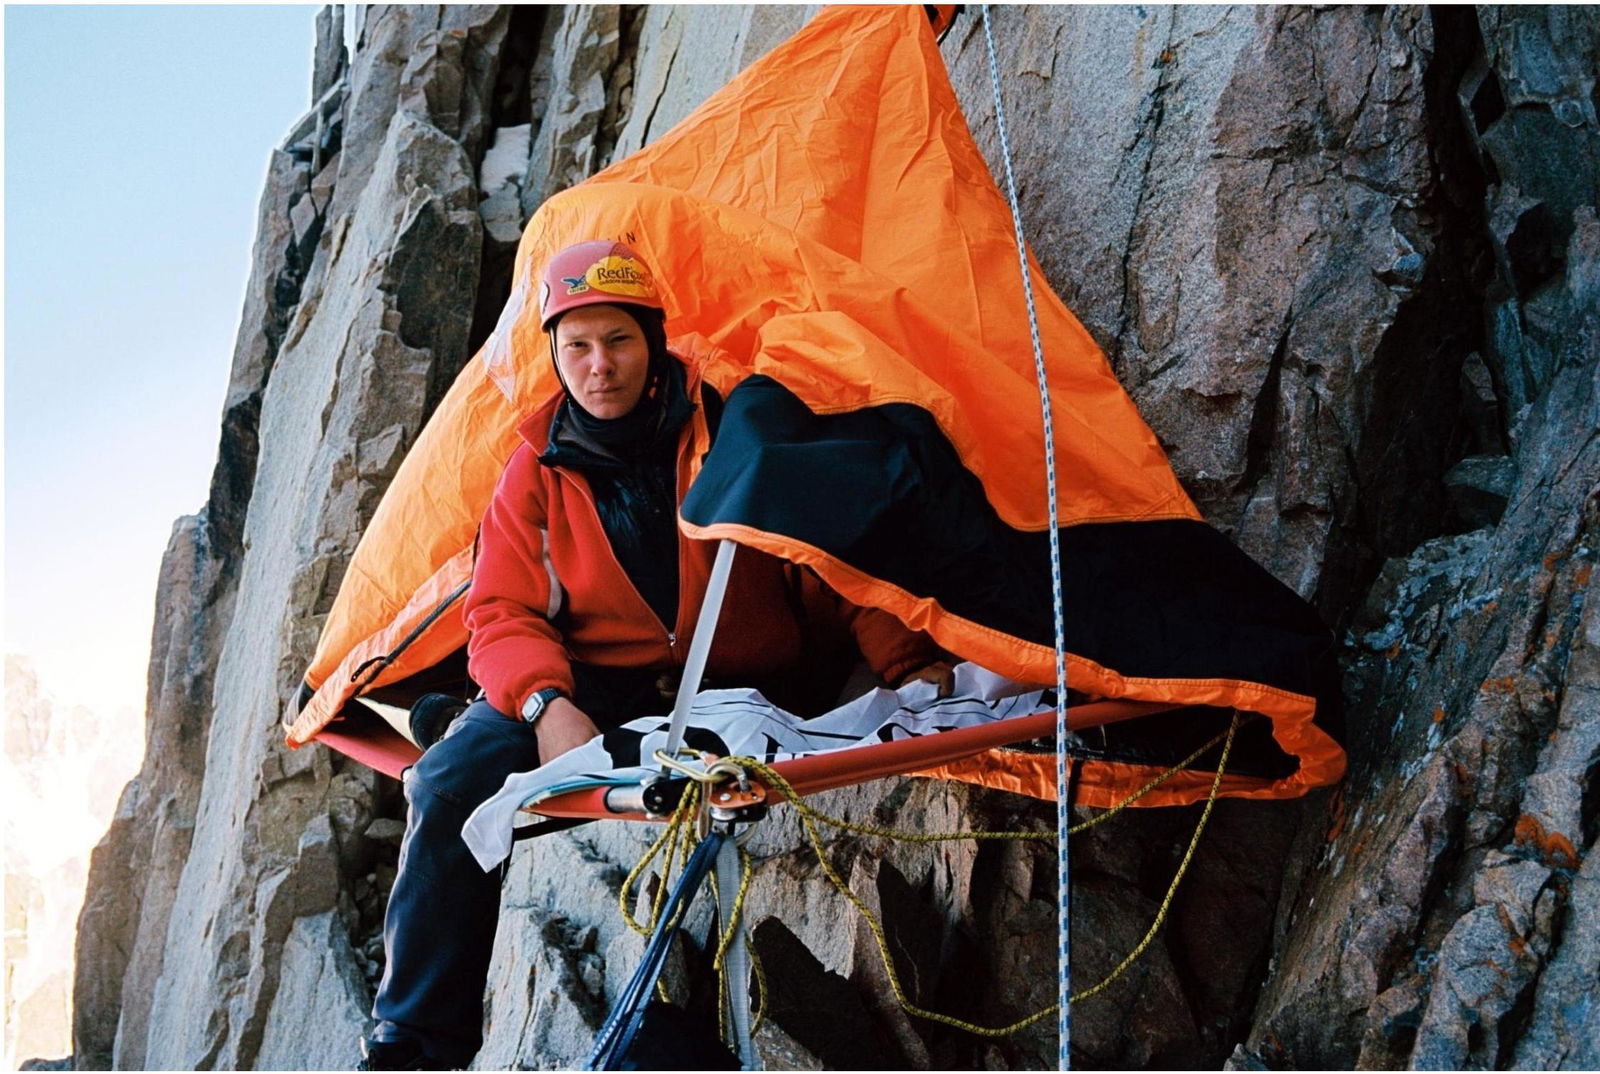
Photo №5. Bivouac on R4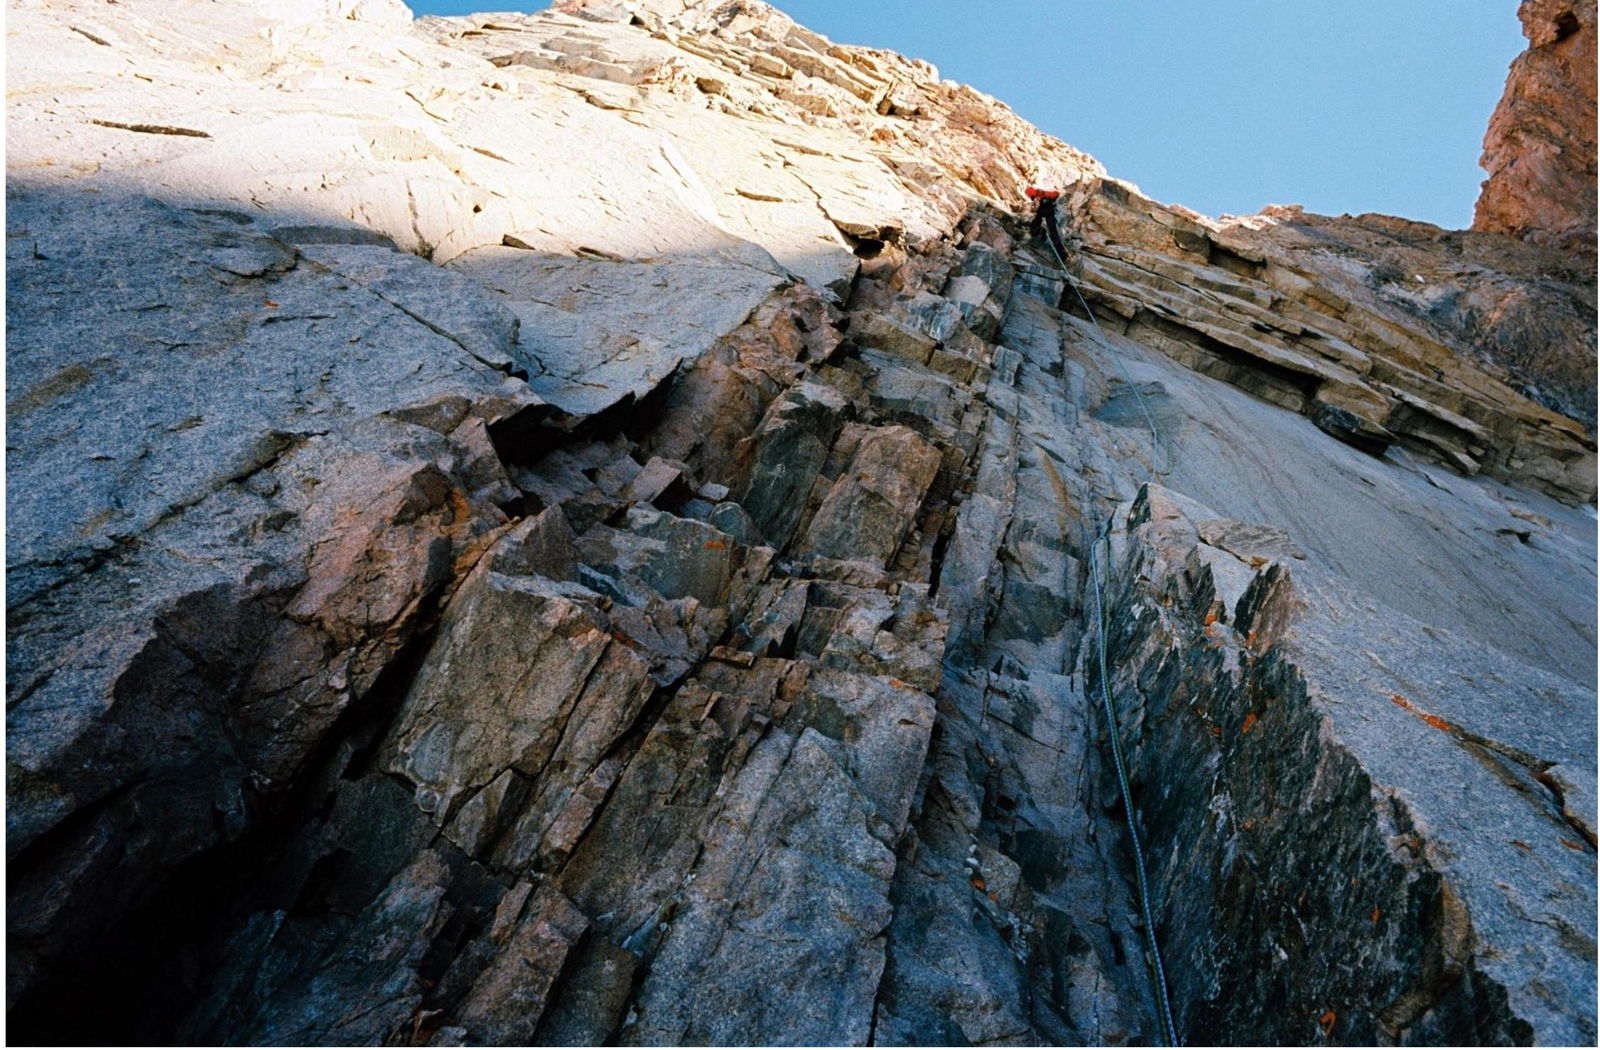
Photo №6. R4–R5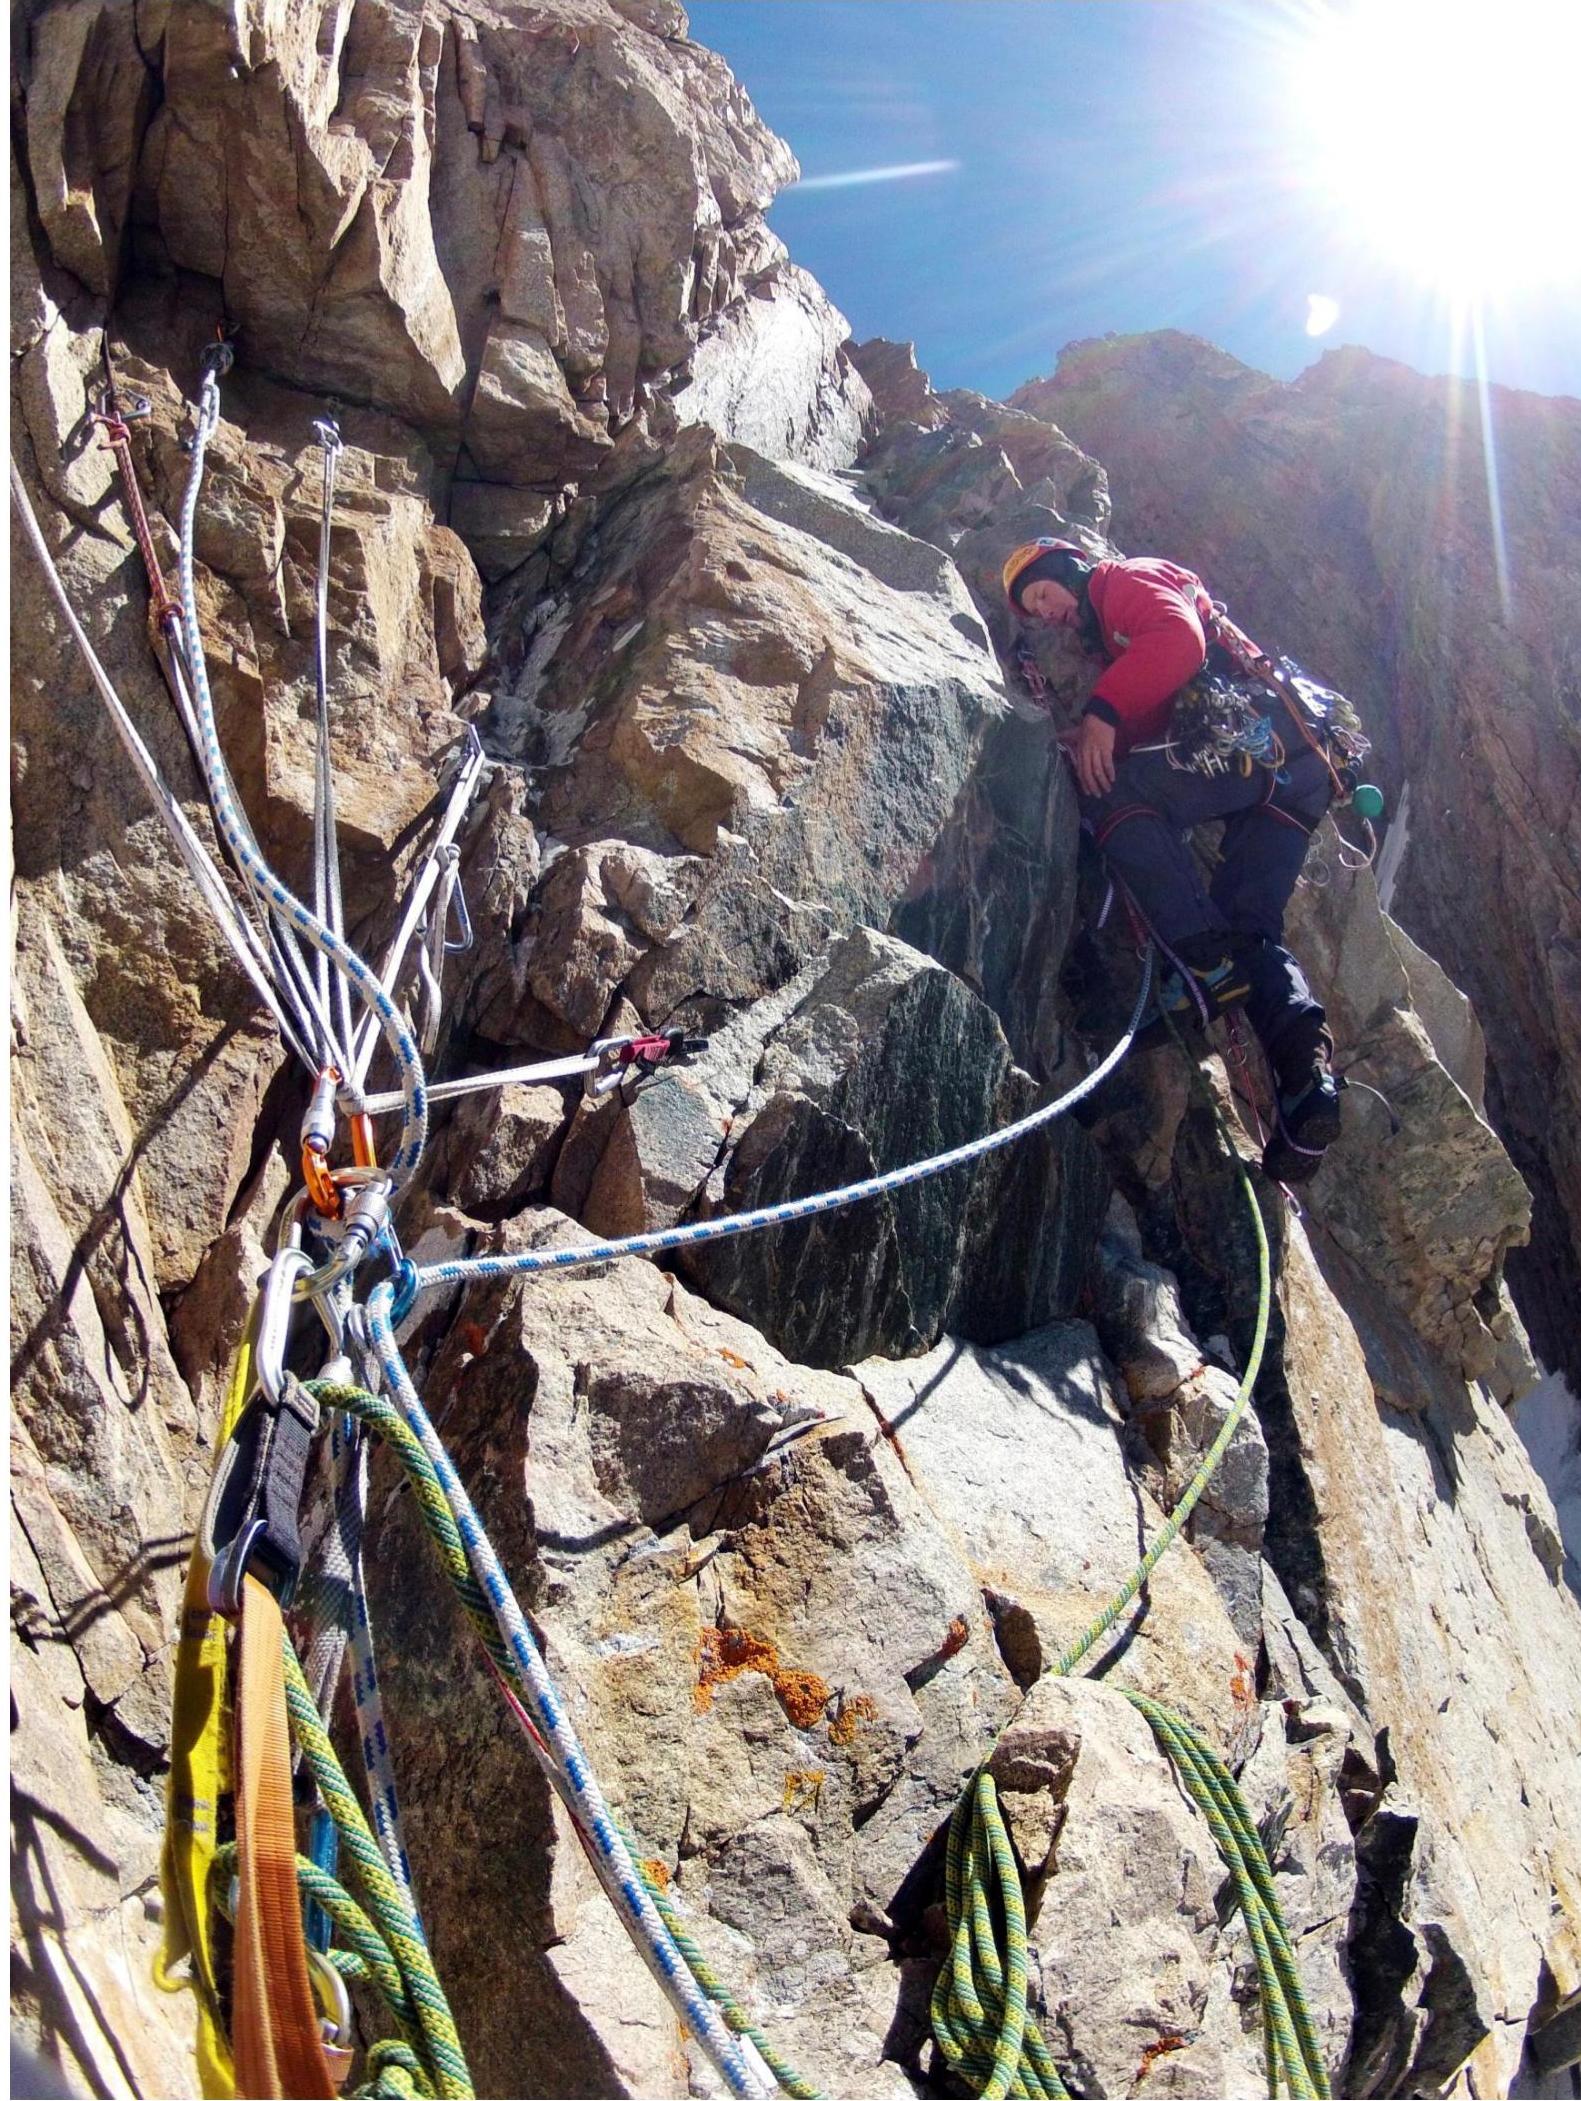
Photo №7. On station R5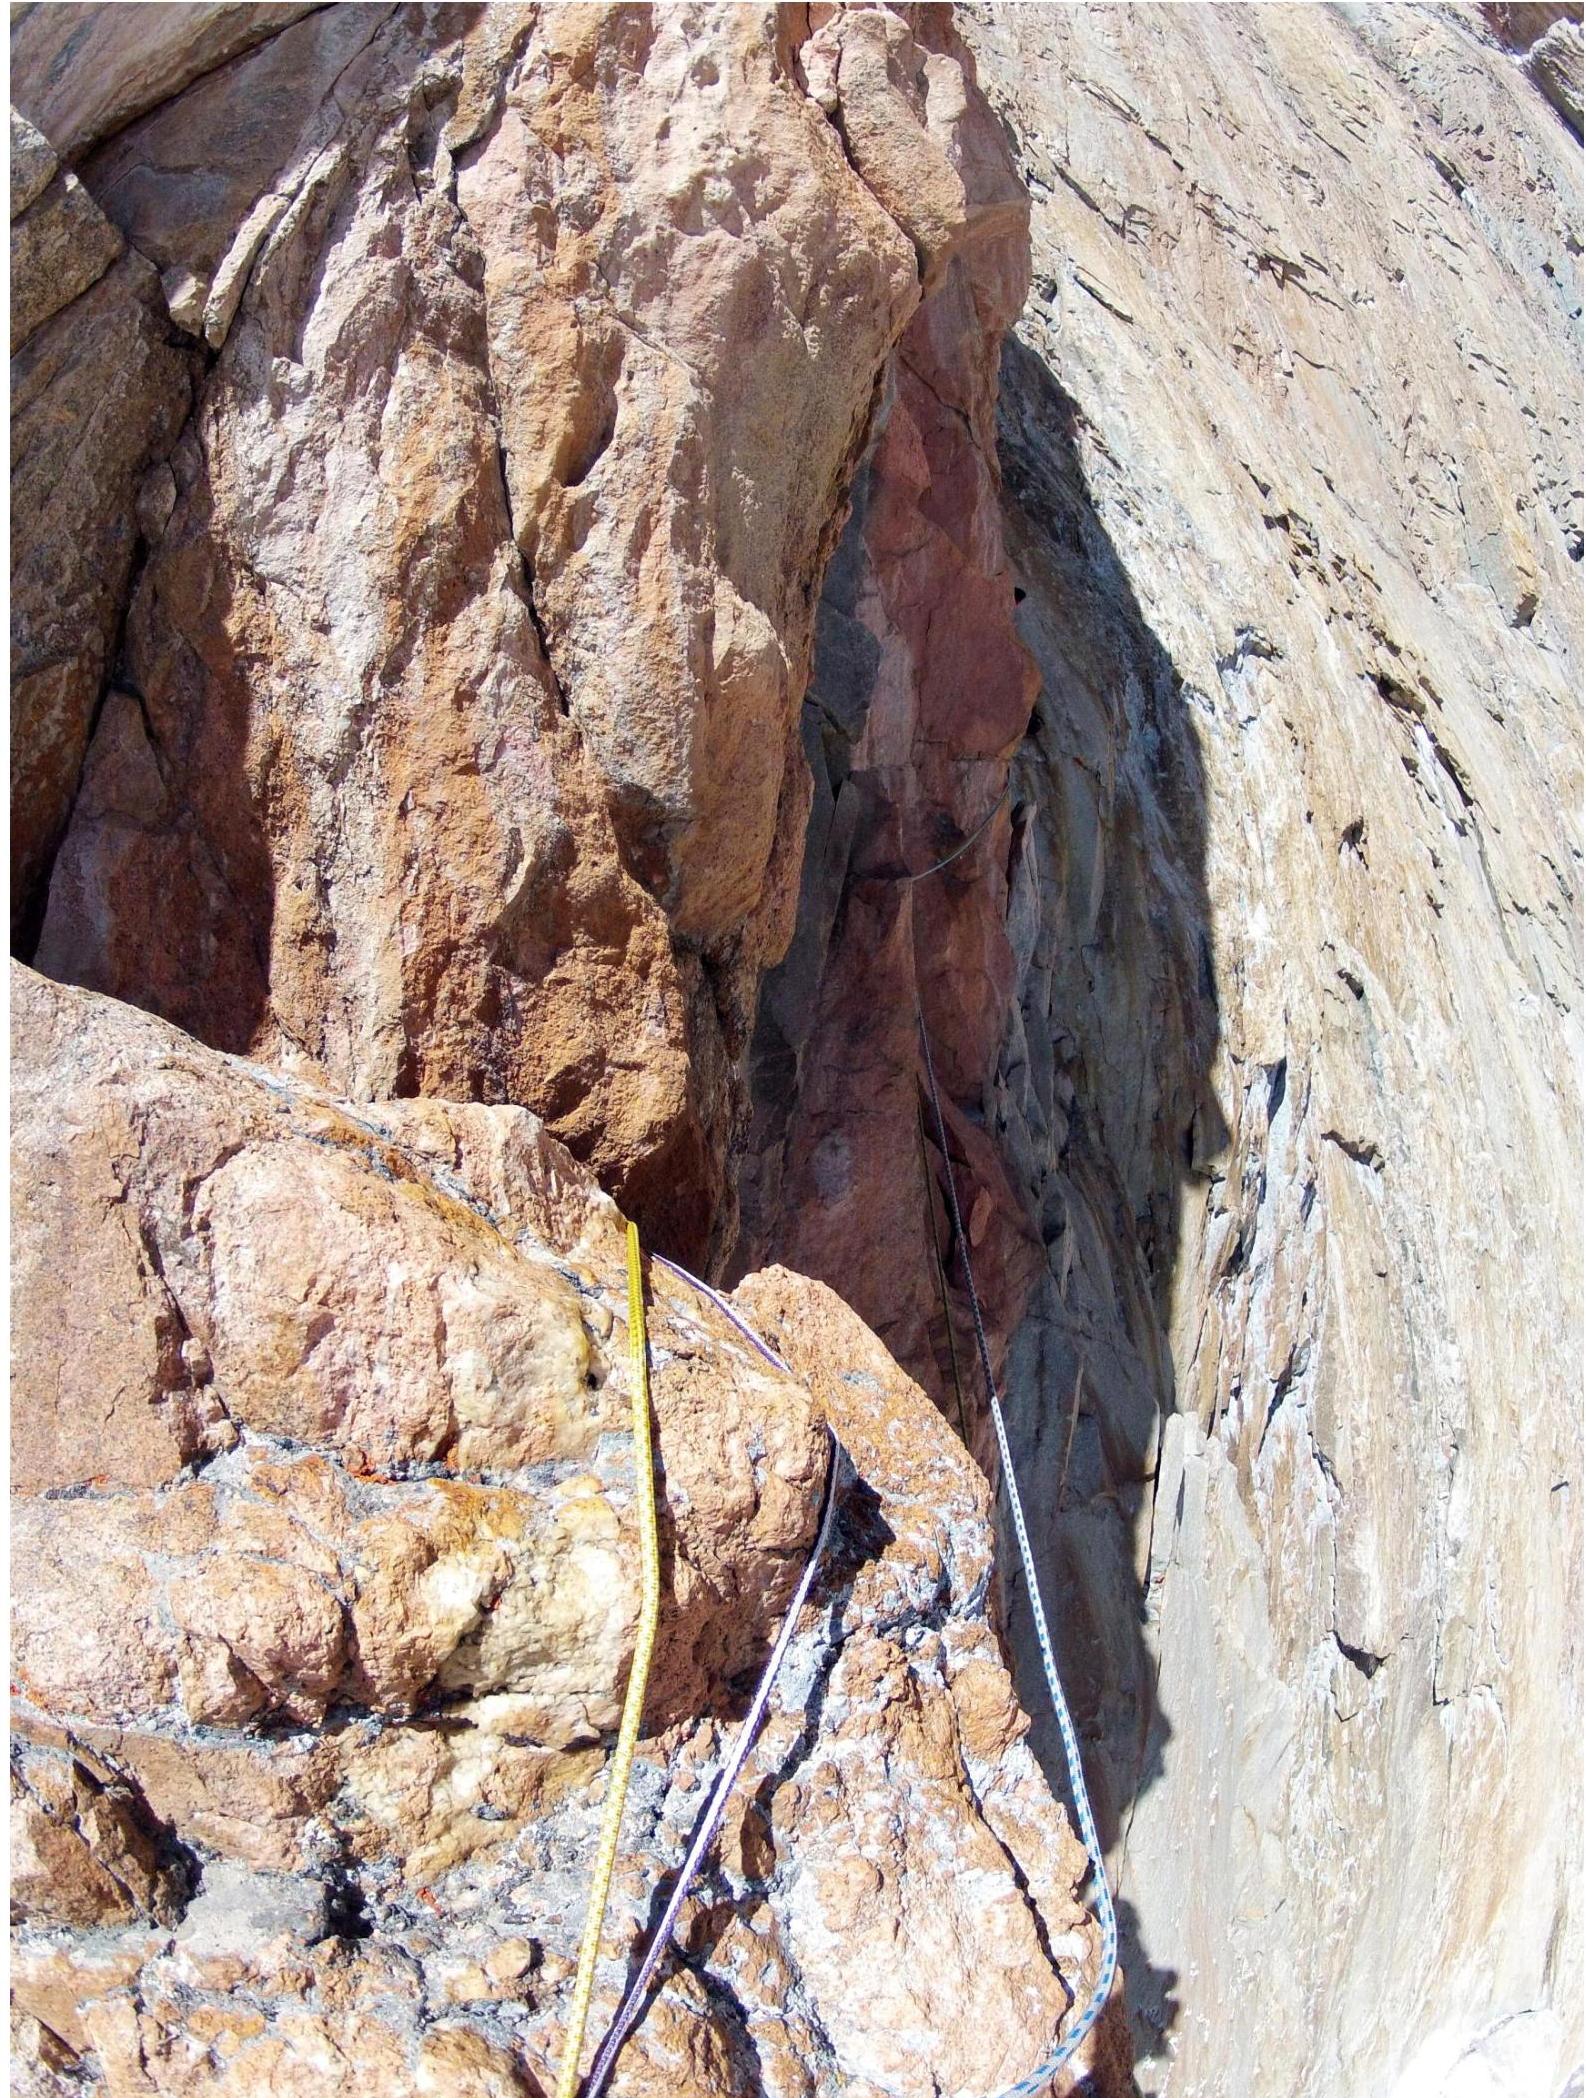
Photo №8. On station R6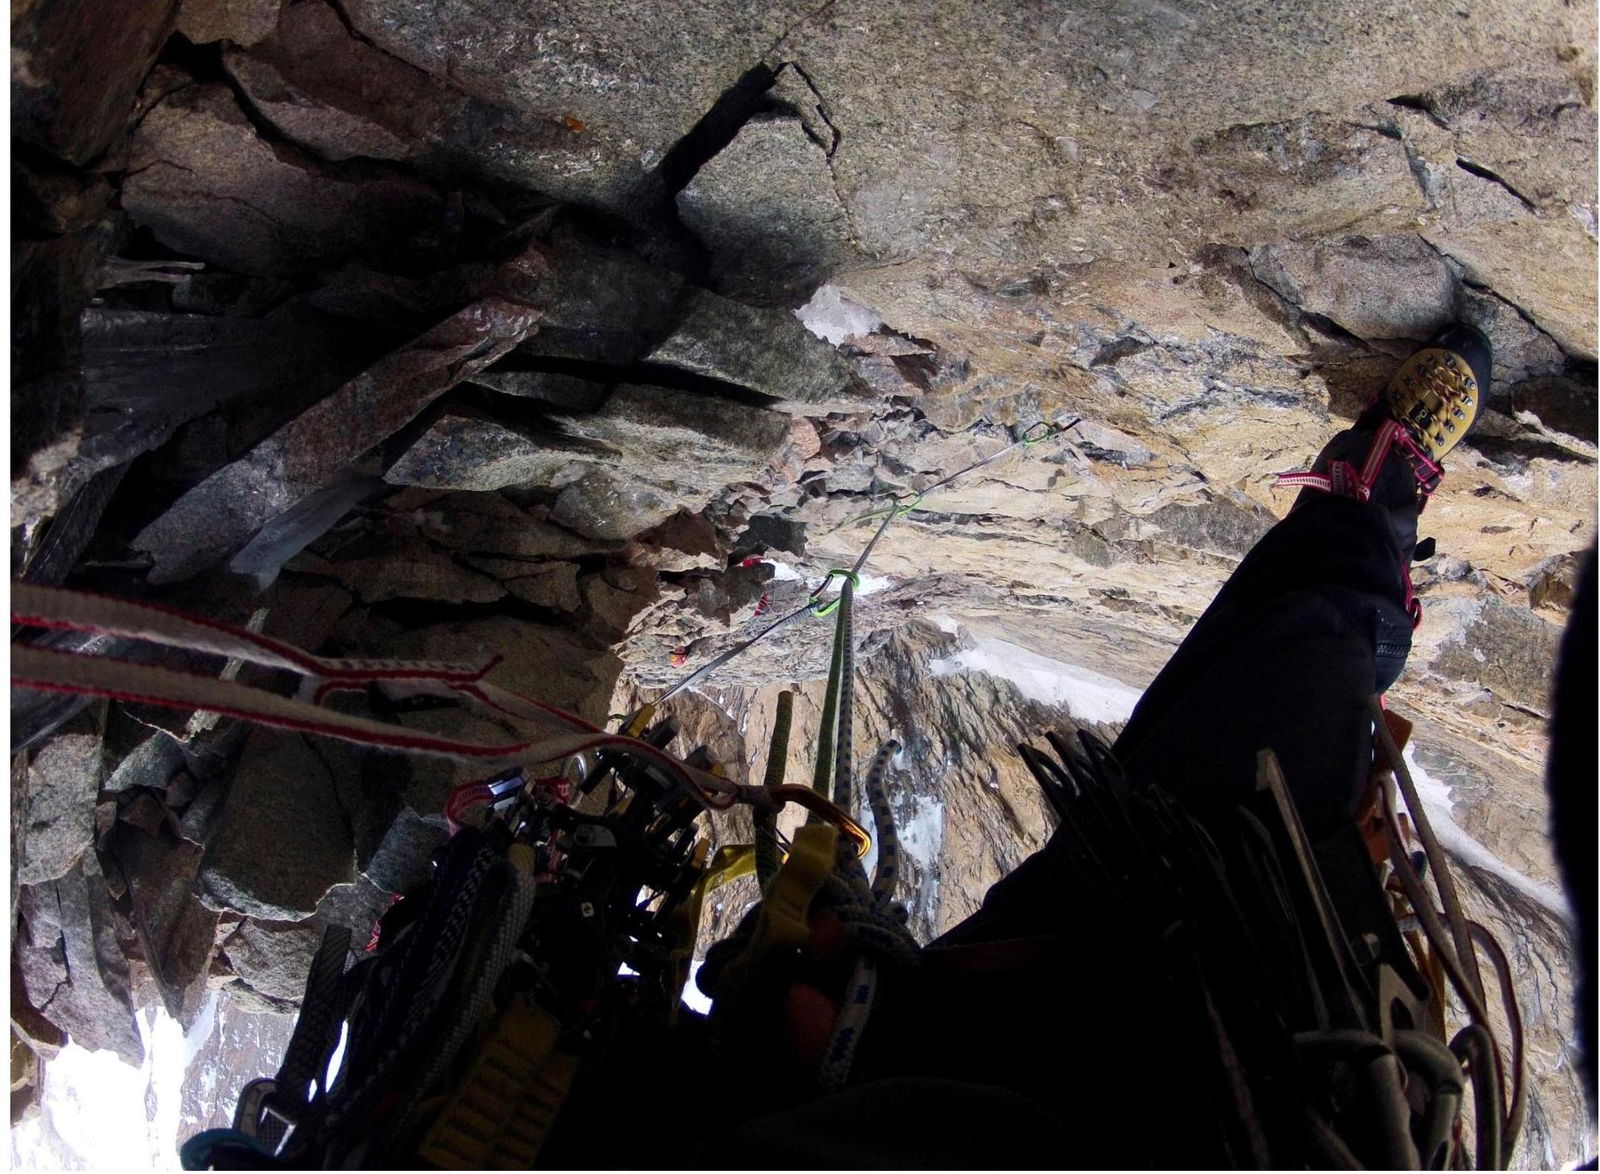
Photo №9. Beginning of section R8–R9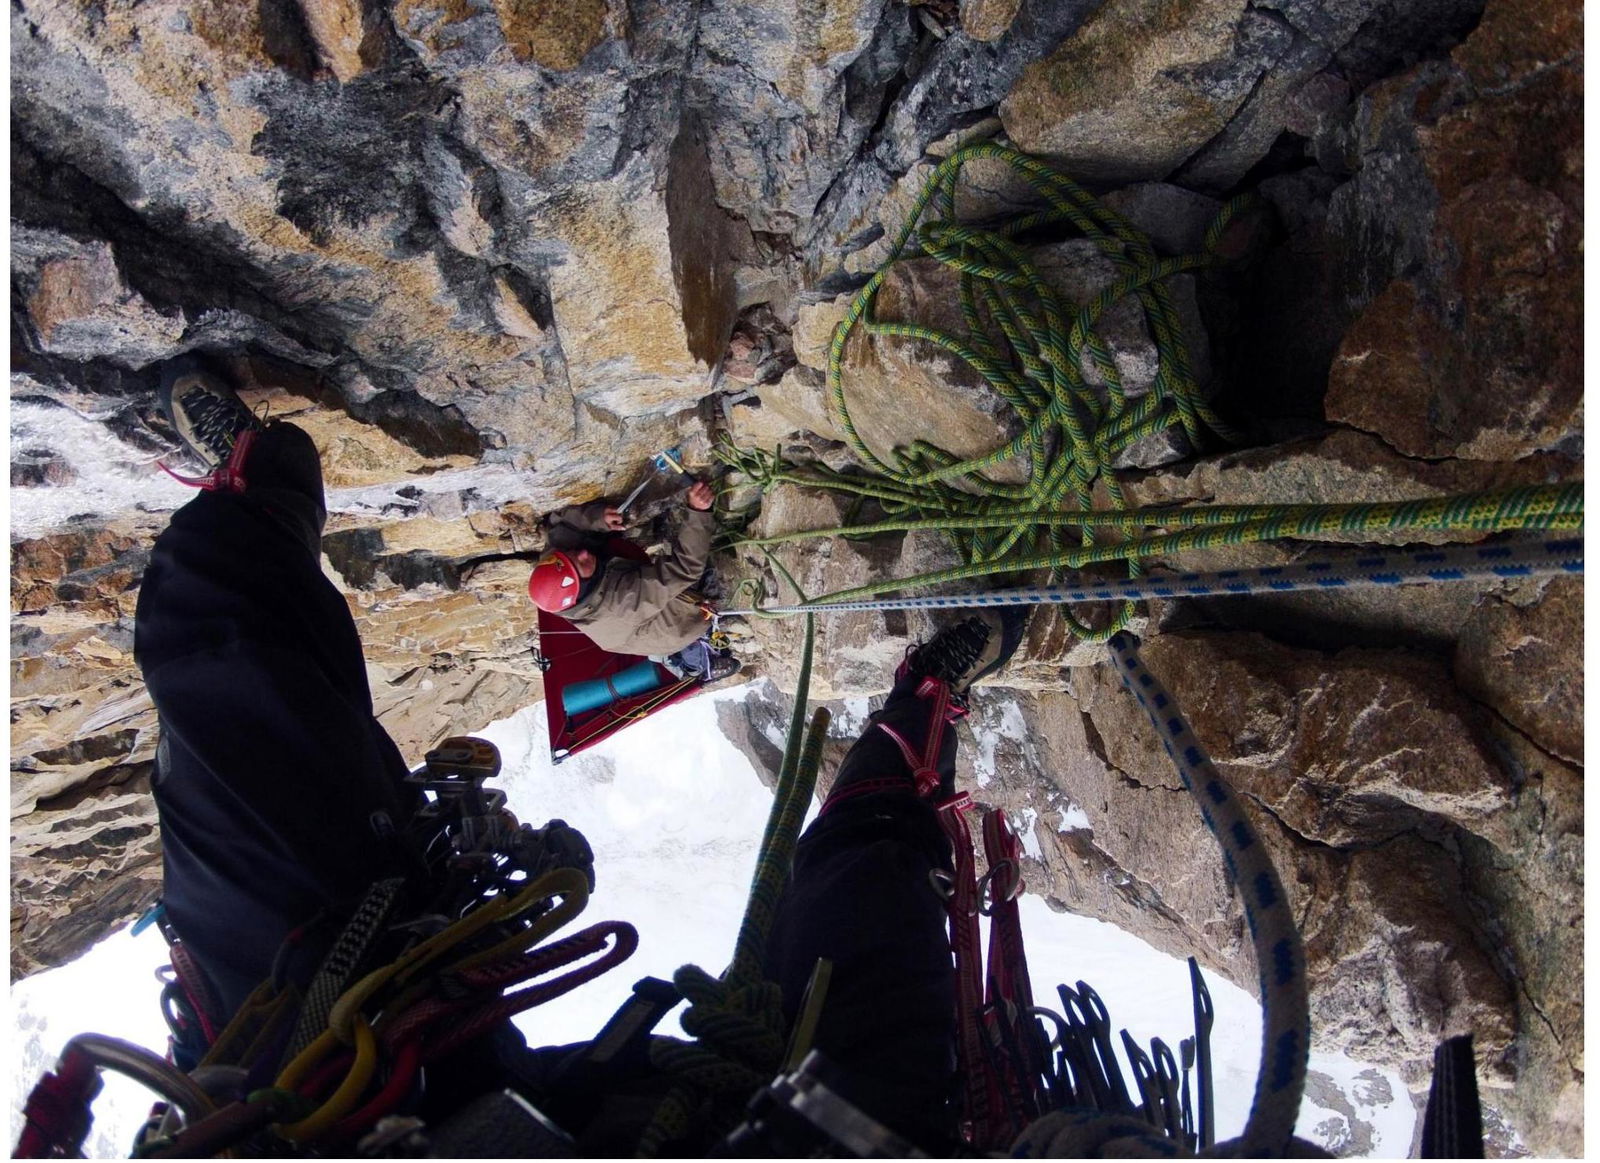
Photo №10. On station R10
Photo №11. On station R13. View of the beginning of section R13–R14
Footnotes
-
*Pitons driven, including for setting up stations, "old" pitons are shown in red ↩