4Б cat. dif., "Kurinnaya Lapochka" (Chicken Leg)
The exit to the cirque above the first belt of rocks is described in route Ch10. Walk along the terrace to the left, under a narrow, clearly visible crack in the slab, stretching from right to left. The crack is located 40–50 m to the left of a large cornice. R1 is set near a tree under the crack.
Climb up the crack to the left and exit onto a small ledge (20 m, 80°, V, small and medium-sized gear).
Then:
- Under the cornice, climb up an inner corner with a convenient crack for 15 m to a ledge.
- Traverse left along the ledge to a tree (VI) — R2.
From the tree:
- Climb 4–5 m up and to the right along the wall.
- Swing right into an inner corner behind a ridge.
Climb complex rocks in the inner corner for 15 m upwards (85°, VA1, small and medium-sized gear), then pass a small overhang and exit into another inner corner.
Climb 25 m up this corner and exit onto a ledge (75°, IV) — R3.
Climb simple rocks to reach the yayla (40 m, 60°, II).
Danger! Chelebi "Kurinnaya Lapochka" 4B.
Mykyta writes on March 19, 2013, 15:23 — "This '4' can be safely called hazardous. Without experience on Crimean '5s', it's not recommended to climb 'Kurinnaya Lapochka'!" — a quote from the guidebook "Alpinistskie marshruty Kryma". Not by chance did I start this article with a warning quote: today, several more exclamation marks can be added to this quote, or even changed to: "Without experience with ITI and Crimean '5s', it's not recommended to climb!" — and add a list of recommended gear:
- ITI (Individual Tactical Equipment)
- Climbing harness
- Helmet
- Rock shoes
- Chalk and chalk bag
- Reliable rope
- Carabiners and quickdraws
- Descender
- Climbing gloves
- Headlamp with spare batteries
- First aid kit
- Water and food supplies
- Map and compass
- Radio or satellite phone
The thing is, some changes have recently occurred on this route. On the R5–R6 section (after the pendulum), a slab finally fell out. Now this section of the route has become significantly more hazardous.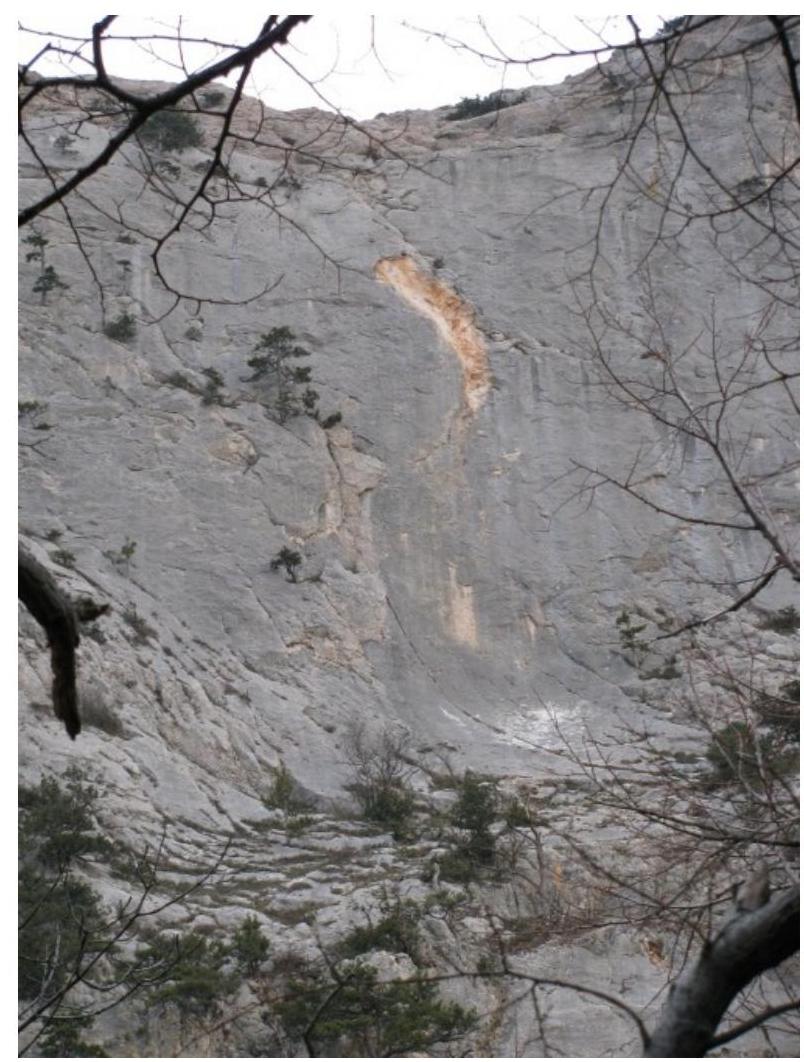
Now, in order. This event slightly affected the approach to the route; now, when approaching the route, one can observe the full force and power of falling stones, or rather, the aftermath. Trees are mown down as if by a chainsaw.
- Trees are mown down as if by a chainsaw.
- Seeing clearly what stones do to trees, it's scary to imagine oneself in the center of the rockfall.
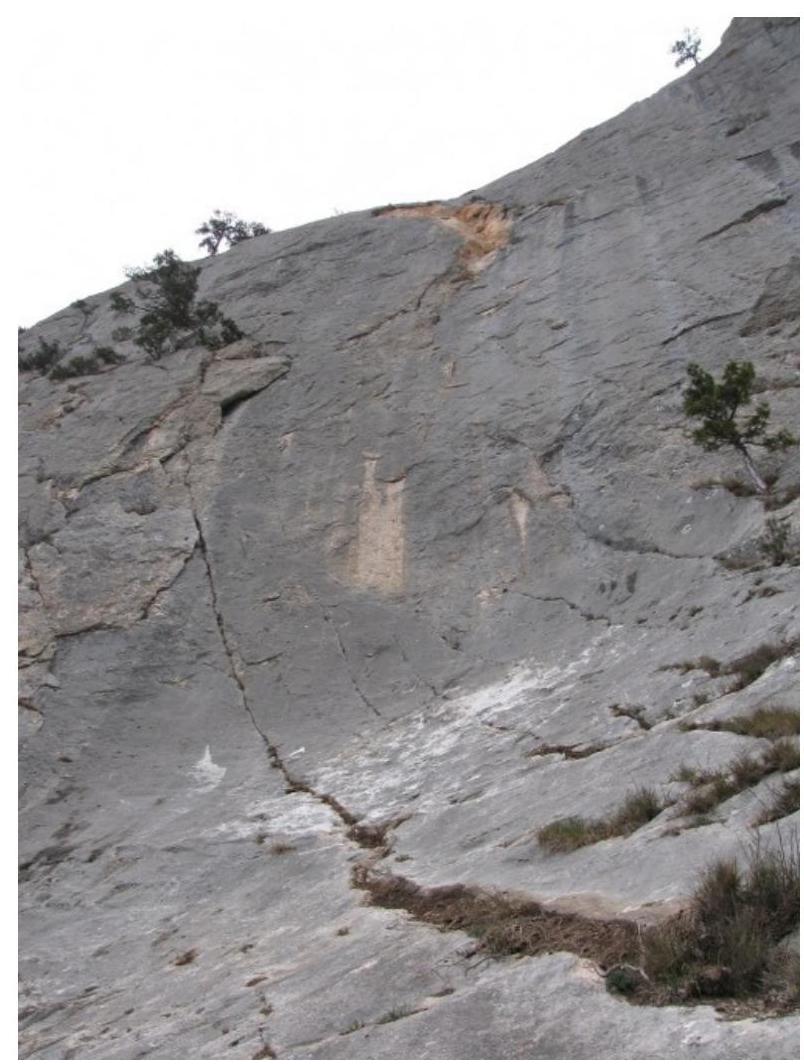
The first two ropes of the route remained absolutely unchanged, and we followed the description without deviation. On the third rope, for safety reasons, we decided to move the R3 station to the side to avoid the line of falling stones, just in case.
A photo from the spot where the station should have been, according to the description. The crack leading to the tree — exactly where the stones were falling — is where the route goes. We decided that going through this crack might be unsafe and traversed 15 m to the left along a huge ledge with easy climbing — we even walked, not climbed. The station is on a large tree, comfortable.
From this point, half a rope is enough, but the climbing difficulty remains the same as on the original route, neither more nor less. The first half of the rope is done with pitons, shвеллерами, and V-shaped anchors, the second half — with gear and friends, a full range of sizes.
Then comes the pendulum. One can climb or swing, especially since there are two pendulum bolts! The next station is on its own anchors, the station spot remained intact, and there were no problems with organization. Suitable gear includes:
- швеллерами (channel-shaped pitons)
- V-shaped anchors
- anchor pitons
Then comes the most interesting part. The next rope goes through a crack in a formed rusty corner. From the very beginning of the section, I started using ladders. As a result, we got 30 m of not very difficult ITI with short pitches literally in one move (PS I'm a weak climber).
The problem was as follows:
- This section is VERY dirty: many stones that haven't fallen out yet, a lot of dirt hiding the crack. To hammer a piton into the crack, I had to dig it out first.
- My partner below got hit with everything that fell — all the stones and dirt flew straight at him.
- The rock itself was very soft and rotten: I could easily break off handholds with my hands; pitons didn't hold well when hammered.
- V-shaped anchors instead of getting stuck in the crack simply cut through the rock.
- All the pitons I hammered could only be used as support, not as intermediate protection points.
- According to my partner, pitons flew out with the second jerk.
Options for passage:
-
It's possible to climb the section by going left along the corner — it's more feasible, but for that, you need:
- To clean the rocks from dirt thoroughly.
- To take into account that all holds are passive and sloping, with a lot of dirt on them.
- Dirt doesn't help with proper friction between rock shoes and rock.
-
An attempt to go right from the corner:
- There's a nice flake there that looks like easy climbing.
- However, this flake is like a stack of bricks, and the whole wall "sways" under a person's weight.
- We had to return to the corner.
Technical details:
- The length of the complex section going through the rusty corner is 25–30 m.
- Suitable gear for passage includes: pitons, anchors, швеллерами, V-shaped anchors (especially V-shaped anchors).
- Then comes a section that remained unchanged: climbing becomes significantly easier, about 15–20 m.
- On this section, placement of gear is excellent.
- The station is on a small ledge, on its own anchors; gear placement is good.
The last rope is easy, follows the description. Be careful on this route and have a successful ascent!


