Paraghelmen — 7
List of routes to the summit Paraghelmen:
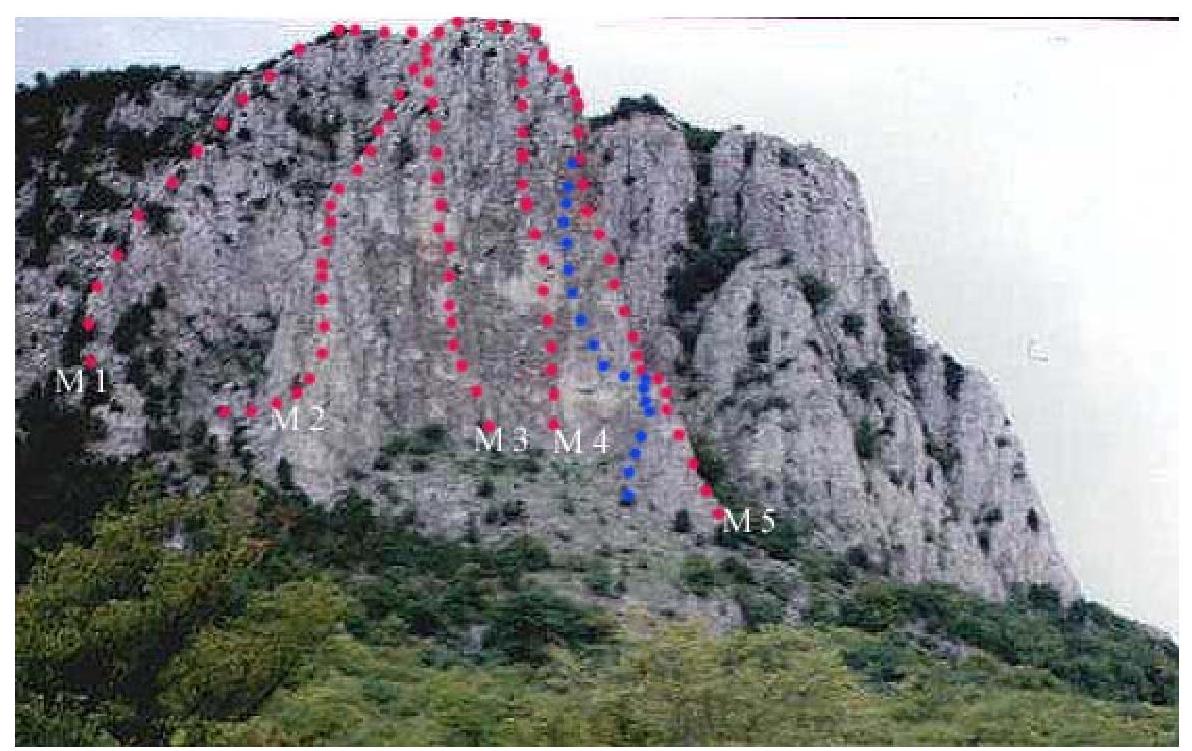
- Paraghelmen via the right edge of the western part of the massif and the spur 1B, II
- Paraghelmen via the left spur of the central wall (SW edge) 2A, III, A1
- Paraghelmen via the center of the wall and SW edge 3B, V, A1
- Paraghelmen via the right edge of the wall 4B
- Paraghelmen via the right spur of the central wall (SE edge) 2B
variant: Paraghelmen via SE edge and the center of the wall 3B, V
Route 5
2B
The route passes along the right (SE) spur of the central wall of Paraghelmen.
There are two variants for the start of the route:
- from the base of the spur (60 m),
- via the cracks in the right part of the wall (40 m).
Both variants lead to the shoulder — a large horizontal ledge — R1. From the shoulder, 5–10 m along the right side of the spur and a small wall to approach under the cornice, which is passed on the right part. Then move along the inner corner to a small narrow ledge with a bollard — R2. From the ledge, move towards the chimney with a cork, and a stance behind it on the ledge.
Through the system of cracks, corners, and small difficult walls — exit to the pre-summit tower. From it, through a pass (!) 60 m to the yayla. The route is slightly stronger than via the left spur.
Time of passage: 2–3 hours. Equipment:
- chocks
- 5–8 quickdraws
- slings for blocking pitons.