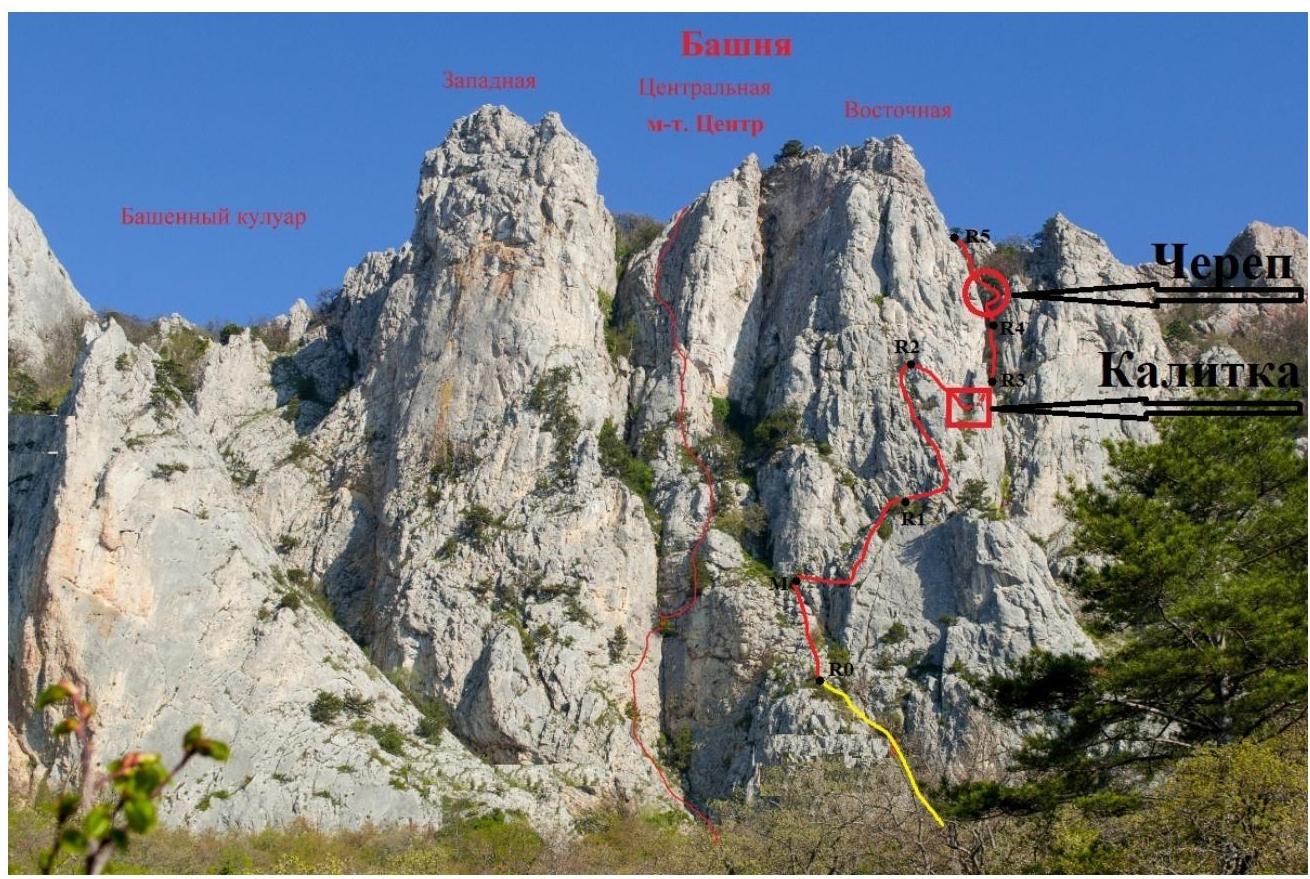
Cherep. 1B.
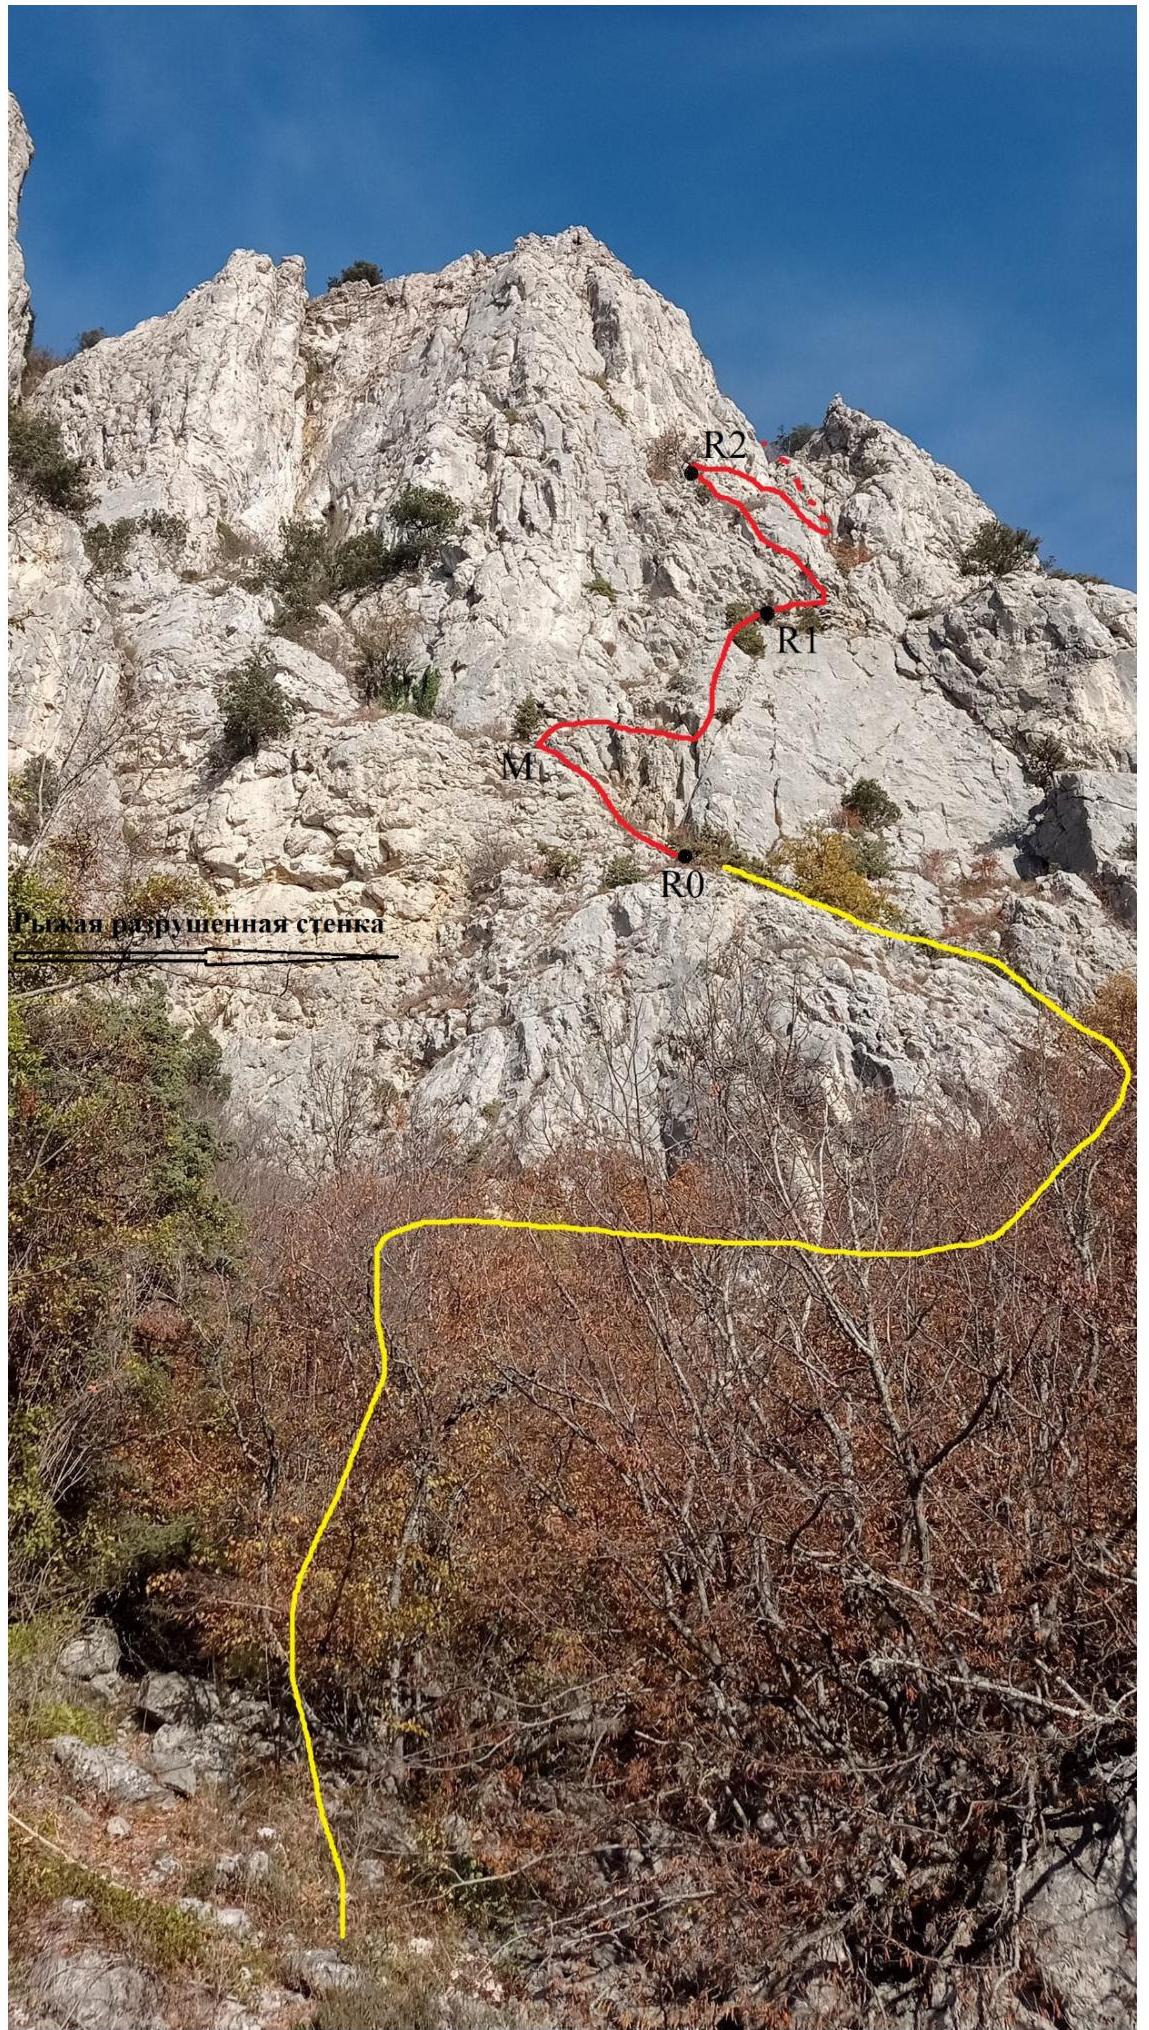
Follow the trail to the clearing with former mountaineering campsites (scattered with large stones). From the clearing, follow a faint trail towards the rocky scree. From the stones near the river, a rusty, crumbling wall is visible; move in its direction with no clear trail.
Approach the rusty, crumbling wall (there's no need to climb into the couloir above it) and move right along it for 30–40 m. A vegetation-filled couloir will appear on the left:
- Put on your harnesses and gear before entering the couloir.
- Move up the couloir through easy rock climbing, with some loose rocks.
- After about 30–40 m, set up station R0 on one of the trees, preferably the left juniper.
From R0, you'll see a smoothed wall on the right; R1 is located on a convenient ledge above it. To get to R1 from R0, continue up the couloir onto a crumbling ledge towards a sturdy juniper, marked "М" on the diagram (not to the last tree on the ledge, as some descriptions suggest). From the juniper, move right and you'll see the path to the next trees in the direction of the crumbling rusty corner. Belay from the juniper, lengthen the quickdraw significantly, and move up to the right. Avoid climbing into the rusty, crumbling corner; instead, belay in a crack on the left wall, make a 1 m traverse to the right, and then move up to the ledge with trees. The station is on two new bolted anchors. The rope is rockfall-prone; be cautious. For larger groups, consider setting up an intermediate station on the juniper to avoid being hit by rocks. Climbing grade: 2–3.
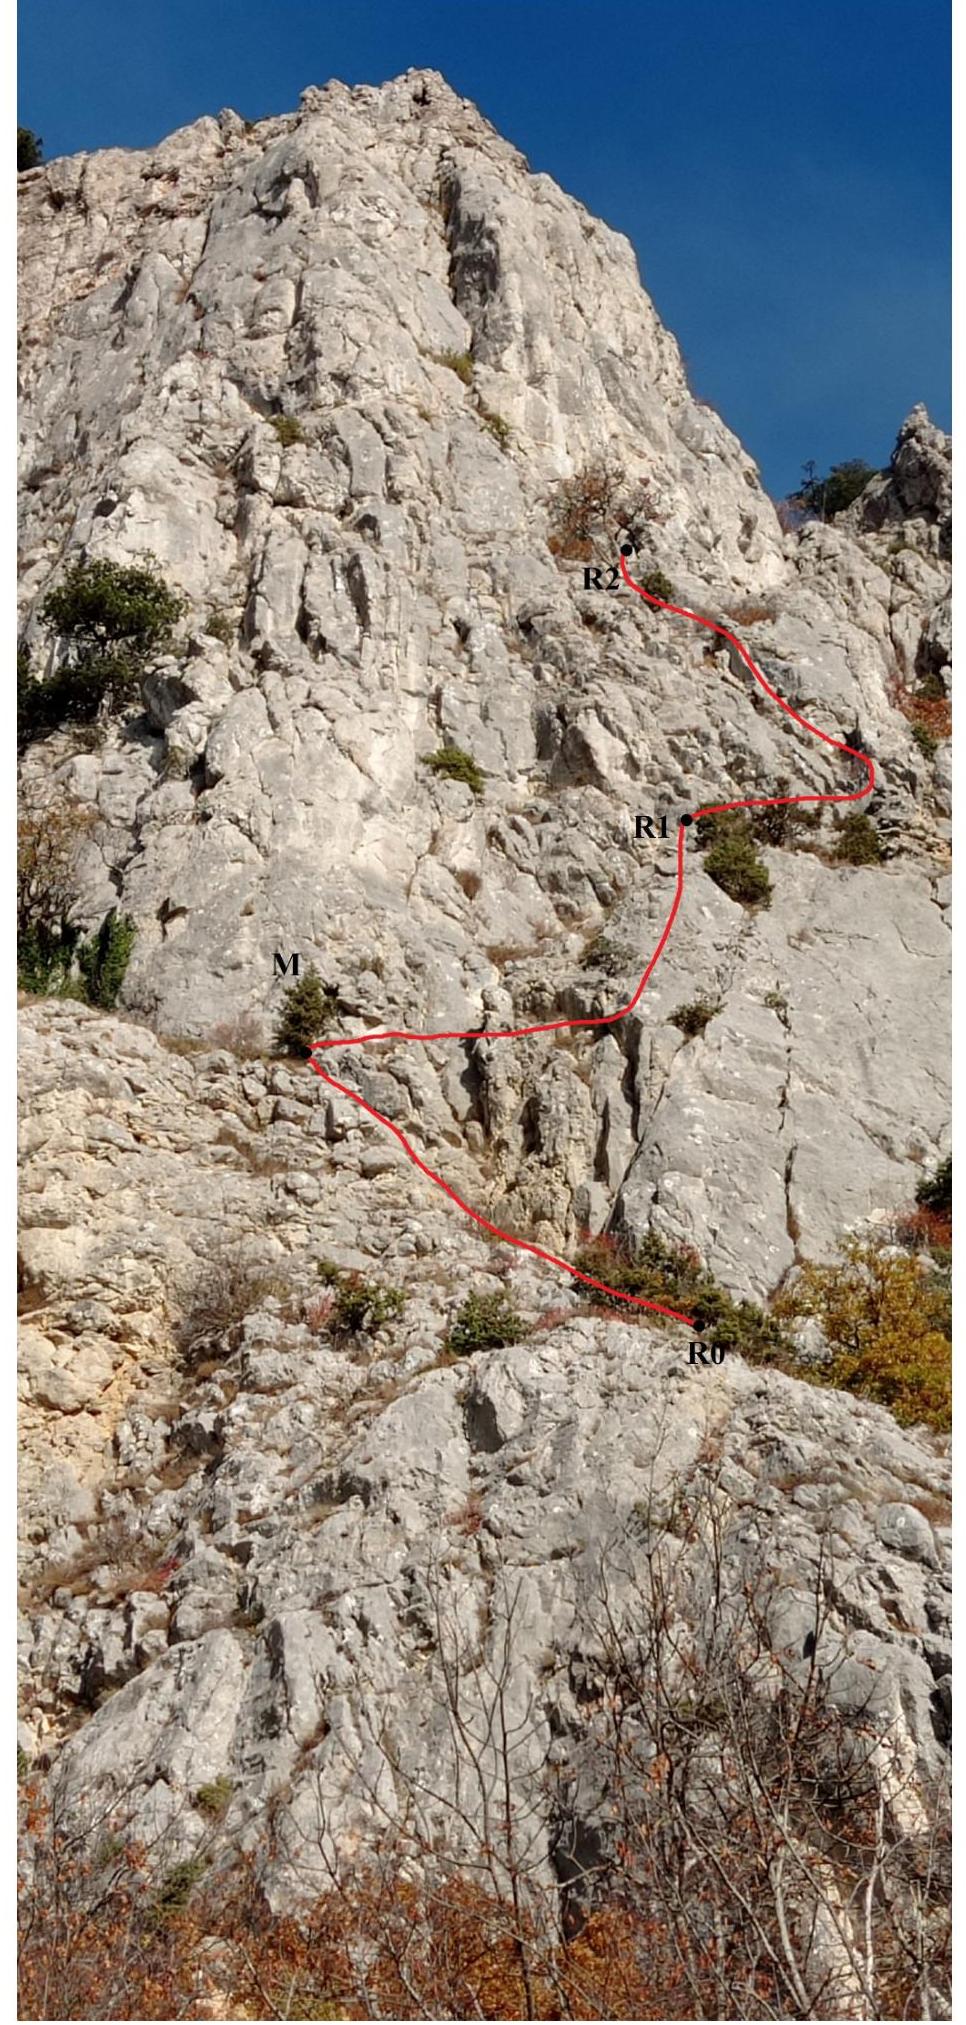 To get to R2 from R1, move 5 m to the right, climb onto the ridge, and follow it, veering slightly left, to a small ledge with a large oak tree visible from below. Avoid climbing directly up from the station. The station is above the oak tree on 2 new bolts. Climbing grade: 3–2.
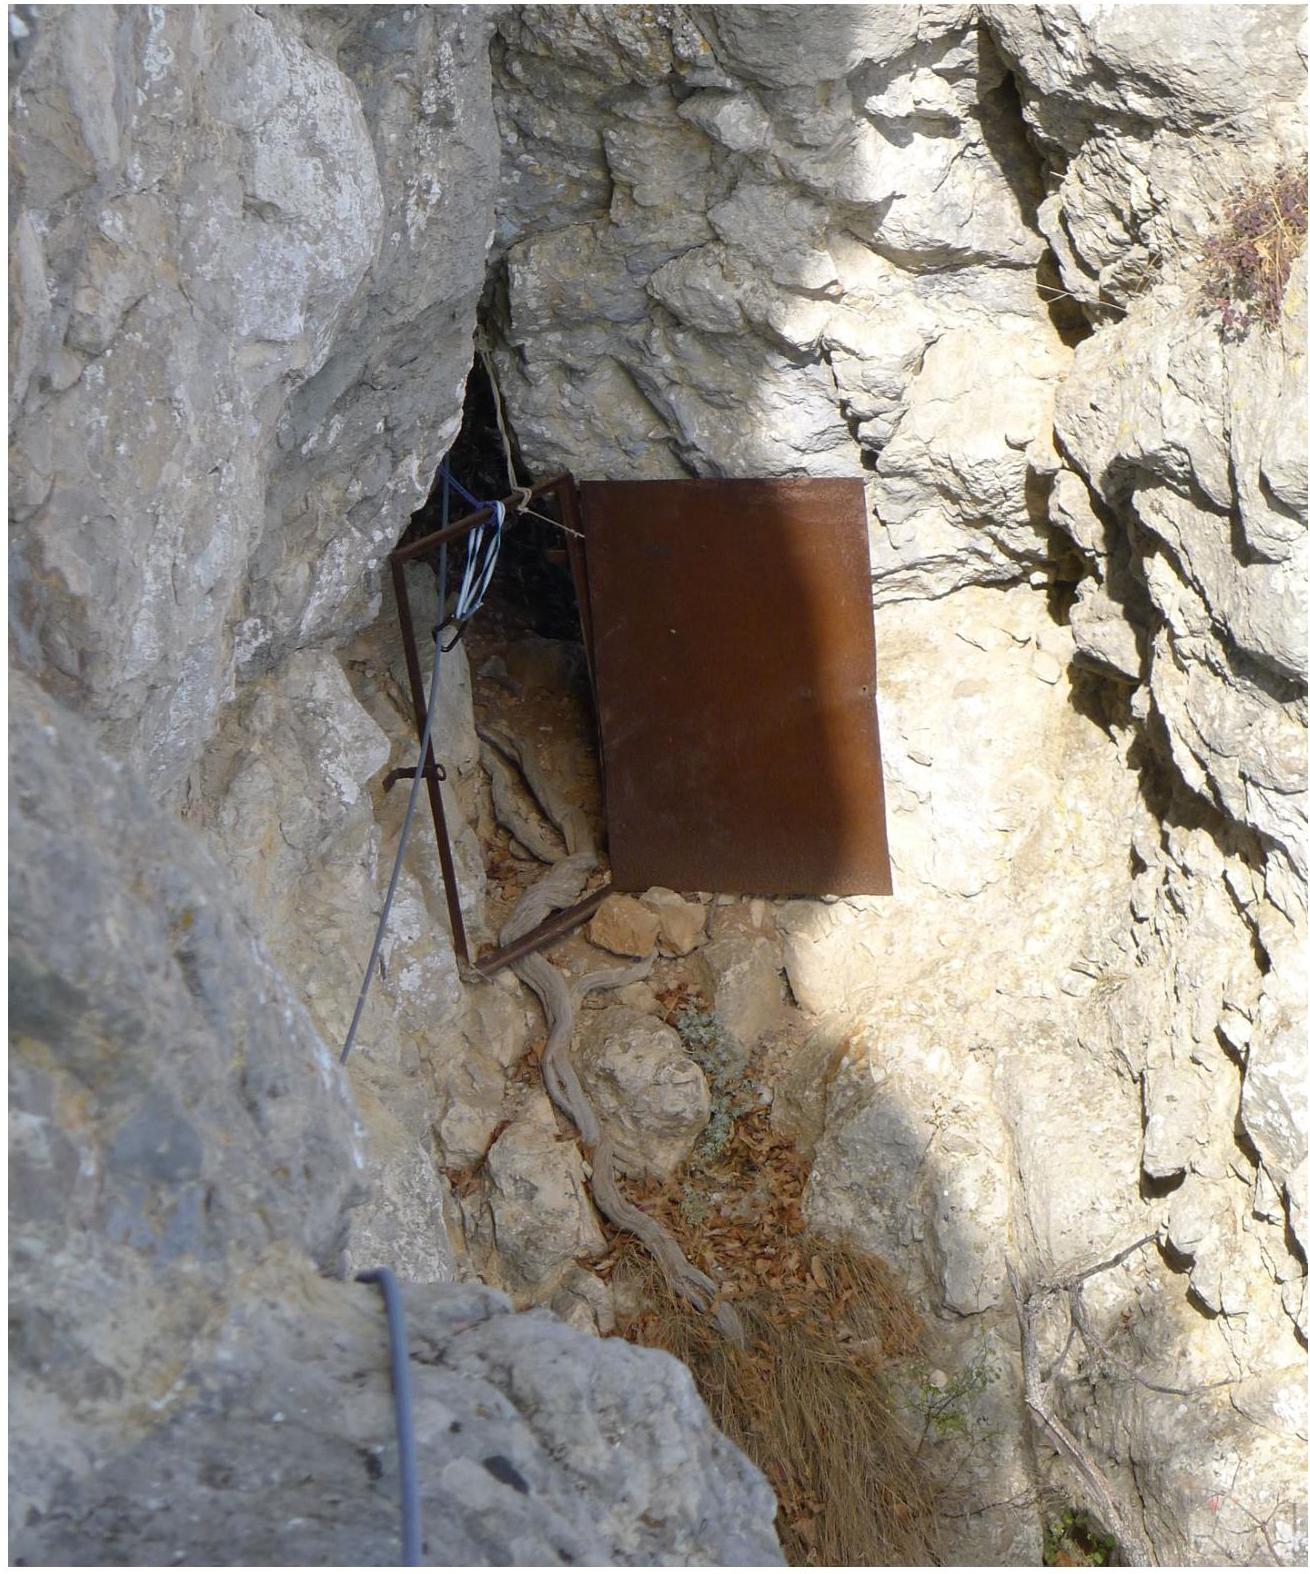
To get to R3 from R2, move right past the massive "hourglass" formation and around the corner. After passing the "hourglass," avoid descending into the couloir; instead, traverse left along the small wall, with a slight descent towards the iron door.
Along the way, just after the descent, you'll encounter a rock anchor. The second climber will find this section more challenging than the first.
The iron door is secured with a nut and a rock anchor. Pass through the door into the "dungeon" and exit through the hole into the couloir. Walk to the rock bridge and cross it.
This is the key section of this pitch:
- There are limited options for belaying.
- The holds are good and reliable.
- Climbing grade: 3+.
After crossing the bridge, you'll see a poor-quality tree with roots on the left. You can set up a makeshift station on the tree and its roots or continue to the grotto, where there are sturdy roots, but you won't be able to hear each other without a radio.
To get to R4 from R3, move towards the grotto and pass through the hole in its ceiling. However, this is quite challenging... At 74 kg, I found it very difficult, had to remove all my gear and hang it from my feet. With a backpack, it's impossible to pass through.
The grotto can be bypassed on the right, but the climbing is challenging, and there are limited options for protection. If you have team members weighing 85+ kg, you'll likely need to improvise with re-roping and throwing the rope into the corner of the wall on the right side of the grotto.
The R4 station, located just after passing through the hole on a sturdy tree in a convenient spot, allows you to calmly address any issues, unless someone gets stuck... Climbing grade: 2+ overall.
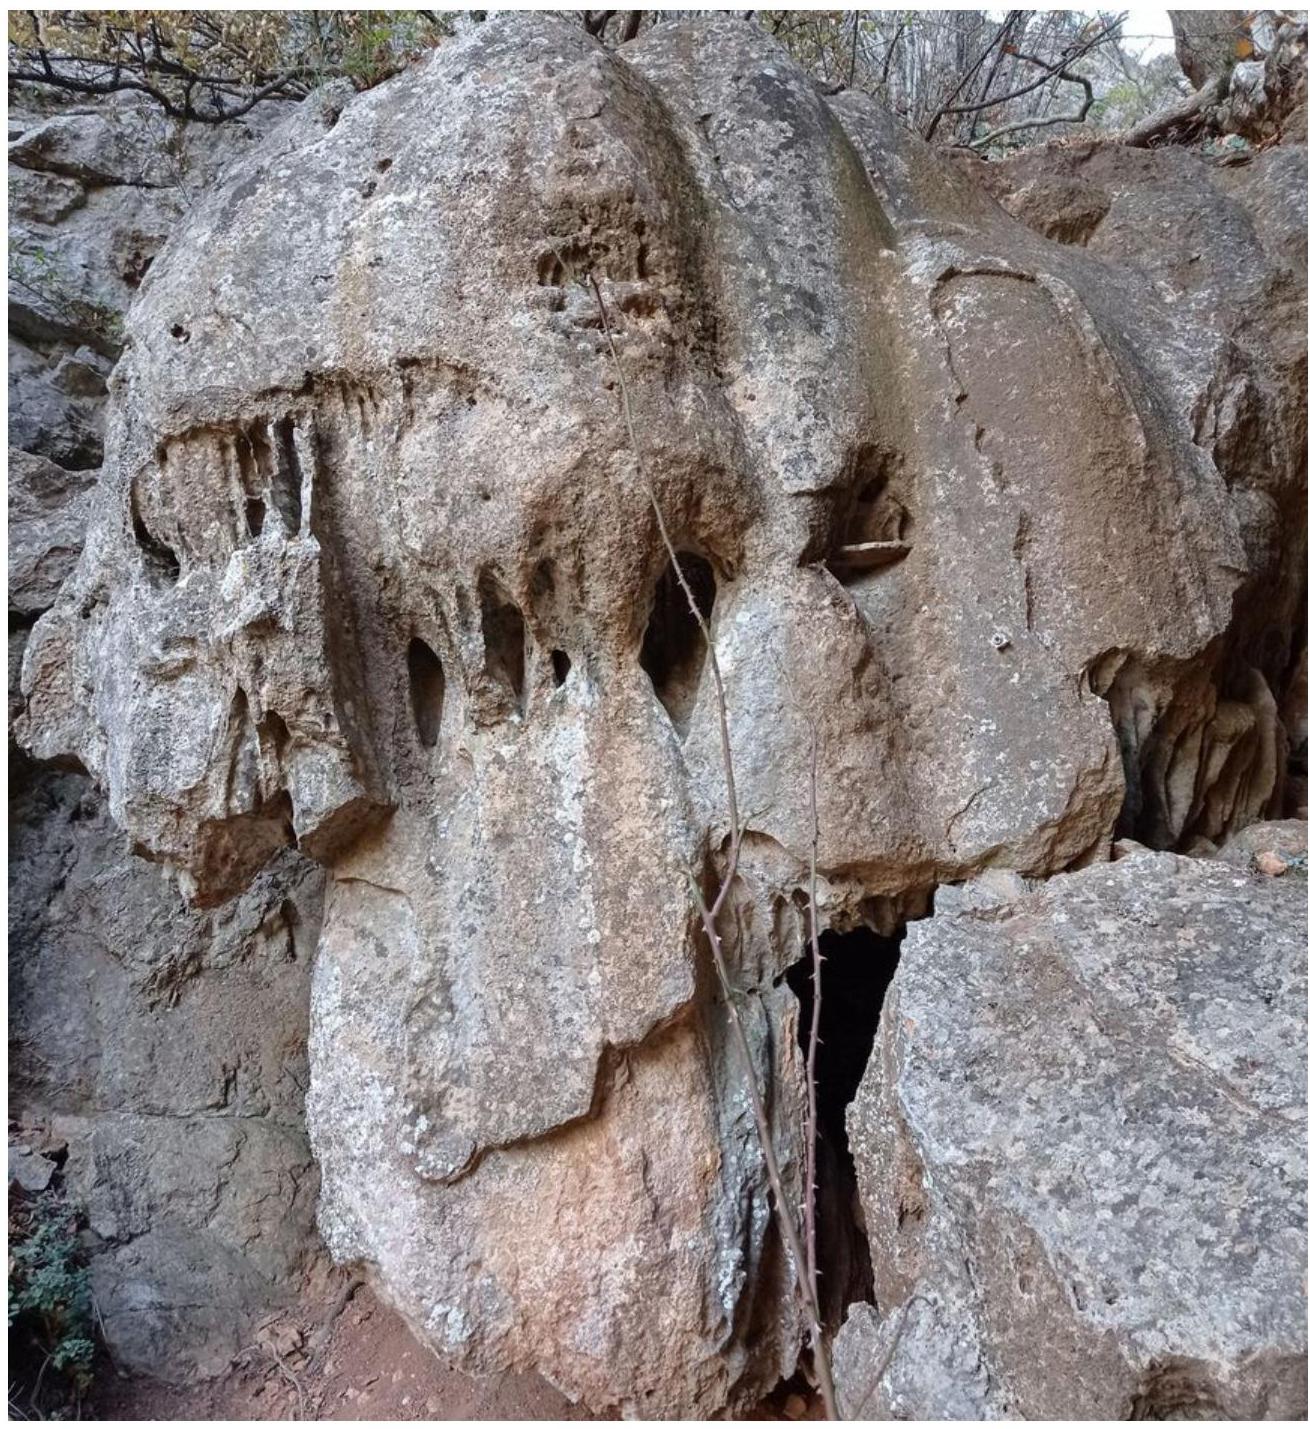
If you've successfully overcome the previous obstacle, you'll see the "Cherep" (Skull) in all its glory. Move towards it and bypass it on the right. The exit onto the "Cherep" is awkward, but:
- there's a good crack on the right for cams;
- there are good handholds on top of the "Cherep";
- there's a bolt on the "Cherep".
Given the presence of the crack on the right, I believe it was sacrilegious to bolt it.
Continue up the scree-filled couloir to the yayla (alpine meadow) and set up the final station on a tree or belay through an anchor point.
To descend from the route, follow the trail slightly west. The start of the descent into the Bashi (Tower) couloir is marked with a cairn. The trail in the couloir is not entirely obvious. Be cautious and attentive to avoid rockfall.


