Russian Championship in Mountaineering, high-altitude technical class. 2018
Report
of the Sverdlovsk region team on the ascent via the right part of the northern wall to the peak Parandas, 4640 m (Fan Mountains). 6A route Arkhipov.
July 27-29, 2018
Yekaterinburg, 2018
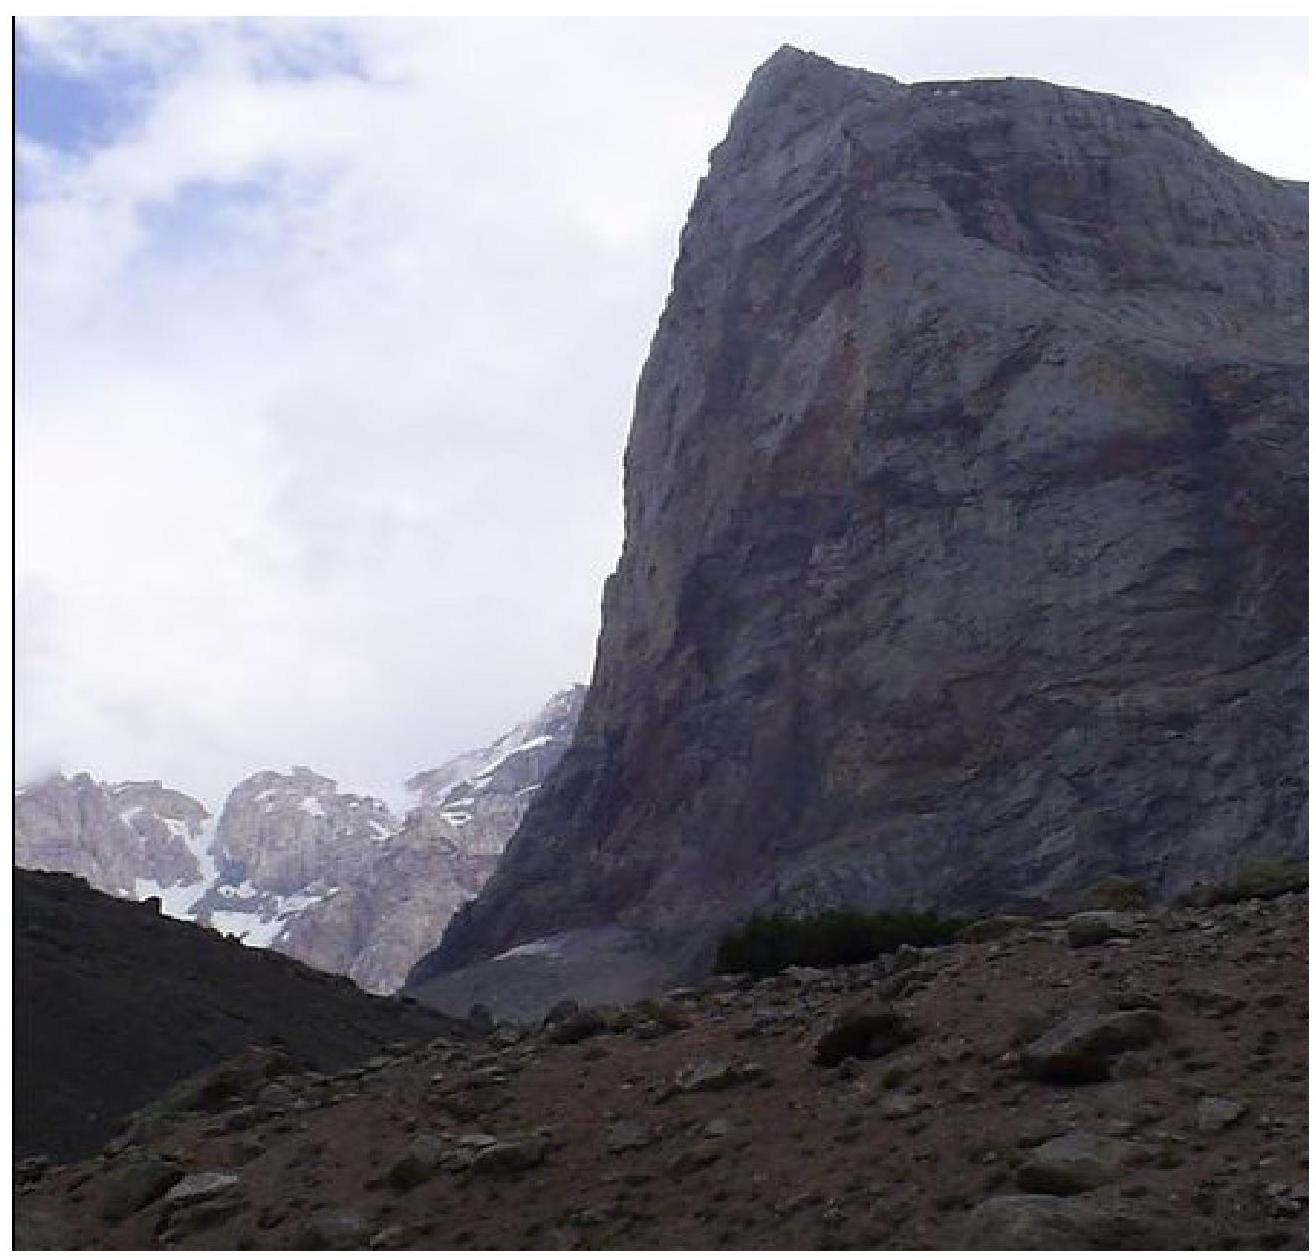
General photo of the northern wall of peak Parandas.
Route Passport
-
Route classification: High-altitude technical.
-
Mountain region: Pamir-Alay, Zeravshan ridge, Fan Mountains (northern part).
-
Peak Parandas (4640 m), via the right part of the northern wall, route Arkhipov.
-
Category of difficulty: 6A.
-
Height difference (wall section of the route): 800 m. 3780–4580 m.
Length of the wall section of the route: 1040 m. Length of sections: 5 category of difficulty — 640 m, 6 category of difficulty — 400 m. Average steepness of main sections — 80°, of the route — 76°.
-
Number of pitons left on the route: 10*.
- using previously driven pitons.
Number of pitons driven on the route:
- rock pitons — 55 pcs, including ITO* — 15 pcs.
- placement elements (stoppers, friends, camalots) — 110 pcs, including ITO — 35 pcs.
- bolt pitons — 12 pcs, including ITO — 7 pcs.
- sky-hooks — 6 pcs.
Total 183, including ITO — 63 pcs.
-
Team's working hours: 26 hours and 2.5 days.
- 1 day: 9 hours.
- 2 day: 9 hours.
- 3 day: 8 hours.
- Exit from base camp: July 26, 2018 at 10:00 and overnight stay under the wall.
- Start of the route: July 27, 2018 at 9:00.
- Reach the summit: July 29, 2018 at 16:00.
- Return to base camp: July 30, 2018 at 14:30.
-
Description of overnight stays:
- 1st (lying down) — under the start of the route, water available.
- 2nd (lying down) — platform on a ledge.
- 3rd (lying down) — platform on a ledge.
- 4th (lying down) — on the descent before the first rappel on a platform.
-
Team leader: Mikhail Donskikh — Master of Sports, Yekaterinburg. Participant: Mikhail Anikin — Candidate for Master of Sports, Yekaterinburg. Coach: Nikolai Zhilin — Master of Sports, Yekaterinburg.
-
Organizing body: Federation of Mountaineering of Sverdlovsk region.
Brief overview of the region and the ascent object
Fan Mountains — peaks exceeding 5,000 m in height with walls having a height difference of 1500 m. Mass development of the Fan Mountains by mountaineers began in the second half of the 60s. First ascents were made to the main peaks, and complex wall routes were passed in the region. The peak activity was in the 70s, when hundreds of mountaineers made ascents on routes of 5–6 category of difficulty during a season. During this period, most of the prize-winners of the USSR Mountaineering Championship.
Peak Parandas (4640 m) — a powerful, standalone bastion in the Zamok massif (5070 m). The following key ascents were made:
- The first passage of the northern wall of Parandas was made by a team led by V. Tishchenko in 1983, and it was reported as a first ascent. However, the route was not classified at that time.
- In 1987, a team from Krasnoyarsk led by V. Arkhipov laid another route on the right part of the wall, which goes along the line of chimneys and internal corners, crossing the entire wall from bottom to top. For this route, the Krasnoyarsk team received gold medals as champions of the USSR.
During the USSR Championship in 1990 in the Fan Mountains, routes on the northern part of the wall of Parandas had fairly high ratings.
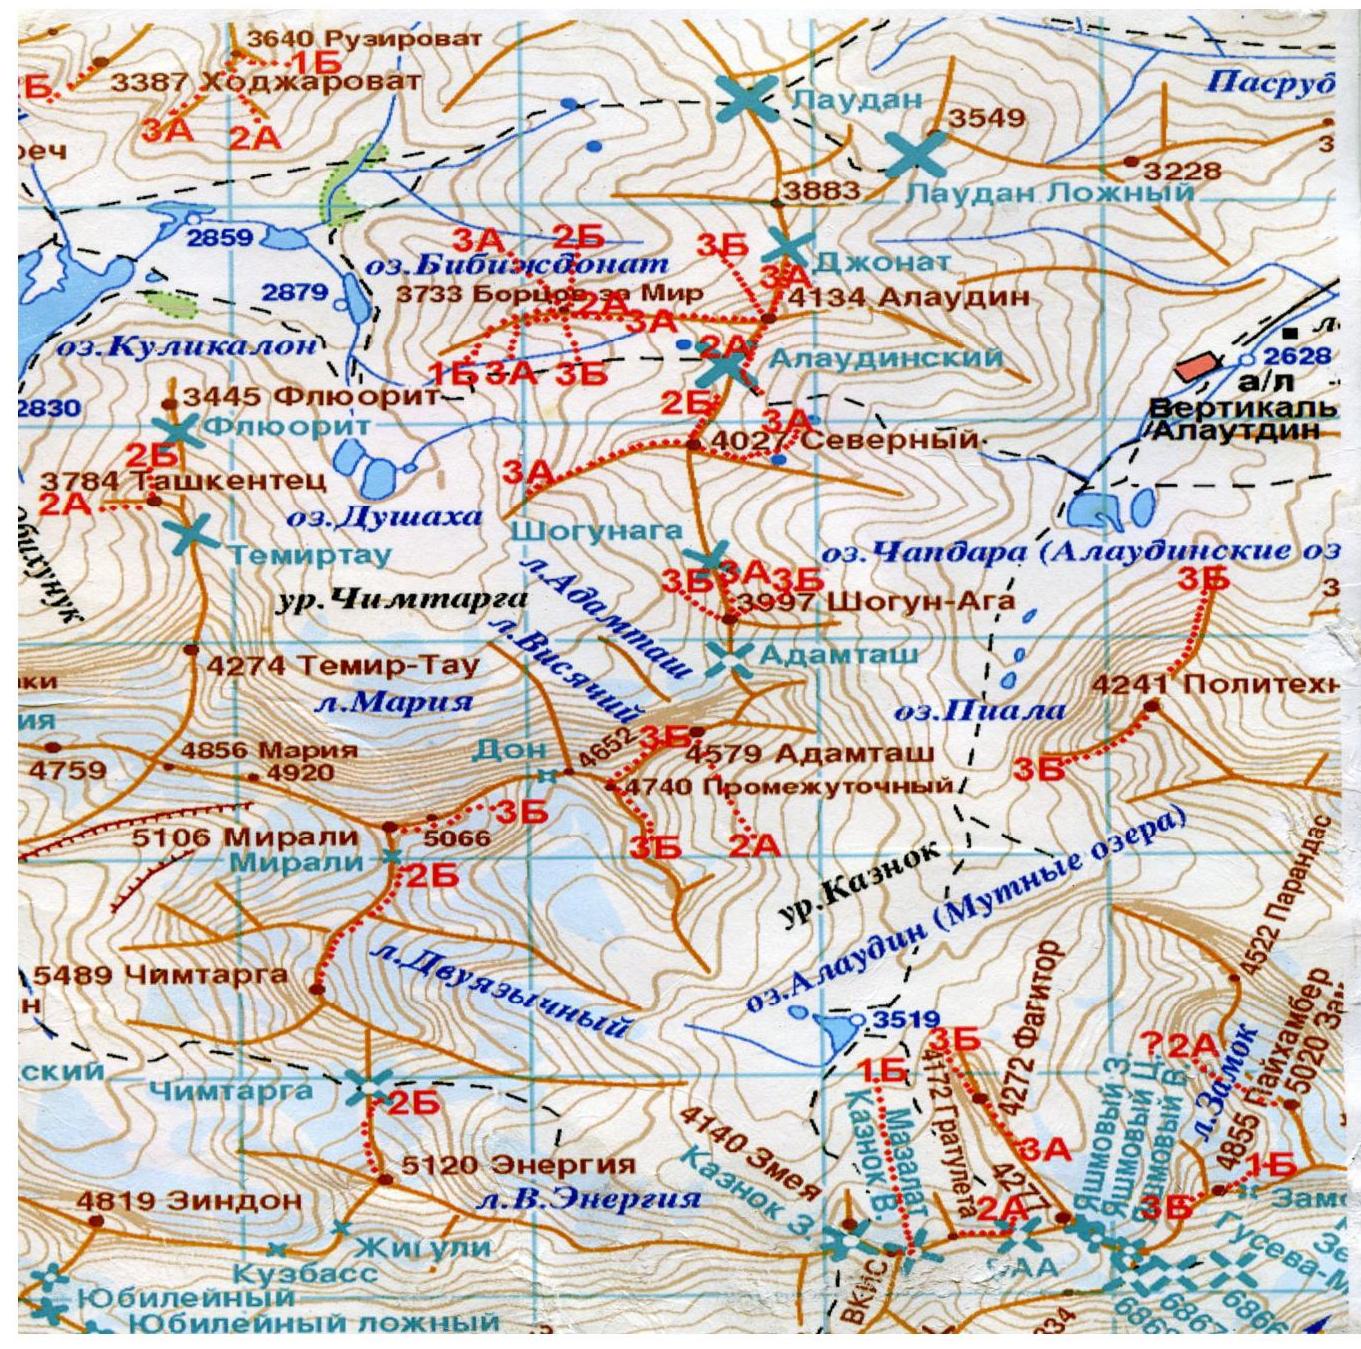
Map-scheme of the ascent area to peak Parandas.
Tactical actions of the team
The choice of the route was determined by three factors:
- the ascent was made in an area where the FASS training camp was held under the leadership of A.V. Kovrizhkin, who provided radio communication and rescue team support to the climbers;
- Arkhipov's route on peak Parandas was chosen by the team for participation in the Russian Championship as a more rated and less frequently climbed route in the area;
- stable good weather.
Before starting the route on Parandas, the team made an acclimatization ascent to peak Zamok with a 5A category of difficulty. In the same area, they inspected the descent from peak Parandas via a couloir. Before climbing the wall, the team conducted a visual observation of the route and studied reports from teams that had previously climbed this route.
The team of two people started the route with:
- two ropes meeting UIAA requirements;
- a set of equipment;
- a water supply;
- a food supply for three days;
- a gas stove.
The tent was replaced with a 2 x 3 m tarp. They had a reserve bolt set, which they had to use as some previously installed bolts did not inspire confidence, and they also had to deepen holes for sky-hooks.
They had:
- a well-equipped first-aid kit;
- a radio.
Communication was of high quality, stable, and took place every 2 hours.
The team decided to start the ascent without prior processing, immediately lifting off the ground. Good rock and physical preparation, weather, and route conditions allowed them to move fairly quickly.
The team did not tie themselves to specific overnight locations, as it was always possible to find a ledge for a lying-down overnight stay for two people on the route. During the first overnight stay, each team member slept on their own ledge, 10 meters apart. The second overnight stay was more comfortable — a spot was found for both team members.
The first climber led with lower protection, the second followed on a top-rope, collected equipment, and jumared up. Often, the first climber did not go the full length of the rope but went halfway for safety and speed due to the route's terrain.
Hot meals were prepared only in the morning and evening using dehydrated porridge and soups. Energy supplements were added to tea. Daytime snacks included crackers, dry-cured sausage, dried fruits, and candies.
The successful movement was also facilitated by a sufficient amount of modern, high-quality equipment (friends, camalots, anchor pitons...). Naturally, the experience of similar ascents from past years also helped.
| Section № | Profile | Length (m) | Slope | Category of difficulty |
|---|---|---|---|---|
| R27–R28 | 250 | 30 | II | |
| R26–R27 | 550 | 35 | II–IV | |
| R25–R26 | 50 | 45 | IV | |
| R24–R25 | 55 | 80 | V | |
| R23–R24 | 50 | 80 | V | |
| R22–R23 | 50 | 100 | VI А0–А2 | |
| R21–R22 | 25 | 65 | V | |
| R20–R21 | 50 | 85 | VI | |
| R19–R20 | 55 | 75 | VI А3 | |
| R18–R19 | 40 | 75 | VI А2 | |
| R17–R18 | 25 | 95 | VI А3 | |
| R16–R17 | 50 | 75 | VI А1 | |
| R15–R16 | 20 | 65 | V | |
| R14–R15 | 45 | 85 | VI А1–А2 | |
| R13–R14 | 60 | 90 | VI А2 | |
| R12–R13 | 30 | 75 | VI | |
| R11–R12 | 55 | 90 | VI А1 | |
| R10–R11 | 45 | 80 | VI | |
| R9–R10 | 35 | 85 | VI | |
| R8–R9 | 40 | 85 | VI | |
| R7–R8 | 25 | 90 | VI | |
| R6–R7 | 35 | 75 | IV | |
| R5–R6 | 40 | 60 | III | |
| R4–R5 | 30 | 75 | VI | |
| R3–R4 | 10 | 80 | V | |
| R2–R3 | 50 | 70 | V | |
| R1–R2 | 50 | 55 | V | |
| R0–R1 | 50 | 60 | IV |
Description by sections:
R0–R1. Hike on scree between two snowfields, through a short black wall 7 m, IV+, then up and right on scree under the wall 3 m to the right of the internal corner (50 m, IV). Photo 4.
R1–R2. Up the destroyed wall, then along the corner up and right 2–3 m to the right of the smooth internal corner — climbing is quite tense, then up and left to the flattening (50 m, IV–V). Photo 5.
R2–R3. Left and up 20 m, II–IV on flattening ledges to a vertically ascending chimney. Along the chimney 30 m, 80°, V to a piton station in the chimney's expansion (50 m, II–V). Photo 6.
R3–R4. Up the chimney 10 m, climbing mainly on friction, unpleasant, 80°, V to a comfortable ledge (10 m, V).
R4–R5. Up and right on ledges-plates 10–15 m to a wide slightly overhanging corner, along it 8 m up, climbing very difficult (3 m, V+–VI), exit to a wide scree ledge under the black wall (30 m, VI). Photo 7.
R5–R6. Left on the ledge 30 m, and up and left 10 m to a hook loop (40 m, II–III).
R6–R7. From the loop left 3 m, enter the internal corner, up (20 m, IV) to an inclined ledge, along it up and right under a wide corner with grass (35 m, IV). Photo 8.
R7–R8. To the right of the corner on destroyed walls, climbing tense — difficult to organize reliable protection — destroyed, up along horizontal cracks, strongly moving right under an angle of 45° to a hook loop (25 m, VI).
R8–R9. Right on plates 6–8 m to an internal corner, the corner is passed in a straddle on friction, up 15–20 m, VI, and then along an inclined ledge right 15 m, VI to a good ledge under a vertical open internal corner (40 m, VI). Photo 9.
R9–R10. Up 15 m, 85°, VI on a destroyed wall with "feathers", then along the internal corner 20 m, 85°, VI to the start of a wide corner with a smooth right wall of red color. Climbing very tense, mainly on friction, requires good rock climbing technique from the climber. Piton station (35 m, VI).
R10–R11. Along the corner 30 m, VI up, in the lower part climbing, then switching to ITO* VI, A1 on pitons. All holds are passive, climbing mainly on friction. Piton station on pitons and placements (45 m, VI). Photo 10.
R11–R12. Along a crack on ITO or climbing, climbing quite powerful and technical to a cornice 15 m, VI, A1. The cornice is bypassed on the right 1.5 m, A1 on medium-sized friends, or free climbing — climbing very difficult, holds on the cornice are underhand, then up 8 m, VI, A1. Further transition from ITO to climbing 5 m, VI, then along the internal corner — couloir 15 m, V, with large wedged blocks, some of which are live, to a ledge. Piton station on pitons (55 m, VI). Photo 11.
R12–R13. From the ledge left, then up goes the internal corner 30 m, VI, under a large overhanging cornice. Station on pitons (30 m, VI, 8 friends, 3 pitons, 2 fifi hooks).
R13–R14. Bypass of the cornice on the wall left and up through a bend (5 m, 100°, VI), then left and up 2 m to a bolt, from it a traverse above the cornice 3 m right to a crack. On the traverse, it's wet, and it's thrown off, holds are underhand. Further up along the corner-crack to a ledge, then 10 m to a ledge under a wide internal corner. On the left on the ledge, there's an outcrop, 2 m above it there are 2 bolts (60 m, VI). Overnight stay on ledge №1. Photo 12.
R14–R15. Up the right part of the wide corner 35 m, VI, A1, 85° to an overhanging bulge. Further traverse right on a plate under the overhang, protection in a destroyed wet crack, VI, A2, 8 m to the exit on a ledge (45 m, VI).
R15–R16. Up 15–20 m, VI, 70° to the exit on a large wedged plate. 1st control point (no notes found in the cairn). Behind the plate on the wall, there's ice. Possible semi-reclining overnight stay (20 m, VI). Photo 13.
R16–R17. Left and up along the internal corner with ice 20 m to a ledge with a bolt, possible lying-down overnight stay for one person. Further up the right side of a wide internal corner filled with water, very difficult climbing related to sections of ITO and free climbing: VI, A1, 5 m, traverse left to the flattening of a crack, under water streams flowing from the cornice above. At the base of the crack — ice. On the walls of the corner — 2 bolts, but it's exactly in this place that it's very wet. Piton station a few meters higher, in the depth of an uncomfortable and dry destroyed niche directly under the cornice, large friends (50 m, V). Photo 14.
R17–R18. From the niche, traverse on ITO (large pitons, medium friends) horizontally right 6 m, then up 7 m, VI, A3, 90°, bypassing a larger overhang with water runoff. The cornice is passed entirely on ITO. To the right of the overhang, a Petzl Spit is driven under an ear 8 mm. Then climbing to the base of a wide internal corner 10 m, V+ (25 m, VI).
R18–R19. Up, moving right, along the internal corner, approach under a belt of destroyed rocks: 40 m, VI, 75°. Do not exit left on a ledge under the overhang, as falling rocks are possible when passing the next rope (40 m, VI).
R19–R20. Exit left on a ledge under the wall. The rock is strongly destroyed, resembling upside-down tiles. The start of the movement is slightly to the right of a strongly destroyed internal corner, up and right, ITO on pitons, anchor pitons help. 5–7 m from the start of the wall, a Petzl Spit is driven under an ear M8 mm. Further, a vertical crack appears: 20 m, VI, A3, 85°. Then the crack widens and flattens 25 m, and it's possible to switch to free climbing VI, 75° (55 m, VI). Overnight stay №2. Photo 15.
R20–R21. Up, along wide cracks with smoothed edges and ice inside, very difficult climbing, difficult to organize normal protection, anchor pitons help again. This section is the most difficult in terms of free climbing, friction works well 50 m, VI, 80–85°. Uncomfortable piton station to the right of the crack on pitons or on ice (50 m, VI). Photo 16.
R21–R22. Left on gentle plates to a bolt, not reaching the "bulge" 25 m, V, 65° (25 m, V). Photo 17.
R22–R23. Right under an overhang with water runoff to left loops (7 m, VI, 75°), then on ITO traverse along a crack (VI, 5 m, А0, 100°), along a plate 5 m up (VI, А0, 90°), further 10 m (VI, А0, 80°). The section is passed using standby placements, pitons, bolts, some of which look unreliable. Then on sky-hooks along holes 5 m, A1, to a bolt and traverse on ITO, or with good rock climbing preparation, it's possible to go free right 8 m, VI, A2, then along a crack to a ledge 10 m, VI. Piton station on pitons and medium friends. 2nd control point (no notes found in the cairn) (50 m, VI). Photo 18.
R23–R24. Left and up along walls and ledges (20 m, V+) to the exit on scree ledges, along them under the base of a large corner-chimney (30 m, I–II). There's ice. To the right on an inclined ledge under an overhang — overnight stay, comfortable lying down, water available (ice/snow) (50 m, V). Photo 19.
R24–R25. Up a wide wet chimney, through a small overhang, climbing in a straddle, местами лёд в щели, to the exit on a ridge. 55 m, V, 80° (55 m, V). Photo 20.
R25–R26. Up the ridge rocks to the flattening. Good platform for overnight stay. Dangerous in a thunderstorm. IV, 50° (50 m, IV).
R26–R27. Along the ridge rocks to a saddle, which is the start of a wide couloir going right. II–IV (550 m, II–IV). Photo 22.
R27–R28. To the summit, along the right part of the ridge, then through a shoulder to the summit tower (250 m, II).
Further along the ridge, moving left to peak Zamok — peak Parandas (4640 m). Descent from the summit via 2A, between Parandas and Zamok. After peak Parandas, there's no need to descend to the saddle with peak Zamok. Return a bit back along the ridge, then down to a rocky-scree terrace, and:
- 20 m down.
- Rappel 40 m.
- Approximately 100 m further, another rappel 40 m.
- Further down the main couloir between peaks Parandas and Zamok.
When descending, it's necessary to stick to the right side (frequent rockfall from the side of peak Zamok). Descent via the couloir is recommended in the first half of the day due to rockfall.
UIAA Route Diagram
| Rock, anchor pitons | Placements | Camalots | Bolt pitons | Diagram | R. Section | Category of difficulty | Length (m) | Slope (°) | Note |
|---|---|---|---|---|---|---|---|---|---|
| - | - | - | - | peak Parandas 4640 m | 27 | II | 250 | 30 | Photo 22 |
| - | 6 | 8 | - | 26 | II–IV | 550 | 35 | ||
| 1 | 3 | 2 | - | 25 | IV | 50 | 45 | ||
| 5 | 3 | 6 | - | 24 | V | 55 | 80 | Photo 20 | |
| 3 | 1 | 4 | - |  | 23 | V | 50 | 80 | Photo 19 |
| 5/2 | 3/1 | 2 | 5/5 |  | 22 | VI А0–А2 | 50 | 100 | CT 2. Photo 18 |
| - | 2 | 4 | 2 |  | 21 | V | 25 | 65 | Photo 17 |
| 6 | 3 | 10 | - | 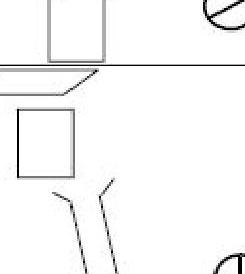 | 20 | VI | 50 | 85 | Photo 16. Overnight №2. |
| 9/9 | 4 | 6 | 1/1 | 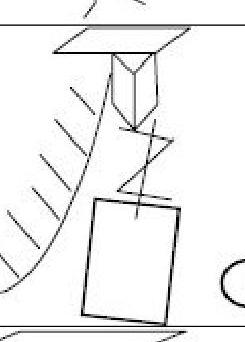 | 19 | VI А3 | 55 | 75 | Photo 15 |
| 2/2 | 3/2 | 6/3 | - | 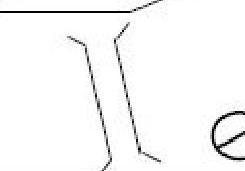 | 18 | VI А2 | 40 | 75 | |
| 2/2 | 3/2 | 6 | - | 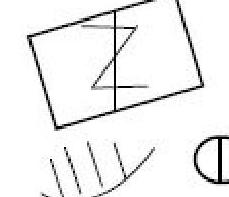 | 17 | VI А3 | 25 | 95 | |
| 2 | 2/1 | 5/5 | 2 |  | 16 | VI А1 | 50 | 75 | Photo 14 |
| 2 | 2 | 2 | - |  | 15 | V | 20 | 60 | CT 1. Photo 13 |
| 4/2 | 2/2 | 8/3 | - |  | 14 | VI А2 | 45 | 85 | |
| 3/3 | 2/1 | 8/2 | - |  | 13 | VI А2 | 60 | 90 | Photo 12. Overnight №1. |
| 3 | - | 8 | - |  | 12 | VI | 30 | 70 | |
| 6/4 | 2/1 | 12/2 | - |  | 11 | VI А1 | 55 | 90 | Photo 11 |
| 10 | 4 | 6 | - | 10 | VI | 45 | 80 | Photo 10 | |
| 4 | 2 | 5 | - | 9 | VI | 35 | 85 | ||
| - | - | 2 | - | 8 | VI | 40 | 85 | Photo 9 | |
| 2 | 2 | 8 | - | 7 | VI | 25 | 90 | ||
| - | 1 | 4 | - | 6 | IV | 35 | 75 | Photo 8 | |
| - | - | 2 | - | 5 | III | 40 | 60 | ||
| - | 4 | 3 | - | 4 | VI | 30 | 75 | Photo 7 | |
| - | 1 | 2 | - | 3 | V | 10 | 80 | ||
| - | 2 | 6 | - |  | 2 | V | 50 | 70 | Photo 6 |
| - | 2 | 4 | - |  | 1 | V | 50 | 55 | Photo 5 |
| - | - | 2 | - |  | 0 | IV | 50 | 60 | Photo 4 |
Movement graph
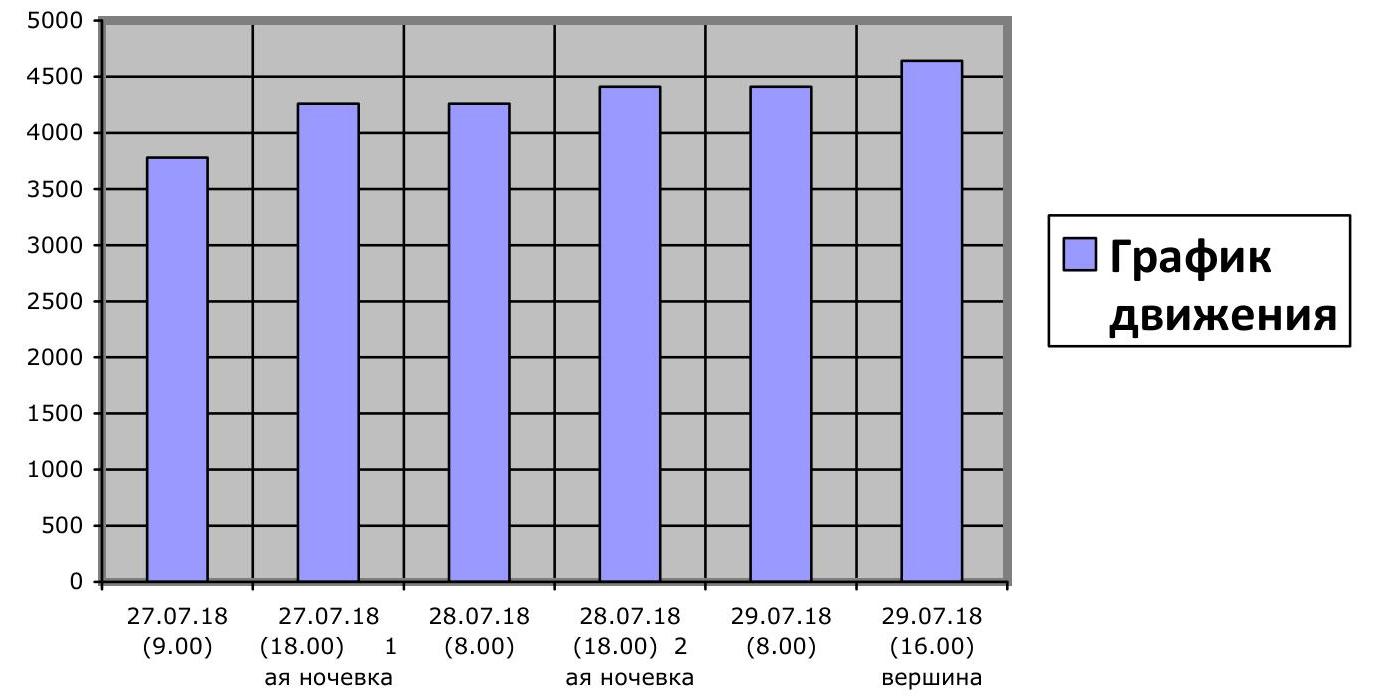

Photo 1. Team's route.
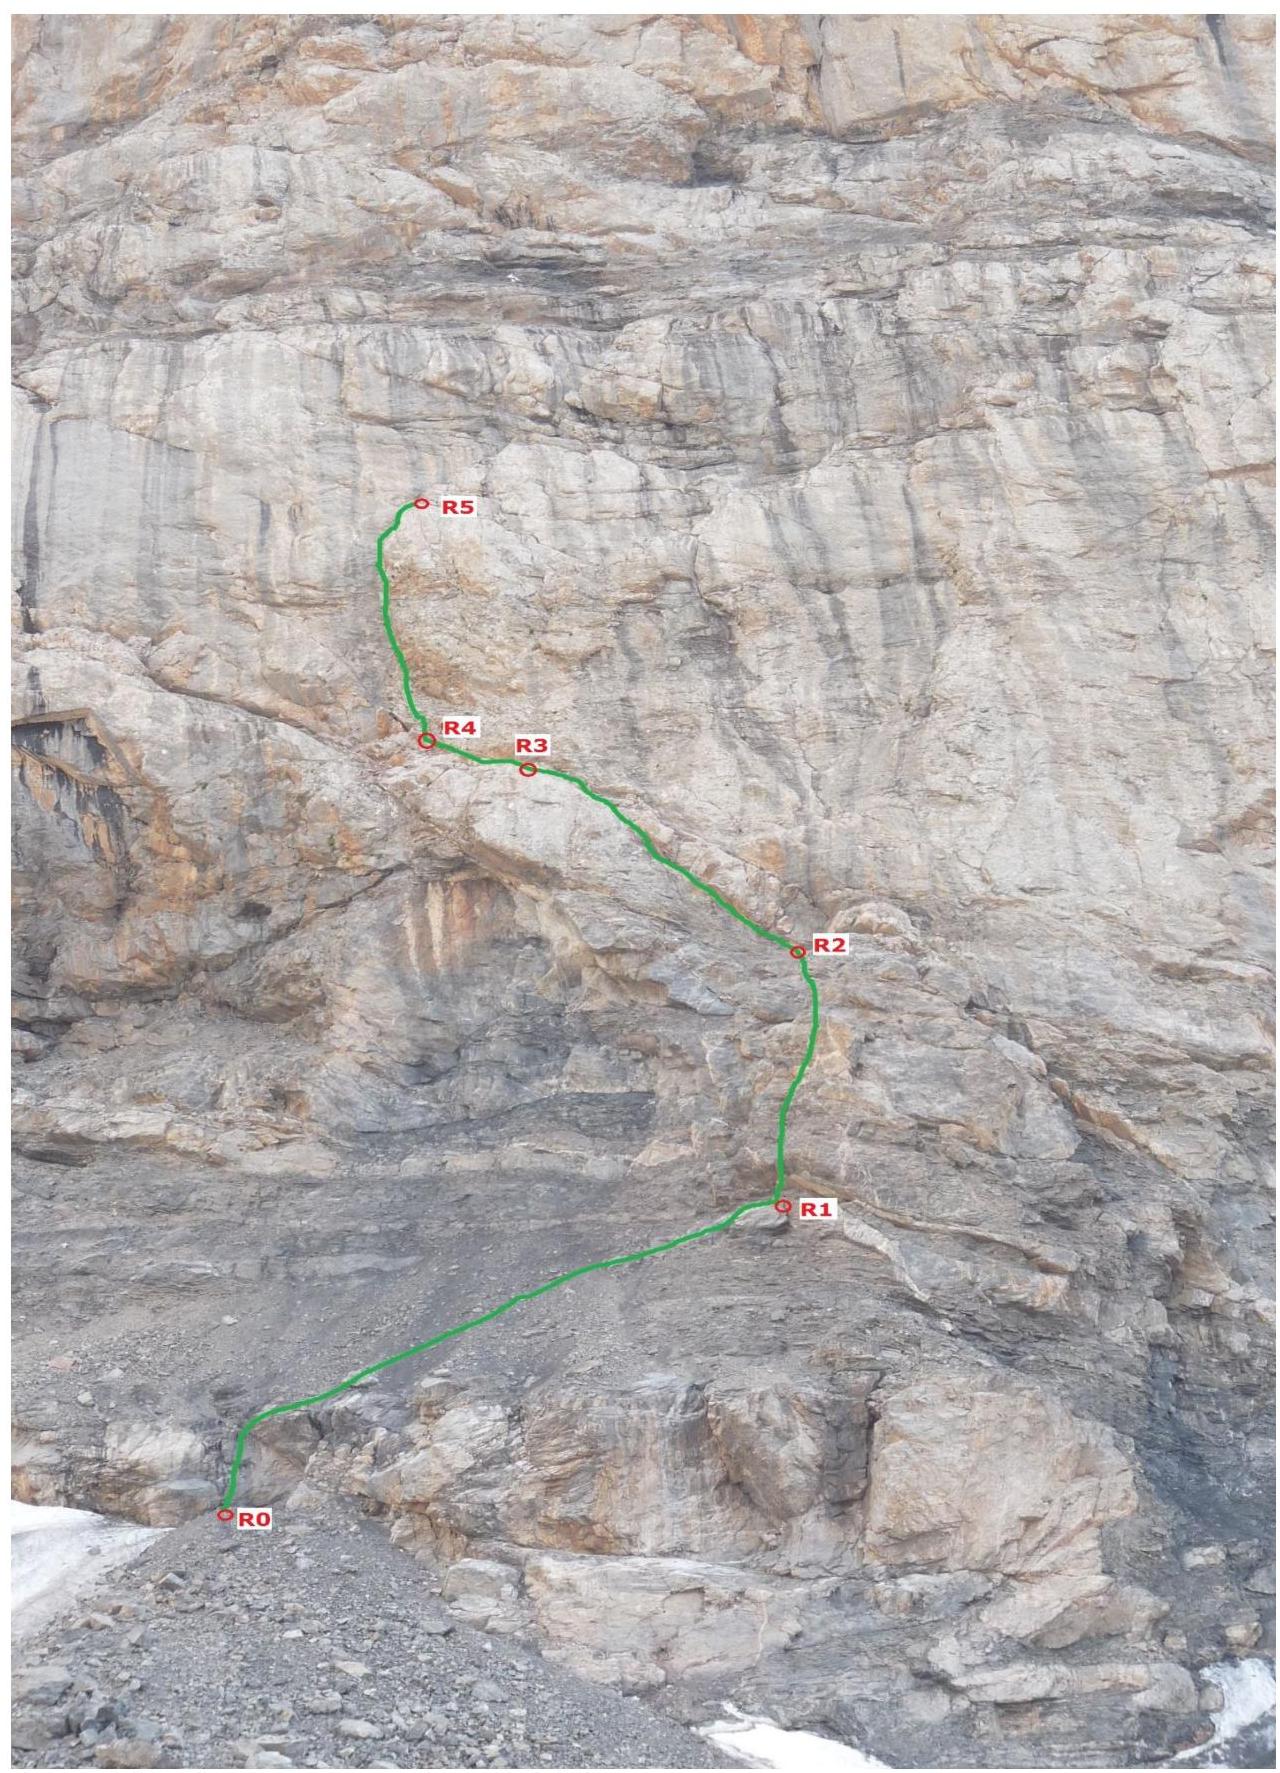
Photo 1 (1). Technical photo R0–R5.
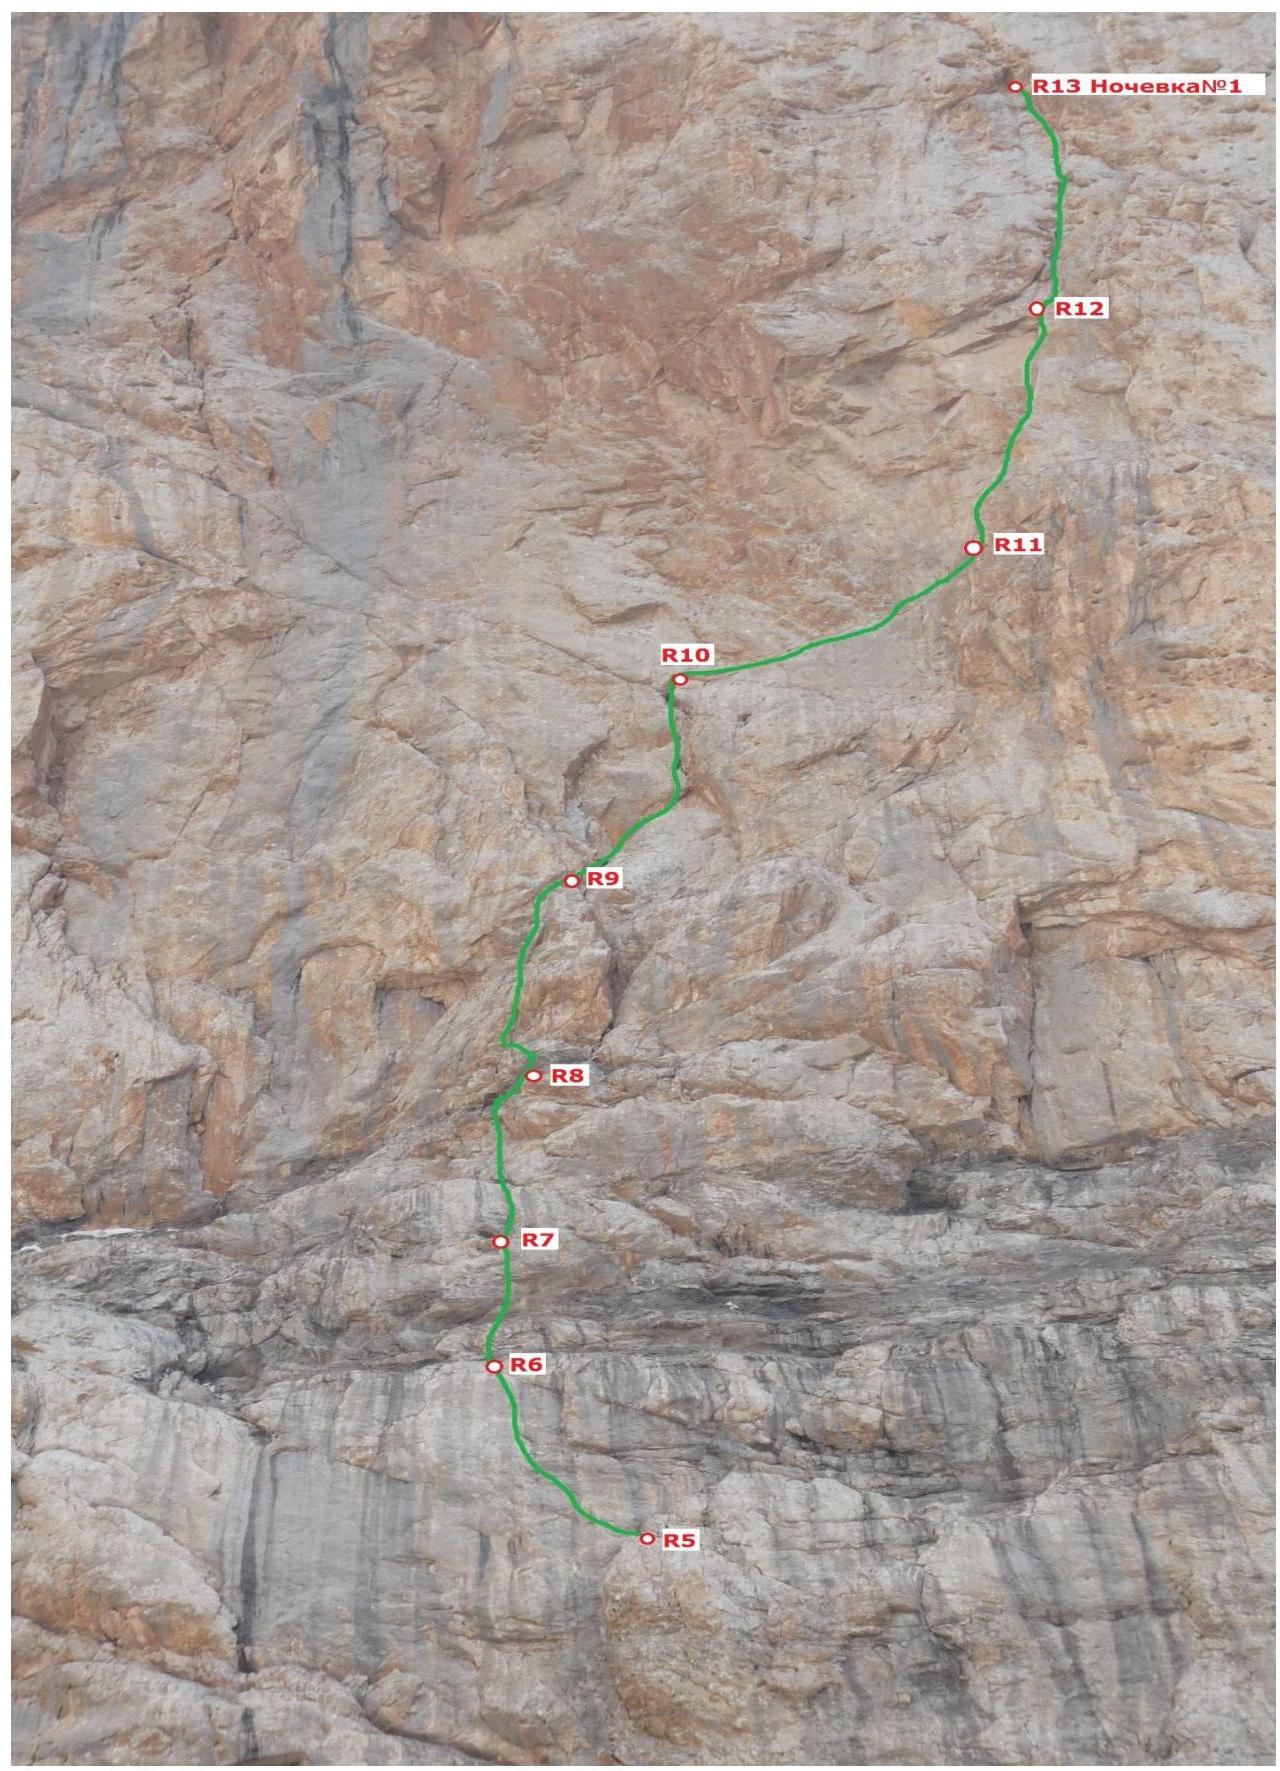
Photo 1 (2). Technical photo R5–R13.
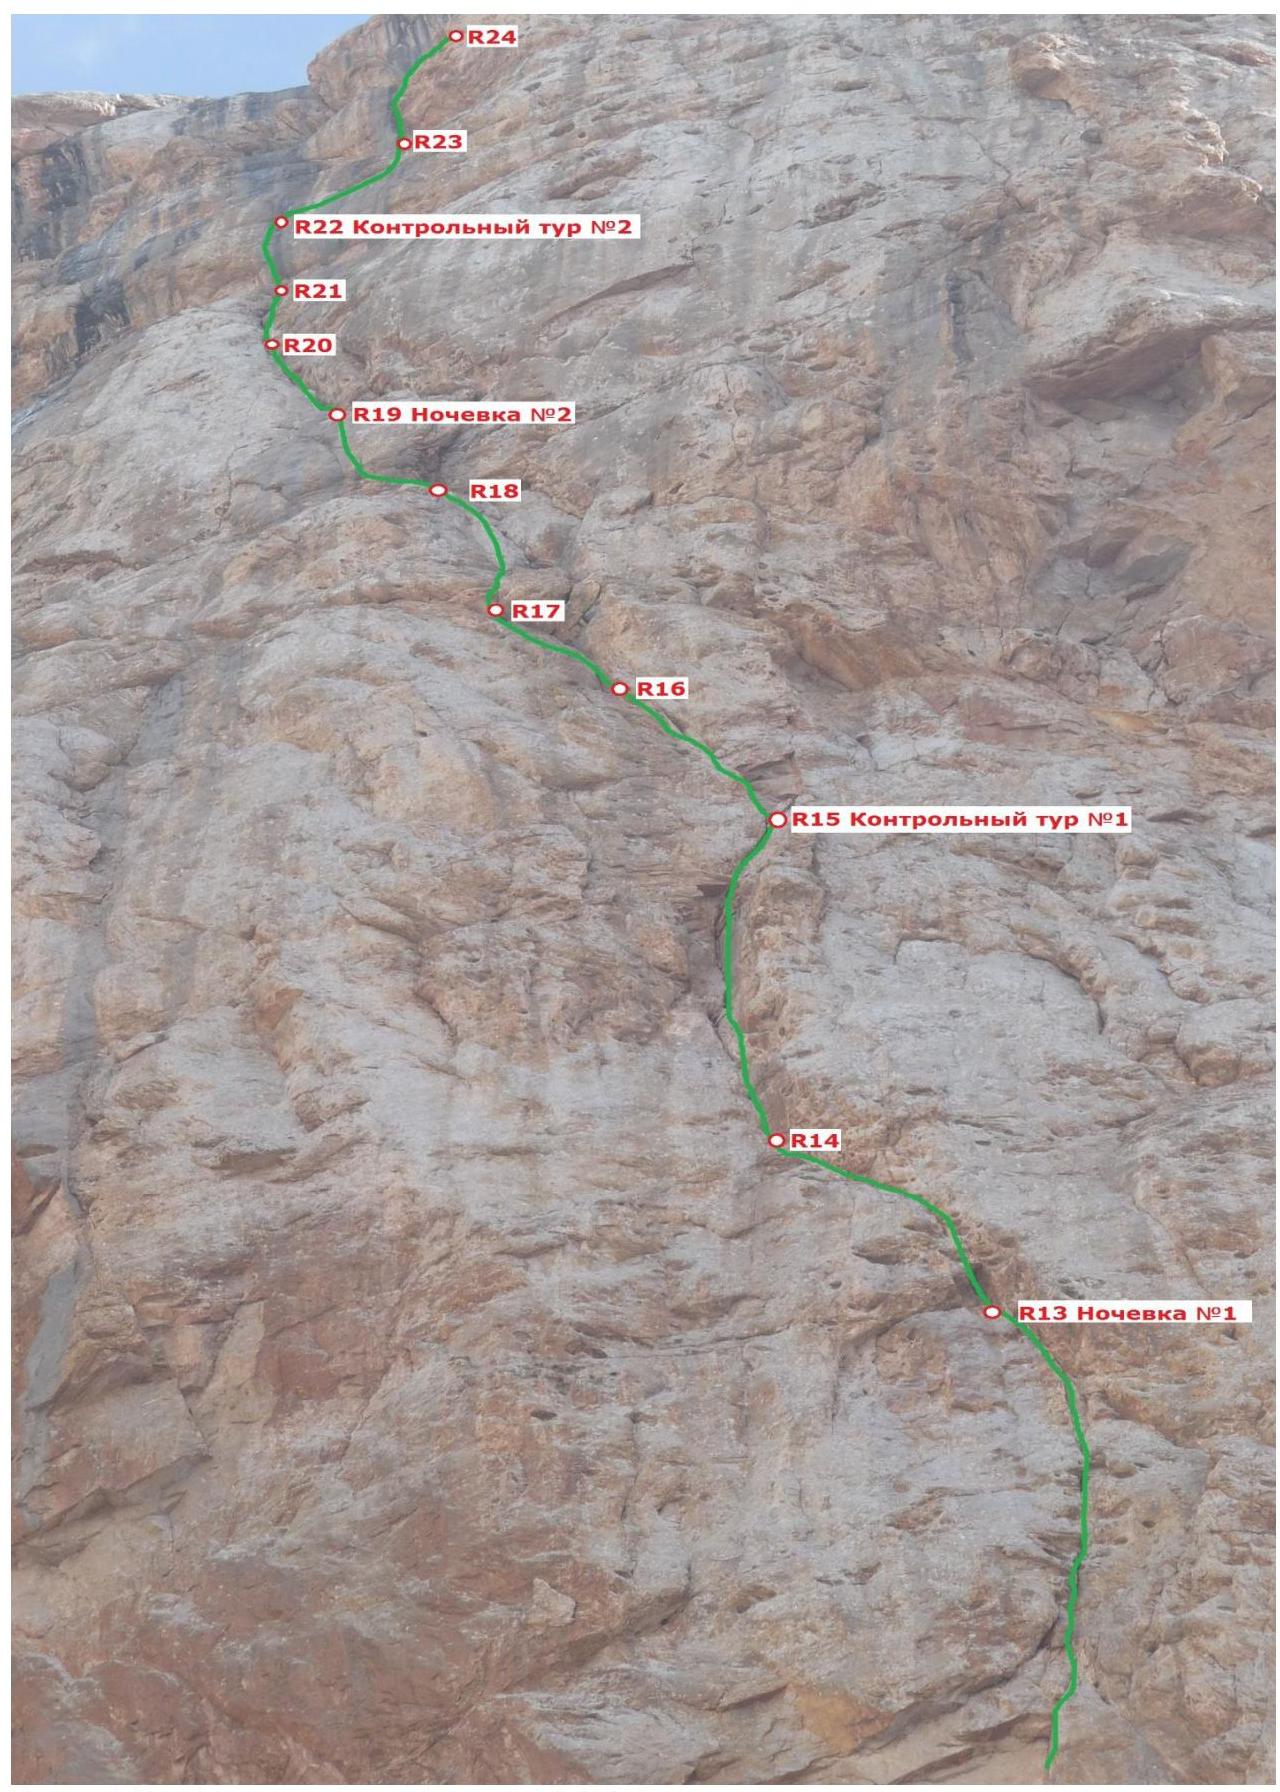
Photo 1 (3). Technical photo R13–R24.
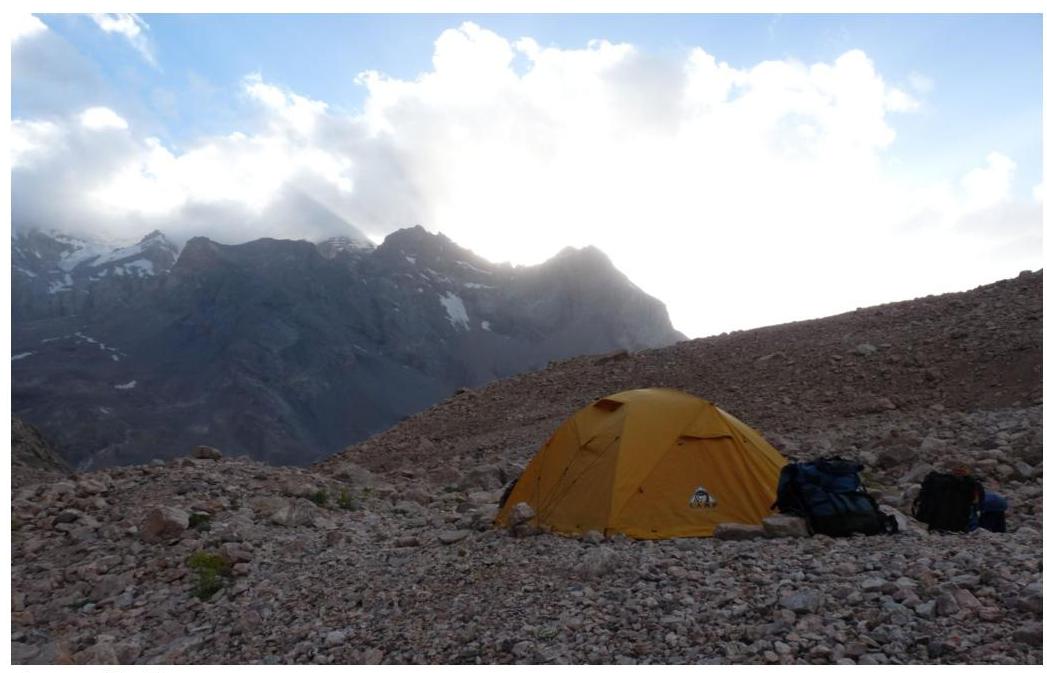
Photo 2. Camp under the route.
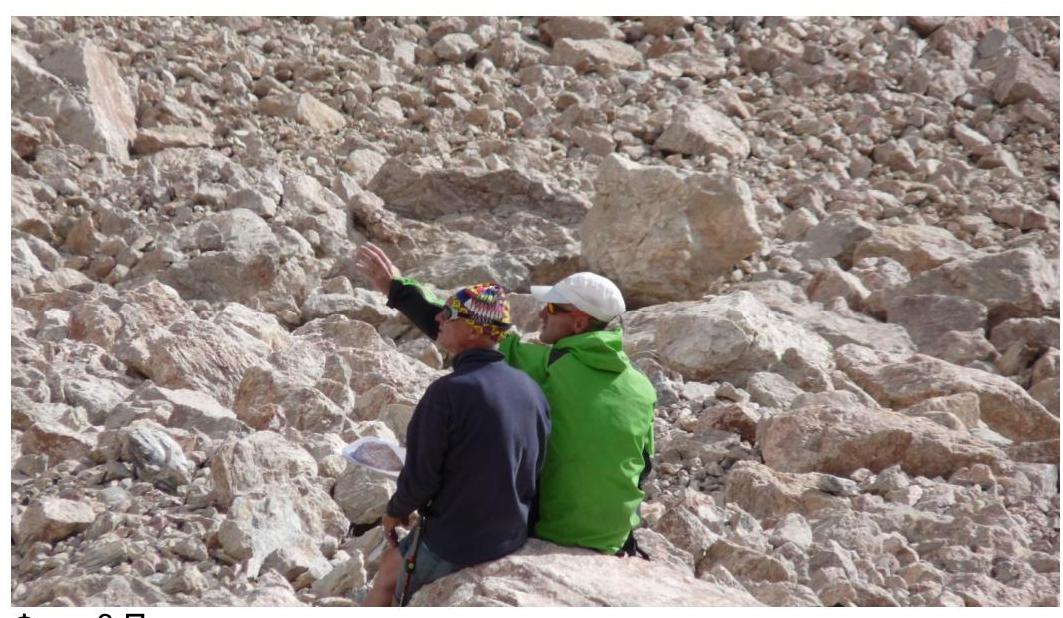
Photo 3. Route inspection.
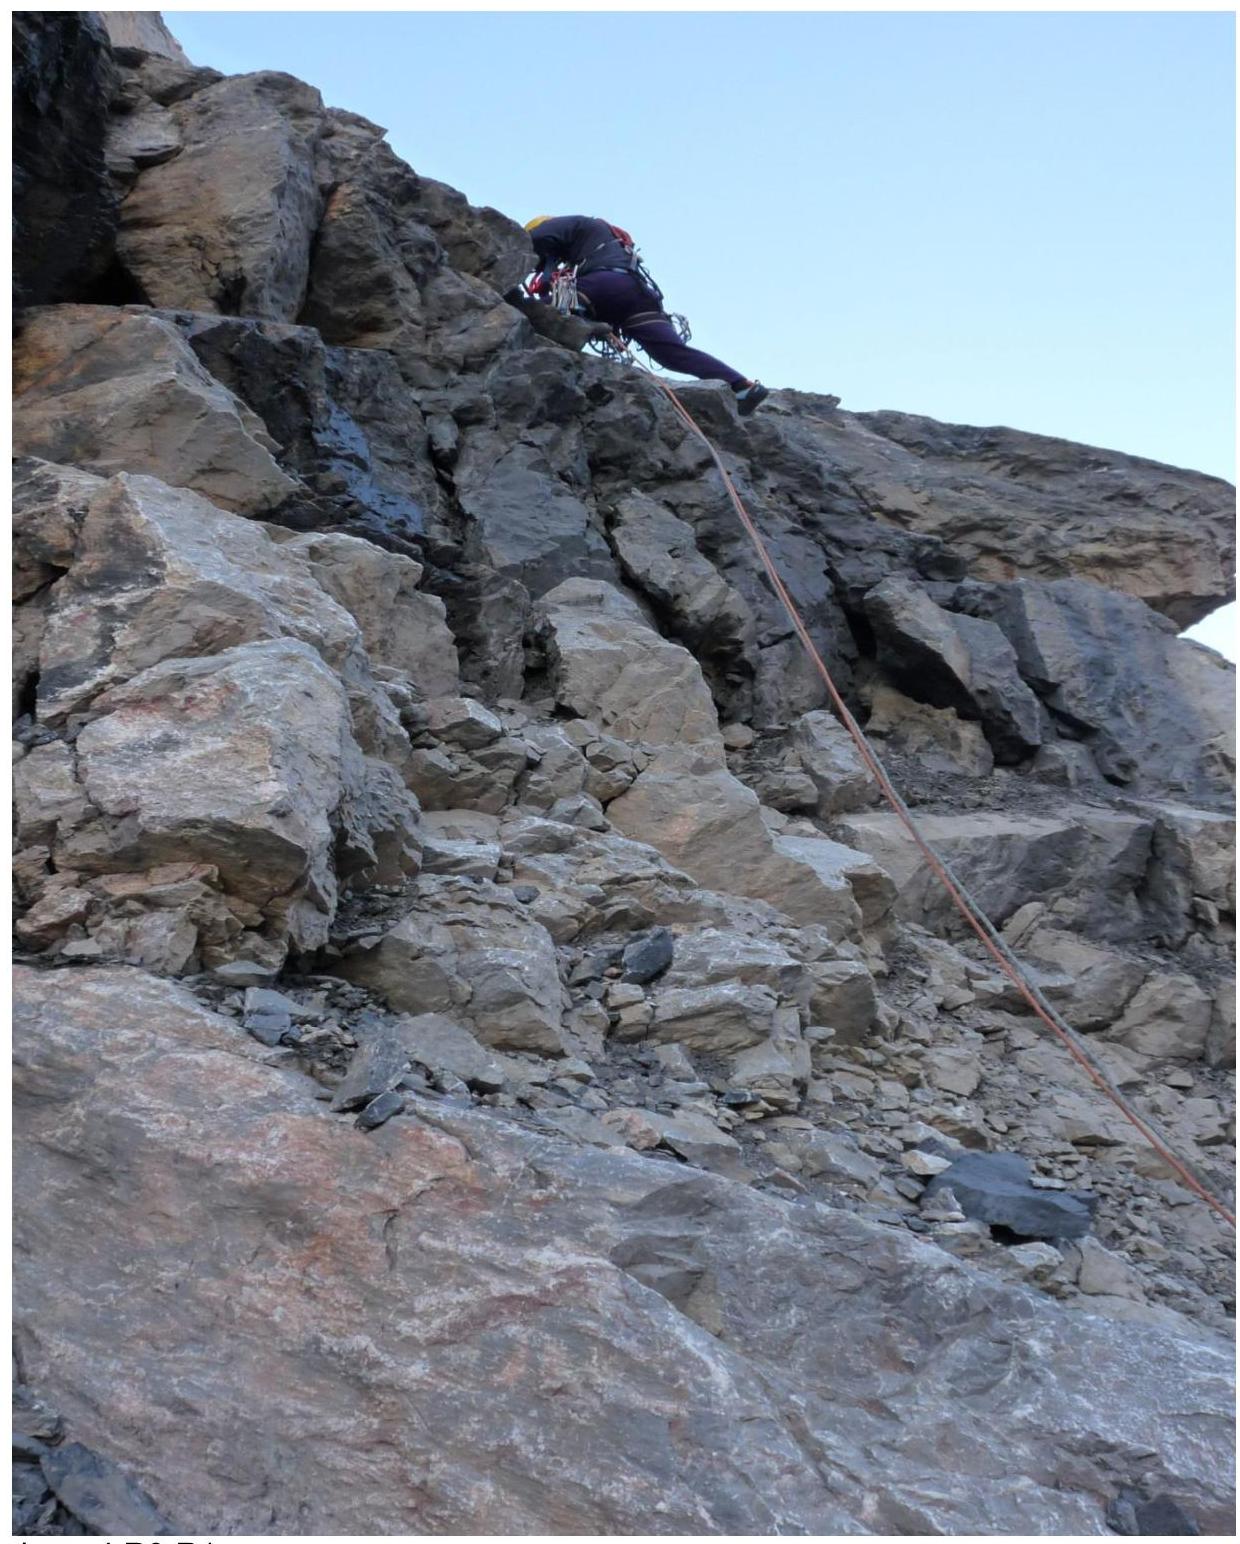
Photo 4. R0–R1.
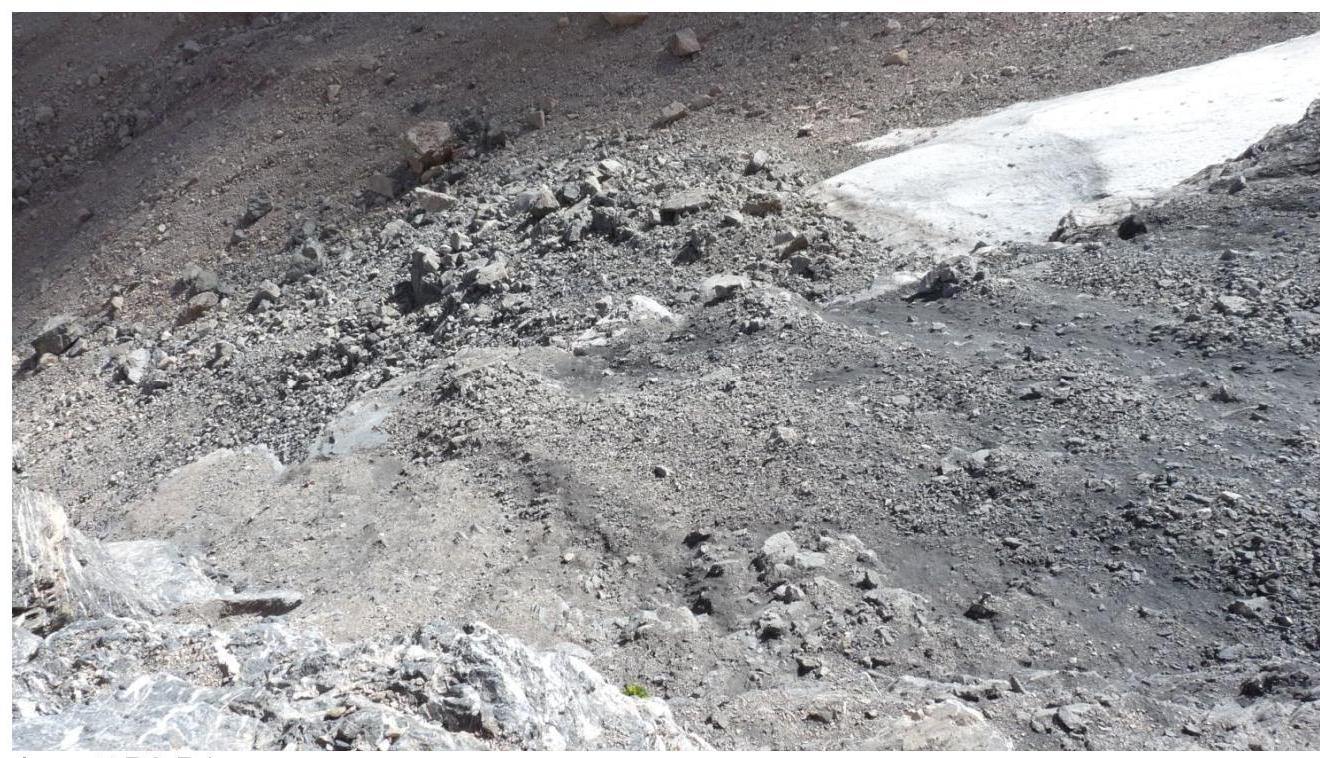
Photo 5. R0–R1.
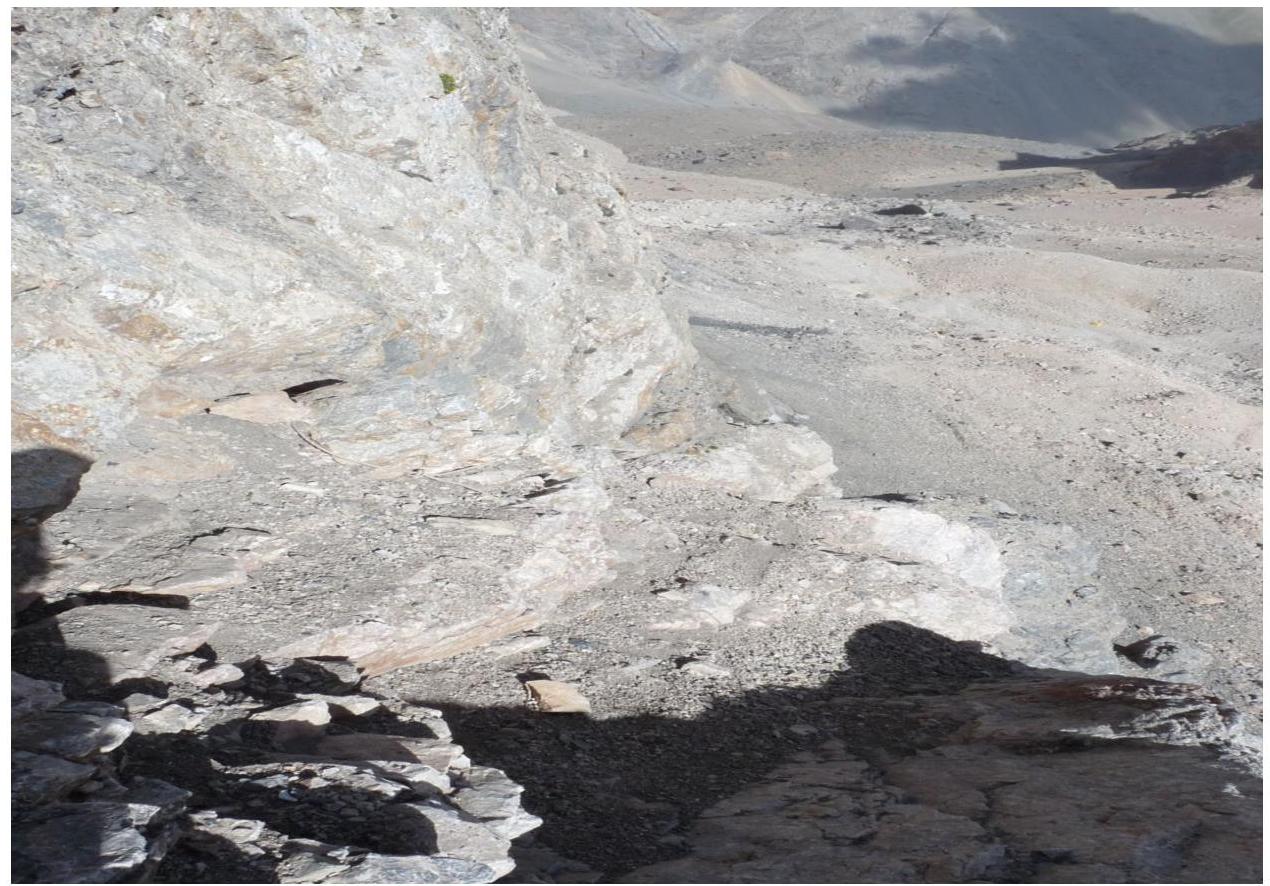
Photo 6. R2–R3.
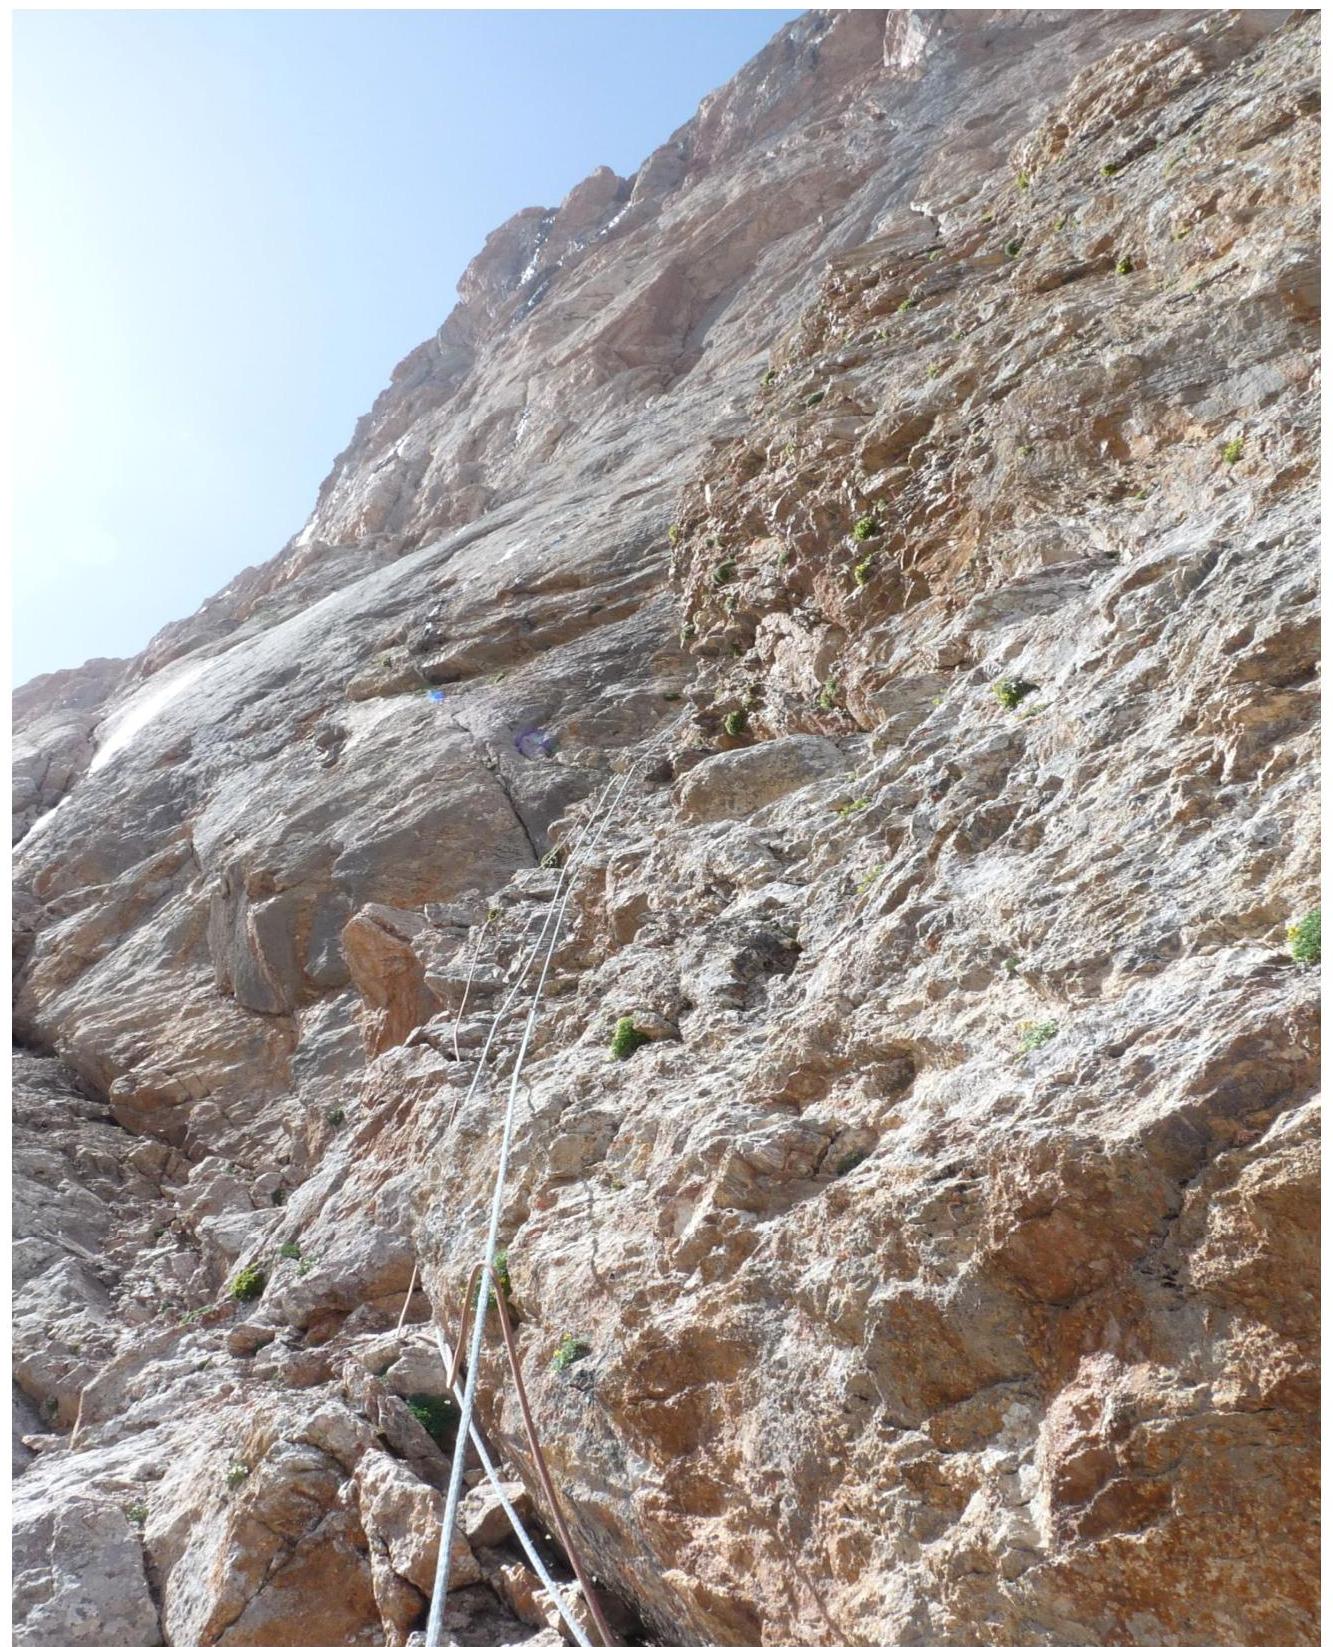
Photo 7. R4–R5.
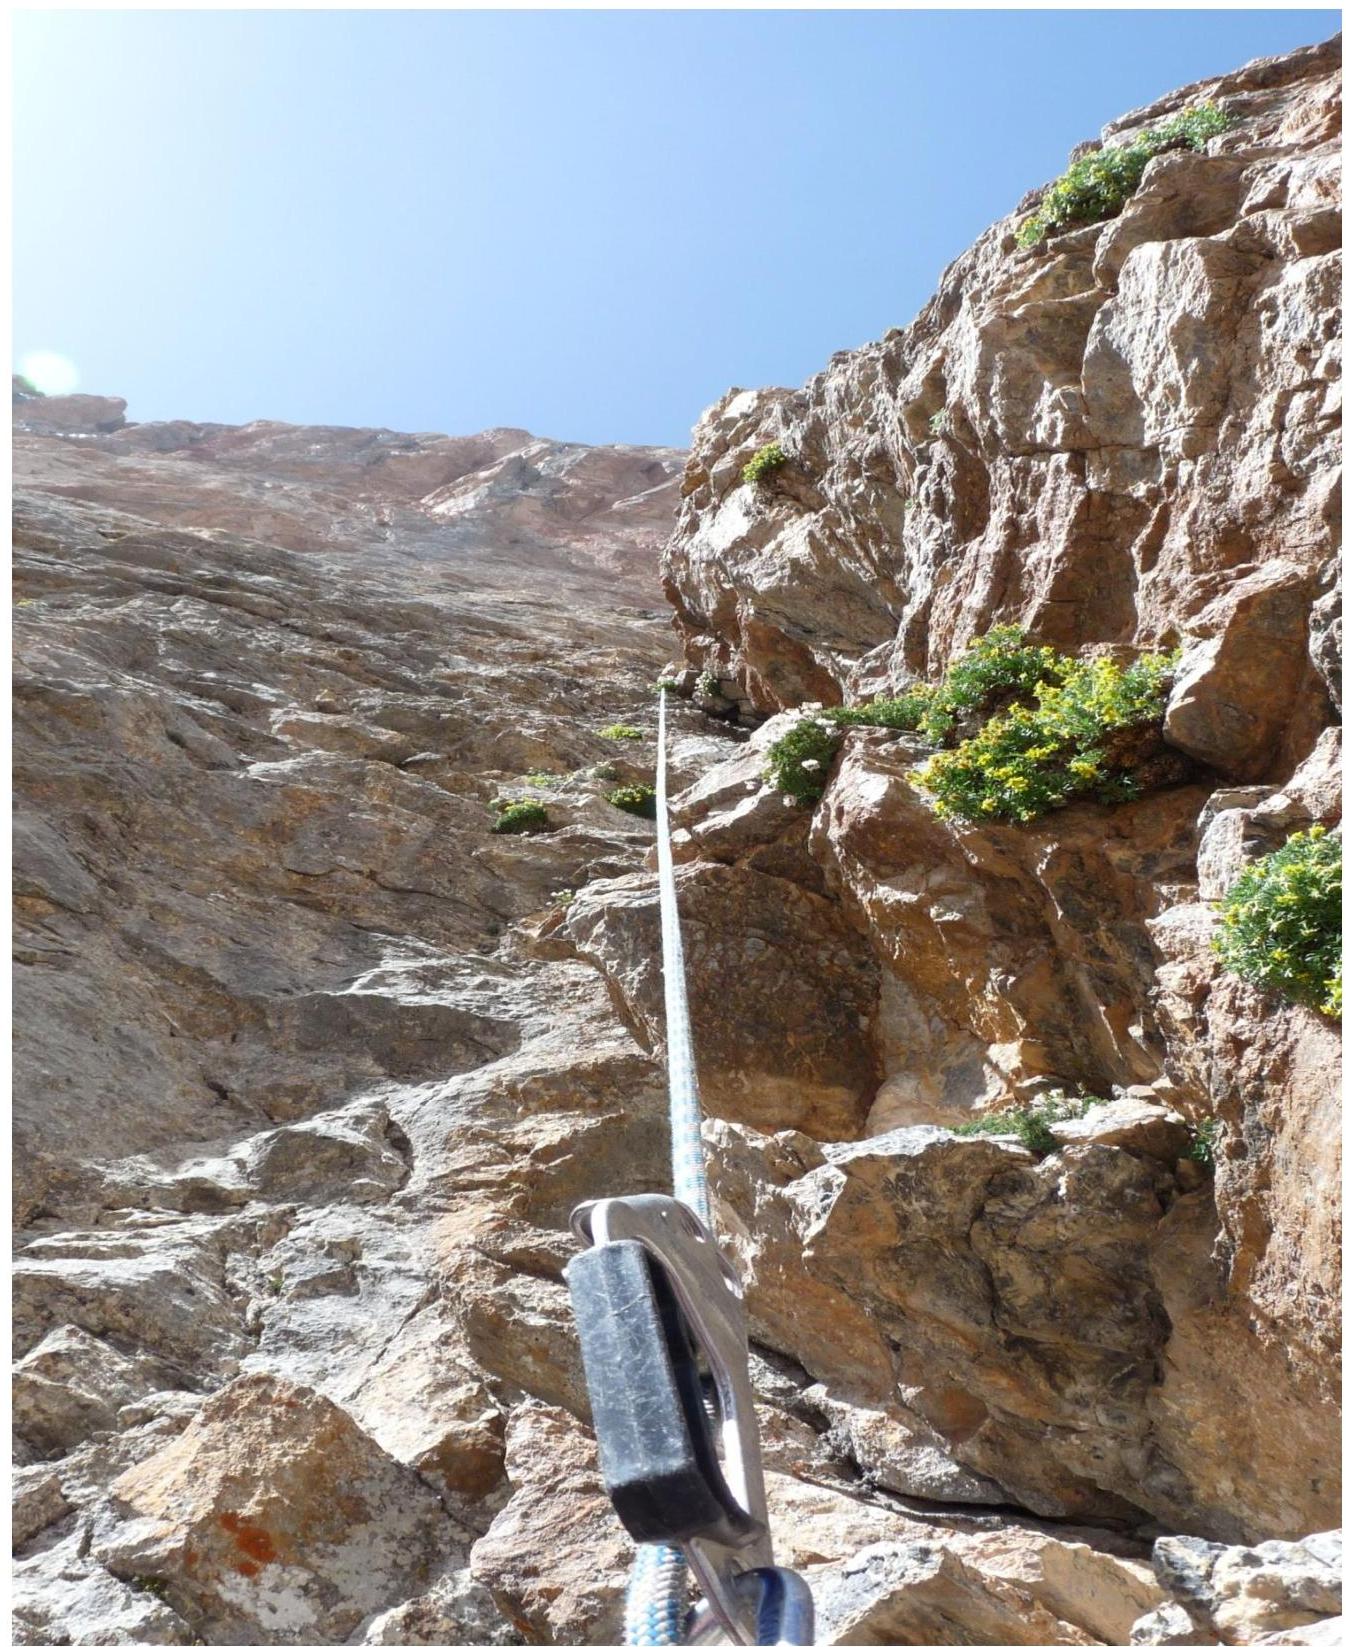
Photo 8. R6–R7.
Photo 9. R8–R9.

Photo 10. R10–R11.
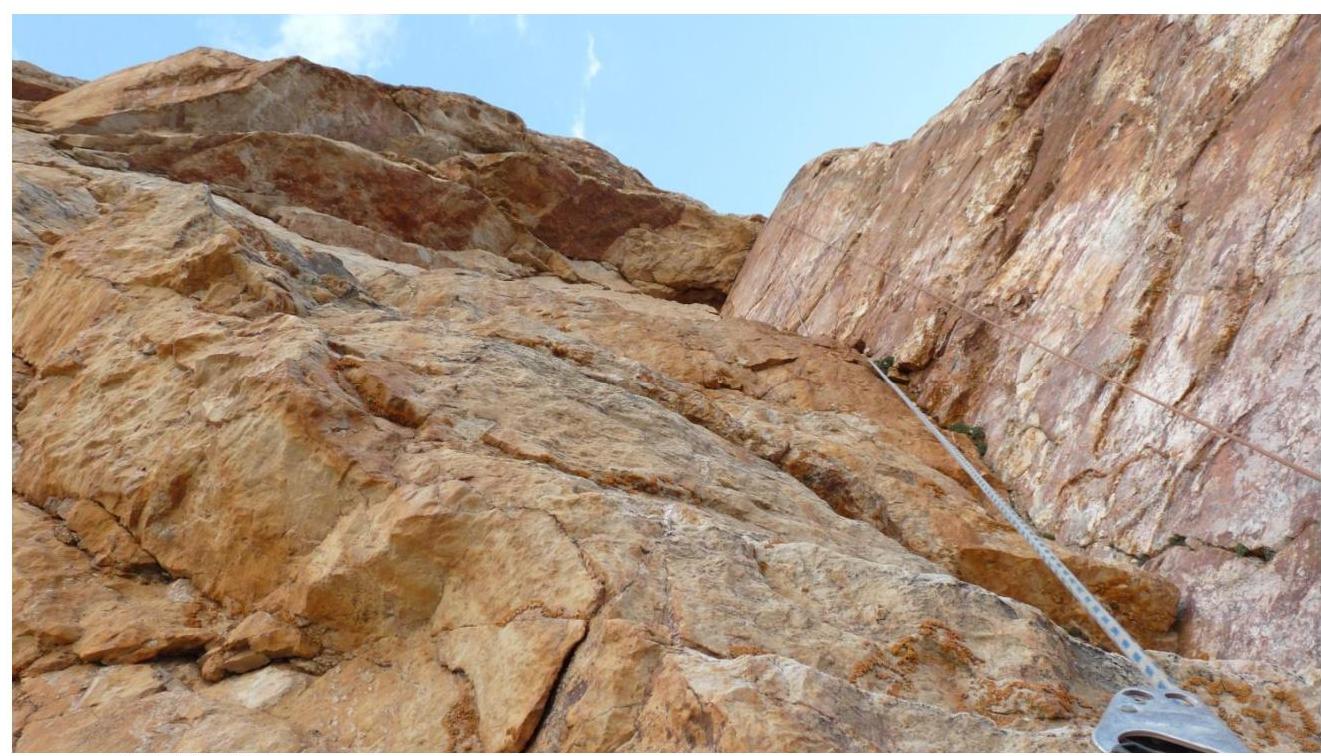
Photo 11. R11–R12. ![img-33.jpeg]({"width":132