Report on the First Ascent
Djarlam South-East
from the south via the right couloir
Utyashev Yu.A. Estimated difficulty 3B
2020 year
ASCENT PASSPORT
| 1. General Information | ||
|---|---|---|
| 1.1 | Full name, sports rank of the leader | Utyashev Yuri Anatolyevich, 2nd sports rank |
| 1.2 | Full name, sports rank of participants | Egorov Sergey Leonidovich, 1st sports rank; Bobrinsky Konstantin Igorevich, 2nd sports rank; Petrov Dmitry Alexandrovich, 2nd sports rank; Davydych Vitaly Viktorovich, 2nd sports rank |
| 1.3 | Organization | UAL Mountain Club |
| 2. Characteristics of the Ascent Object | ||
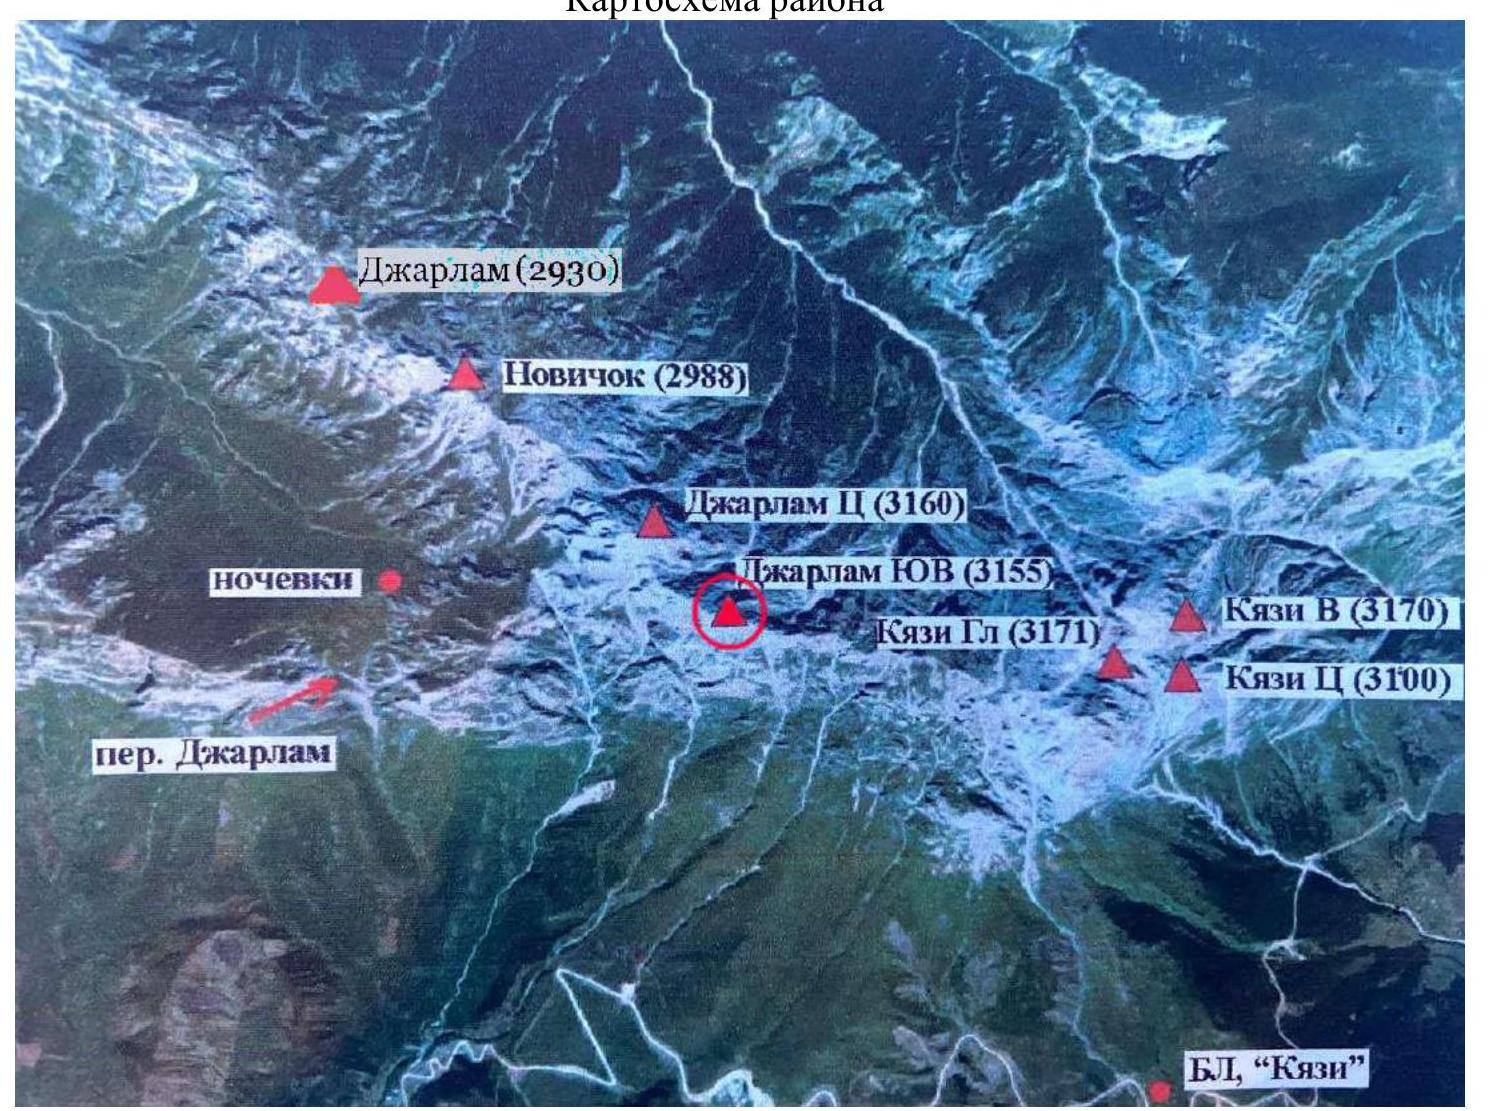
| 2.1 | Region | Caucasus |
| 2.2 | Valley | Dzheyrakh district |
| 2.4 | Name and height of the summit | Djarlam South-East (3171 m) |
| 2.5 | Geographical coordinates of the summit (latitude/longitude), GPS coordinates | N 42°50′20″ E 44°49′55″ |
| 3. Characteristics of the Route | ||
| 3.1 | Nature of the route terrain | Rocky |
| 3.2 | Category of difficulty | 3B |
| 3.3 | Name, year of first ascent | from south via right couloir, 2020 |
| 3.2 | Height difference of the route (altimeter or GPS data, m) | 670 |
| 3.3 | Route length (in meters) | 980 |
| 3.4 | Descent from the summit | via 2A category route along the eastern ridge |
| 3.5 | Additional route characteristics | The route has challenging sections of 5+ category difficulty. Use anchors and friends for belay points. Not recommended for groups with low rock climbing skills. |
| 4. Characteristics of Team Actions | ||
| 4.1 | Time of movement along the route (team's walking hours) — time to the summit — total time with descent — time from bivouacs to bivouacs | 9 h 00 min — 14 h 15 min — ----- |
| 4.3 | Time at control points | Departure from monument — 5:30 (November 5, 2020) — Approach to the wall — 7:00 — Exit from couloir — 11:00 — Reach the summit — 16:00 — Return to road — 19:15 (November 5, 2020) — Return to "Kyazi" recreation center: 20:15, November 5, 2020 |
| 5. Weather Conditions | ||
| 5 | November 5, 2020 clear, cloudy by evening, fog on the summit | |
| 6. Responsible for the Report | ||
| 6.1 | Full name, e-mail | Petrov Dmitry Alexandrovich, alwe@ya.ru, 8 (903) 216-46-50 |
Section lengths:
- n-k — 100 m.
- I category difficulty — 800 m.
- II category difficulty — 240 m.
- III category difficulty — 110 m.
- IV category difficulty — 140 m.
- V category difficulty — 80 m.
Maximum steepness of the wall section — 80°; average steepness of the wall section — 55°; average steepness of the entire route — 40°.
Belay points used: Rock anchors on the route (including in the denominator for ITO): 5+3+1+1/2 32/2; placements 4+2+1+3/2 56/4; Belay points left on the route: Total — 0.
Movement table by sections.
| Section | Length | Steepness | Terrain nature | Category difficulty | Number of anchors |
|---|---|---|---|---|---|
| R0–R1 | 1000 | 20 | Grass | n/k | 0 |
| R1–R2 | 300 | 30 | Rocks | I | 0 |
| R2–R3 | 50 | 50 | Grass, rocks | III | 0 |
| R3–R4 | 100 | 40 | Grass, rocks | II | 0 |
| R4–R5 | 100 | 40 | Grass, rocks | II | 0 |
| R5–R6 | 50 | 80 | Rocks | V | 12 |
| R6–R7 | 40 | 70 | Rocks | IV | 8 |
| R7–R8 | 200 | 40 | Grass, rocks | II | 0 |
| R8–R9 | 100 | 30 | Grass | I | 0 |
| R9–R10 | 150 | 40 | Grass, rocks | I | 0 |
| R10–R11 | 250 | 30 | Grass, rocks | I | 0 |
| R11–R12 | 50 | 50 | Rocks | IV | 10 |
| R12–R13 | 60 | 30 | Rocks | III | 6 |
| R13–R14 | 40 | 30 | Rocks | II | 3 |
| R14–R15 | 50 | 70 | Rocks | IV | 6 |
Equipment used by the group:
- Anchor anchors — 12 pcs.
- Anchors — 2 pcs.
- Friends — 6 pcs.
- Set of chocks — 12 pcs.
- Ropes: static, dynamic
Area Map
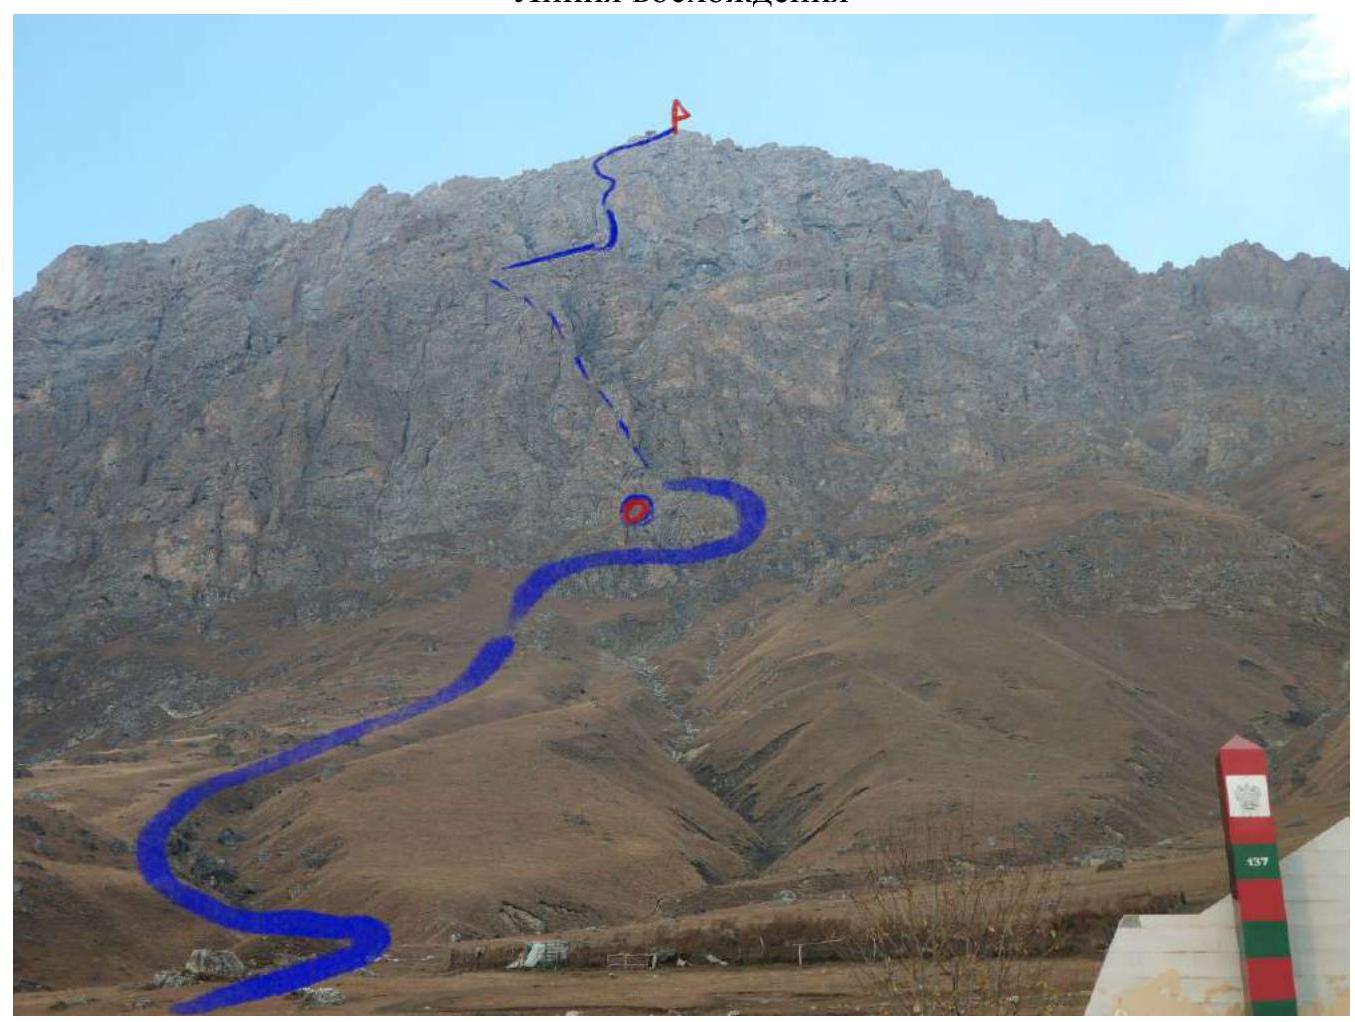
Route Description
Approach: up the grassy slope to the base of the wall. From the road (monument to the crashed border guard helicopter) move up, crossing gullies formed by the stream beds, towards the massif — 1.5–2 hours.
R0–R1. Approach to the route: from the monument up to the center of the wall, to the right of the yellow buttress.
R1–R2. Under the wall — to the right into the base of the large couloir (the start of the couloir is above the gully). Up the couloir — easy climbing under a huge egg-shaped plug.
R2–R3. Bypass to the right along grassy ledges.
R3–R4. Ascend the grassy slope to a large ledge on the left.
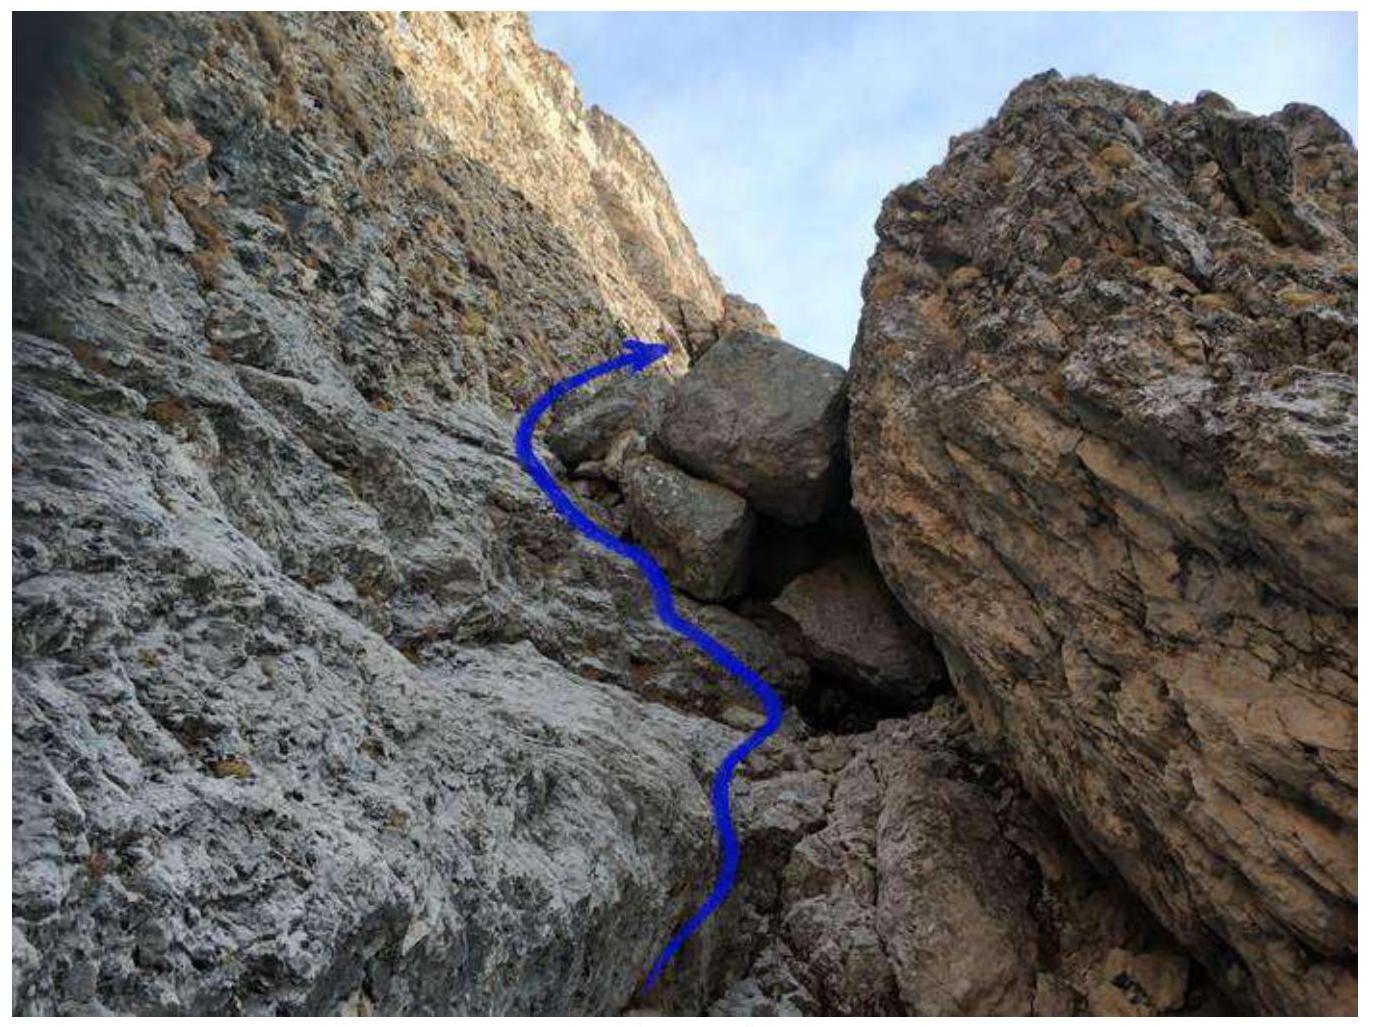
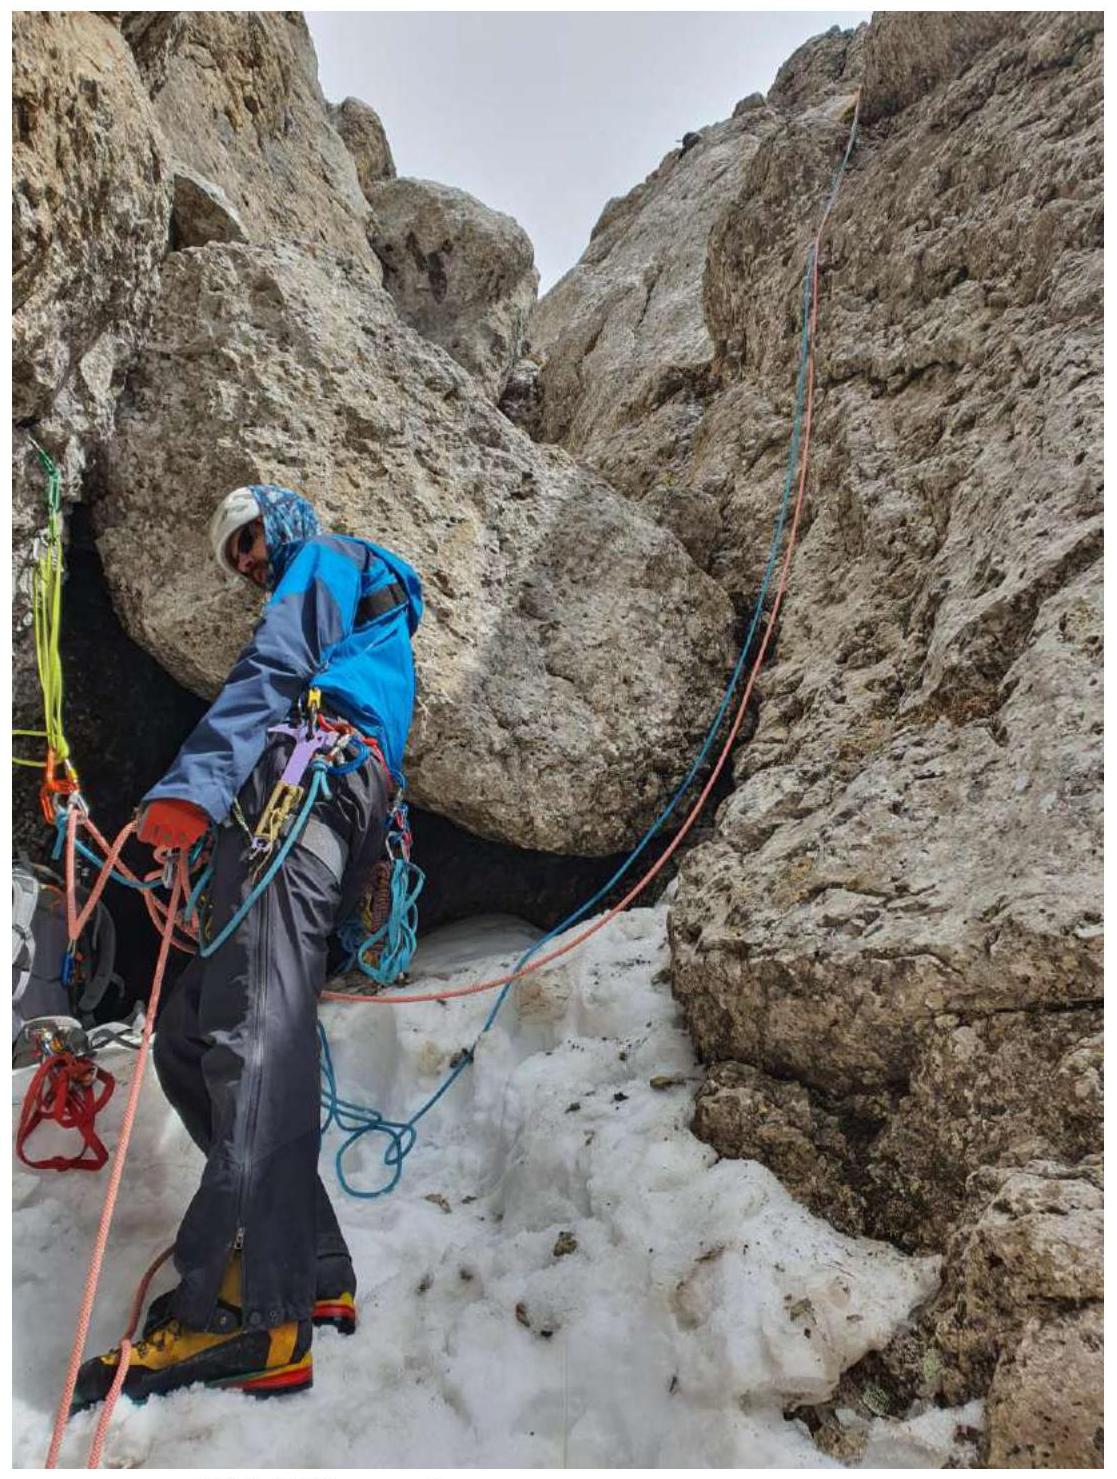
R4–R5. Traverse left to the end of the ledge, descend into the couloir — exit above the "egg" (belay with a rope). Move up the couloir to the plug. The couloir is prone to rockfall!
R5–R6. Through a crack in the right wall — exit above the plug (difficult climbing 6C, 35 m, 80°) — the key section of the route. Old anchors are encountered.
R6–R7. The next plug is bypassed on the right (10 m of 4–5 category climbing, 60–70°).
R7–R8. Further up the couloir — easy climbing with an exit to a saddle at the end of the couloir.
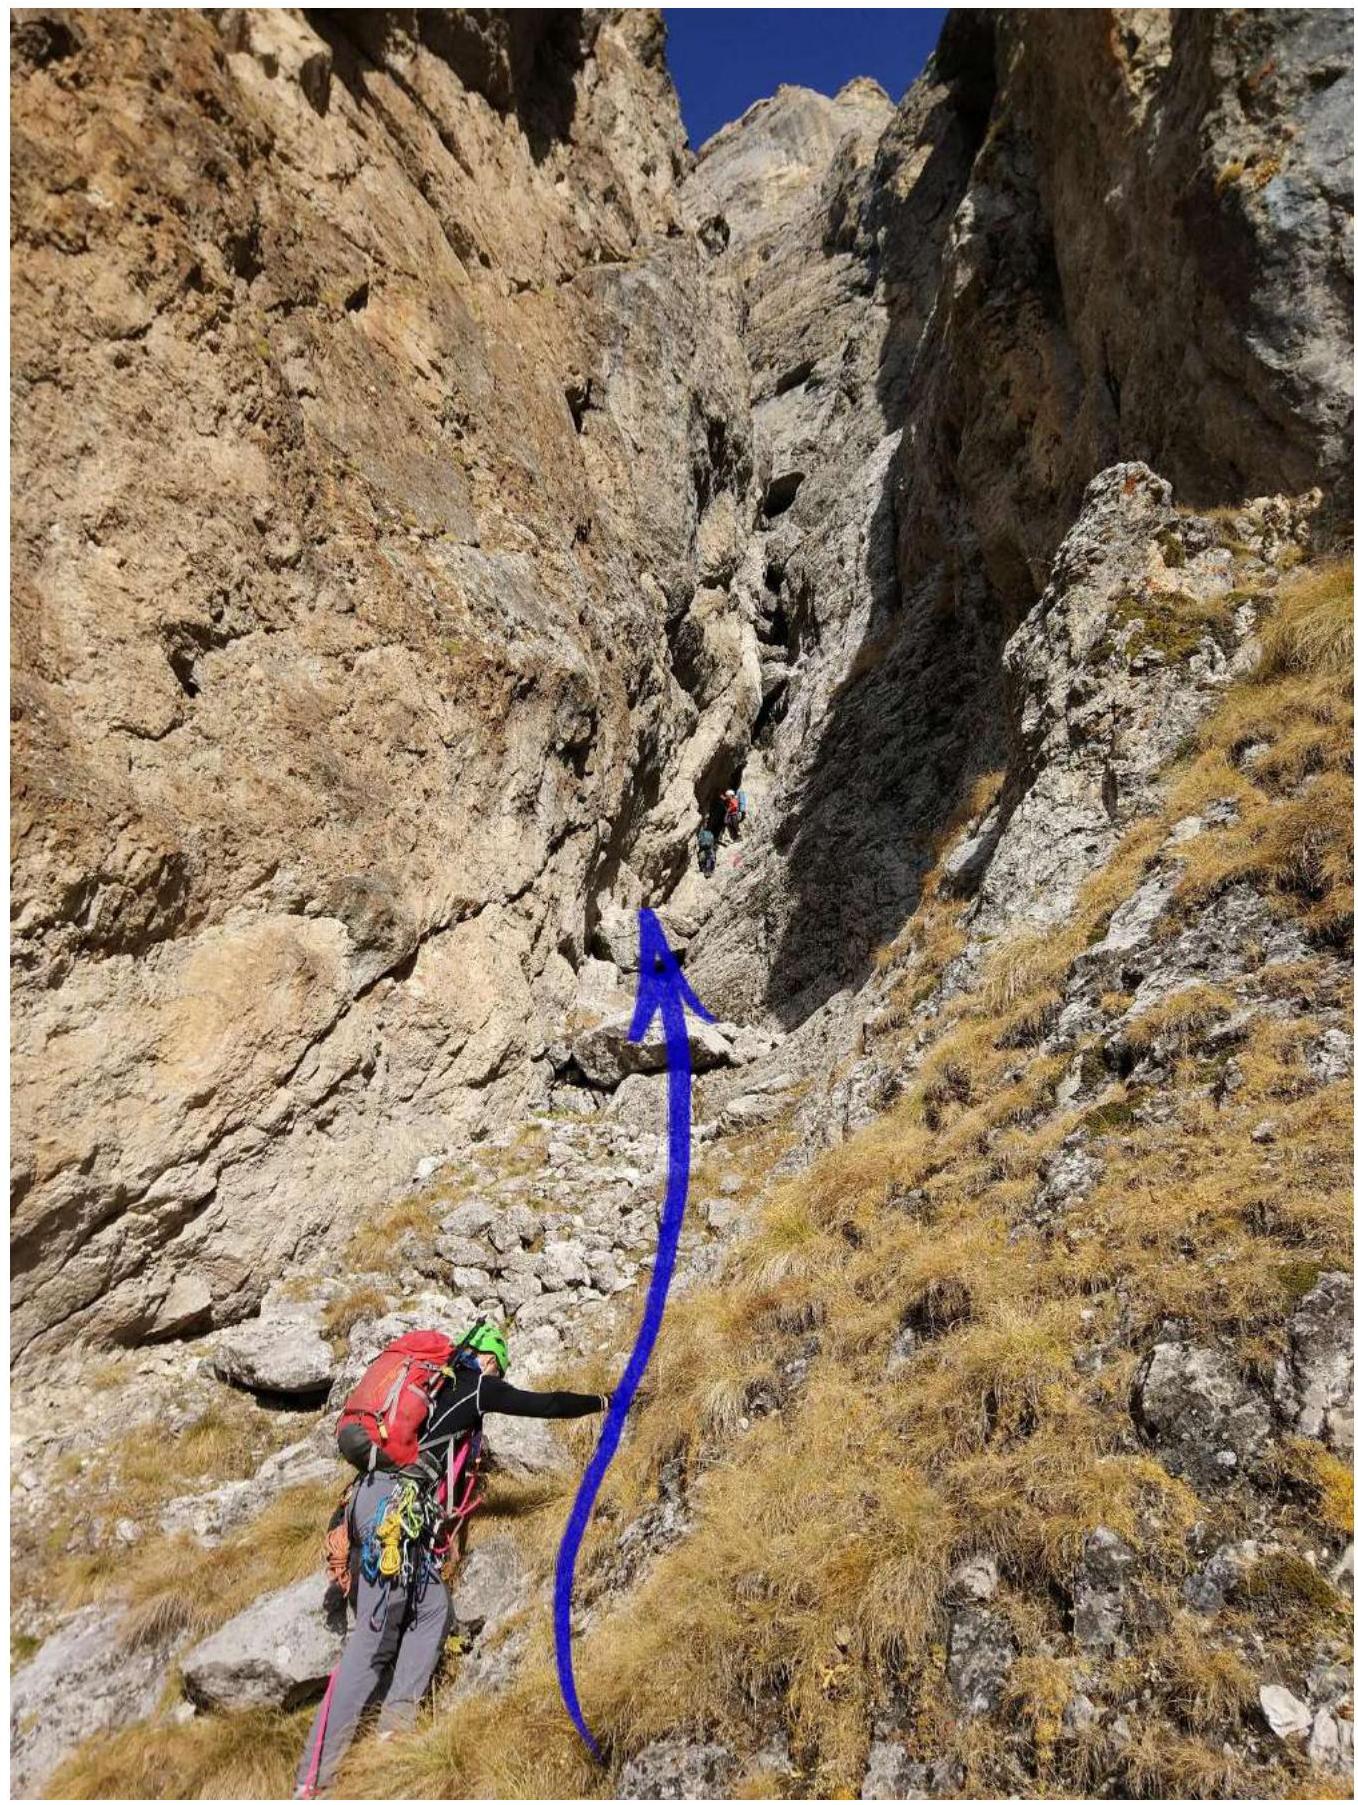
R8–R9. Traverse right along the wall to the next saddle, leading into the central large couloir.
R9–R10. Descend and then ascend to a huge grotto at the fork of the couloirs. To the right along the scree slope to a saddle.
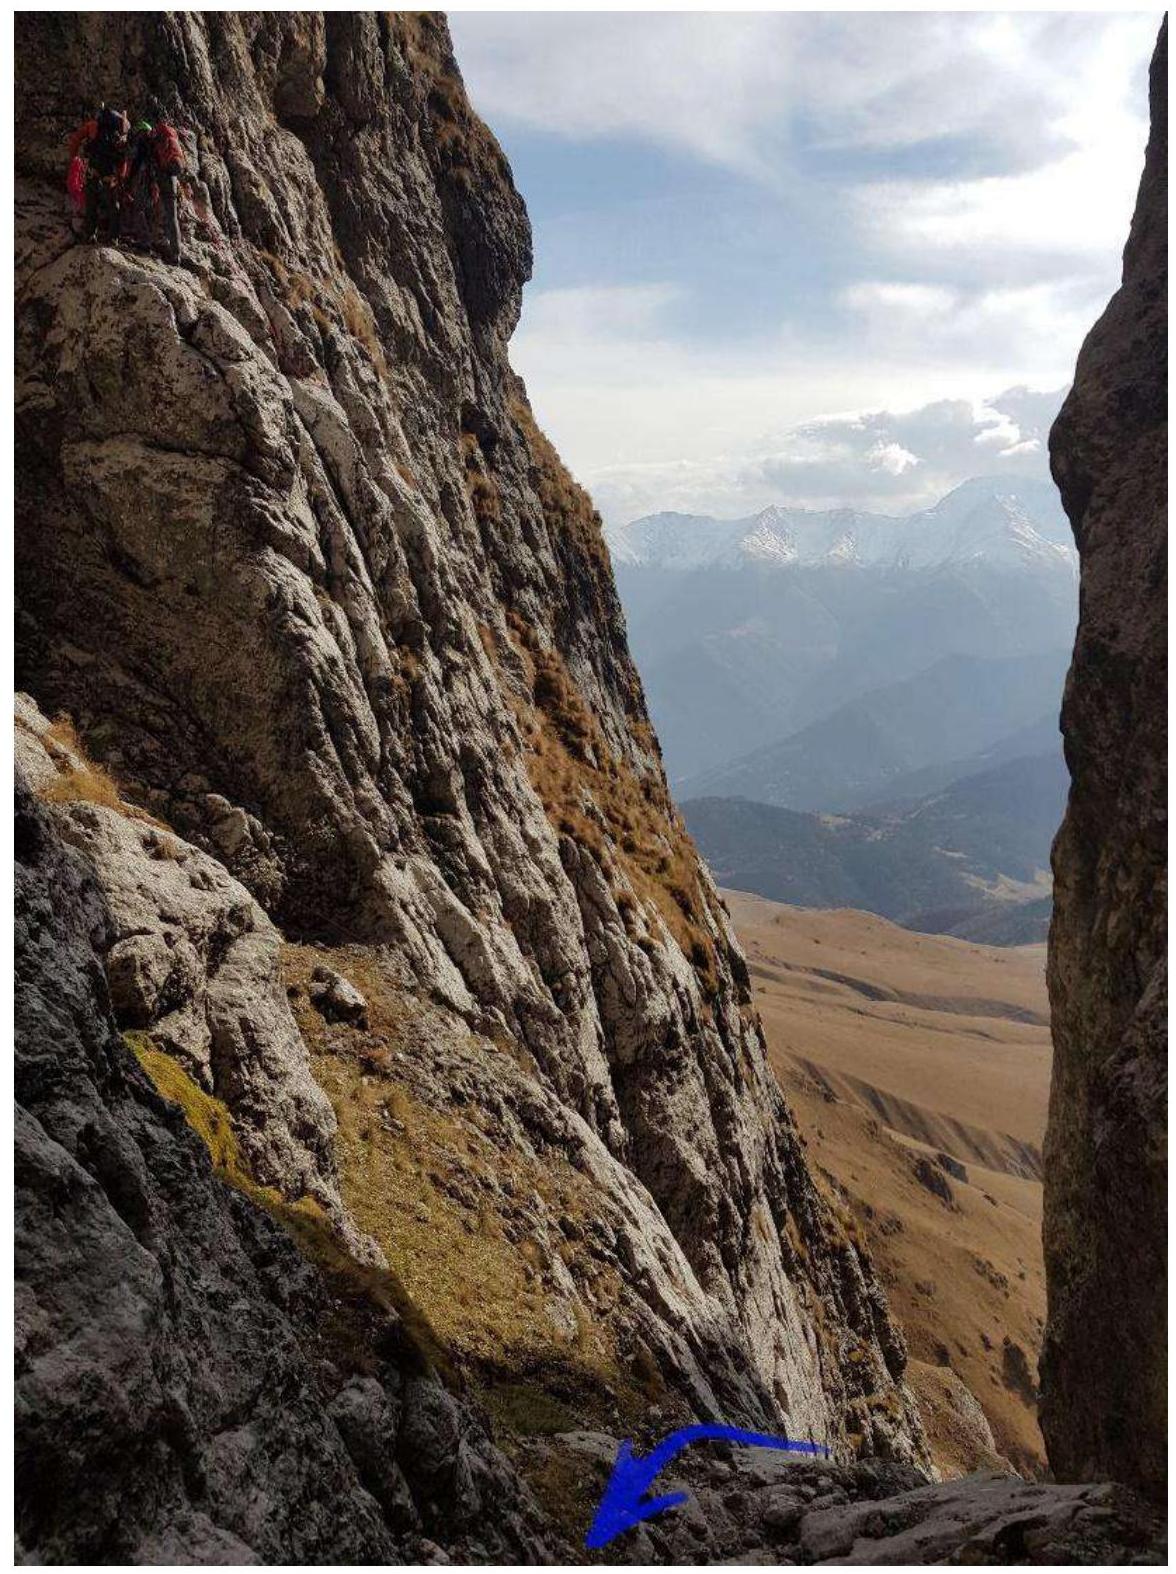
R10–R11. From the saddle (10 m to the left) along a large crack (from left to right) — 50 m of easy climbing (4th category difficulty). Approach to the plug. Station under the plug.
R11–R12. Along the right side of the couloir — exit to the ridge, 60 m up the ridge to a large boulder (good station).
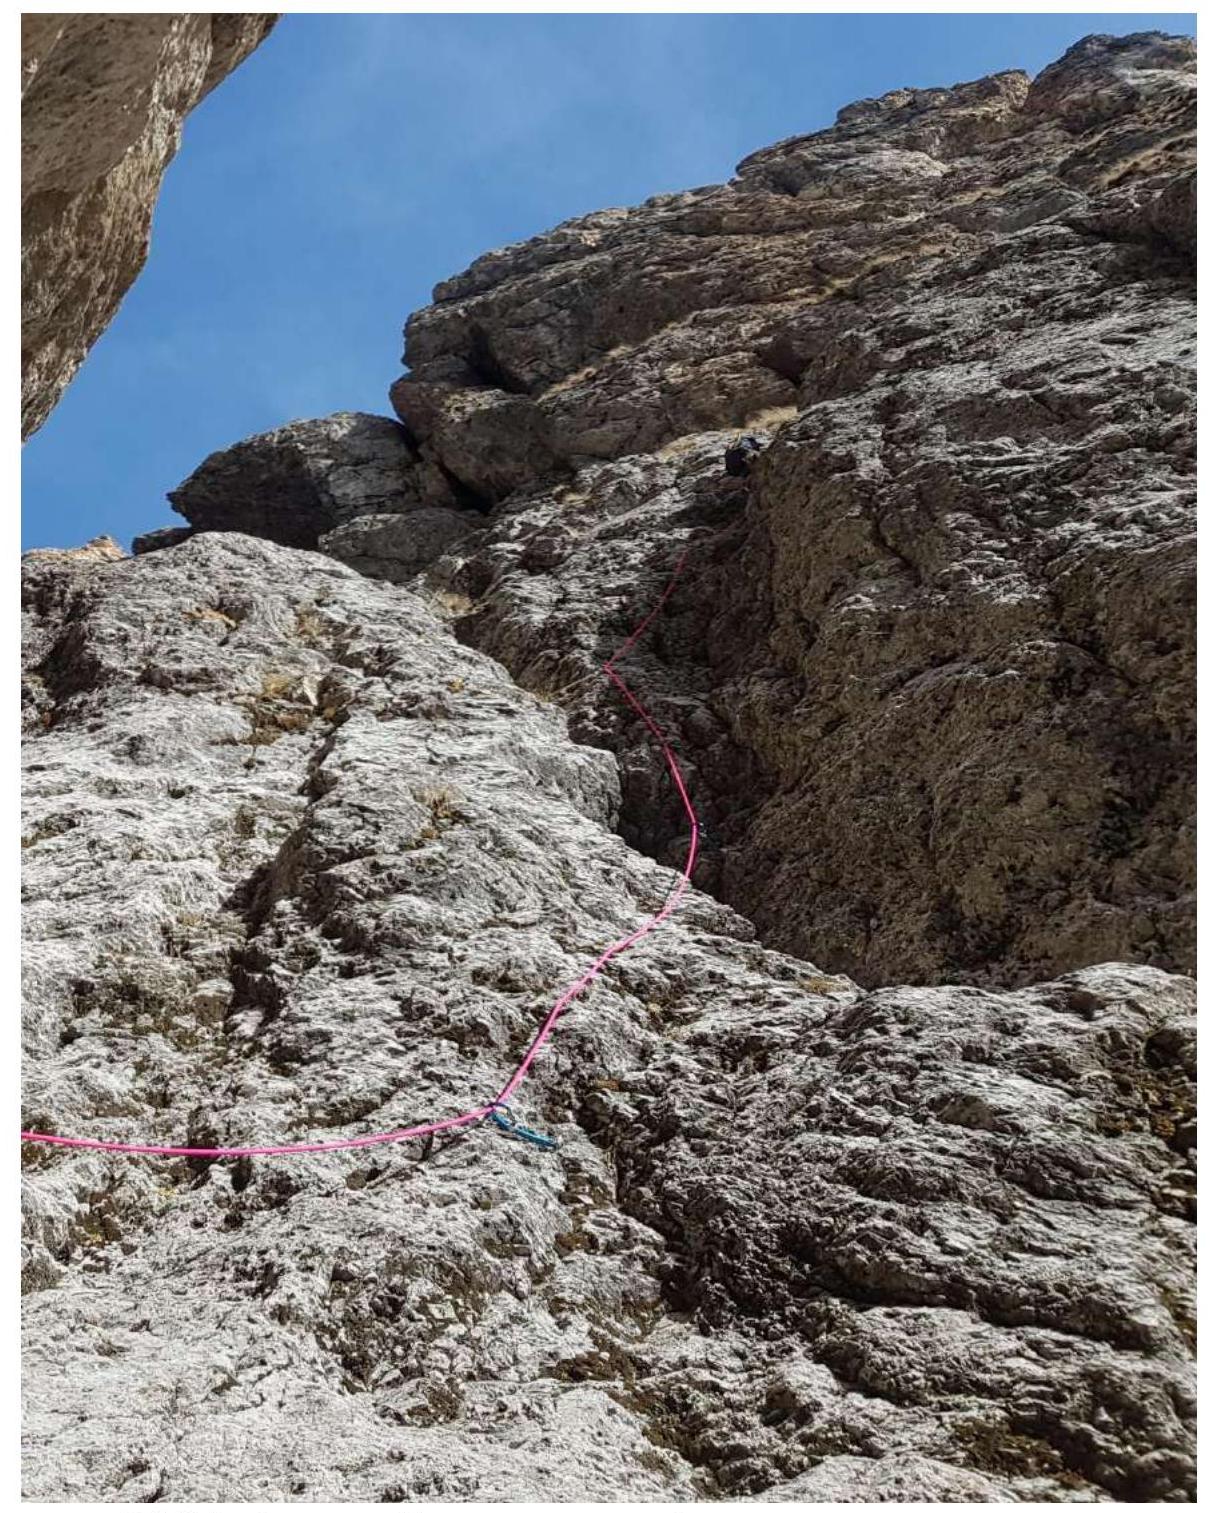
R12–R13. Further from the large boulder to the right up the ledges to the wall (50 m).
R13–R14. Then up the wall vertically 40 m — exit under the ridge.
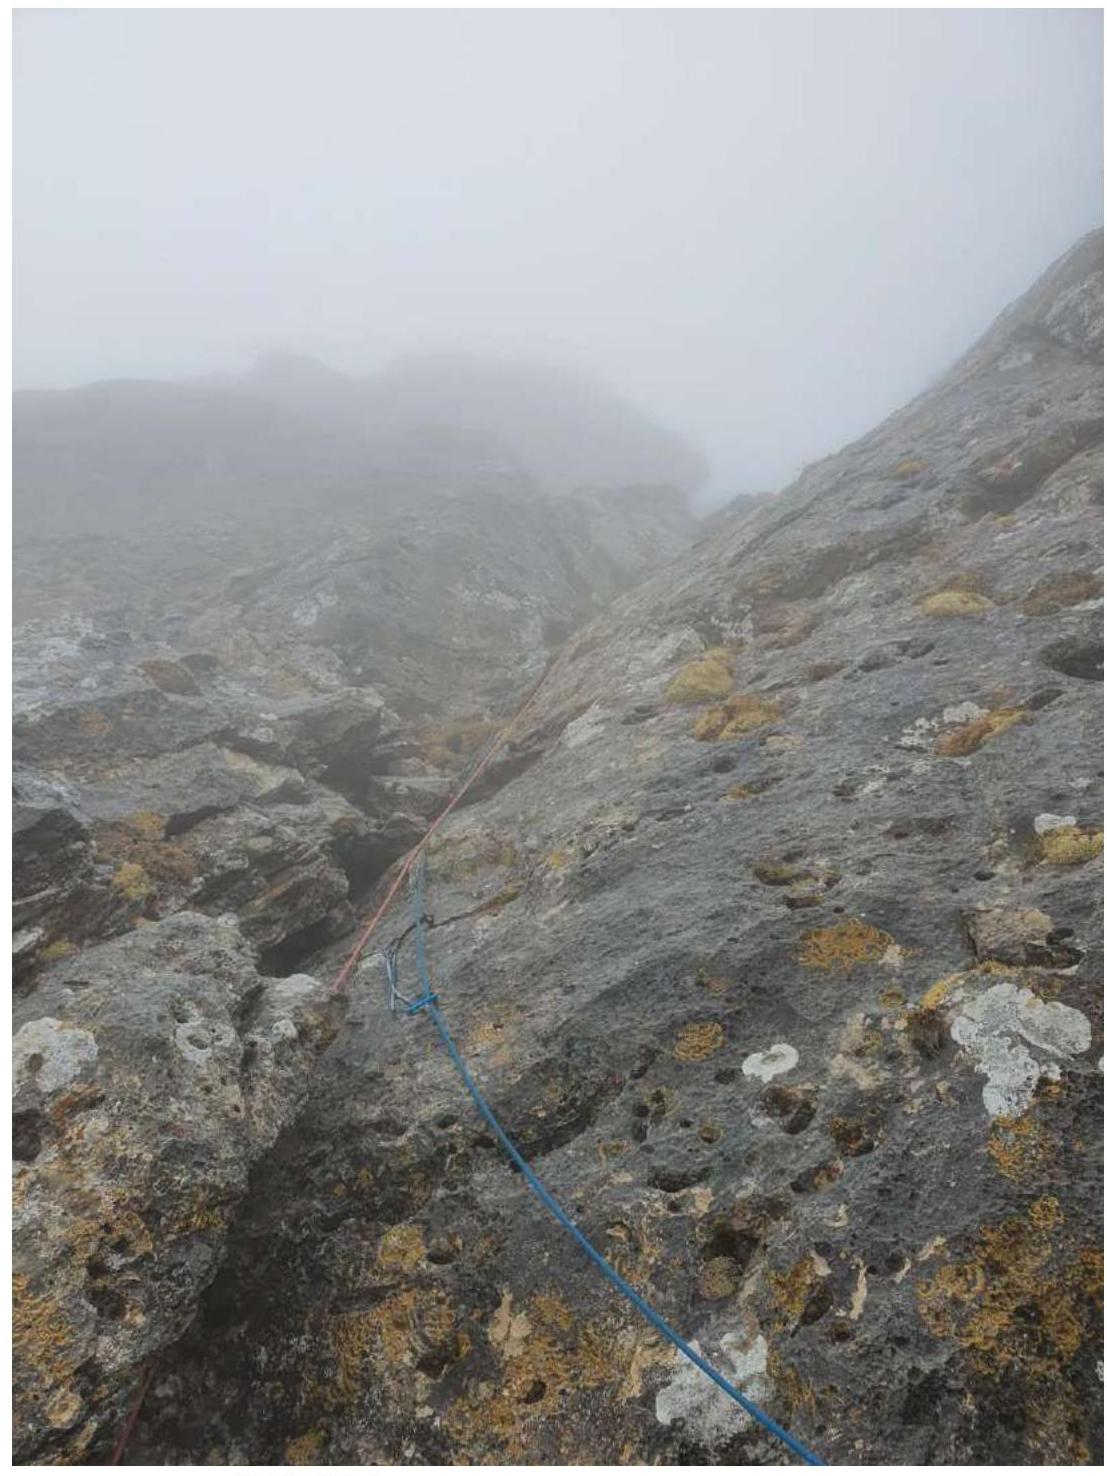
R14–R15. Along the easy ridge to the right up to the summit (80 m). From the summit, continue along the ridge in the opposite direction from the ascent route. Recommended descent along the eastern ridge (2A route).
| Length | Steepness | Category difficulty | |
|---|---|---|---|
| R15 | 200 | 40 | II |
| R14 | 50 | 70 | IV |
| R13 | 40 | 30 | II |
| R12 | 60 | 30 | III |
| R11 | 50 | 50 | IV |
| R10 | 250 | 30 | I |
| R9 | 150 | 40 | I |
| R8 | 100 | 30 | I |
| R7 | 200 | 40 | II |
| R6 | 40 | 70 | IV |
| R5 | 50 | 80 | V |
| R4 | 100 | 40 | II |
| R3 | 100 | 40 | II |
| R2 | 50 | 50 | III |
| R1 | 300 | 30 | I |
| R0 | 1000 | 20 | I |
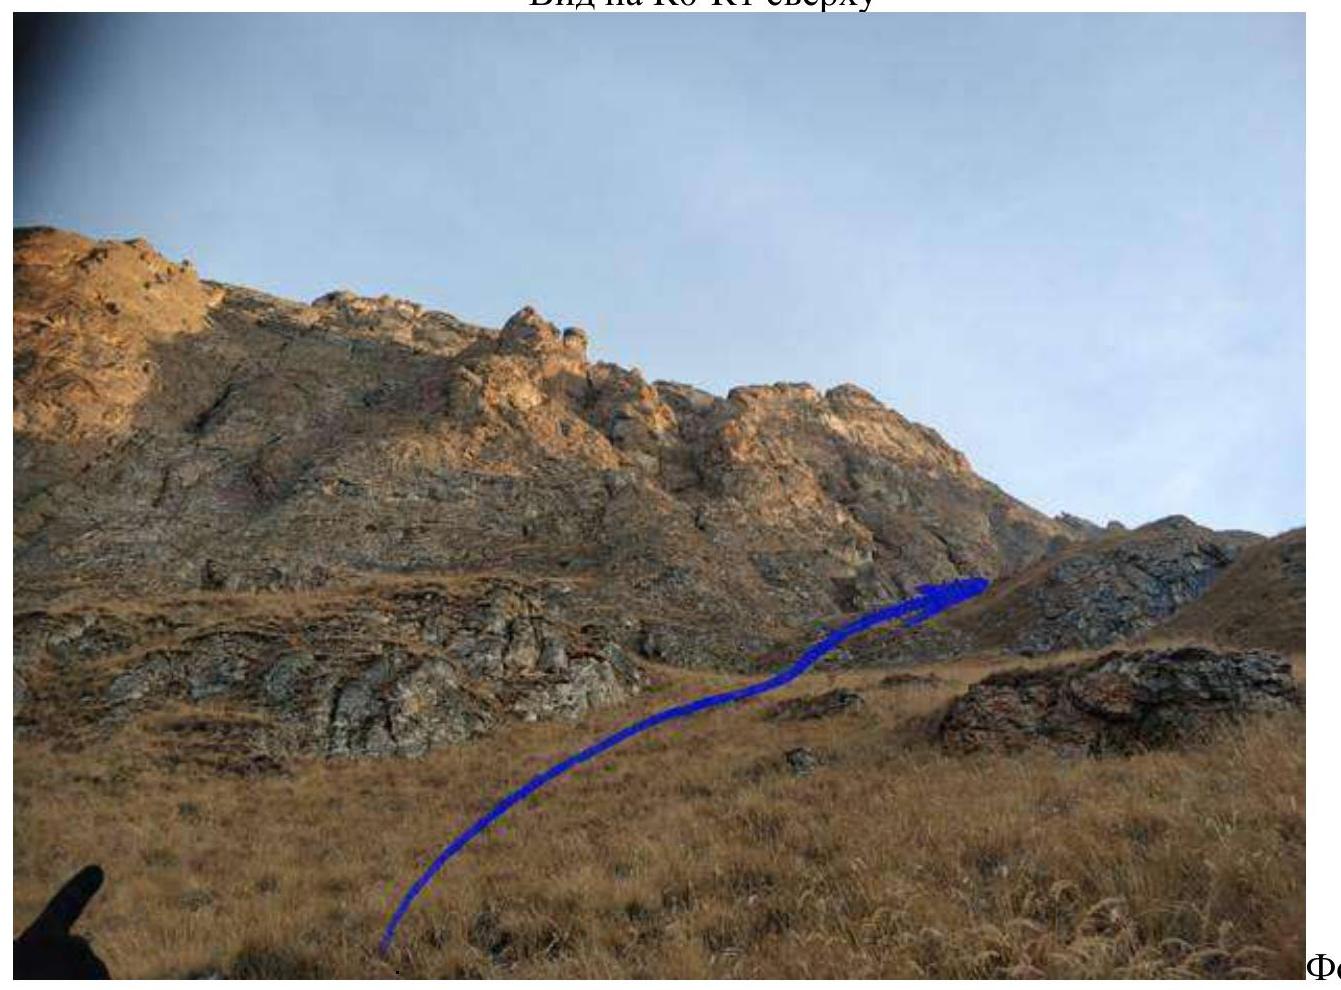
View of R0–R1 from above
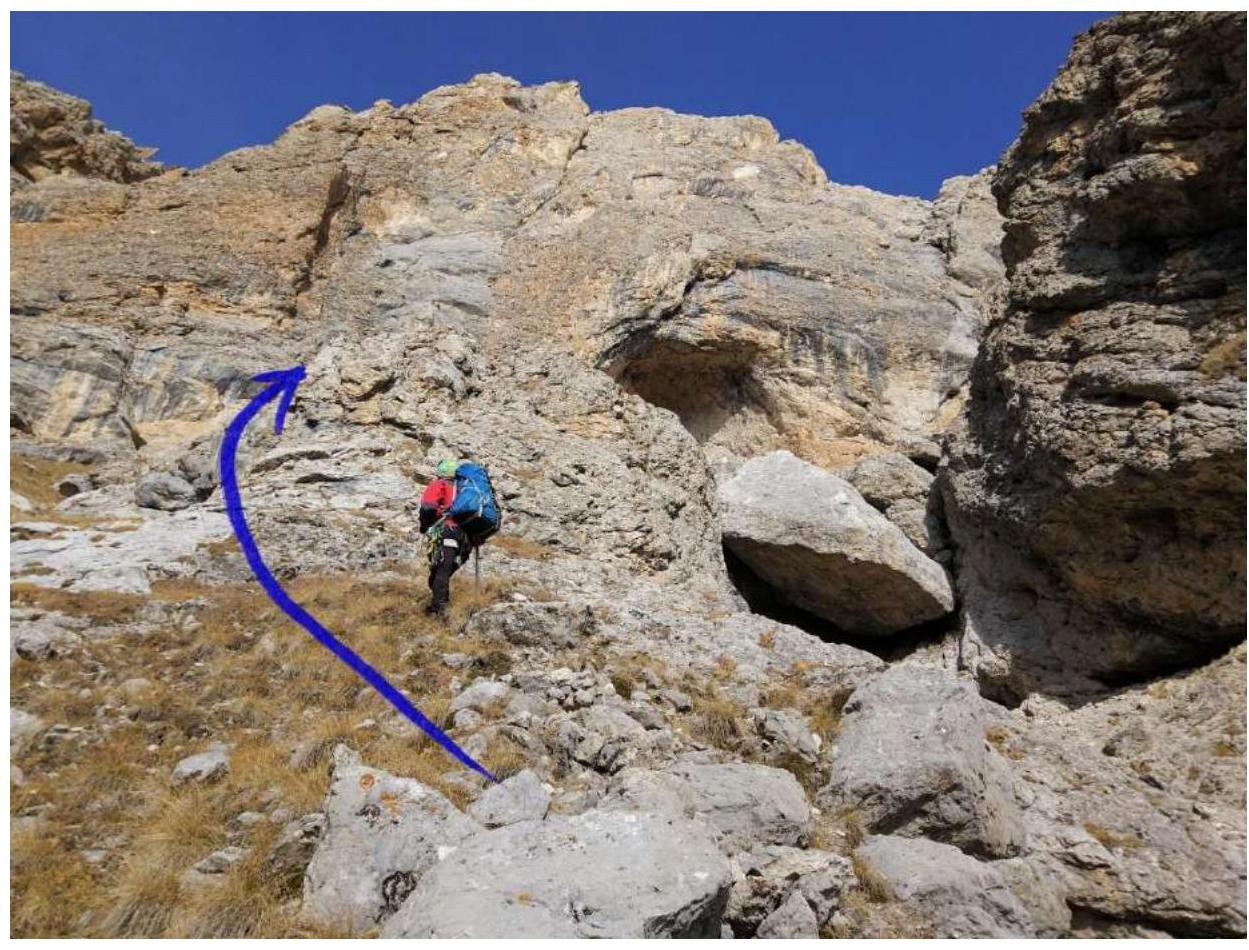
 Movement along the route. Approach to the wall to R1
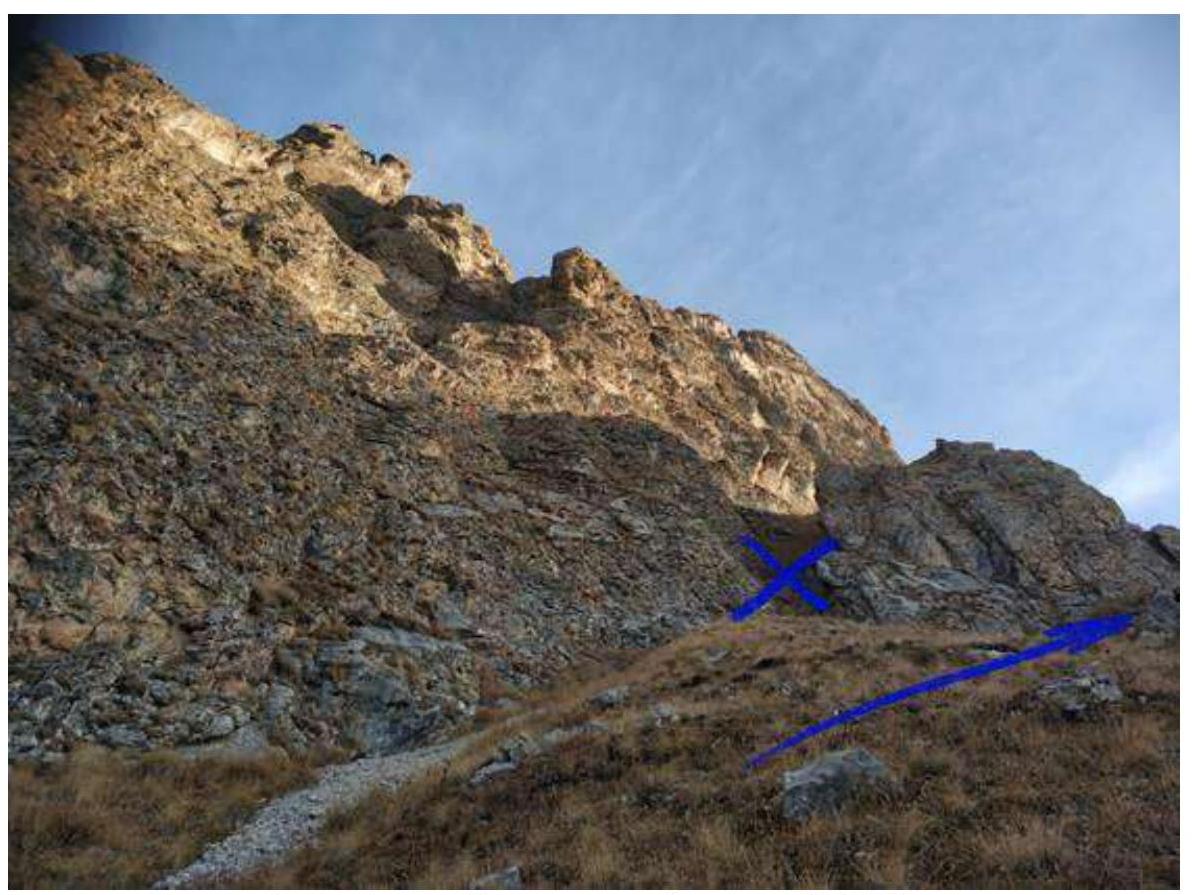
Correct bypass option on R1–R2
Plug in R1–R2
Entering the couloir above the "egg" R4–R5
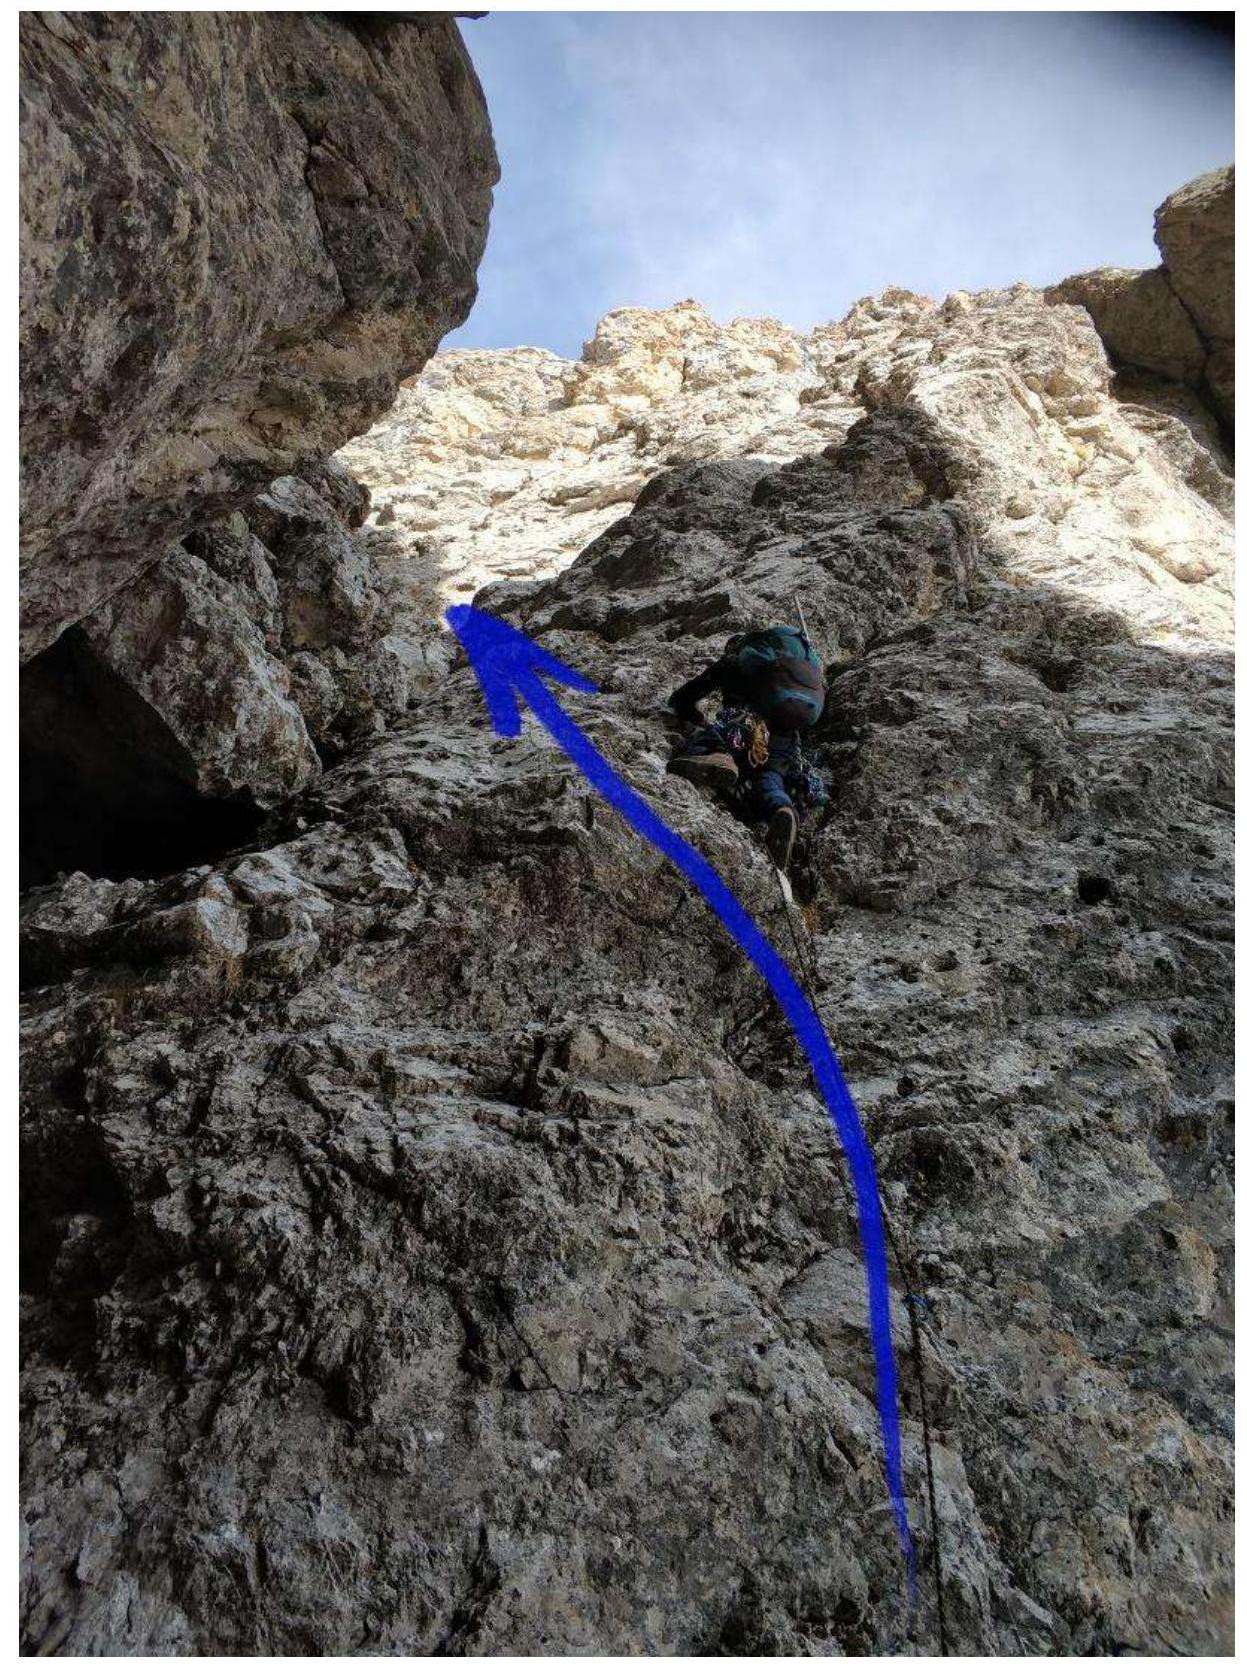
R5–R6 bypassing the plug along the right side of the couloir — view from below
Exit from R5–R6 (view from above)
R6–R7 bypassing the plug on the right. View from below
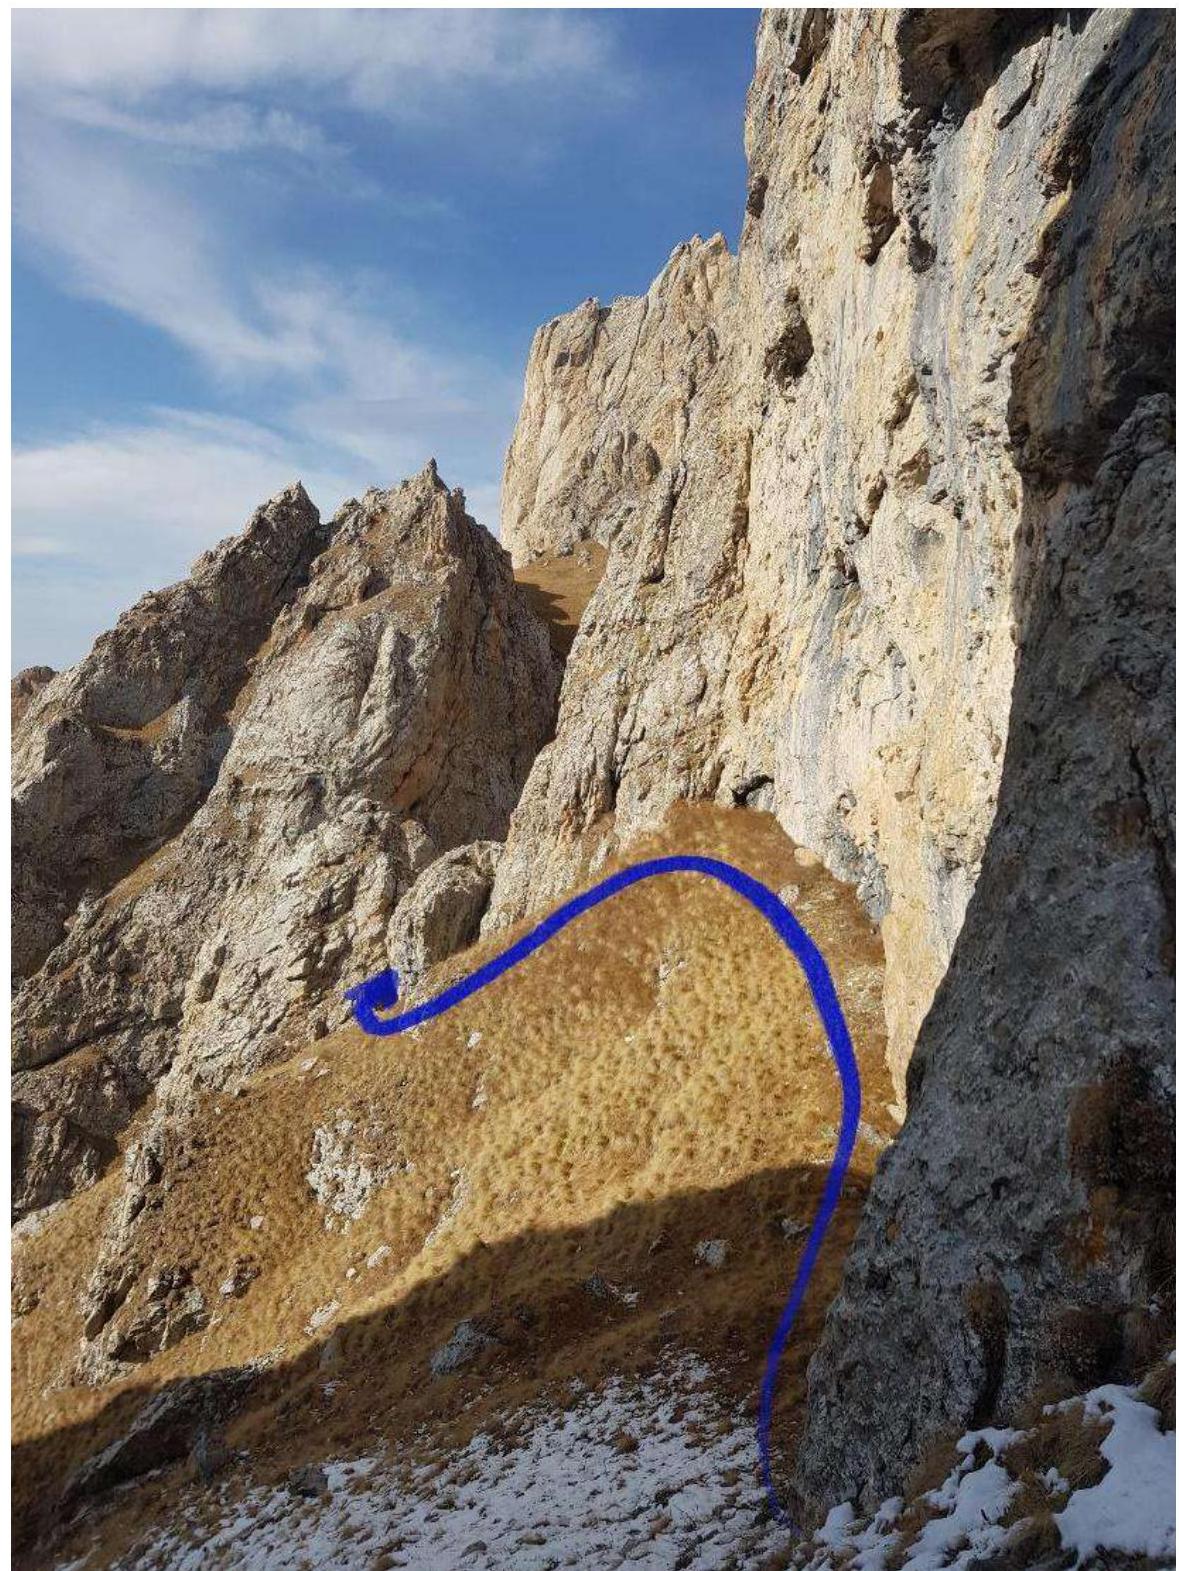
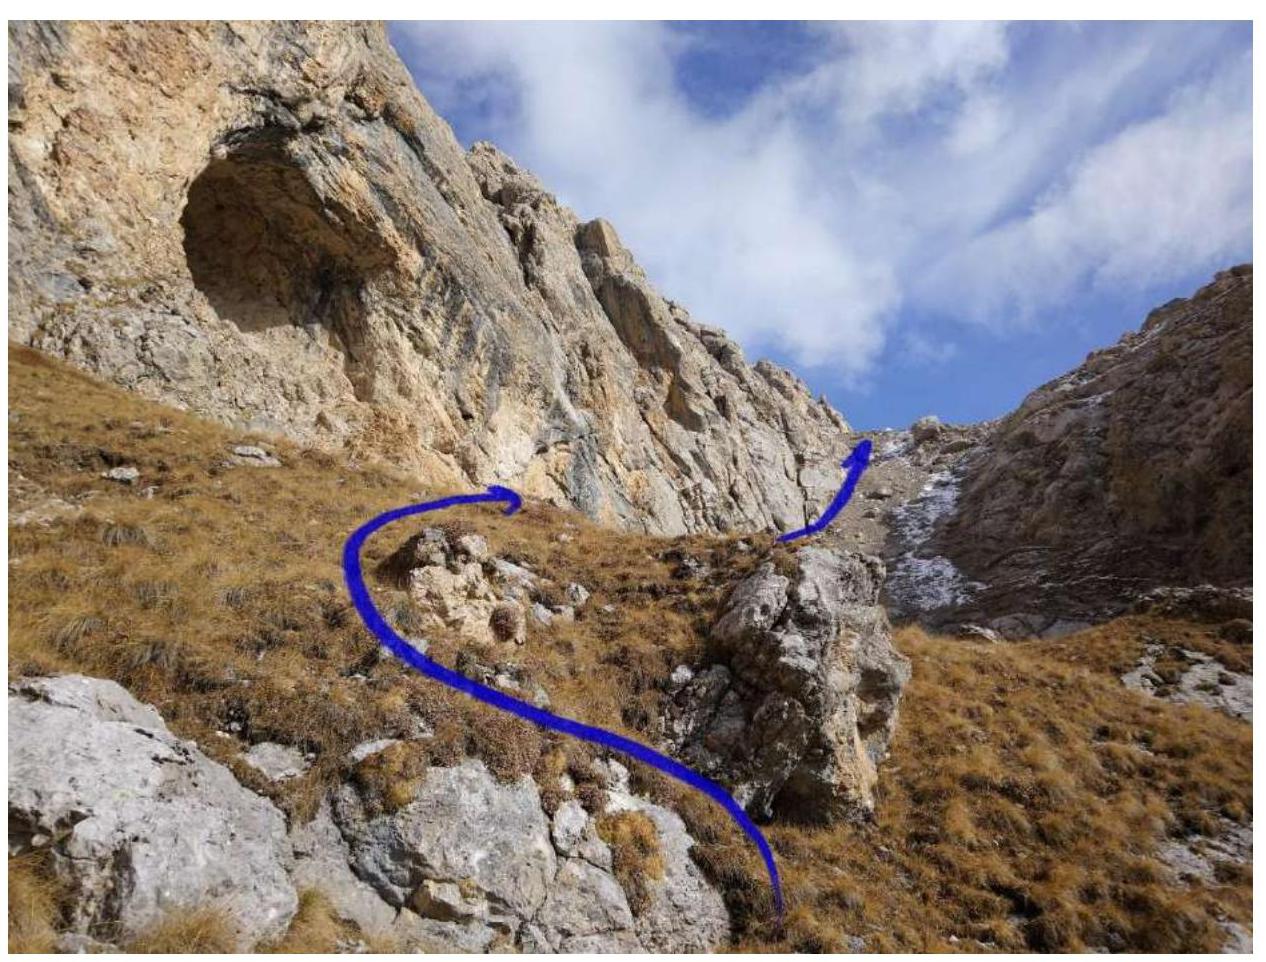
R8–R9 traverse between the first and second saddles
R9–R10 — ascent to the shrine
R10–R11 — ascent along the couloir to the saddle

R11–R12 — start of the inner corner from the saddle
R12–R13 — from the large boulder to the right upwards
R13–R14 — up the wall vertically
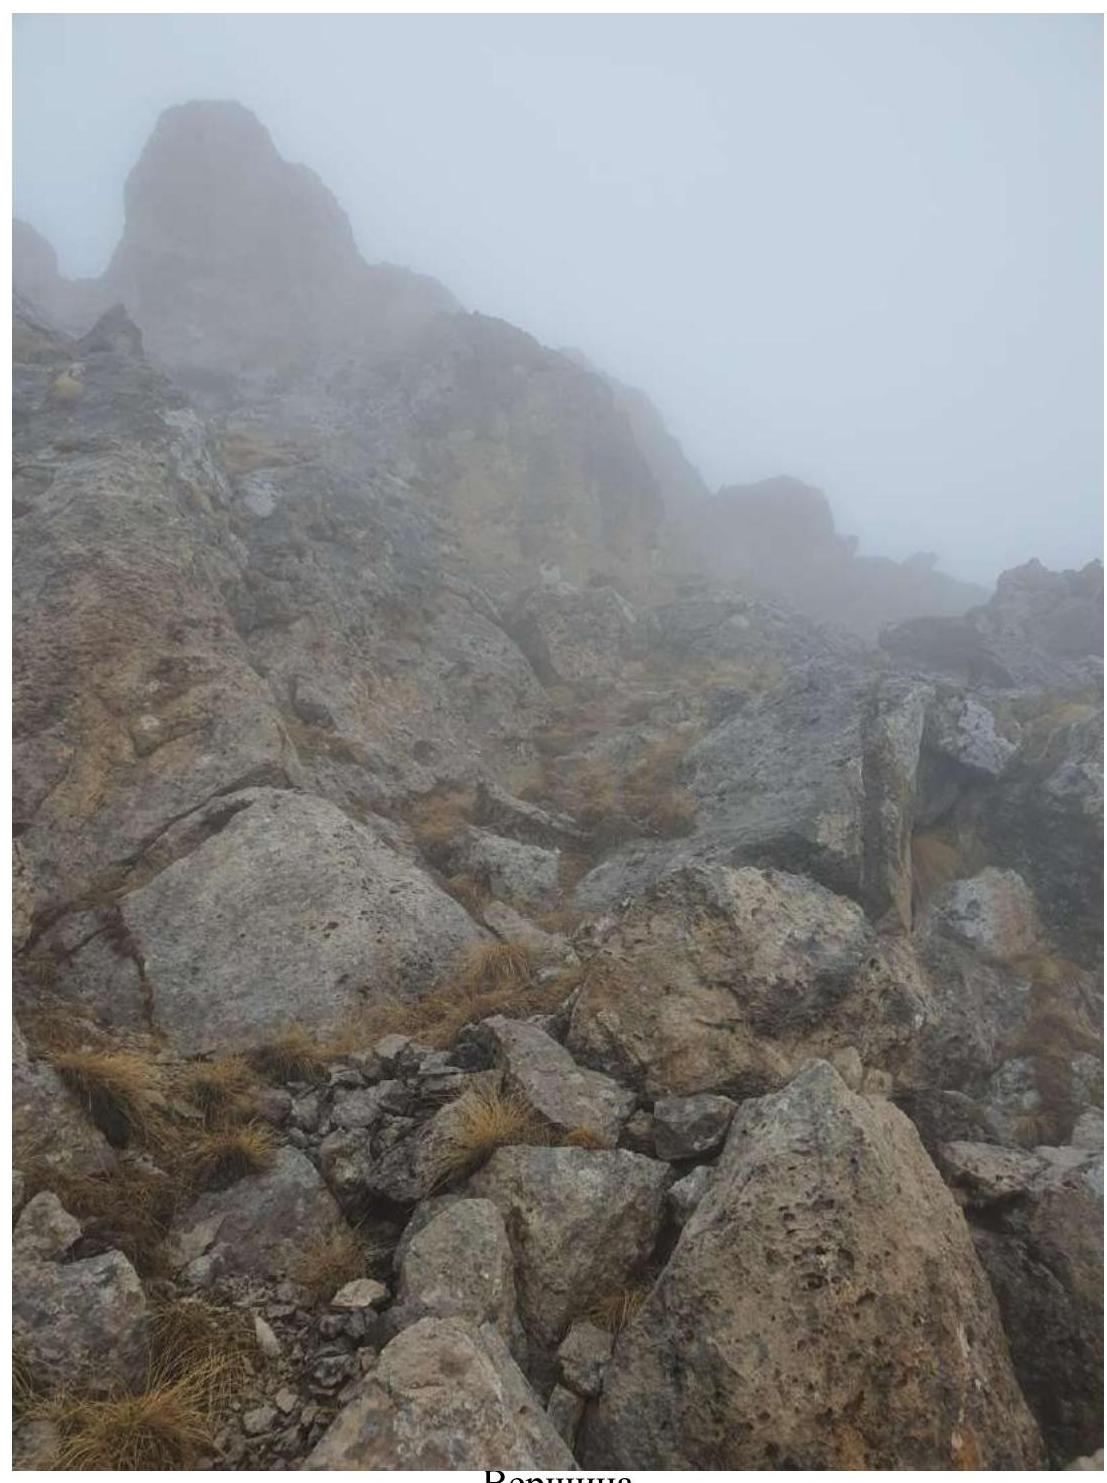
Summit
General Conclusion on the Route
Approach to the route: from the monument up to the center of the wall, to the right of the yellow buttress.
Under the wall — to the right into the base of the large couloir (the start of the couloir is above the gully). Up the couloir — easyUtilizing the huge egg-shaped plug.
Bypass to the right along grassy ledges, then to the left — exit above the "egg" (belay with a rope).
Move up the couloir to the plug. The couloir is prone to rockfall! Through a crack in the right wall — exit above the plug (difficult climbing 6C, 35 m, 80°) — the key section of the route. Old anchors are encountered.
The next plug is bypassed on the right (10 m of 4–5 category climbing, 60–70°).
Further up the couloir — easy climbing with an exit to a saddle at the end of the couloir. Traverse right along the wall to the next saddle, leading into the central large couloir. Descend and then ascend to a huge grotto at the fork of the couloirs. To the right along the scree slope to a saddle.
From the saddle (10 m to the left) along a large crack (from left to right) — 50 m of easy climbing (4th category difficulty). Approach to the plug. Station under the plug. Along the right side of the couloir — exit to the ridge, 60 m up the ridge to a large boulder (good station). Further from the large boulder to the right up the ledges to the wall (50 m). Then up the wall vertically 40 m — exit under the ridge.
Along the easy ridge to the right up to the summit (80 m). Recommended descent along the eastern ridge (2A route).
Remarks:
- In spring and with snow in the couloir, water flow is possible, which greatly complicates the passage of the key element (ITO recommended).