
Anniversary Climbing Event on the Central Caucasus, dedicated to the 50th anniversary of Victory
1995
Rock Climbing Category
Report
- On the first ascent to the summit of Fytargin, 4184 m, via the south-eastern counterfort
- Of the southern spur, approximately 4B category of difficulty, by a sports group from Dnipropetrovsk
- August 14, 1995
Leader: Banya A.V.
Coach: Mityukhin F.P.
Dnipropetrovsk 1995
Addresses:
- 320027, Dnipropetrovsk
- Oktyabrskaya Square, 9
- Alpinism Federation at “Dnieper” climbing club
Leader: Banya Alexander Vasilyevich, 244031, Sumy, 40 let Oktyabrya St., 55, apt. 114, phone 24-08-61
Coach: Mityukhin Fedor Petrovich, 244004, Sumy, Metallurgov St., 14, apt. 67, phone 24-56-06
Height measurements were made using calculations. Steepness was determined:
- Visually;
- Using a protractor.
Passport
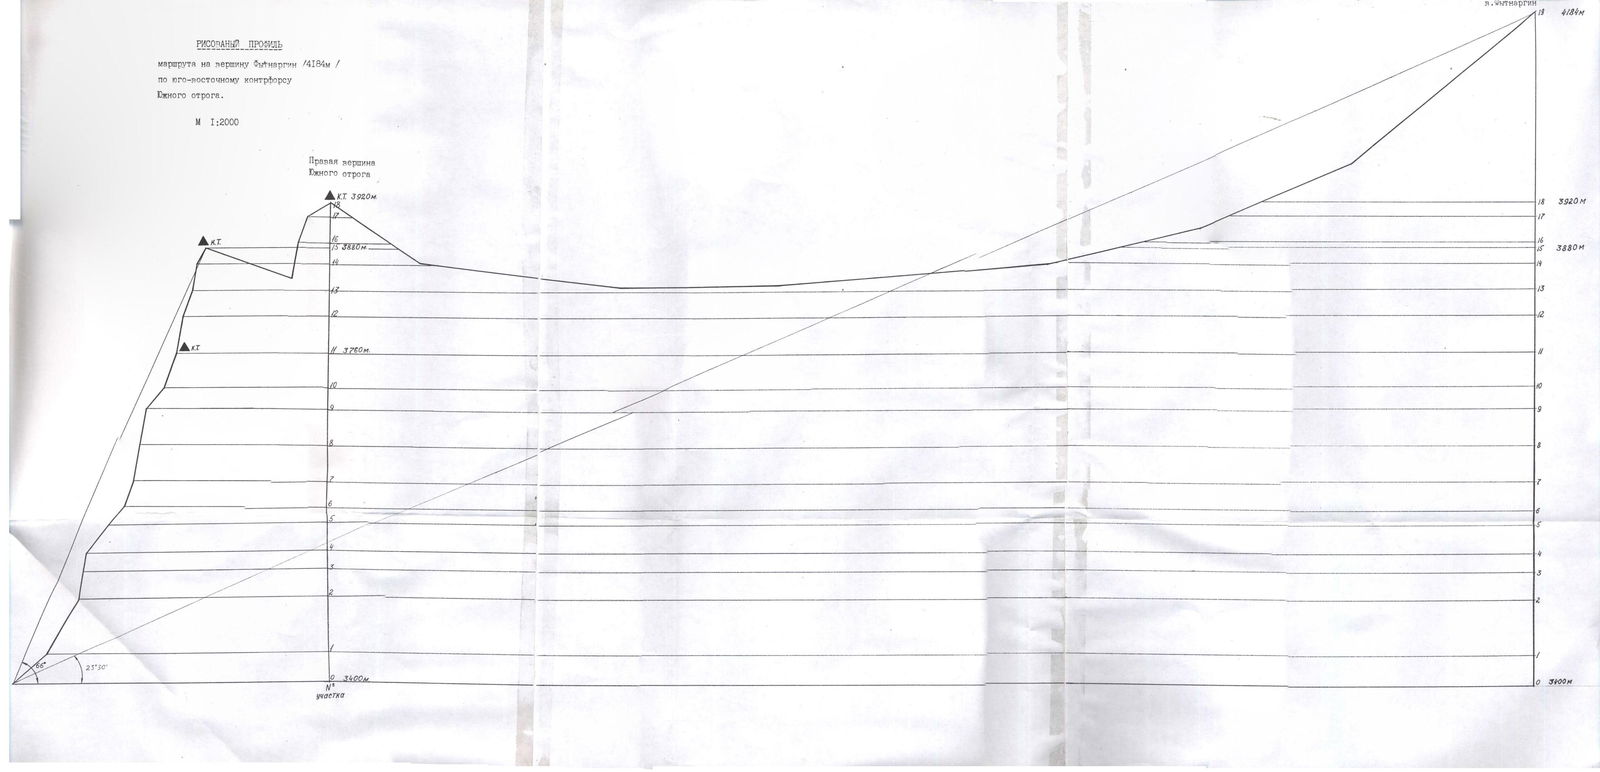
1. Climbing category — rock climbing 2. Climbing area — Central Caucasus, Karasu gorge 3. Mount Fytargin (4184 m) via the SE counterfort of the southern spur 4. Proposed category of difficulty — 4B (first ascent) 5. Height difference: 780 m Distance — 2040 m Length of the wall section — 600 m Length of sections with 5th category of difficulty — 170 m Average steepness of the route — 23°30′ Average steepness of the wall section — 66°
6. Pitons used: rock — 24 chocks — 91
7. Team's climbing hours — 12 8. Overnight stays: none 9. Leader: Banya Alexander Vasilyevich — 1st sports category
10. Coach: Mityukhin Fedor Petrovich — Master of Sports 11. Approach to the route: August 14, 1995 Summit — August 14, 1995 Return — August 14, 1995
12. Organization — Anniversary Climbing Event on the Central Caucasus, dedicated to the 50th anniversary of Victory.
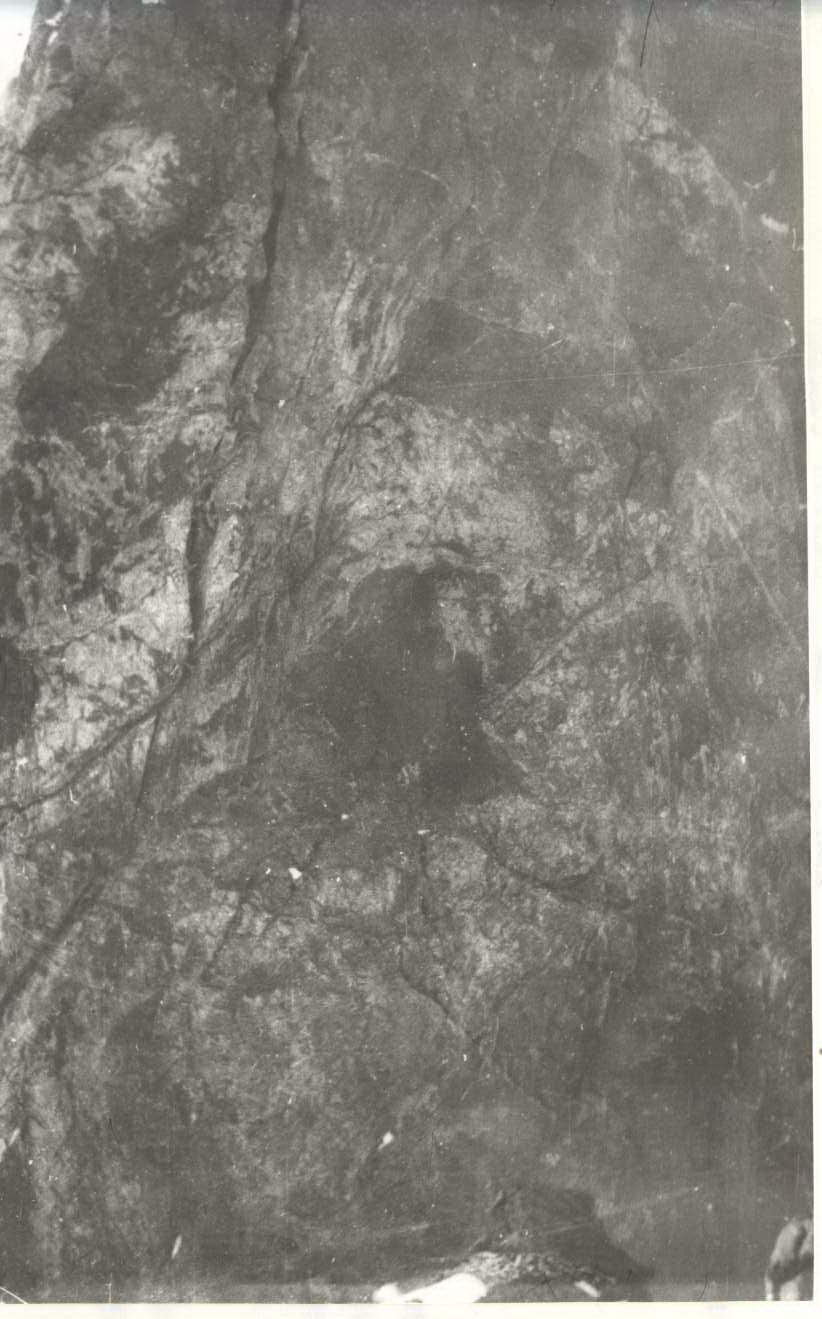
Technical Photograph
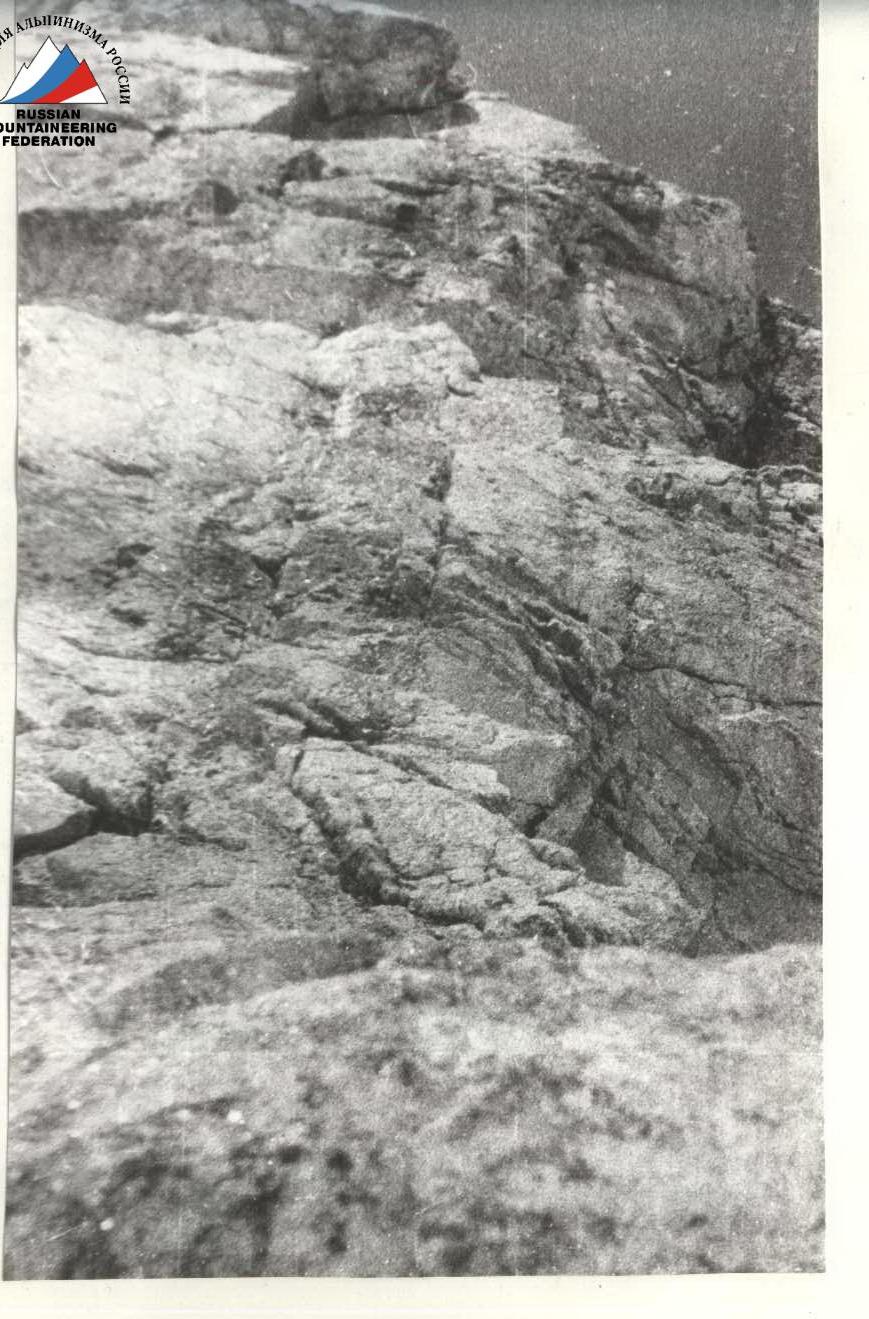
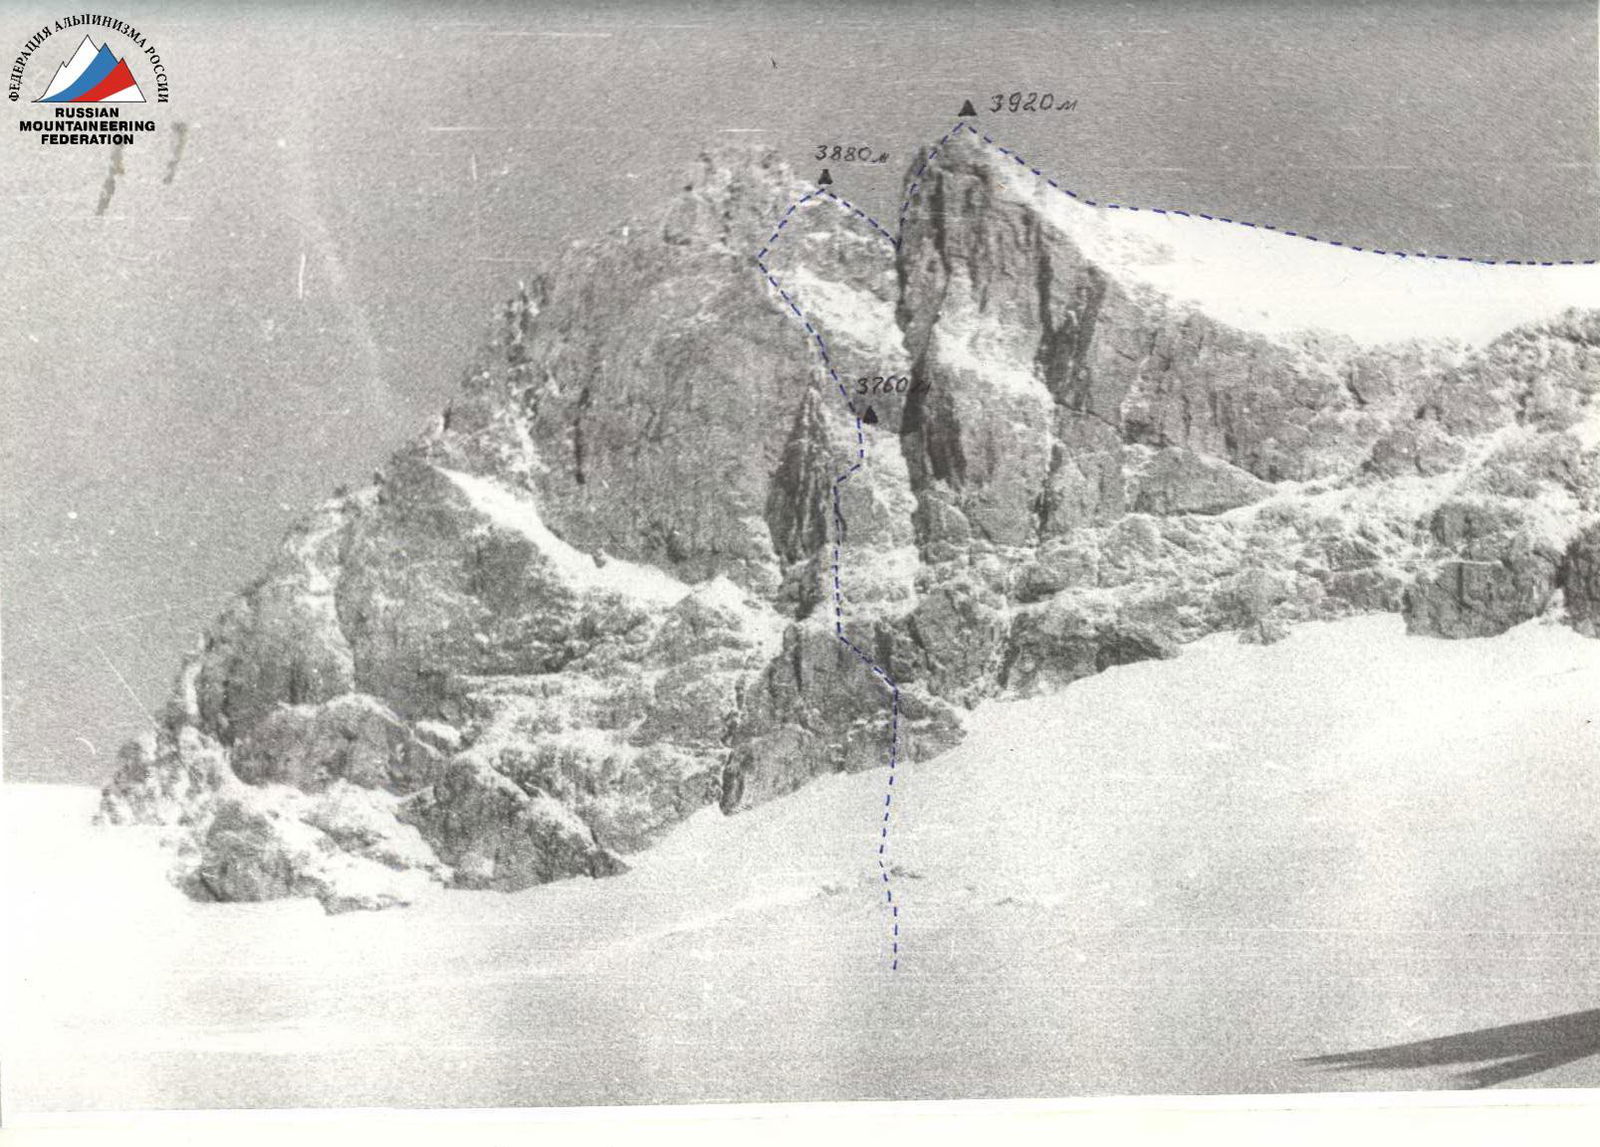 Photo 1.
 Taken on August 12, 1995, 9:00 AM, "Lomo-Compact", shooting point.
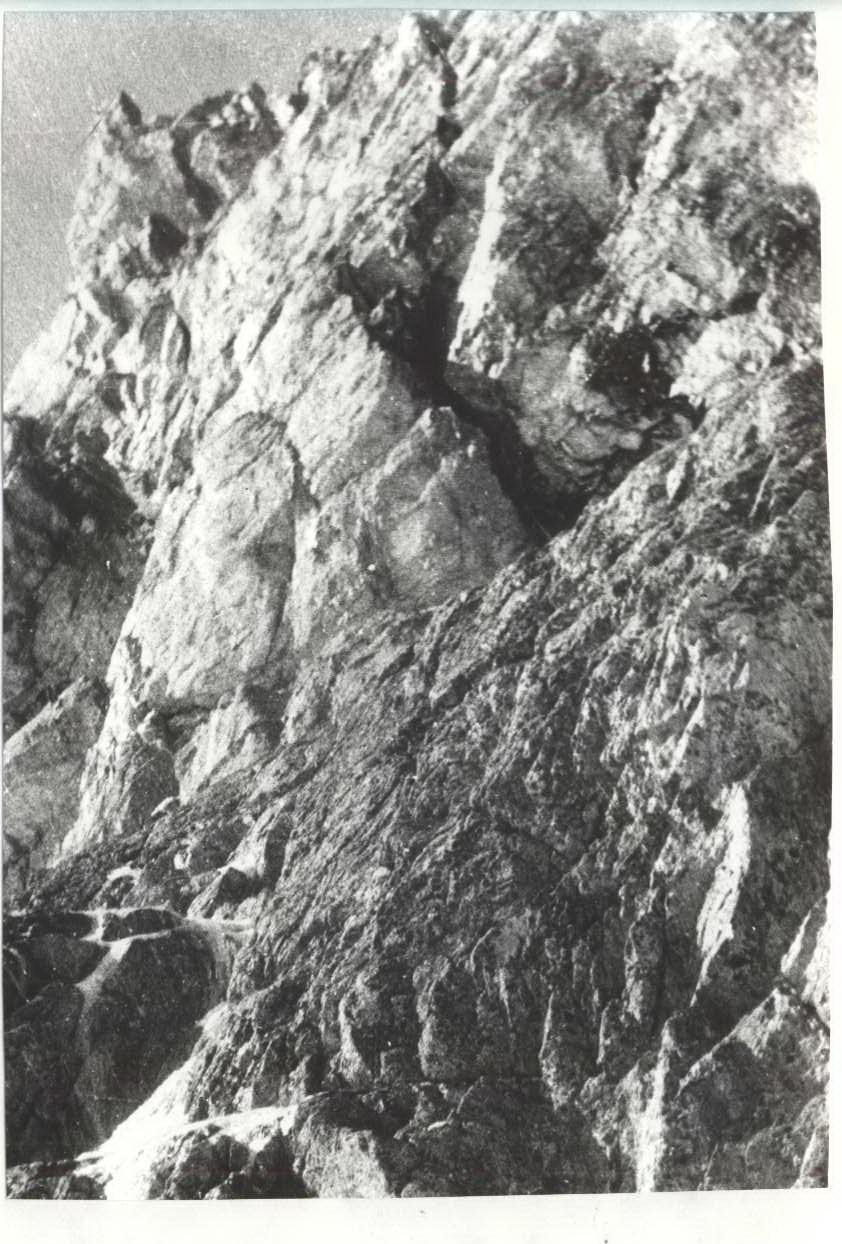
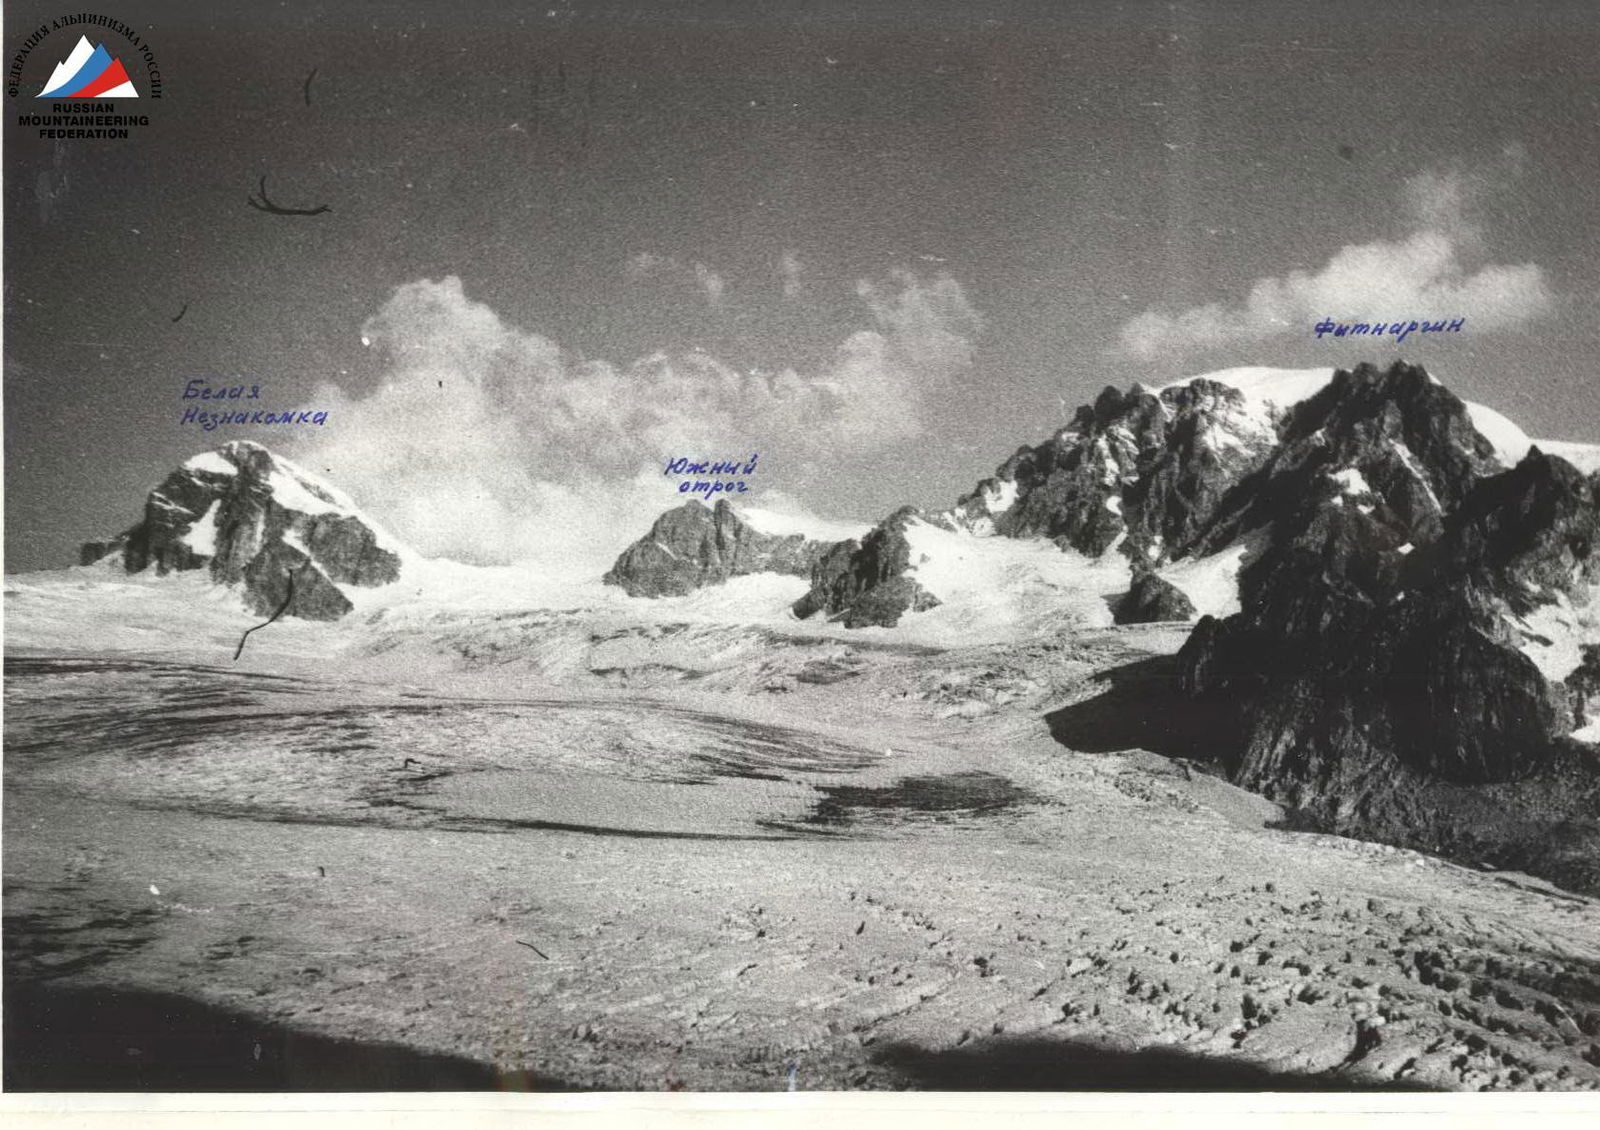 Taken on August 12, 1995, 11:00 AM, "Lomo-Compact". General view. Photo No. 2.
Brief Description of the Area
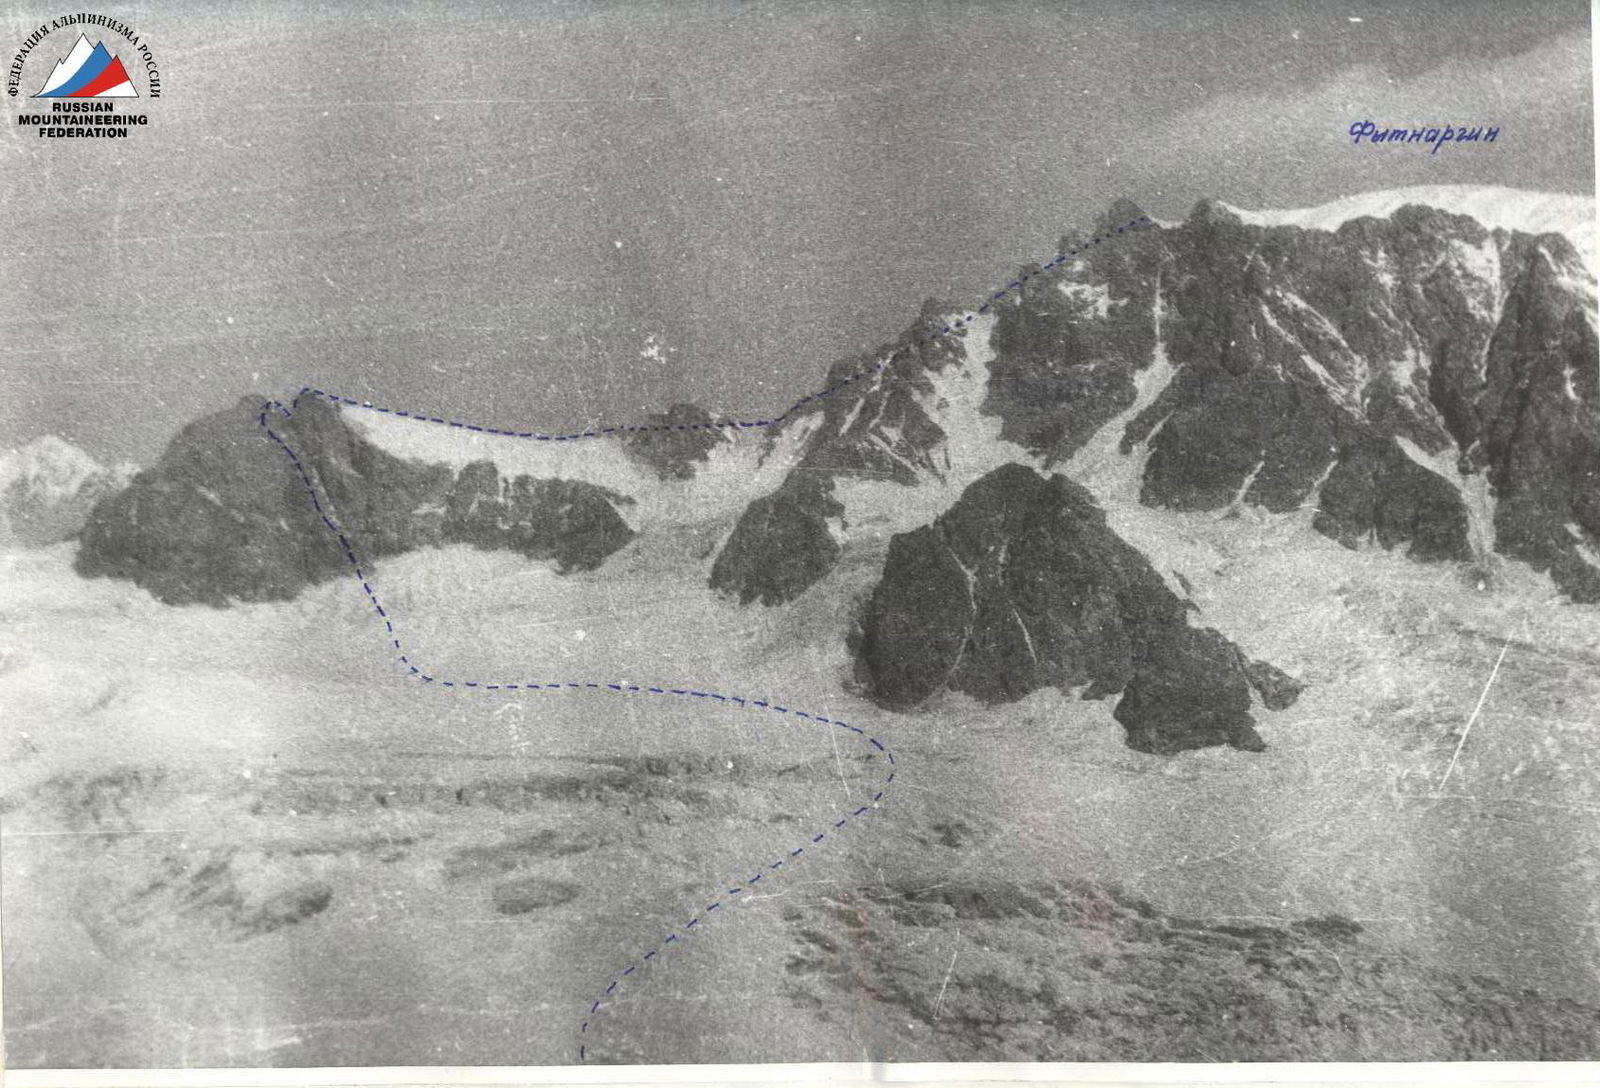
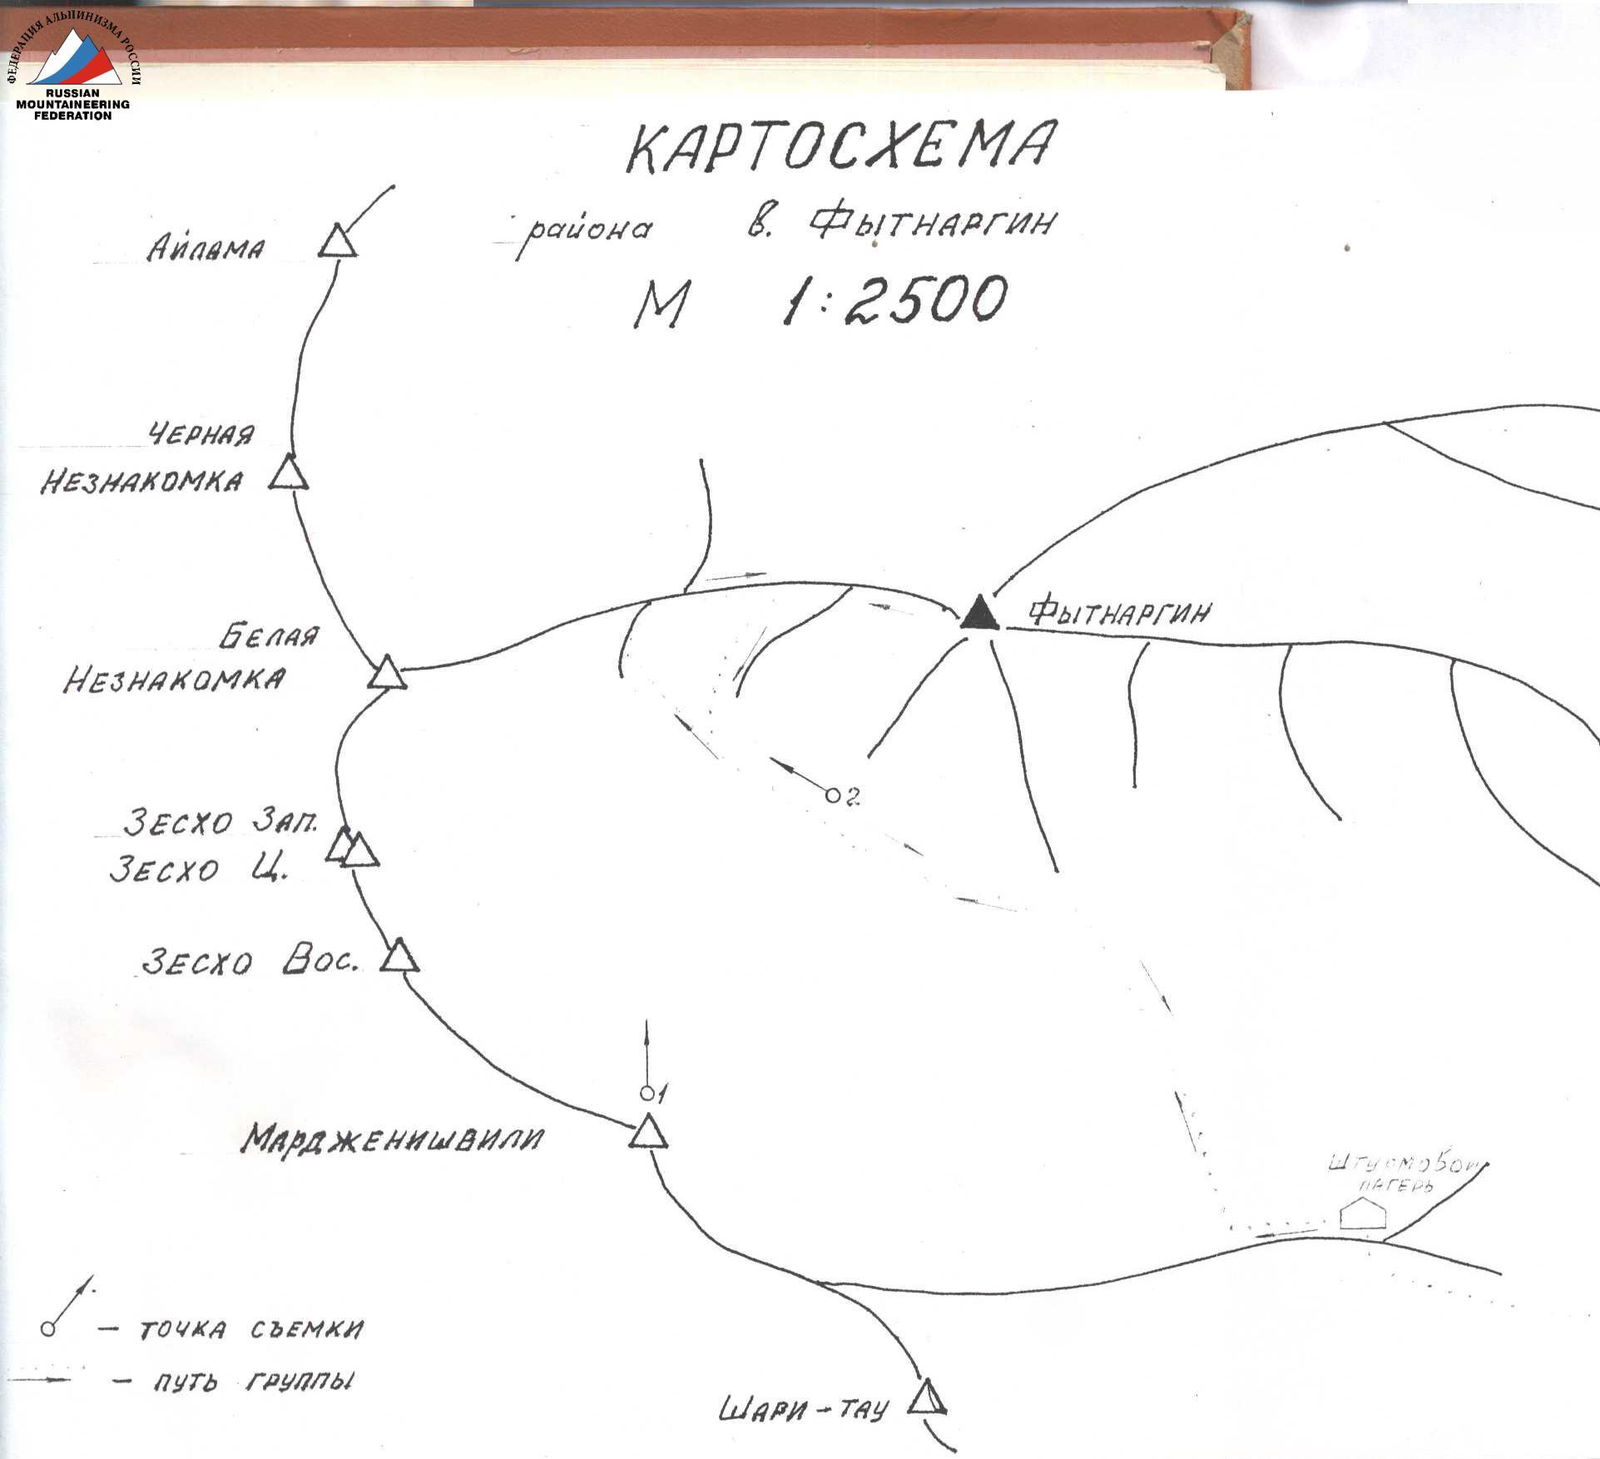
At an altitude of 3000 m, along the northern side of the Main Caucasian Range (MCR) lies a huge bowl of the Fytargin ice plateau, flowing down a steep icefall into the Karasu gorge. To the south, the peaks of the MCR rise above the plateau: Sharitau, Machkhapara, Mardzhanishvili, and Zeskho. On the western side, the plateau is bounded by a northern spur extending from the Узловой жандарм ( Узловой pinnacle) of the MCR, with the first notable peak being Belaya Neznakomka (4200 m). Beyond Belaya Neznakomka, the spur turns east, transitioning into the broad massif of Fytargin (4184 m), which borders the plateau to the north.
The northern slopes of Fytargin feed the Aylama glacier. The southern slopes of Fytargin and its spurs descend in ridges or drop off as walls onto the ice plateau. The Fytargin plateau is heavily crevassed in various directions and often lacks landmarks due to frequent fog.
For mountaineers, the Fytargin massif presents a certain interest for achieving first ascents, both via ridge routes and wall climbs, with a sufficiently high category of difficulty.
Description of the Approach to the Base Camp
From the village of Verkhnyaya Balkaria, follow the Dykhsu gorge along a good mountain road on the right bank of the Cherek-Balkarsky River. Approximately within 1 hour (5 km), the road leads to a border post. From the border post, continue along the road further up the gorge. At times, the road is intersected by streams flowing down the slopes, which are forded. Within 2–2.5 hours, the road leads to a wide green valley formed by the intersection of the Dykhsu and Karasu gorges. Here, the rivers Dykhsu and Karasu merge to form the Cherek-Balkarsky River.
Continue along the wide, trough-shaped bottom of the Karasu gorge. After overcoming a steep ascent (1–1.5 hours), reach the narzan spring. 500 m from the spring, there is a summer rest house of the local kolkhoz. 500 m further up the road from the rest house, on the left bank of the Karasu River, is a forward border post.
Upon reaching the post, cross the bridge to the left bank and ascend to a clearing between the post and the ruins of a shelter. This is a convenient location for the base camp. Among the rocks is a small pond filled with melt and rainwater. Drinking water should be taken from a stream 200 m from the camp, below the rocky outcrops.
Description of the Approach to the Route
From the base camp, cross the stream serving as a source of drinking water and exit onto a clearing at its upper part. The border post and the ruins of the shelter remain on the left in the lower part of the clearing.
Ascend from the clearing along a trail up the left slopes of the gorge:
Within 40–50 minutes of ascent, the trail passes through a narrow passage between a strong stream and an overhanging rock. During floods, when the water level rises, this passage becomes impassable. In such cases, the area should be bypassed above via the "ram's foreheads."
After the "gate":
- Continue ascending along the trail laid on a grassy-taluss slope.
- From here, three mountain streams descending from the left slope of the gorge are visible.
- From the trail, ascend along the middle stream on its left side to a small, steep, grassy couloir.
- At the point of leaving the trail, a cairn is built; follow the couloir to the right and upwards, exiting onto a steep slope overgrown with blueberries and rhododendrons.
- Continue ascending the slope, bypassing the "ram's foreheads" on the left, between the middle and right streams, towards a depression in the ridge.
- As you reach the ridge, the slope gradually becomes gentler.
From the ridge, a panorama of the middle and lower parts of the Fytargin glacier unfolds. Continue:
- Descend along a grassy-taluss slope onto a long green clearing situated between the slope of the ridge and the moraine, known as the "green pocket."
- Here is the location for the forward camp.
- At the bottom of the "pocket" is a stream flowing from under a snowpatch, serving as a source of drinking water.
The approach from the river to the forward camp takes 1.5–2 hours. Note that the camp tents should be set up on the slope of the ridge as the bottom of the "pocket" floods during rain.
The forward (assault) camp is located on the orographic right side of the lower part of the Fytargin glacier, between the lateral moraine and the northern spur of the MCR extending from the summit of Sharivcek.
From the "green pocket," ascend via snowfields at its upper part, exiting onto a sharp ridge of the moraine that steeply drops towards the glacier. Continue along the moraine ridge to where it joins the slope of the spur. Here, descend onto the glacier towards a large boulder. From the boulder, move 20–25 minutes up the right side of the glacier to the crevasses. The crevasses are bypassed to the left and upwards via a snowfield under the rocks. Continue in crampons. Having bypassed the rocks from below along the glacier, exit onto a small lateral tongue of the glacier. After crossing the tongue, ascend to the left and upwards along steep snow towards a rocky promontory with a peak-like summit. From the rocks of the promontory, the object of the ascent — the southern spur of the Fytargin massif, crowned by a double-headed summit, is clearly visible. It blocks the cirque to the west and, from this viewpoint, appears as an independent peak between Fytargin and Belaya Neznakomka.
From the rocky promontory, descend onto the ice plateau. Cross the plateau towards Mardzhanishvili peak. Crevasses are bypassed or crossed via snow bridges with mandatory simultaneous belay.
Upon reaching the base of Mardzhanishvili peak, overcome the bergschrund and ascend onto the upper plateau. The bergschrund is best overcome closer to Mardzhanishvili peak.
Having crossed the plateau, approach the depression located at the base of the double-headed summit of the southern spur of Fytargin. From this depression, the route begins.
From the "green pocket" to the depression takes 4–4.5 hours.
Brief description of the route's passage by sections.
R0–R1: The route begins from the depression, ascending a snowy slope to the right and upwards. Movement is simultaneous. The bergschrund is overcome via a "bridge." Belay is alternating.
R1–R2: Further approach under the wall via an ice-snow ascent with overcoming a randkluft. Belay is alternating, movement is in crampons; the last 30 m and the randkluft are traversed on front points.
R2–R3: Directly up the wall via a not clearly defined counterfort for 30 m. The rocks are smoothed, climbing is difficult. After the wall, exit onto a ledge up to 1 m wide.
R3–R4: From the ledge, overcoming a short overhanging section directly upwards onto an inclined ledge. The rocks are iced over.
R4–R5: Along the inclined, scree-covered ledge to the left and upwards. Many "live" stones; the ledge is covered with flow ice. Movement is in crampons, belay is alternating.
R5–R6: The upper part of the ledge is free from ice, but the rocks are heavily destroyed, rocky, and there are no reliable holds or cracks. Belay is alternating. The ledge leads under the wall.
R6–R7: The wall is traversed directly upwards via good rocks with sufficient holds and cracks.
R7–R8: In the upper part of the wall, the rocks are more smoothed, holds and cracks are rare. From the wall, exit onto a good horizontal ledge up to 2 m wide. Along the ledge to the right for 30 m, there is a suitable area for an overnight stay.
R8–R9: From the ledge directly upwards along a smooth wall. The first key point. The wall is traversed via a crack. There are sections with overhangs. Climbing is difficult.
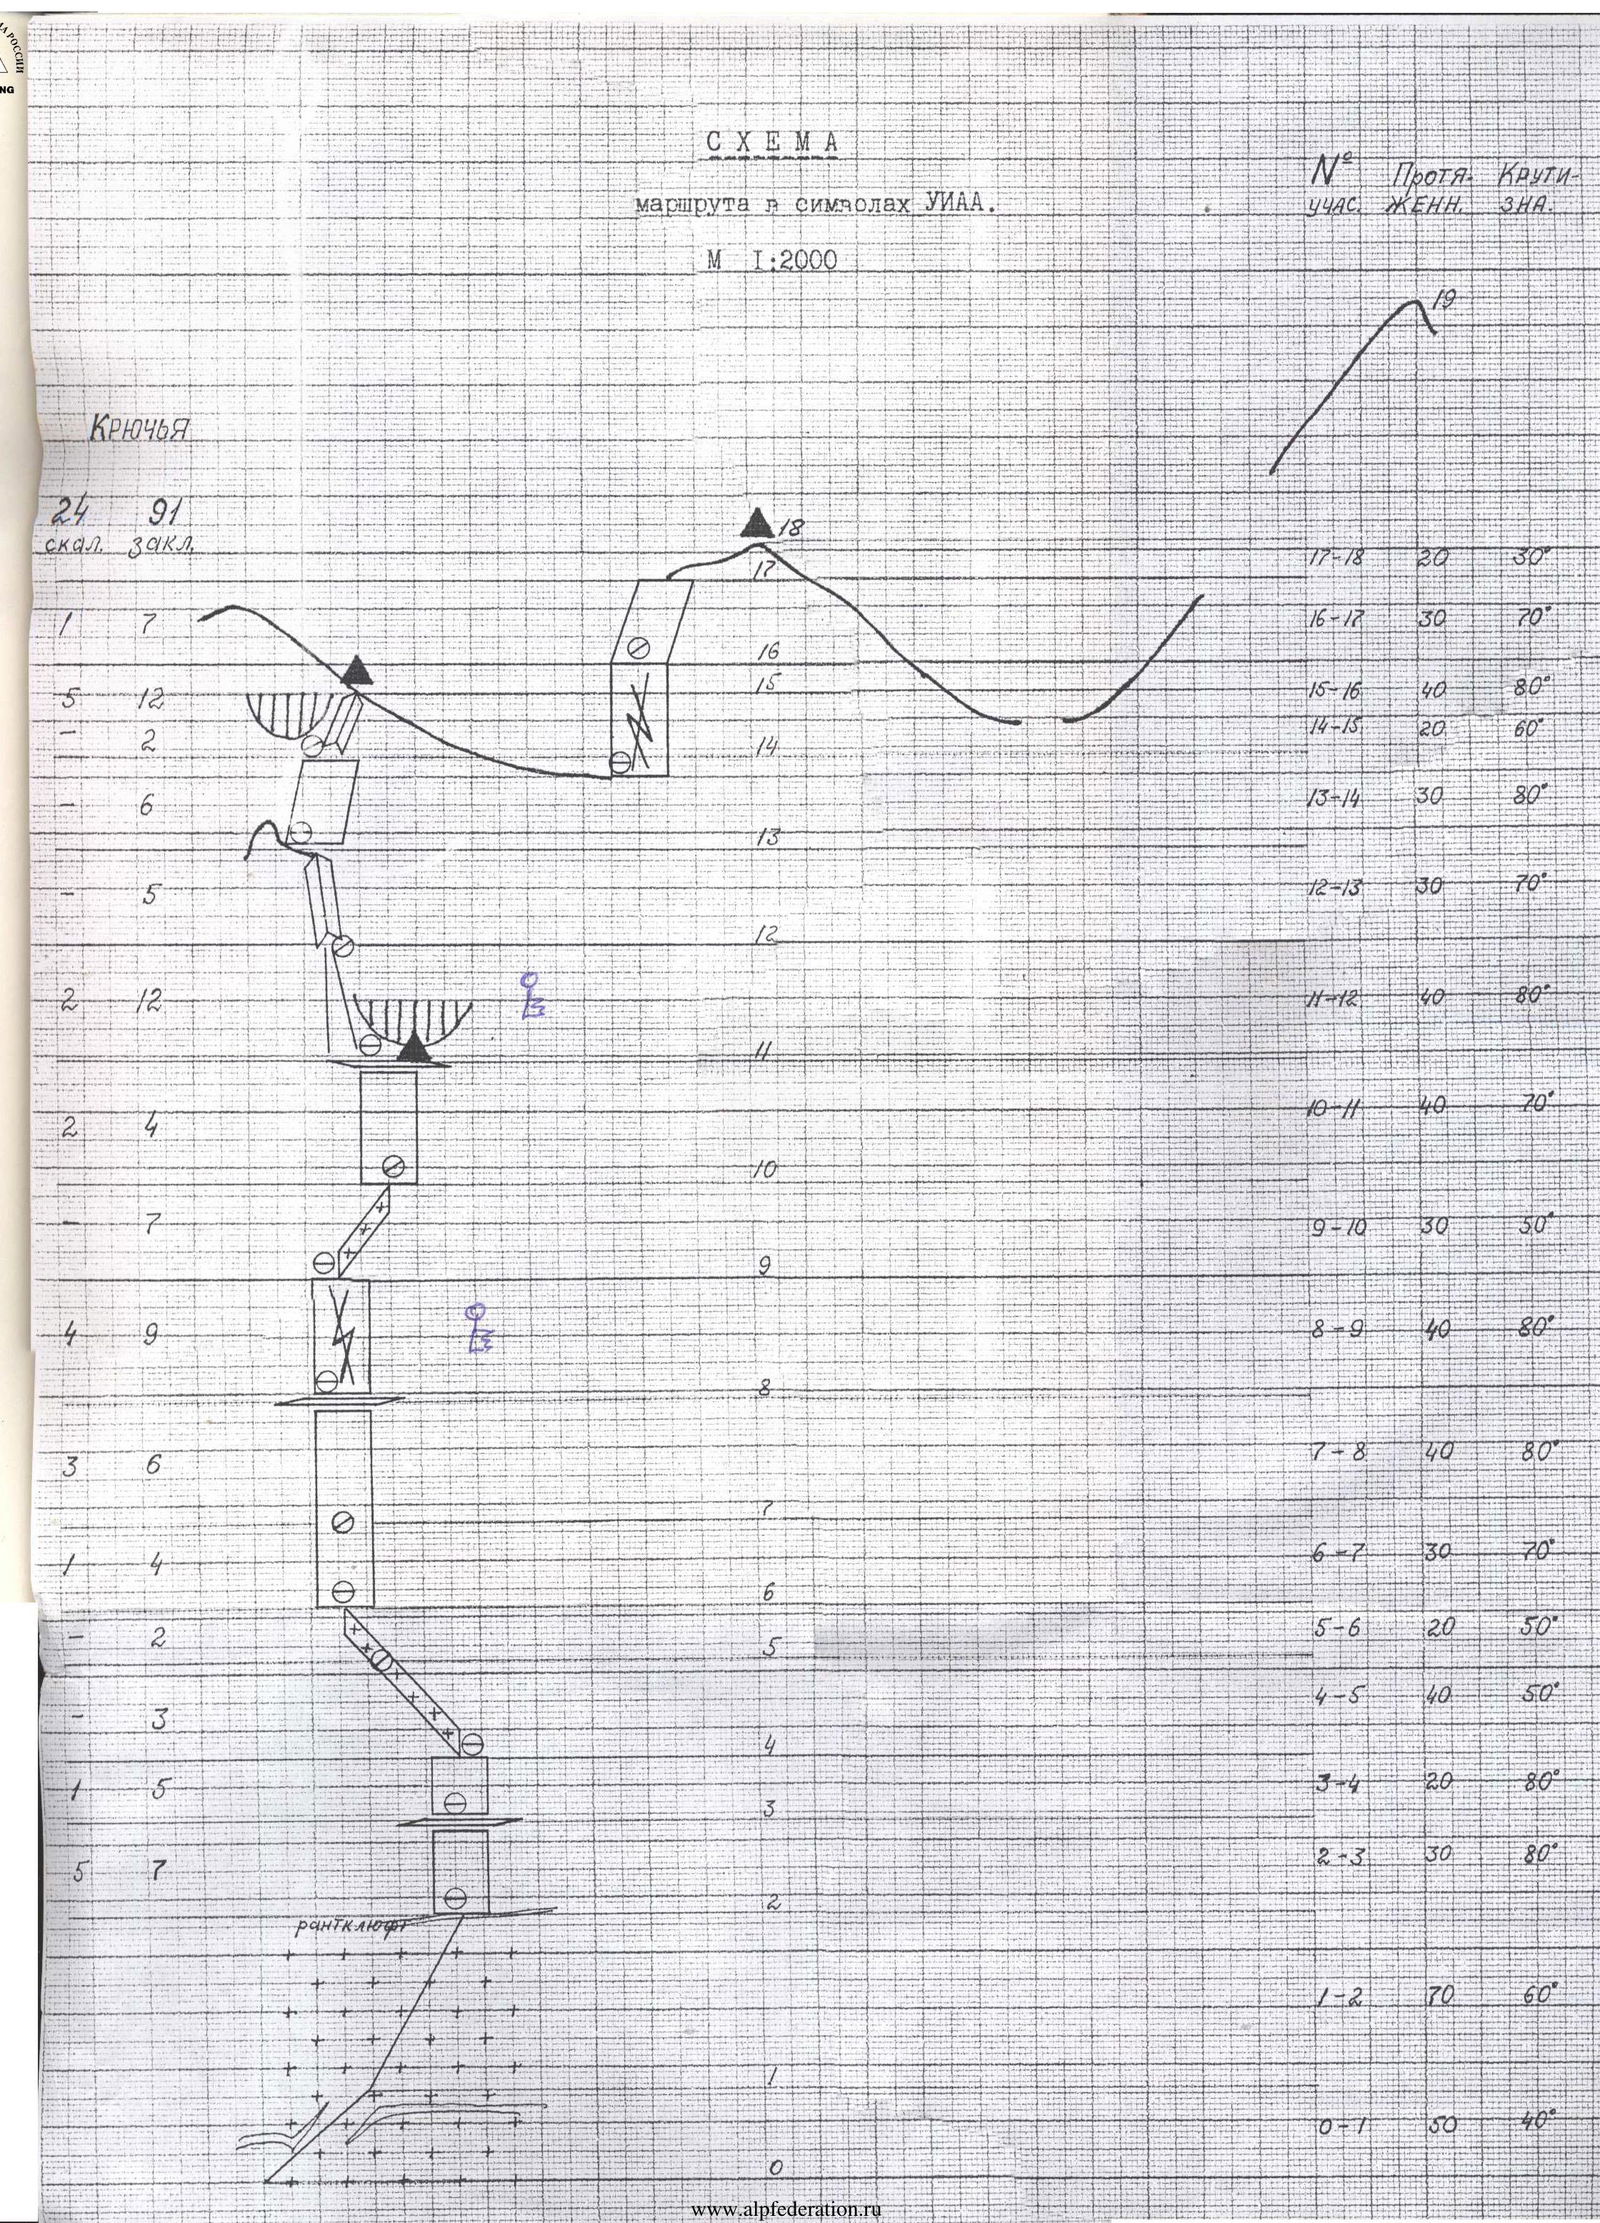
R9–R10: Having traversed the wall, exit onto a not clearly defined ledge covered with ice. Along the ledge to the right and upwards, movement is in crampons.
R10–R11:
- From the ledge, ascend the wall to the left and upwards.
- In the lower part of the wall, the rocks are covered with ice; movement is in crampons.
- Higher up, the rocks have sufficient holds and cracks.
- The wall leads onto a narrow ledge with an overhang.
- A control cairn is set.
R11–R12: The overhang is bypassed on the left and up a steep, ice-covered couloir. Movement is in crampons, belay is via ice screws. The upper part of the couloir transitions into an internal corner. The second key point. Passage is very difficult. There are very few holds and cracks.
R12–R13: Along the left side of the internal corner, ascend onto a col between a "pinnacle" and the ridge of the counterfort. The first 7–8 m of the internal corner's rocks are very difficult to climb. Higher up, the rocks become easier with sufficient holds. In the upper part of the internal corner, there are many "live" stones.
R13–R14: From the col, ascend along an inclined slab to the right and upwards. Climbing is difficult. The rocks are partially iced over. Movement is in crampons.
R14–R15: From the slab, ascend along a not clearly defined internal corner onto the ridge of the left summit of the spur. A control cairn is set.
R15–R16:
- Along the ridge down to a col under the wall of the right summit of the spur.
- Movement is simultaneous.
- From the col, along the wall.
- The wall is traversed via a crack.
- Climbing is very difficult; there are overhangs.
R16–R17: In the upper part, the wall becomes gentler. Climbing becomes easier. Along the wall to the exit onto the ridge of the right summit.
R17–R18: Along the ridge to the main summit. The rocks are simple; movement is simultaneous. On the summit, a control cairn is set.
R18–R19: From the summit, descend along the right ridge onto the snow plateau. The rocks are iced over; belay is alternating. Along the snow plateau, move upwards towards a clearly visible "pinnacle." The "pinnacle" is traversed on the left. Further, along the left side of the ridge, partially along snowy slopes — exit onto the summit. Partially, alternating belay via ledges.
Descent from the summit is via the ascent route along the ridge to the "pinnacle." Further, to the left and downwards along a snowy slope and a taluss slope onto the Fytargin plateau.
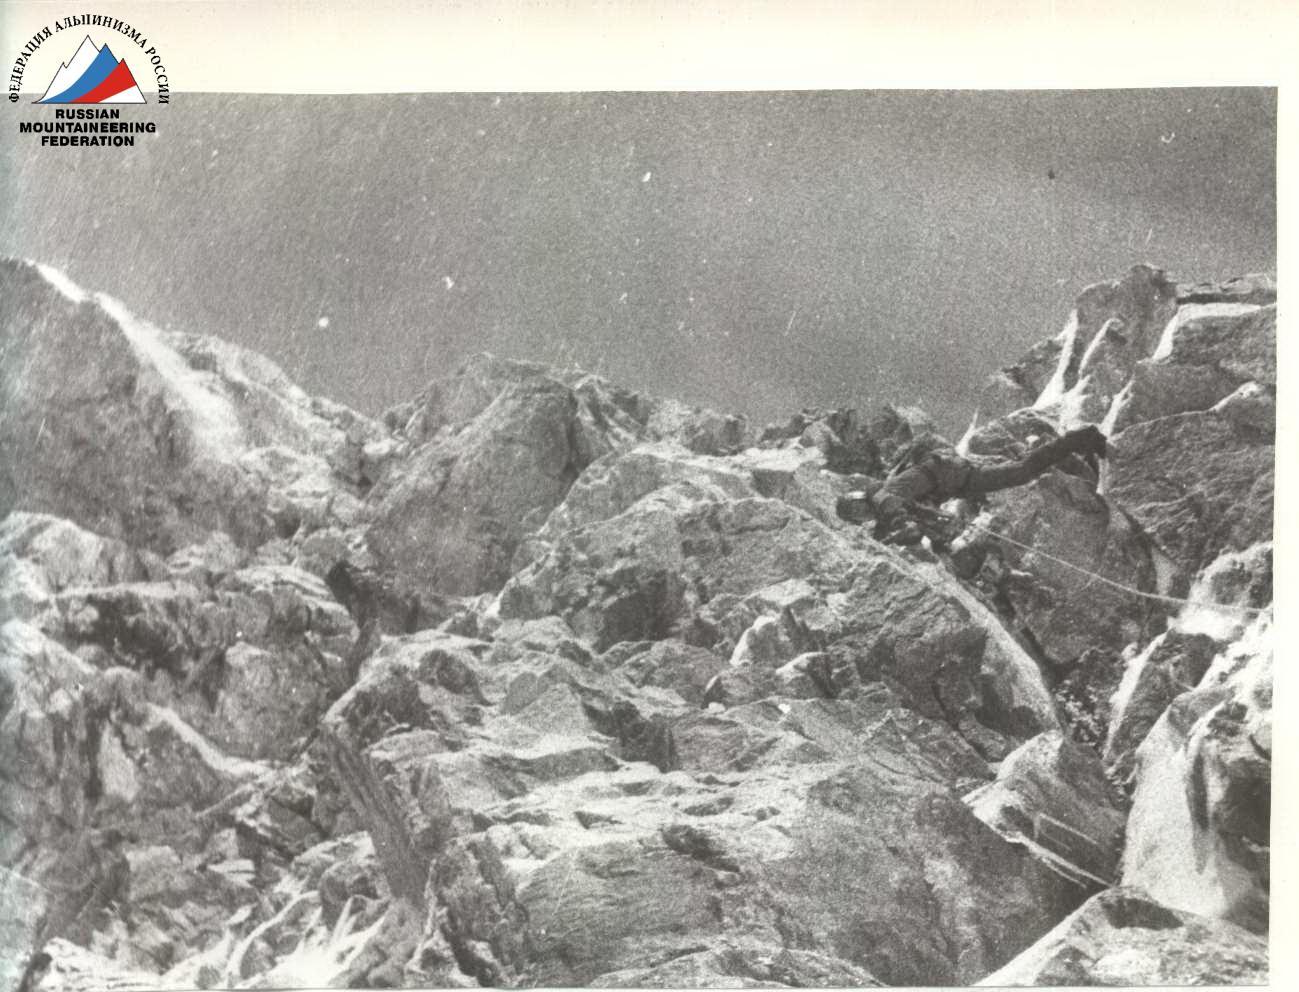
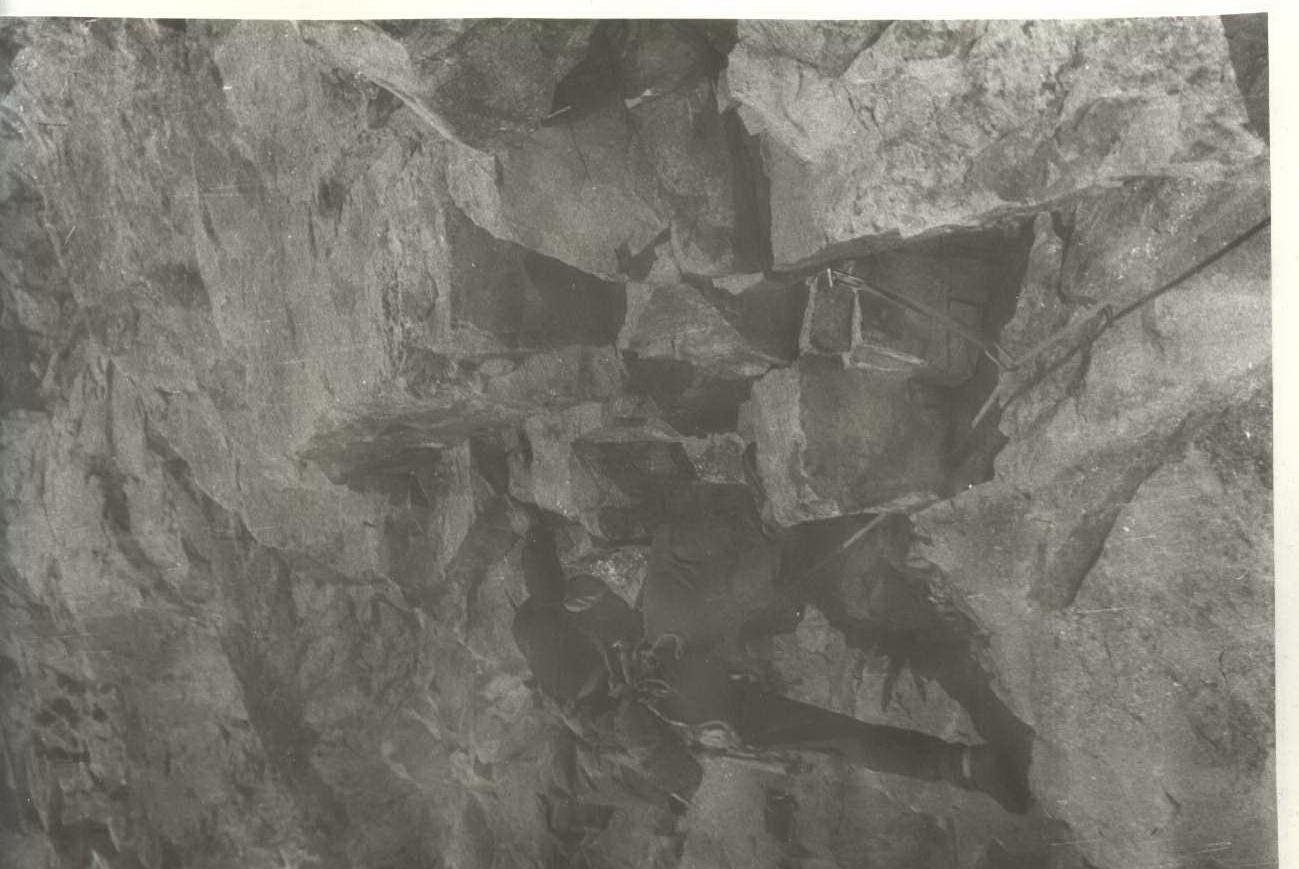
Section R6–R7
Section R8–R9
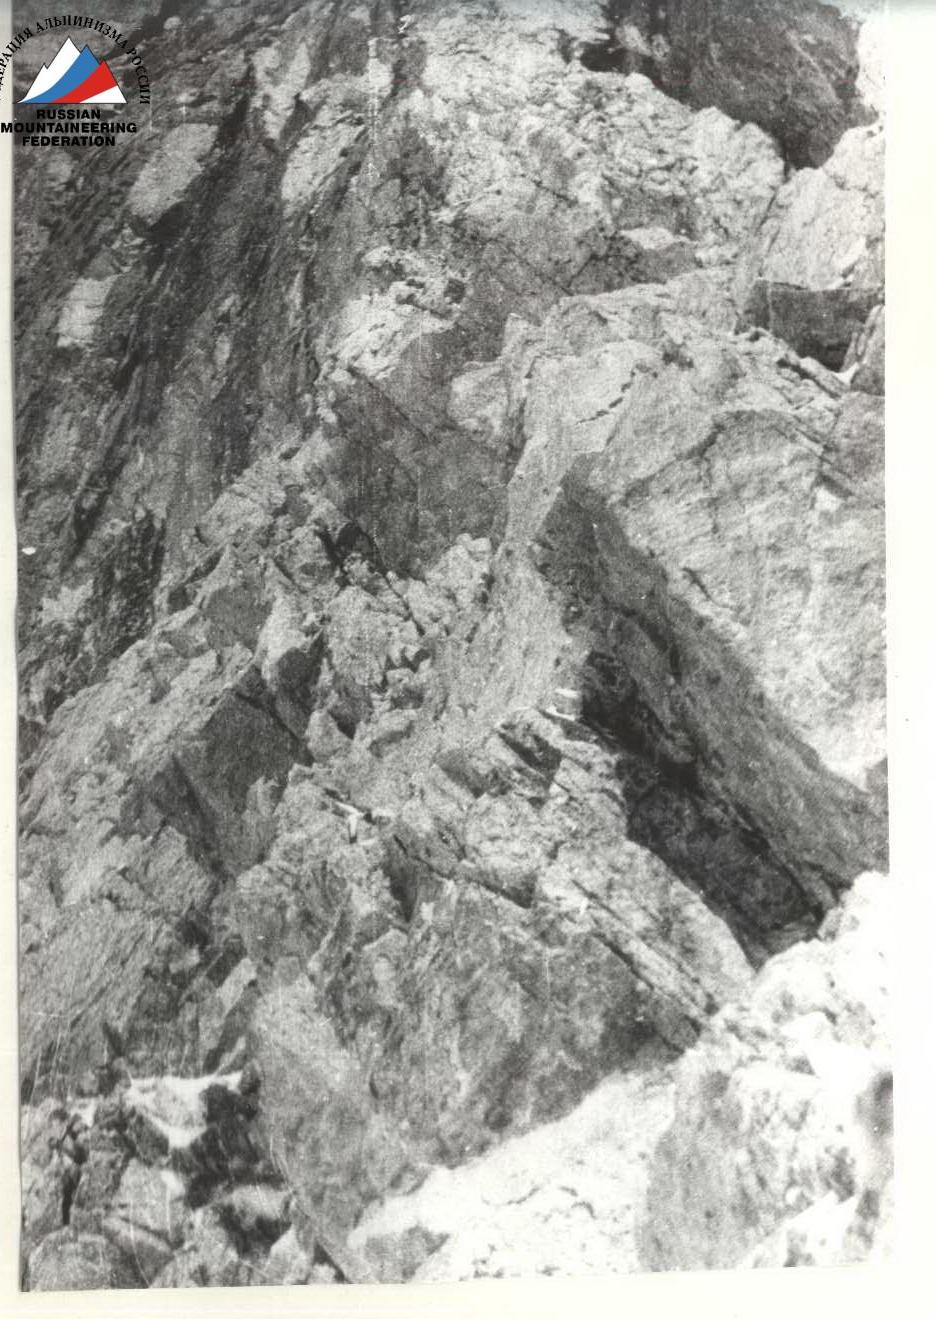
Section R11–R12
 Section R15–R16
Safety Assessment of the Route
The route is generally relatively safe. Special attention should be paid to the rockfall hazard on sections R5–R6 and R11–R12.
Recommendations for Subsequent Groups
- When overcoming the randkluft, it is recommended to use ice screws. Additionally, under certain climatic conditions (rainy summer), ice screws may be used when passing section R9–R10.
- Sections R8–R9, R12–R13, and R15–R16 are traversed in rock shoes or crampons. The first person goes on a double rope.
- When traversing section R15–R16, it is recommended to have ladders.
- Groups undertaking the ascent should have ropes at least 40 m long, chocks, and hexes of various sizes and configurations.